
|
|
|
|
||||||||||
| Xoutpost server transfer and maintenance is occurring.... |
| Xoutpost is currently undergoing a planned server migration.... stay tuned for new developments.... sincerely, the management |
|
|
LinkBack | Thread Tools | Display Modes |
|
#1
 01-09-2006, 11:05 AM
|
|||
|
|||
|
Bluetooth ULF Retrofit in a 2001 BMW X5
August 8, 2004 This article details the installation of the BMW Bluetooth ULF in my 2001 X5. I am pleased to report that the system is in and working and I couldn't be happier. For those wishing to install this in earlier model X5's, I can tell you from first hand experience that it in fact can be done :-) Here are the details. Complete retrofit kits are available from several X5world sponsors, include EAS and Bavarian Sound Works. With this kit you get everything you need to do the installation, along with documentation on how to do it. The kit consists of a Bluetooth ULF which has a custom cable that allows the unit to be plugged directly into the DB25 phone connection that was part of the original factory phone prep, the pairing cradle with a custom cable that adapts to the existing wiring and antenna cable in the console, and the ULF antenna for communications between the phone and the ULF module. I had already installed the microphone about a year and a half ago when I installed the stand-alone voice recognition module (since removed and sold), so that part of the project wasn't necessary for me. The first step was the installation of the ULF and ULF antenna. I opted to install these right up on the top of the frame that holds the CD changer and Nav drive. 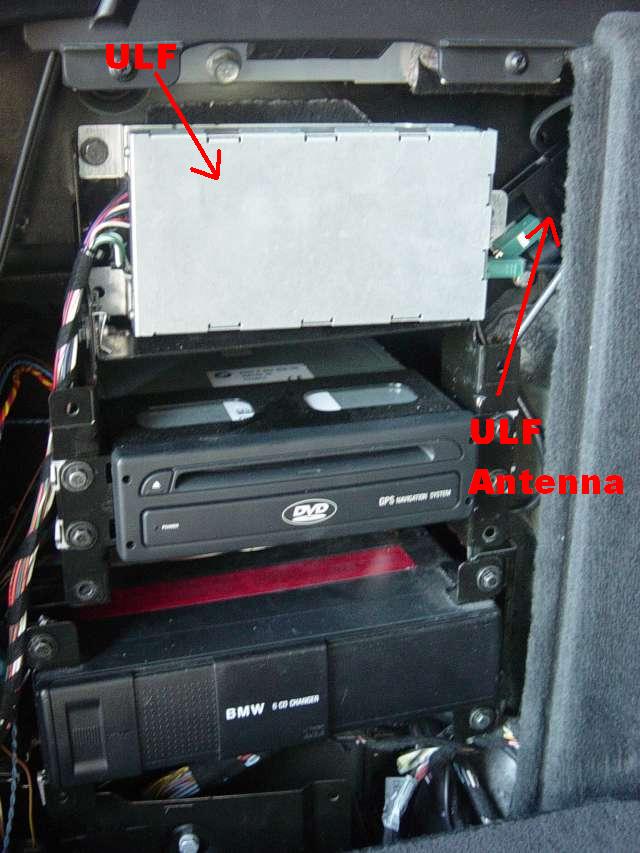 Here's a close-up of the ULF installed:  And to the right of that is where I installed the antenna. I used the bolt from the top right of the rack to mount the antenna. 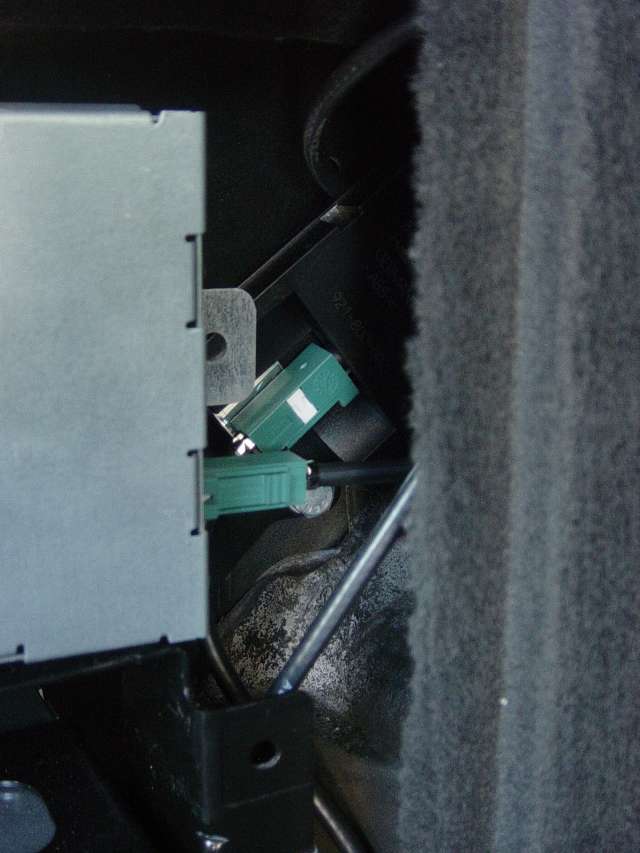 When mounting the ULF I used the bolt from the top left of the rack. In order to get this to fit properly I had to shave about an 1/8 of an inch off of the tab, as shown here: 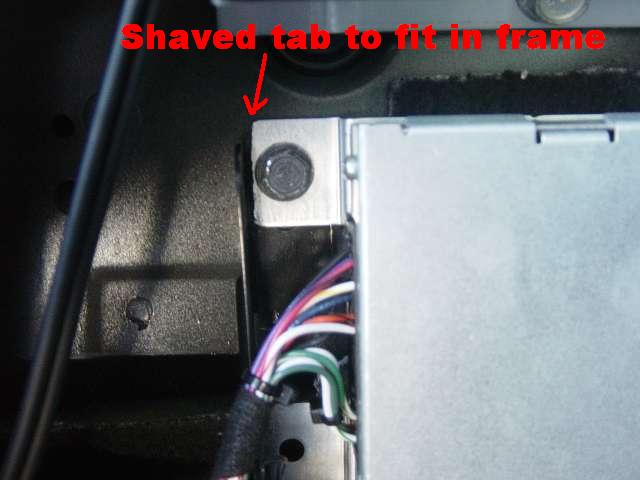 The cable then comes out of the left hand side of the ULF and I ran it down the side of the rack and down to the DB25 cable connection. Again, this is a custom cable that was made for this application that allows the existing phone wiring to work with the ULF: 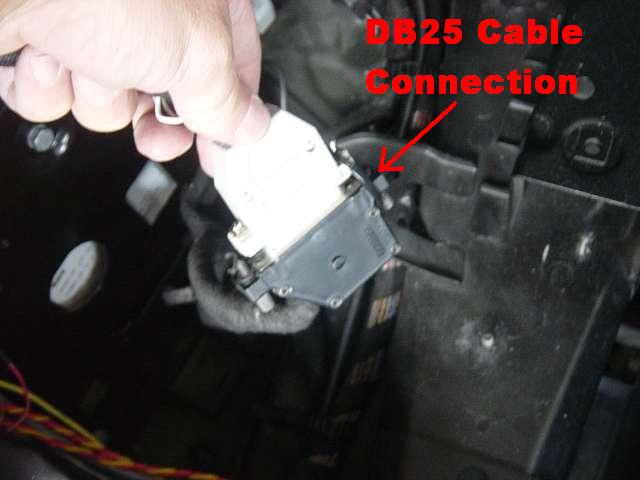 That was the easy part. Now the fun begins. Although my X5 had been prepped for the phone install from the factory (ie the CPT8000), for reasons that escape me BMW decided not to extend the wiring harness up to the armrest. The cabling basically ends by the gearshift underneath the console (and buried down underneath the carpet). Thus, the only way to get the cable up to where you need it is to remove the console. The kit comes with good instructions on how to do the console removal. Additionally, this kit includes the custom cables that will extend the harness and antenna leads up to the cradle, and convert the antenna lead from the mini-coax to the new style snap-on antenna connection used by the Bluetooth cradle. After the cables were extended and the console reinstalled, the final set-up looks like this (with the V600 snap-in and the Aston Martin edition V600 phone  ) ) With everything hooked up, the menu on the Nav screen now has a new option - TELEPHONE  Selecting the TELEPHONE option took me to a screen indicating "ACTIVATE PHONE"  The first couple attempts that I made to pair the phone didn't result in anything happening. My thoughts were that the vehicle was going to need to be coded in order for it to work. However, after letting the system sit idle for about a half an hour, I tried again and was rewarded with the following screen: 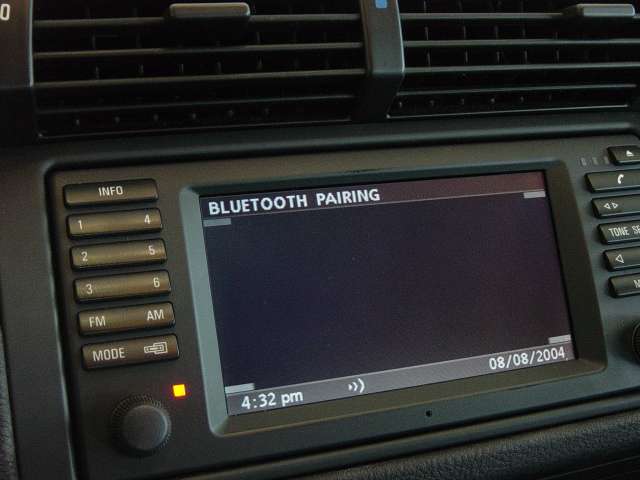 Once the phone was paired the address book synced up automatically from the V600  The final step in the process was installing an amplifier. The amp is the ELK800, and connecting it up was a very simple procedure. Once this was complete, I adjusted the audio levels to my liking so that the Voice Module interaction is clear but not too loud. The ULF allows for basic adjustments of the phone volume using the steering wheel controls, and the radio automatically mutes when the phone is in use. The only real challenging part of this mod is the removal and reinstallation of the center console. However, if you follow the instructions and take your time, it's not difficult at all. The only tools you really need are a philips screw driver and a couple Torx drivers. And an extra set of hands are helpful. In summary, BLUETOOTH ROCKS, and the kit made the installation a snap!!! This is a great upgrade to the X5! Enjoy! |
| Sponsored Links | |
|
|
|
| Bookmarks |
|
|
|
|


 Linear Mode


