Contributed by: X5world
Since the instructions that come with the CPT8000 installation kit are clear
and accurate, I won't go into any detail regarding the install. Instead, this
page is an overview of the install along with some pointers and general comments
about the CPT8000 phone and installation kit.
Further information (part numbers etc):
www.bmwwireless.com
user name: bmwna
password: digital
Installing a non-BMW supplied StarTac
There are excellent directions posted at: http://startac.how.to.
Update 10/03/2004
:
Since I installed this phone over a year ago, I had been getting random resets
of the phone shortly after plugging it in. I'd plug the phone in but it would
reset (turn off then back on) and the phone would be unusable for a minute or
so. Apparently, the phone is supposed to do this when you close the door.
Not knowing this detail, it appeared to be a problem with the phone. Now what I
do is get into the car and close the door, start it and then plug in the
phone. Now that I'm following this order, the phone has not reset for about a
week so I'm convinced that was the problem (user error). If the phone is turned
off when plugging it in (even if the driver's door is left open) then it doesn't
seem to reset.
Overview of installation:
- Assemble phone cradle and then replace cup holders and coin holder with
the new cradle assembly.
- Remove left inner trunk trim. Remove amplifier and bracket assembly.
Assemble the new brackets with the amplifier and CPT8000 controller.
Re-assemble everything (this step might be slightly different depending on
whether or not you have a CD changer or NAV system).
- Install "shark fin" or bumper mount antenna.
- Plug in phone and test operation.
General notes & observations:
Installation tips:
- The wiring harness connectors have locking levers which are in the locked
position even though nothing is plugged into them yet. Be sure that the
locking lever is all of the way open (about a 90 degree swing). Plug in the
new connector and lock the lever at the same time. Be sure that the
connector is all the way plugged in and locked. I had some trouble immediately
after installation with the hand set. It turned out that I didn't have
the connector all the way plugged in. The lock lever was only released by
about 45 degrees when the connectors were plugged together. Though it did
seem to lock the connection was not secure. This seems like a detail that
would be easy to overlook.
- If you install the "shark fin" antenna, be careful with the
rubber seal around the window. it is thin at the edge and can easily tear.
Do NOT use any metal tools as you will likely scratch the paint and tear the
seal. Use a couple of old credit cards to lift the seal and work the cable
into place. You might use something like Meguiar's Final Inspection spray as
a lubricant. Center the antenna in the roof of the car and start working the
seal in from that point (not the point where the wire exits the trunk). Clean the
paint where the antenna will go to remove the dirt (I used Meguiar's Final Inspection followed by
rubbing alcohol) before you stick on the shark fin. The shark fin should be
stuck on LAST, after the cable has been routed under the window seal. To
stick on the antenna on straight, hold the bottom rear edge of the rubber
seal against the edge of the painted surface with the antenna pointing about
45 or so degrees in the air. Peal the protector off of the adhesive and
carefully set into place.
Here are some pictures of the installation:
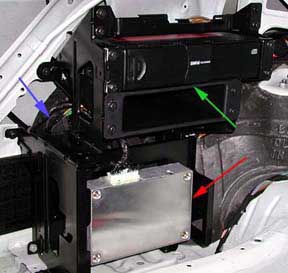
This is a picture of everything installed except the new inner trunk
panel. The red arrow points to the CPT8000 control unit. The green
arrow
crosses over the storage bin and points to the CD changer. The blue
arrow is
pointing to the audio amplifier connector. The audio amplifier is
mounted
vertically, like the CPT8000 control unit, but it is a little taller
and wider.
It's also black so it is hard to see in the picture.
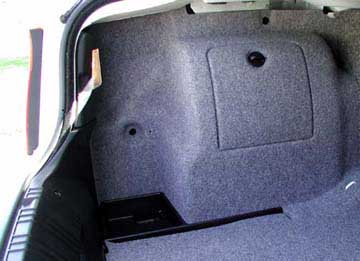
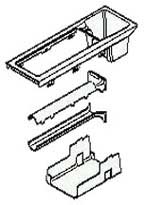
Here's what the new inner trunk liner and lower tray look like (if you already have the NAV
system or CD changer mounted on the side, you already have this).

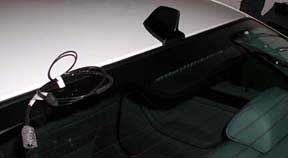
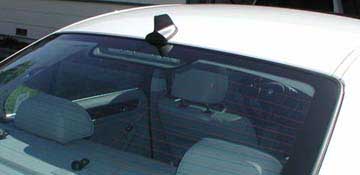
Centering the antenna on the roof was pretty easy. After that, you need to route
the cable under the second lip of the window seal using a couple of credit
cards.
Remove the rubber plug just inside the left side of the trunk opening. Roll up
the label and feed the antenna wire through the hole. Connect the antenna wire
to the short cable adapter then connect the adapter to the vehicle's wiring
harness.
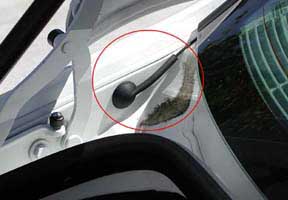
Here are some more pictures of the installed antenna.

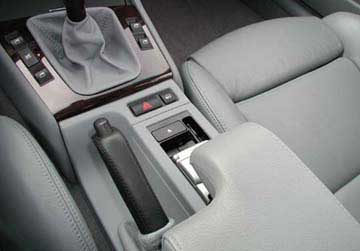
Here are some pictures of the center console:
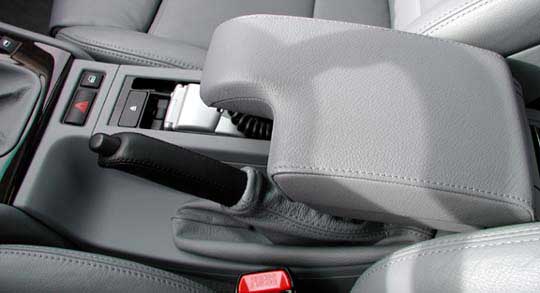
Arm rest up without phone installed (driver's perspective).
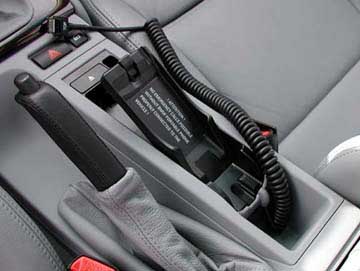
Arm rest up with phone installed.

Arm rest down with phone installed.
Here's the same view but with the black console that came with the phone kit.
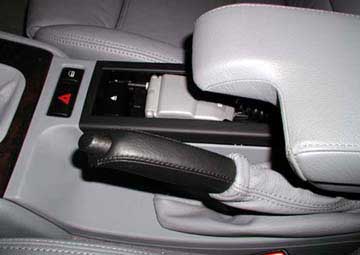
One more shot with the arm rest down (driver's perspective).

 01-09-2006, 11:05 AM


 Threaded Mode

