
|
|
|
|
||||||||||
| Xoutpost server transfer and maintenance is occurring.... |
| Xoutpost is currently undergoing a planned server migration.... stay tuned for new developments.... sincerely, the management |
 |
|
|
LinkBack | Thread Tools | Display Modes |
|
|
|
#1
 12-30-2016, 12:54 AM
|
||||
|
||||
|
You people suck. 12 years later, I finally replace speakers.
So inspired was I by Jay's work on his JL speakers, that I found myself open to the notion of a speaker upgrade in the E53.
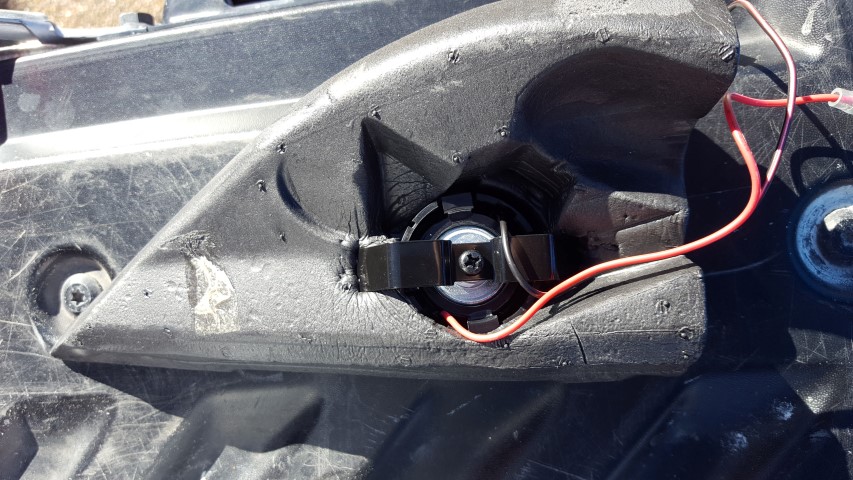
That's not entirely true. I've always been a bit of a speaker fiend, but I haven't actually fiddled with speakers in a BMW since the early 90's when I replaced the once-upgraded units in my 1975 2002. Since then, I never found the value prop behind spending money on a system through which I normally listen to news radio, classical radio, and radio radio. I did install the AUX input a couple years ago, so I can at least get streaming digital, but that's more ab something to keep my ears busy than it is a passion for music. I certainly don't care much about symphonic reproduction, accuracy, or any of the other things that have some folks replacing entire OEM audio systems. Not for me. But what I learned through the most recent threads is that the speaker upgrade I thought was impossible without a BavAuto offering was not only possible, but it could be done for a nominal price, return very nice sound, and retain the OE look, brackets, and connectors. Sign me up, Coach. And so it was that I found myself out and about faced with a JL Audio set much less expensive than it was online. It was a sign that they had two of them- one for the front and one for the rear. 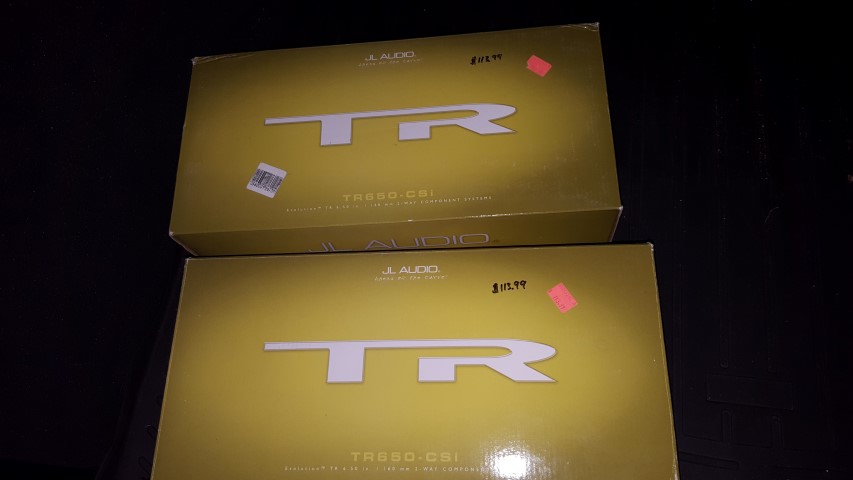 Now, against the advice from Jay's work, I found these at 6.5" instead of 6". The key here is that they are not 'oversized' 6.5" which are closer to 6.75". Another poster there mentioned that they could be 160mm and would fit with a little encouragement. Indeed, while others cut with a dremel or snips or something like that, I found the metal mounting ring of the speakers was easy to simply shape up and inward with a small pair of flat nose pliers. Once carefully turned upward, the physical fit was fine. We used silicon rather than hot glue for the bond to the OE housing. We put a bead down on the lip behind the speaker and a bead along the top once seated. They're not going anywhere, and they're not vibrating either. We lined up the new speaker connections to the OE leads so that a little solder would bridge the connections. Indeed, a little solder and voila. circuit complete. Now the cool part happened when we got lucky with the tweeters in the door. The JL tweeters are WAY smaller than the OE ones, so that presents a challenge for the mount. We looked around for some foam and could not believe how lucky we were to discover this perfect solution. The tweeters in the door are difficult to remove, but not impossible. Once removed, the opening from the back of the speaker grill is the exactly the same size as the foam insulation for copper water pipe. The 'test fit was nearly impossible to believe: Once cut to fit for depth, trimming the foam to fit the new tweeter was a simple matter. The results arent exactly OE, but they're not going anywhere. When viewed from the inside, the speakers appear no different from OE. They do not rattle, and the sound... Well... I'm more than 25 years older than I was when I did this the last time. What I've noticed is that I don't hear so well. In fact, I suspect that one reason I don't listen to the radio much with the girls in tow is that I need it a bit louder- just to hear the words. We only got through the rear doors today, but the sound improvement is amazing. For $113, this may be one of the more incredible 'bang for the buck' mods I have done. Just hearing the rear speakers makes me confident that the fronts we do tomorrow are going to be transformative. We'll do the front doors tomorrow. If there's time, we'll do the BSW sub that I bought this summer. It was on clearance and I couldn't resist having a bit of E53 legend in my own X5. More to come.
__________________
 
Last edited by PropellerHead; 01-02-2017 at 03:52 PM. 
|
|
#2
12-30-2016, 01:22 AM
|
||||
|
||||
|
Awesome! Any plans for the mids in the dash? I'm pretty sure mine are blown, and I don't really want to go the OEM route.
__________________
2004 X5 3.0 6 Speed MT Build Date - 09/03 156K Alpine White / Black Premium & Cold Weather Packs, Nav, Tons of lighting mods, 4.8is Exhaust, Headers, Eibach Springs, OEM 87's, Custom DME Tune, OEM Hitch. 2005 X3 3.0i - 100K - Blue water Metallic / Black 2005 X5 3.0i - 140K - Alpine White / Hellbeige 2 
|
|
#3
12-30-2016, 02:17 AM
|
||||
|
||||
|
Quote:
I have actually considered picking up a pair tomorrow and dropping them in. Why not, right? 
__________________
|
|
#4
12-30-2016, 02:02 AM
|
||||
|
||||
|
Nice work Prop. I find with mounting solutions for speakers, it's much less about aesthetics and much more about solidity. No rattles, as you mentioned, is the end goal... so your mounting solutions look plenty good to me. Definitely a great value for the enjoyment factor, though I admit, I am biased when it comes to audio mods as a quasi-audiophile. Very few things make me feel better than listening to music be reproduced accurately in a vehicle I really enjoy driving.
What impedance are those drivers btw? I assume they match the factory drivers to play nice with the factory amp. Do you have DSP?
__________________
2005 X5 4.4i Build 04/05 Maintenance/Build Log Nav, Pano, Sport (Purchased 06/14 w/ 109,000 miles) (Sold 8/15 w/121,000 miles) 2006 X5 4.8is Build 11/05 Maintenance/Build Log Nav, DSP, Pano, Running Boards, OEM Tow Hitch, Cold Weather Pckg (Purchased 08/15 w/ 90,500 miles) 2010 X5 35d Build 02/10 Nav, HiFi, 6 DVD, Sports Pckg, Cold Weather Pckg, HUD, CAS, Running Boards, Leather Dash, PDC, Pano (Purchased 03/17 w/ 136,120 miles)
|
|
#5
12-30-2016, 02:13 AM
|
||||
|
||||
|
Quote:
 I'll have to look that up. I'll have to look that up.  (I know, probably drives you nuts) I am not *certain* that all 4.8's have DSP, but mine does. My previous '04 3.0 and the E39 I've driven for 16 years do as well. I've never turned it on. (I know, probably drives you nuts) I am not *certain* that all 4.8's have DSP, but mine does. My previous '04 3.0 and the E39 I've driven for 16 years do as well. I've never turned it on.  That doesn't mean I won't take advice on how to set it. Sh!t sounds great now to me. But if I can spin a few dials and get something I'll notice, have at. I'll fiddle through it. Impedence- 4 Ohms. Factory is 8. I worried about this for years before I got these. I thought it meant that the 4 Ohms wouldn't work. Well, they do. Buddy who did the deeply technical stuff (ok, he soldered) said that it may make for some heat. I dunno why that is, what it means, or how concerned I should be. But if you (or anyone) has advice ab that, I am happy to think about it for myself with better information than I have rt now. So, if ya got stuff that'll make me smarter, hit me. 
__________________
|
|
#6
12-30-2016, 10:51 AM
|
|||
|
|||
|
Quote:
|
|
#7
12-30-2016, 12:02 PM
|
||||
|
||||
|
Quote:
I have also looked for but not found a dash speaker solution. I am going to head out for the front door install, but I may stop in a shop to see if they the 3" speakers that I found. I'll let you guys know.
__________________
|
|
#8
12-30-2016, 08:41 PM
|
||||
|
||||
|
Quote:
Quote:
I will only share this for now. Date night. And yes. My wife is coming along with me and the E53. 
__________________
Last edited by PropellerHead; 12-31-2016 at 01:51 AM.
|
|
#9
12-31-2016, 01:47 AM
|
||||
|
||||
|
Today was the day for the front door speakers/woofers and the A pillar tweeters. My buddy who is handy with a soldering gun is generally handy at a number of things, so he decided he wanted to trim the edges with tin snips instead of bending them upward. I'm generally the kind of guy who doesn't care about the details of *how* something is done- as long as it's done well and meant to accomplish the goal of the project. Trim away.
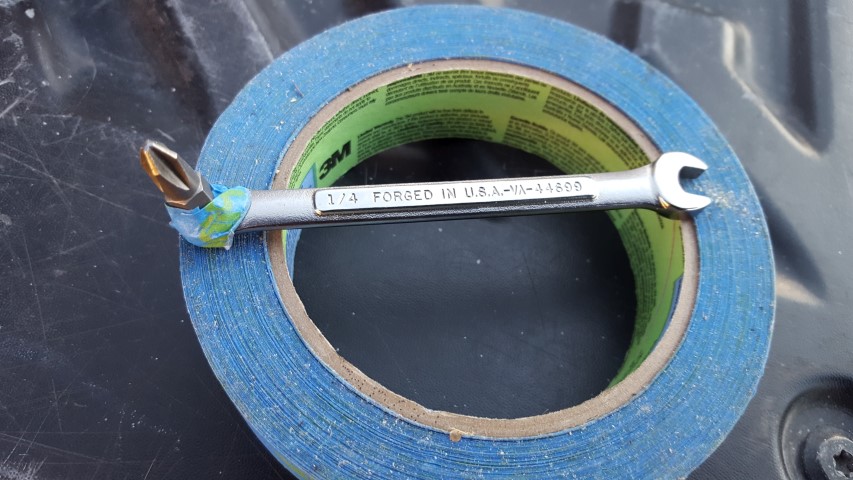
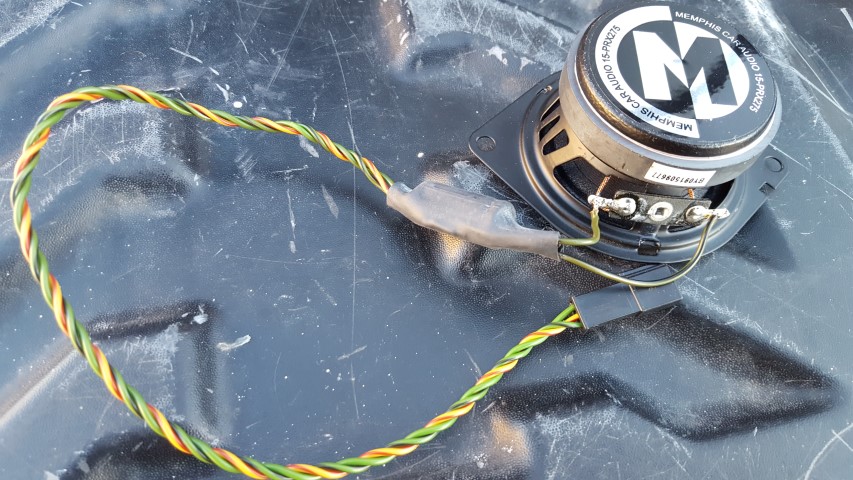
I'll admit that it probably took less time to fit well. It certainly required less test fitting. The ends were nice and clean. They did not need silicon as much to even the peaks of the bends. With a neatly trimmed install, the silicon really was there to serve it's true purpose- adhesion and vibration control. They also look better. Not that it really matters. You can't see them until it's time for window regulators. Here's a neatly trimmed front sub: Removing the front door panels was also a lot easier. No window shades (which I'd never dealt with). We had the most difficult parts of this day's work done so quickly that we were waiting for silicon to set. I was floored to see how well the tiny tweeters fit into the factory foam. The OE units use a plastic bracket that is held down with the bolts for the wing mirrors. Of course, the new ones were just large enough that they were'nt going to fit into these brackets, so I decided to use some of the included mounting brackets to tighten up the install and keep them still/rattle free. Behind all of that, I used a different, softer kind of foam pipe insulation. I wanted to ensure that the bracket didn't find it's way to the metal of the door behind the foam. Some generous application of silicon and tape to let it set was the perfect- if not really ugly solution. /Mini rant: Like the back, we used the original connectors spliced into the OE wires. Here is probably as good a place as any to share some thoughts on OE wiring, OCD, and my dose of reality-as-I-see-it:\rant Now that that's done with... Allow me to demonstrate just exactly how OCD *can* be a fun thing to work with- when it works.  I mentioned above that I had found some speakers that I thought were close to the needed size for the dashboard mids. After we finished the fronts, I zipped up the road to an authorized dealer for Memphis Audio components. I'd removed the speaker from the passenger side and had it out so I could carefully study potential replacements. I was fully prepared to use all the tricks- foam, silicon, brackets, glue guns.. all of it. Let's see if they'll fit in the holes. The sales guy took a glance and said, yep. Right here. $50 for the pair. They matched so well it was outright spooky. It took me longer to drive there than it did to find and purchase the mids. Here is a pic of the OE mid and the new Memphis Audio unit: (spooky close fit, rt?) Removing the dash speakers is easy in concept, but space is tight. The rear screw can be removed with a stubby screwdriver. This means you either use a rt angle driver- which we did not have- or you get creative with ways to motivate the mounting screws. Creativity is one of the requirements for a project like this. Here's the fabulous solution we came up with to grab those screws so close to the base of the windscreen: I promised you all that I'd share the joy of OCD meeting functional perfection, and here it is. With the very accessible leads on the new mids, we saw an easy opportunity not to worry with plastic splices rattling deep in the dash. Heat up the solder on the OE mids and attach them in place on the Memphis Audio units. Boom! Elegance.  I'll be dammed if that thing doesn't look exactly like stock and used the OE harness right up to the new mids. It sort of made up for the less than perfect solutions we'd employed over the last two days. Now, if you've made it this far, you deserve to know the true challenge for the dash mids: The OE speaker grills. The grills attach with two plastic tabs at the windscreen base and a single tab further to the rear. This single tab is where we were challenged. The grill would not lay flat. There wasn't much leverage to push the OE mounting clips back to make room for the tab, so we got out the snips. Unfortunately, I forgot to take pics of the modified Memphis audio units. It's not terribly difficult to do, so I will try to explain. This picture is taken fron the outside of the car, standing at the A pillar and looking down at the installed mid. To make the grill sit flat, we needed to trim the metal edge of the speaker at the green arrow above. Not much. Just about 1/2" or so to make room for the tab on the OE grill. While this helped, we weren't done. We ended up carefully trimming the fairly brittle plastic tab on the grill itself. We probably snipped 1/8" from its width. This and the trimmed metal around the new speaker had the grill sitting flush on the dash with no indication anything was different. Between this bit of fun and the OE wires, it was elegant, clean, and functional. The OCD trifecta!  That's the install. I will share thoughts ab the results in another post. Hint: It's fncking oustanding. Forgive my candor. 
__________________
Last edited by PropellerHead; 01-02-2017 at 10:31 PM.
|
|
#10
12-30-2016, 10:36 AM
|
||||
|
||||
|
This thread is inspiring - especially since BavAuto hit the dust with the E53 DSP offering - I look for a simple upgrade solution as well, hopefully to compliment my upcoming Avant-3
__________________
2018 Ram 2500 6.7L Cummins 68RFE 19k miles -Bright White/Black - Big Horn Sport - Crew Cab Short Bed 2013 X5 35D (CEO's) - Born on 5/17/2013 - 82k miles - Alpine White/Cinnamon Brown/Premium Pkg, Sport Activity/Premium Pkg and Sound/20" Style 214/Running Boards
|
|
| Bookmarks |
|
|
|
|


 Hybrid Mode


