
|
|
|
|
||||||||||
| Xoutpost server transfer and maintenance is occurring.... |
| Xoutpost is currently undergoing a planned server migration.... stay tuned for new developments.... sincerely, the management |
 |
|
|
LinkBack | Thread Tools | Display Modes |
|
#1
 07-17-2019, 10:30 AM
|
||||
|
||||
|
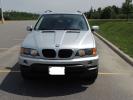
AWR-fix: Front Wheel Bearing Remove & Replace
 UPDATE: Replaced another bearing, added dimensions of the press parts so somebody could DIY out of plumbing parts etc. I also learned a new trick to push the axle out if rust is making it impossible. This was my 7 th wheel bearing replacement I have one more that I'll do this coming week. ======= Original Post ========= Just replaced my right front bearing a second time. It's the only one ever replaced and I learned why they fail from a BMW service bulletin: harsh Impact with a road hazard not age or miles. Anyhow I took a bunch of step by step photos and annotated the process and put them in a photo album. Make sure to enable captions to see what the steps were. I started the photos after removing the hub. I used a slide hammer to remove the hub but I used a heavy weigh to help hold the knukle to reduce impact on the three ball joints attached. https://www.icloud.com/sharedalbum/#B0SJ8GySPGgKVNf That's the album. You can post comments on individual photos if you have questions. It took me a few hours to do the job but it always takes twice as long when documenting and it was stupendously warm the day I did this so I started exhausted.  The old bearing showing obvious signs of overheating
__________________
2011 E70 N55 (me) 2012 E70 N63 (wife) Last edited by andrewwynn; 11-14-2020 at 07:47 AM. 
|
| Sponsored Links | |
|
|
|
|
#2
07-17-2019, 10:46 AM
|
||||
|
||||
|
Great work and write-up Andrew. Very helpful to our members!

__________________
Digital Competition Systems The older I get... The faster I was... No Fear 
|
|
#3
07-17-2019, 11:22 AM
|
|||
|
|||
|
Now that is ingenuity.
Seriously we need a part list for that press you made. That is worth its weight in gold.
__________________
2006 4.8is, Black on White. SOLD Sniff Sniff. 2017 F85 x5m, Black on Red. BEAST MODE "The older we grow the greater becomes our wonder at how much ignorance one can contain without bursting one's clothes." - Mark Twain Unlock OBC post 5
|
|
#4
07-17-2019, 11:24 AM
|
||||
|
||||
|
The press is the kit from harbor freight just drilled out to 1" and an 8" grade 8 fine thread bolt.
I've seen people hobble together what they need from some generic plumbing hardware like cast iron flange etc the trick is the 1" bolt.. 3/4" bolt is worthless to get the old bearing out. I've stripped out 3 or 4, 3/4" threaded rods in the process of changing a few of these, but as you can see in the video it literally took 1 minute of impact with the right tool to push out the old bearing. Putting the new one in took maybe 4 or 5 because i did it by hand and it takes a good number of turns to get that turned in.
__________________
2011 E70 N55 (me) 2012 E70 N63 (wife) Last edited by andrewwynn; 07-17-2019 at 02:10 PM.
|
|
#5
07-17-2019, 02:20 PM
|
||||
|
||||
|
update: i found a kit on amazon that has a 7/8 grade 8 drive bolt.. that will be strong enough to push an x5 bearing:
https://www.amazon.com/dp/B01JBK2OJO The usual push rod is at best grade 5 and is good for 24,000#, the 7/8 grade 8 in this kit is good for 46,000# and is plenty to pull any x5 bearing… I would replace the goofy nut that comes with the kit with some real grade 8 nuts.. they have a 'long nut' so you can get a wrench on when it's deep in a hole; better to use a long socket. It took over 33,000# to remove some of my bearings and typically up to 20,000# to install. A frozen bearing on a hot day took about 12,000# to install. This is the upgrade that has been needed to make these kits not self-destruct.
__________________
2011 E70 N55 (me) 2012 E70 N63 (wife) Last edited by andrewwynn; 07-17-2019 at 02:39 PM.
|
|
#6
08-10-2020, 11:07 AM
|
|||
|
|||
|
This is a great write up. Have to do bearing on my X5 soon, thanks for taking the time to put this together Andrew.
__________________
2001 BMW X5 4.4i Topaz Blue
|
|
#7
08-10-2020, 12:14 PM
|
||||
|
||||
|
Quote:
Here would be an example of an overheated bearing:  Normally whenever there is drastic temperature change on things, there would be an oxidation boundary layer. Some people note this as "bluing" or where you would see a rainbow color effect. I'd be curious to see what the inner races look like, but usually these get destroyed when the slide-hammer is used to pull out the hub. But looking at your pictures with the inner race on the hub, it did not look overheated either. This was the second time you had to replace this bearing?? What brand is it?
__________________
2003 BMW X5 3.0i -- MT5, 3.64s final gears, H&R lowering springs, K-Mac bushing kit 2007 BMW X3 3.0Si -- MT6
|
|
#8
08-11-2020, 01:48 AM
|
||||
|
||||
|
The picture doesnt show as well but yes Im quite aware of what the change in metal from overhearing. One side got very overheated. To the point it lost harness and all the oil. It went from barely a hum to louder than wind noise within a couple days.
I use only OEM bearings. The name that gets flagged for being mean to happy people. Ive replaced six total x5 bearings. 7th is over due. Ive had to replace the eight front on mine twice. They dont usually wear out they get injured from a big pothole. They can probably last a million miles if you never hit a pothole but they could die after a mile if you hit just the wrong pothole just the wrong way.
__________________
2011 E70 N55 (me) 2012 E70 N63 (wife)
|
|
#9
11-14-2020, 07:50 AM
|
||||
|
||||
|
Bump: updated the iCloud photo album to include more details of the bearing press so somebody could copy it. I still have to measure the sizes for the setup for pressing the hub back into the bearing.
__________________
2011 E70 N55 (me) 2012 E70 N63 (wife)
|
|
#10
11-14-2020, 11:05 AM
|
|||
|
|||
|
Nice write up, thx a million. Still looks like a big job.
Sent from my SM-G950W using Xoutpost.com mobile app
__________________
 2003 bmw x5 3.0i ,219000km build date 2003-08-18 2003 bmw x5 3.0i ,219000km build date 2003-08-18
|
|
| Bookmarks |
|
|
|
|


 Linear Mode


