|
||||||||
| Xoutpost server transfer and maintenance is occurring.... |
| Xoutpost is currently undergoing a planned server migration.... stay tuned for new developments.... sincerely, the management |
 |
|
|
LinkBack | Thread Tools | Display Modes |
|
#281
|
|||
|
|||
 Wish I had snow close by to drive on!.
__________________
'06 X5 3.0i - bought @143,123 miles (12/26/20) |
| Sponsored Links | |
|
|
|
|
#282
|
||||
|
||||
|
Quote:
Thinking about taking a break from washing windows and cleaning gutters today and installing the hood cables that came in. Both of my OE cables are looking pretty ratty, and I would rather get it done before one breaks. Just did all the required XOutpost reading regarding this job and depending on the condition of the other two cables, I may just do the first one that goes thru the firewall to the hood lever. Pulling the bumper and headlights is a bit varsity for the amount of time I’ve got today! I’m planning on upgrading my KC driving lights at some point, so that will be the time to remove the bumper bar, oil cooler and them the bumper. I really need a few days where I can put the X into heavy maintenance and get to the above, do the brake refresh, install the 90 deg t-stat I’ve had sitting around for a few months, and do an injector refresh. I used the 20 year old ones when I did the motor swap and it’s likely past time for new ones.
__________________
Current Original owner 2002 E53 X5 4.4i to 4.6i swap 2025 G06 X5 50e Former 1972 Audi Fox 1986 Saab 900S 1996 BMW Z3 1998 BMW E36 M3 Sedan 2004 BMW E46 M3 2006 Audi A3 Quatro 1993 Mopar 318 Jeep Grand Cherokee 2015 V6 Jeep Grand Cherokee Last edited by Henn28; 10-30-2024 at 08:53 AM. |
|
#283
|
||||
|
||||
|
Crank hub bolt
Now that the heads are at the machine shop, I had some time to get down the garage and work on bottom end. I wanted to get the lower timing and oil pan covers off but only got the timing cover done. I had forgotten that two of the engine stand bolts go into the oil pan since part of the bell housing is integrated into it.
I set up with the crank hub holder and a giant breaker bar, but then thought I’d give my impact a try first. I wasn’t expecting it to work, but was surprised when it did. A few seconds of hammering with it and the bolt spun off. After that, the hub slipped right off. 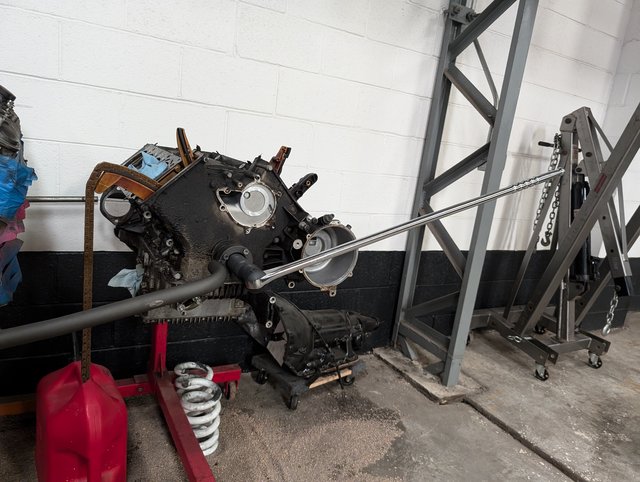 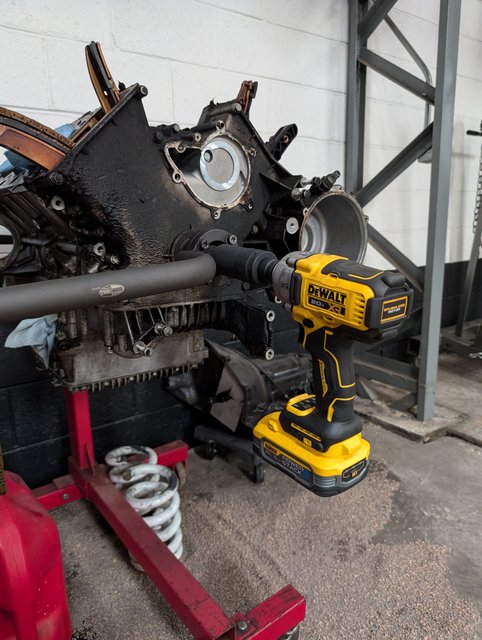 The cover looked good, but I think the impact broke an internal flange off of the inside of the lower cover. The chunk of aluminum was laying in the oil pan, but didn’t look chewed up at all, like I think it would if it had been down there with the motor running. Not a big loss since I’m planning on using the non water cooled alternator cover from the M60. Just a word to the wise tho if you plan on using a big impact on the crank bolt. 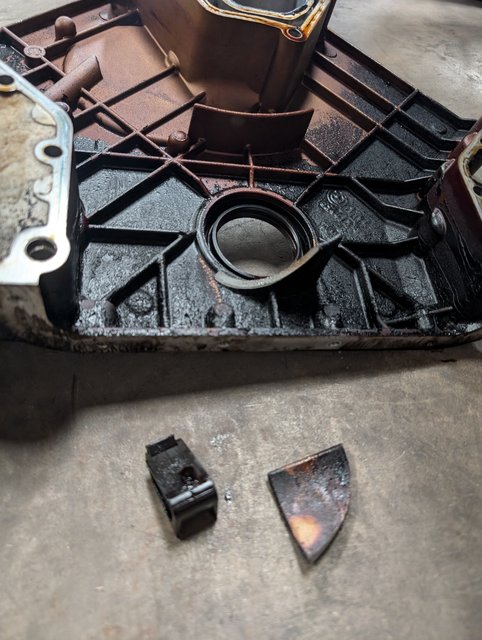 The chunk of plastic is from a chain guide that I also suspect broke under the impact hammering. The guides are very brittle, but looked really good for a motor haveing 150+ k on it when I pulled it. 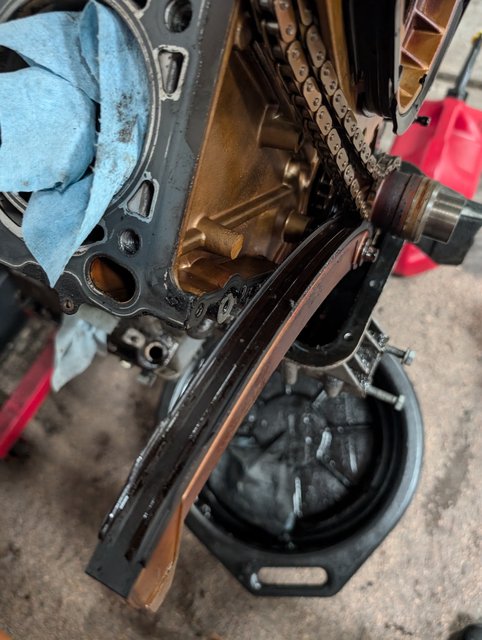 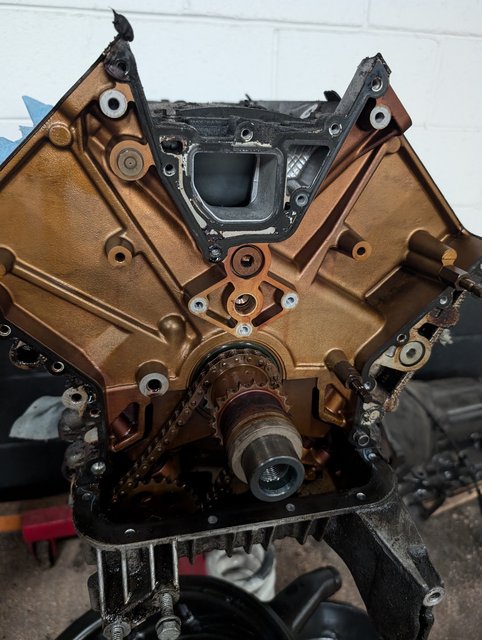 The oil pump chain does have a lot of slack in it. I’m not sure what is normal, but this seems like a lot…it touches the block with gentle pressure. 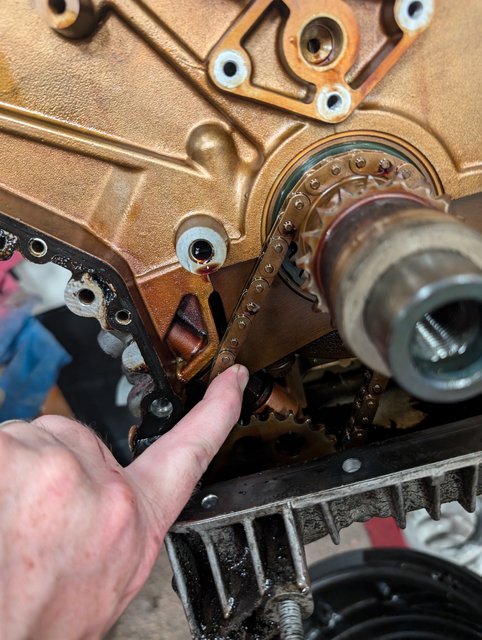 I flipped the motor over and started taking out oil pan bolts but quickly realized that I would need to reposition two of the engine stand bolts, or come up with another solution. The only other place to bolt into is are the starter mount casting, which worries me from a strength perspective. 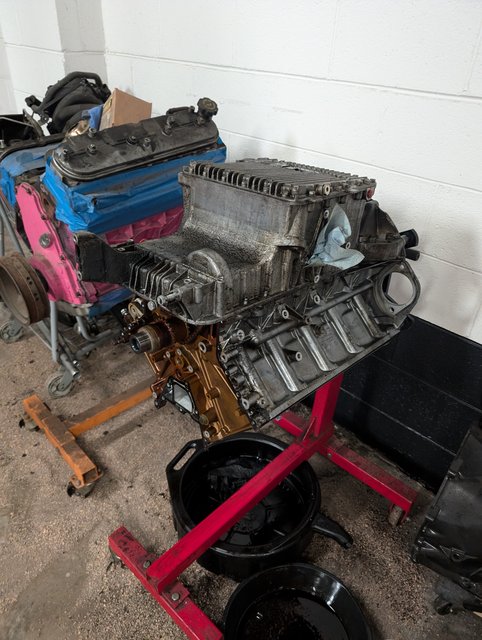 Finally, I pulled the valley pan off and was surprised to find a fine powder filling the top of the metal cover, until I remembered that mice had nested in my cosmetic/acousti engine cover at one point and chowed all the foam. 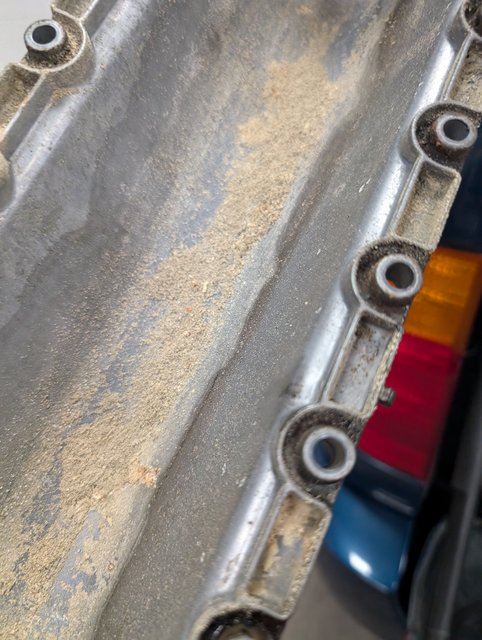 One last picture from the door card I replaced with a “new to me” eBay card that is in amazing shape. I had to swap out the silver trim piece on the handle, and the door handle itself as the silver was a different shade from my oe card. Note the beautiful “airbag” plug that was included. 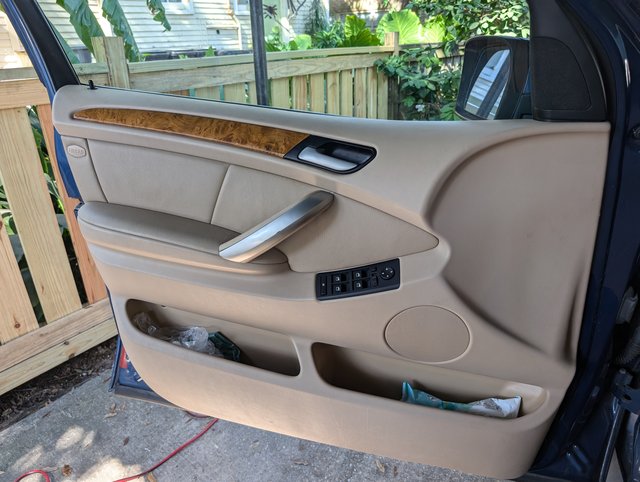
__________________
Current Original owner 2002 E53 X5 4.4i to 4.6i swap 2025 G06 X5 50e Former 1972 Audi Fox 1986 Saab 900S 1996 BMW Z3 1998 BMW E36 M3 Sedan 2004 BMW E46 M3 2006 Audi A3 Quatro 1993 Mopar 318 Jeep Grand Cherokee 2015 V6 Jeep Grand Cherokee Last edited by Henn28; 11-05-2024 at 09:57 PM. |
|
#284
|
||||
|
||||
|
4.4 bottom end teardown
An old saw horse and some wood fit perfectly under the deck of the 4.4 and allowed me to release the two attachment point on the rear engine stand, that were bolted into the oil pan portion of the bell housing flange.
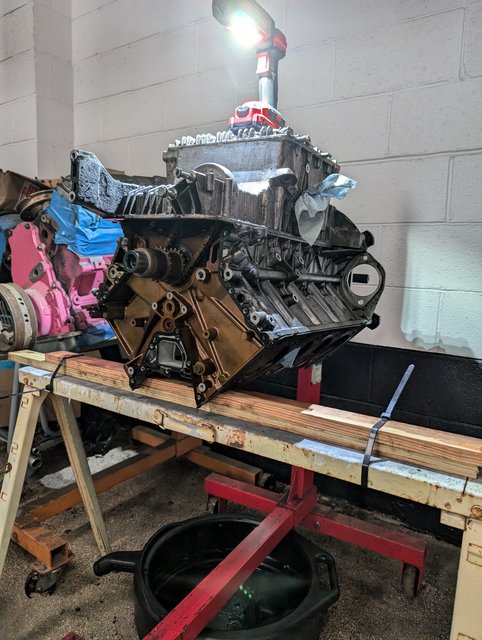 After the 732 internal and external oil pan bolts came out, the pan lifted off easily. The lower pan cover showed a lot of nasty mud, which I guess is just the end result of 24 years of accumulated crap, including macerated guide rail plastic. No chunks however and the pump looks pristine. The rear bearing seal carrier/plate also has a lot of this crap baked onto it, but the block looks really, really good to my eye. 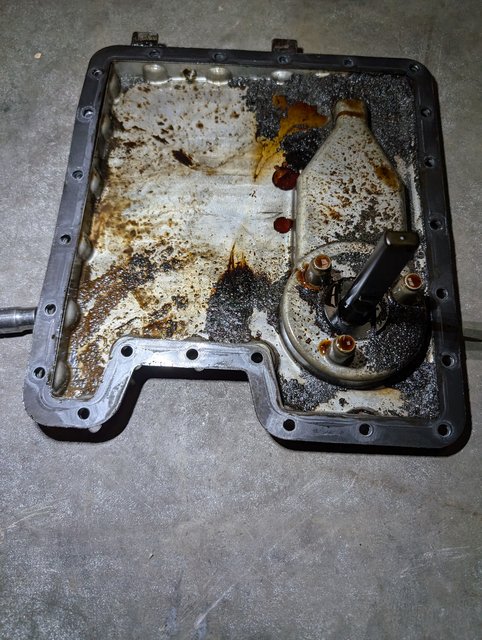 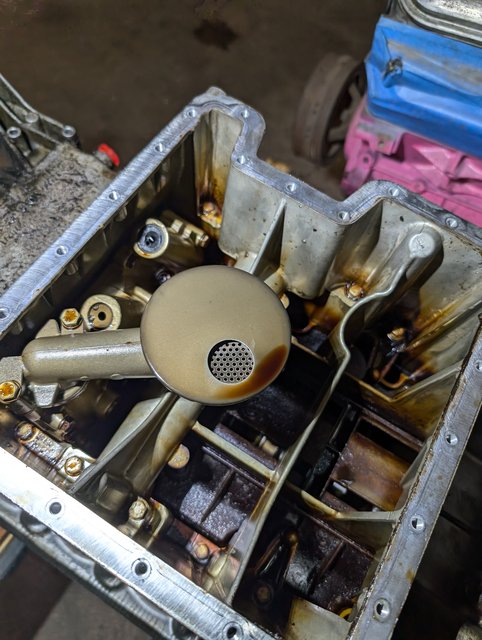 The pump internals looked very clean, or at least as much of them as I could see when I pulled the pickup off and unbolted the pump itself: 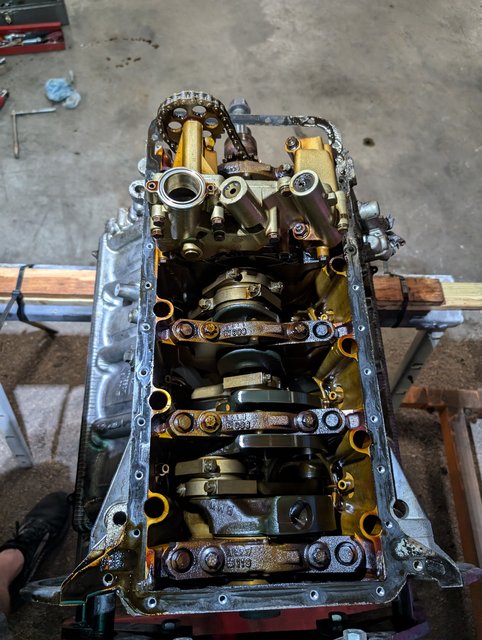 The block itself and the crank look very clean, and I rotated the motor to look, as best I could at the bottom of each cylinder, especially on the piston skirt sides where it seems bore score tends to happen. Tough to see every inch of the bores with the rods and crank in the way, but what I did see looked good thankfully. 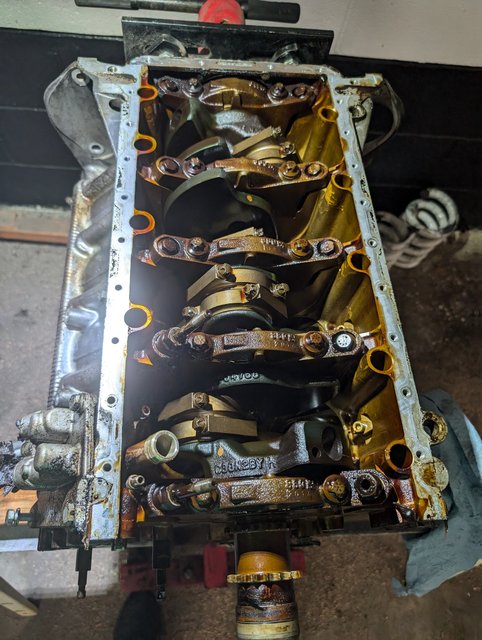 Next job was to pull the bearing caps, one at a time for a quick look. The bearings looked worn but the crank journals look like they are in excellent shape with no scoring or other signs of visible damage or wear. The only one I couldn't pop off was number 5 (rear most bearing cap) because there just isn't any wiggle room with the rear main seal carrier still on. I should have taken this off before putting it on the stand, but whaddaya going do to. The motor had 153,079 miles on it when I pulled it and it had never overheated or otherwise been abused (Was my wife's dailly from 2002 to 2015). However, it did have low compression in 2 cylinders which I was hoping wasn't due to bore problems. I'm pretty happily confident now that I've seen 90% of the bores that the compression issue was in the heads or maybe rings. 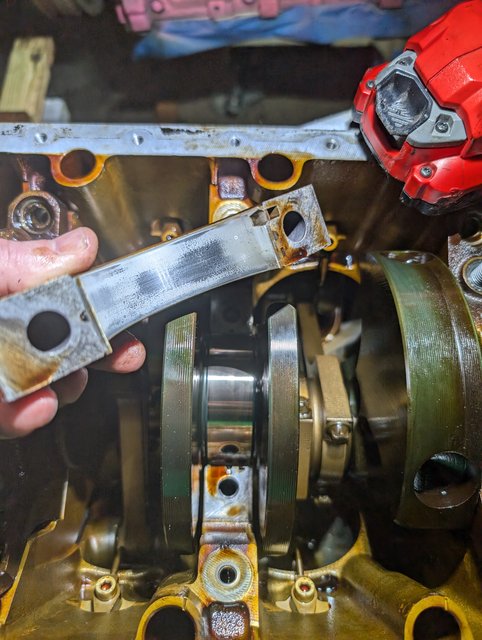 I was out of time so put the pans back with a couple bolts to protect the motor and brought the oil pump assembly home to my (small) shop. My plan currently is to go with the Cybul E36 - M62 swap kit, which entails modifying the oil pump in some way so that it will fit into their modified oil pan arrangement. Not sure if I need to send it to them, or if I can do it myself, but that is somewhere down the road in terms of the to-do list. I've been trading some emails with them and they are working on modifying their engine mount to accommodate an AC compressor with the M62 motor. Figuring out replacement bearing shell sizes, colors, etc. is a bit of a challenge for my one brain cell. I'm sure the idea of colors, grid stages, etc. makes sense to some German engineer, but not to your (below) average econ major. TIS says to ignore the different colors now and just go with yellow bearing shells on all the main bearings, so my current understanding is that the crank will come out of the factory with one of three "grinds": Standard, stage 1, stage 2 or "Undersize 3". A marking on the crank itself will indicate which of the above sizes applies, and allow for a cray super computer to work out which sizes of yellow shells should be used on each journal to bring the play into a tolerance of 0.020 to 0.050mm. My working theory right now is to plastigage each journal with the original bearings, and note the result. This "gap", plus the nominal journal size as denoted by the grind stage mark on the crank, should sum up to a number that is within the size and tolerance in TIS for the OE crank stage grind. If it is off (too much of a gap), then a more undersized yellow bearing size will be needed to bring the play into tolerance. I'd put a micrometer on the journals as well, but I don't think mine will measure out to a thousandth of a mm and TIS specifically notes that plastigage is the only "special tool" needed to replace main and rod bearings. Somewhat ironically, the X5 crossed 170k on the drive home from working on its origial motor. That means the 4.6 I put into it now has 16,921 miles on it. 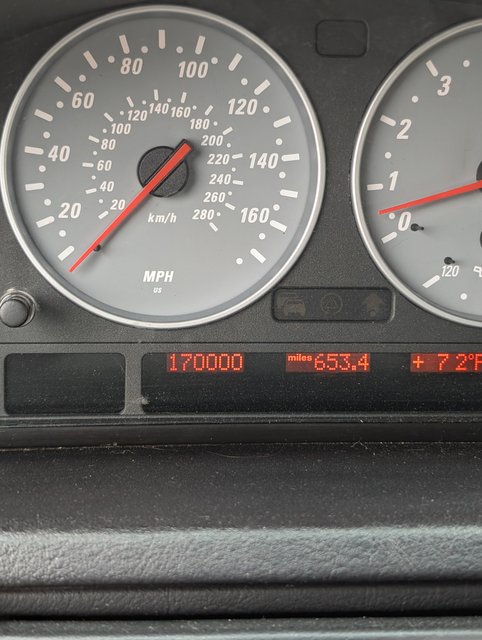 Its running strong, but always has a to-do list. Aside from some long term upgrade/nice to have stuff, currently on that list are a new master cylinder and booster and ECS Tuning monoball lower control arms to replace my worn rubber bushing arms (so far the monoball upper arms I put on have worked out great), and most of all I need to pre-emptively rebuild the Xfer case with a new chain. Its a non-x drive tcase so I'd rather do it pre-emptively than get stranded. Unfortunately its the lessor used tcas, which may limit my options for finding a donor case to rebuild at my leisure.
__________________
Current Original owner 2002 E53 X5 4.4i to 4.6i swap 2025 G06 X5 50e Former 1972 Audi Fox 1986 Saab 900S 1996 BMW Z3 1998 BMW E36 M3 Sedan 2004 BMW E46 M3 2006 Audi A3 Quatro 1993 Mopar 318 Jeep Grand Cherokee 2015 V6 Jeep Grand Cherokee Last edited by Henn28; 11-13-2024 at 11:23 AM. |
|
#285
|
|||
|
|||
|
I was always under the impression the different size bearings were to account for material removed if a crank had to be repaired.
|
|
#286
|
||||
|
||||
|
Quote:
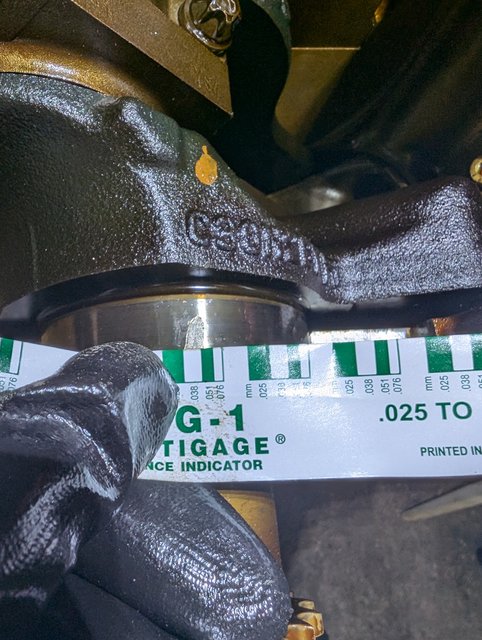 It does seem to me that there are several “yellow” shell sizes so I’m still unsure which to buy. It doesn’t help that my crank doesn’t bear any of the markings TIS talks about. Once again, the 4.4 TIS info is sparse, but I do think the yellow dot in the pic above means that yellow shells were used….maybe…
__________________
Current Original owner 2002 E53 X5 4.4i to 4.6i swap 2025 G06 X5 50e Former 1972 Audi Fox 1986 Saab 900S 1996 BMW Z3 1998 BMW E36 M3 Sedan 2004 BMW E46 M3 2006 Audi A3 Quatro 1993 Mopar 318 Jeep Grand Cherokee 2015 V6 Jeep Grand Cherokee |
|
#287
|
|||
|
|||
|
My experience with main bearings is very limited, I have done some rod bearings on a few engines but on those they just say to use plastigauge to verify clearance and if you need an oversized bearing you install as a set. I've checked a few mains "while I was in there" during some jobs but never found a reason to replace them, they always check out fine with plastigauge.
How I interpret it though is that the baseline value is the marking on the crank, per TIS: Quote:
ie. If cyl 2 is marked green, and cyl 4 marked yellow, you'd use: cyl 2 Bearing shell green 70.00MM (0) cyl 4 Bearing shell yellow 70.00MM (0) If you needed .50 over then you'd use: cyl 2 Bearing shell green 69.50MM (+0.50) cyl 4 Bearing shell yellow 69.50MM (+0.50) This gets a little muddy for me because oversized bearings have the material added to the back of the bearing, to account for the mains being line honed for example (if it was line honed .50 you'd use .50 over bearings). But the BMW nomenclature showing sizes getting incrementally smaller (.50 "over" is .50 smaller than the standard 70) makes me think BMW is counting on you grinding and polishing the crank, and do not have anything in their catalogue to account for line honing. Really, they should be considered undersized if this is the case - so 69.50 (-.50) would be more accurate. But that is somewhat a moot point, I do suspect you'll be fine running standard bearings across the board. If nothing else changed (crank wasn't ground, no line honing was performed) then I don't see why you'd deviate from standard size. As you noted, TIS has a note that you use all yellow in the crankcase side Quote:
Quote:
Last edited by BimmerBreaker; 11-14-2024 at 01:58 AM. |
|
#288
|
||||
|
||||
|
Great info, thanks BimmerBreaker. I misunderstood what TIS was telling me and thought all the shells should be Yellow now, but in reality the block sides are yellow and the tops coincide with the color dots on the crank balance lobes. Thanks much for the lesson!
It makes sense too, as you conclude, that the stages are for reworked crankshafts. Mine has never had been reworked which would explain why there is no "tic" mark(s) punched or etched into the number one bearing balance lobe. They must lay another mark down every time the crank gets machined to fix damage or wear. The rod bearings are pretty straight forward: red on one side, blue on the other. There are different sizes, but I'm hopeful that I don't have to buy 16 new shells. All my main bearing shells had the top layers worn thru, but without knowing how they are made, I can't say if this layer is a sacrificial one, or a bearing layer. So I'm going to just replace all 10 of them. They are cheaper than the rod bearings thankfully.
__________________
Current Original owner 2002 E53 X5 4.4i to 4.6i swap 2025 G06 X5 50e Former 1972 Audi Fox 1986 Saab 900S 1996 BMW Z3 1998 BMW E36 M3 Sedan 2004 BMW E46 M3 2006 Audi A3 Quatro 1993 Mopar 318 Jeep Grand Cherokee 2015 V6 Jeep Grand Cherokee |
|
#289
|
||||
|
||||
|
Teardown complete
I had a few hours today to finish tearing the 4.4 bottom end down today.
First thing was to label the main caps, rod caps and pistons with a sharpie, which will probably come off while cleaning, but I keep forgetting to get a dye pen. At least I won’t get confused as I pull all the parts out. The tops of the pistons have arrows point towards the fronts and the rods and caps are etched with identical info so matching them back up is tough to screw up. Interesting fact I learned from JimLev over on BimmerForums: the connecting rods and caps are cast as a single piece, and then the caps are broken off the connecting rods, so they really shouldn’t be mixed up. I also noted the paint dot colors on the crank at each main bearing journal, as these colors help determine the cap side bearing shells to use. Interestingly, I had dots at 4 of 5 journal locations, but not the rearmost journal. No dot. 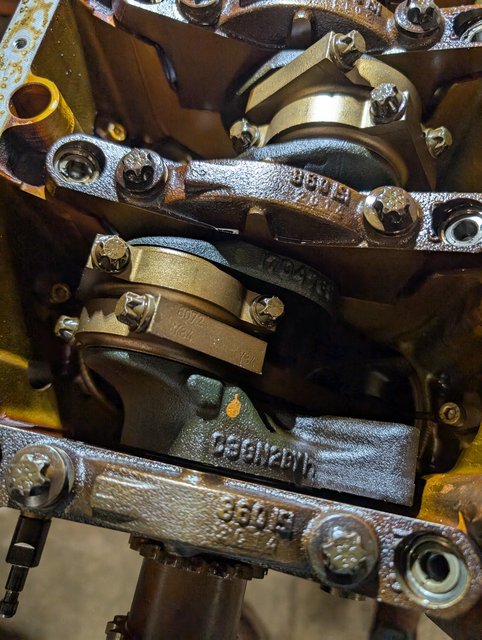 Once labeled and lots of pics taken, all the caps came off, both from the rods and main bearings. The pistons are easily pushed and then gently tapped out of the top of the block, taking care to be ready to catch them so they don’t land on the floor. One note: pull the oil squirters first as I nicked one with a rod on its way out. These little things are stupidly expensive, so hopefully mine isn’t ruined. I’ll clean them all up and see how it looks. Once the pistons are out, or at least pushed to the tops of the cylinders, the crank lifts right out. 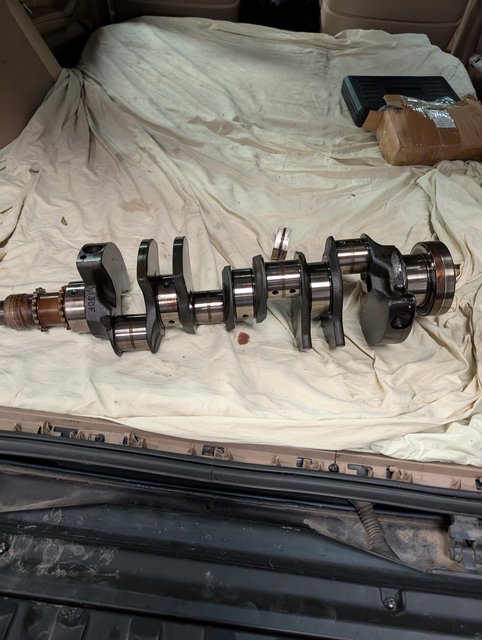 The thrust bearings on journal 5 keep the fore/aft play within specs and drop out, literally, when the crank is pulled up. I think I’ll likely buy new ones as they seem really important, and mine have 150k miles on them. They come as an upper set (2) and lower set (2), and are cheap. BMW called them “upper guide washers” and they are keyed to fit into the number 5 main bearing cap. I drained the remains oil from the block and took a better look at it. Time, and a micrometer will tell, but there is no scoring in any of the cylinders, which is a great start. 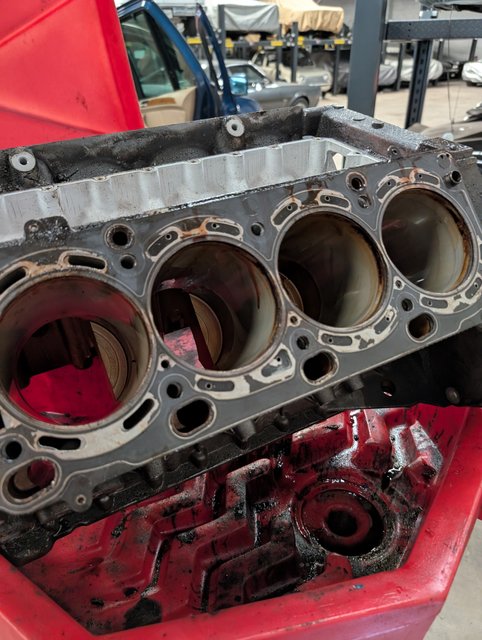 It all got loaded into the X5 (ironically), and I dropped the block and oil pan off at the machine shop for a good cleaning and to measure the bores, both for diameter and roundness. 93mm is the magic number, but there is a tolerance for that, and for out of roundness. The oil pan is likely scrap, but I want to hang onto it just in case it works better in the e34 or e36 the motor finds a home in. It’s a long shot because it’s so deep, but my quick take is that the lower sump is located significantly farther back on the x5 than on the 540 (rear wheel drive oil pan. Who knows, it may help clearing a front crossmember, if it can be modified to be more shallow. 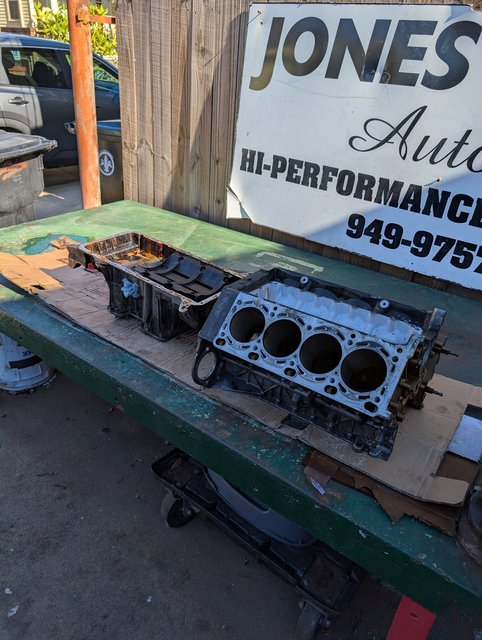 The crank and pistons came home to my little shop and the pistons will need a serious cleaning. The crank looks great, and my initial measurements of the journals look spot on, where TIS, says they should be. This is added peace of mind to my earlier adventures with plastiguage, which also showed journal 1 to be exactly within new spec. 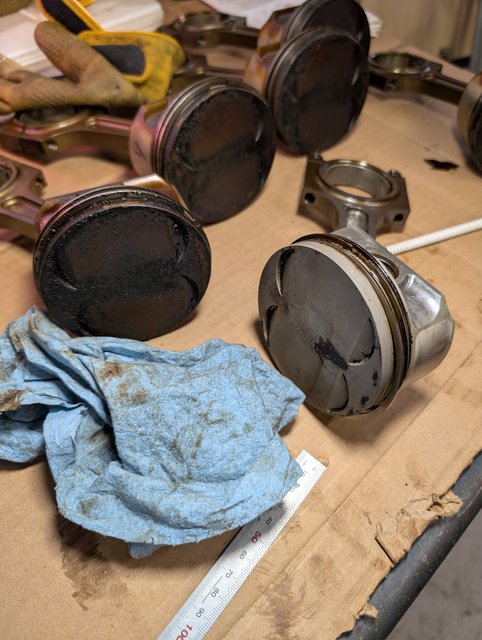 Next I’ll clean and measure the pistons, and start ordering rings and upper bearings shells for the connecting rods (I have new lower shells already), and rod bearing shells.
__________________
Current Original owner 2002 E53 X5 4.4i to 4.6i swap 2025 G06 X5 50e Former 1972 Audi Fox 1986 Saab 900S 1996 BMW Z3 1998 BMW E36 M3 Sedan 2004 BMW E46 M3 2006 Audi A3 Quatro 1993 Mopar 318 Jeep Grand Cherokee 2015 V6 Jeep Grand Cherokee |
|
#290
|
|||
|
|||
|
Great build so far, I am enjoying following along
 All 00+ BMW's use fracture split connecting rods. It's pretty cool tech - and like you mention, no chance of mixing them up. I don't think the X5 oil pan won't allow the engine to fit in an E36, I don't think it would even fit in a Z3 which has the firewall set quite a bit further rearwards X5 pan is really a mid sump and even with a true rear sump setup it's a tight fit into an E36 (or a Z3 for that matter) N62 oil pans are rear sump and can be modified to fit an M62, but some of the modifications are fairly extensive (extending oil pump drive shaft, etc). I've yet to see a finished installation with this conversion done. Soaking the pistons in diesel works pretty well to clean them. |
 |
| Bookmarks |
|
|
|
|