UPDATE: September 14, 2015
I have just received "Limited Warranty Extension" for the Fuel Pump. Apparently BMW says it is not a call to service or a Recall.
Yeah!
Long story short:
Look in your mail for document: B-ELWR 2015 In-tank Fuel Pump
Original Post:
DIY: Replacing Fuel Sender / Pump, (P0442 – EVAP Emission Control Sys: Small Leak)
Problem: Well there are two possibly.
- You get a warning light on your dash center display that states Check your filler cap.
- You get a check engine light (usually follows #1)
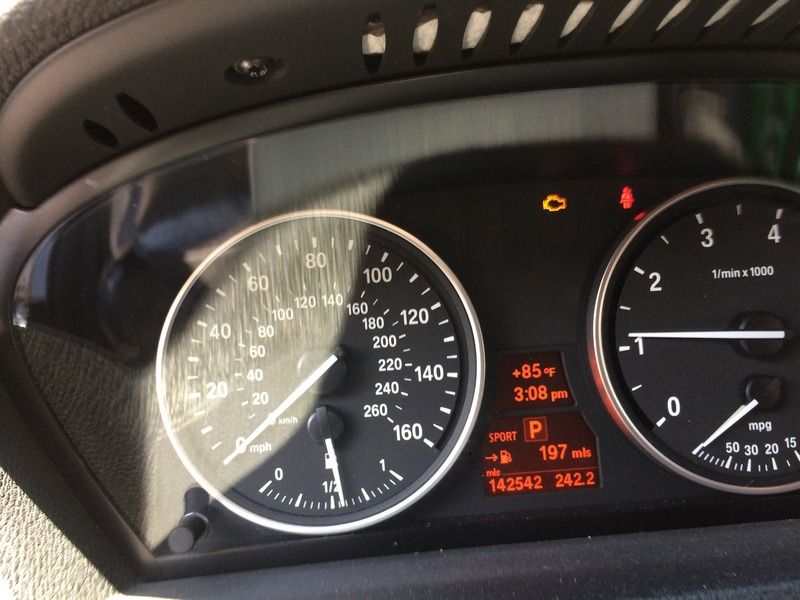
- After scanning the car with OBD II scanner, you get error code: P0442 - EVAP Emission Control Sys: Small Leak

- Car does not start but the started turns the engine over
Possible Causes (as listed on the wab):
- Missing or loose fuel cap
- Incorrect fuel filler cap used
- Fuel filler cap remains open or fails to close
- Foreign matter caught in fuel filler cap
- EVAP canister or fuel tank leaks
- EVAP system hose leaking
- Fuel tank leaking
Most likely Actual Cause (at least in the X5 owner group):
- Overheated fuel pump electrical connector had melted the plastic around the pin leading to fuel vapors escaping the tank
- Defective pump (delivery unit)
- Overheated and melting electrical connection
Enjoy.
What you need:
- e70 x5 (my 2008 X5 E70 4.8i, N62 - about 140k miles, having this issue for last 40K), or similar BMW
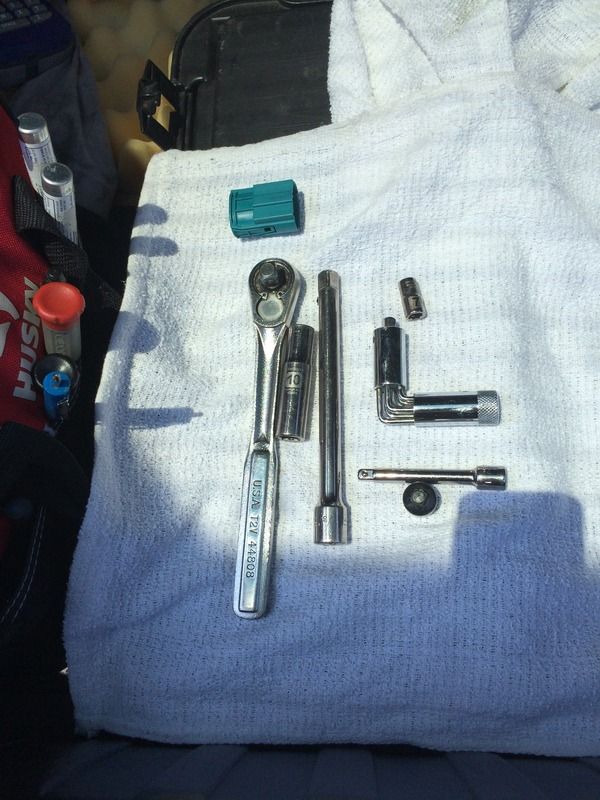
- basic tools to include: 10mm socket, 7 mm socket. few ratchets, a couple of extensions, a 90 degree ¼” adapter
- new replacement Fuel Sending Unit
- new electrical pig tail
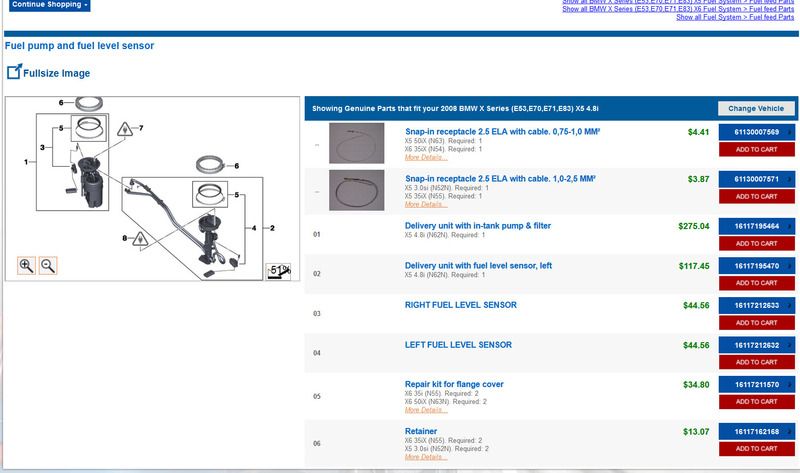
Parts List:
- Delivery unit with in-tank pump & filter: 16-11-7-195-464, qty 1
- Electrical connector: 61-13-8-352-390, qty1
- Electrical cable: 61-13-0-007-571, qty 2
Additional work I’ve performed:
- Disconnect Battery for safety (you should, I did not)
Disclaimer: in no way does reading this post authorize you to do this repair yourself. You should always service your BMW at an authorized BMW Service point. Death and injury may/will result if you undertake this repair.
Things to know:
- the fuel pump is located under rear seat on the passenger side
- possible cause for the connection failing is overheated connection due to higher resistance of pump. This may be tied into clogged fuel filter and pump working harder
- you may consider getting electrical connectors and replacing those as well
- you may also consider replacing the fuel filter
Work to be performed:
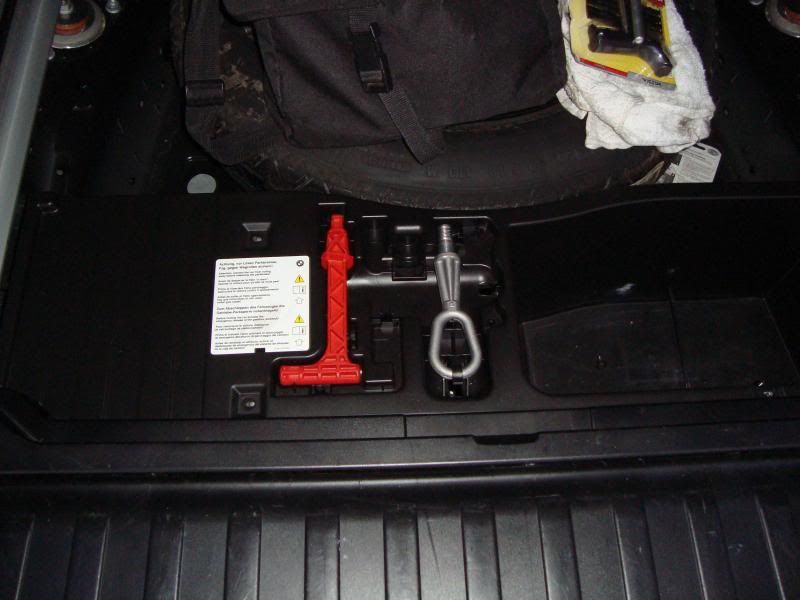
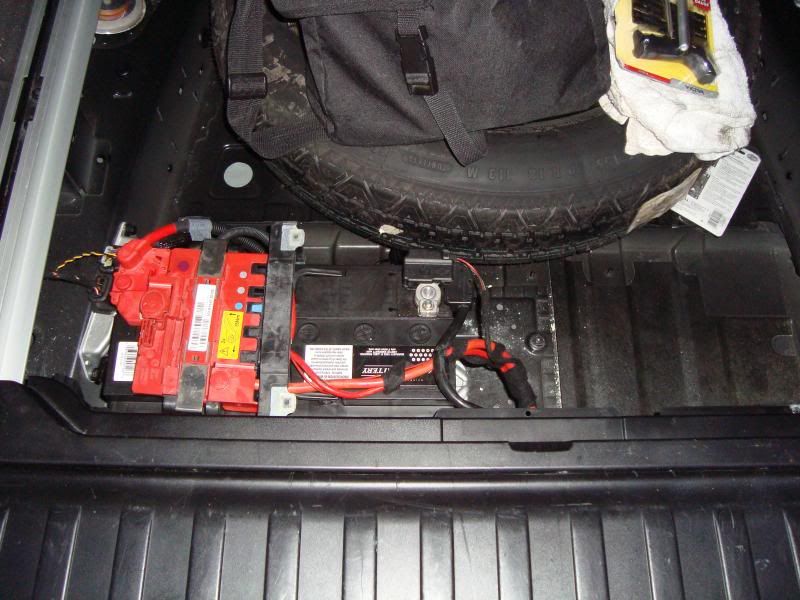
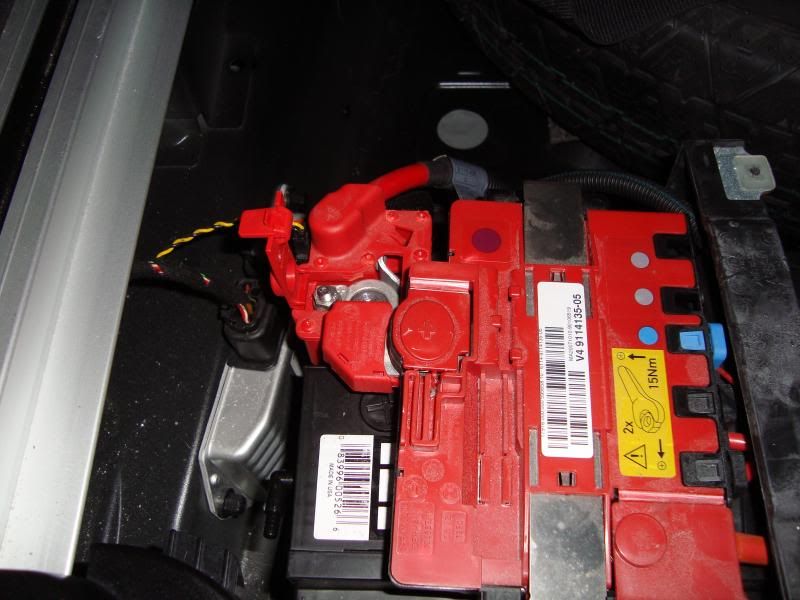
- disconnect the battery: located in trunk under the cover; remove phillips screws, remove battery cover tray, undue positive connector, make sure the connector will not accidentally touch the terminal by possible placing a clean rug in between the two
- remove back bench seat. pull left and right side of the seat straight up until release

- remove bench seat, and place it forward between front seats and back seat on the floor

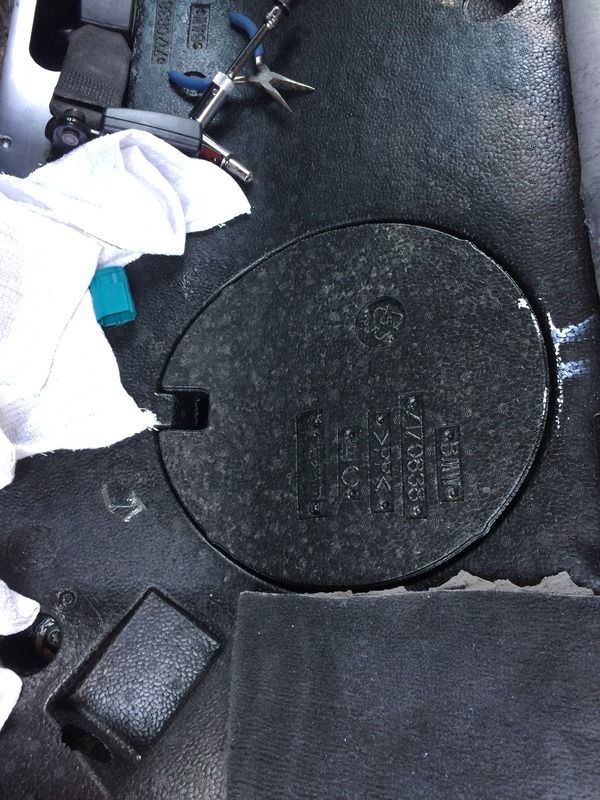
- remove carpet (sorry, I still have not figured out how to do this part. Give me an update and I will feed pictures and text as needed here. I did the dummy thing and cut my carpet in straight line)
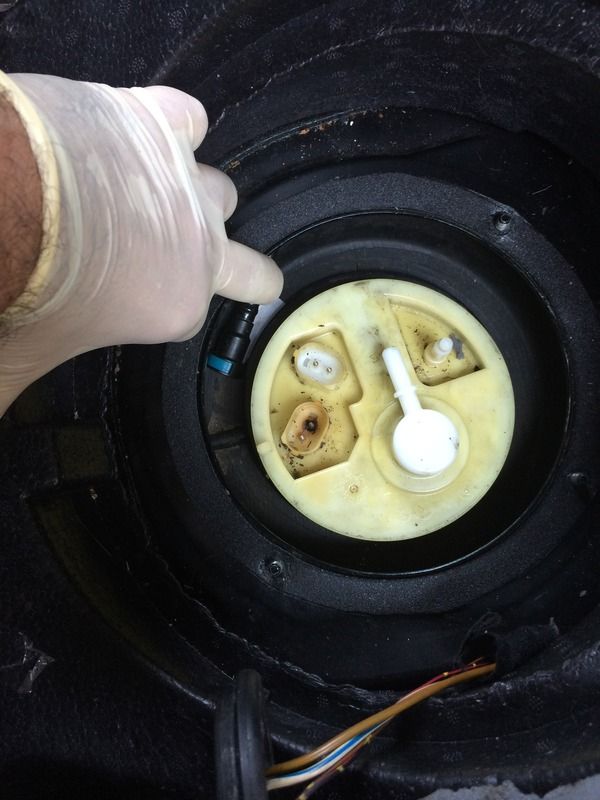
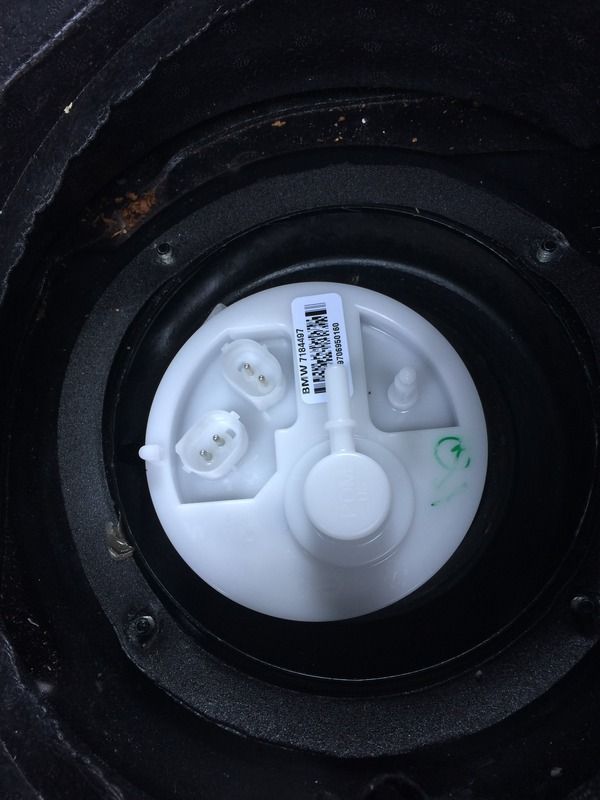
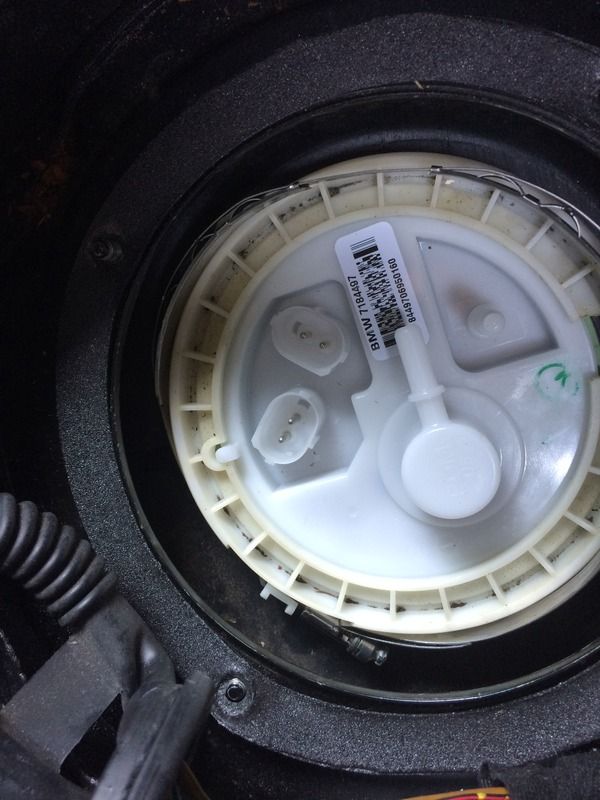
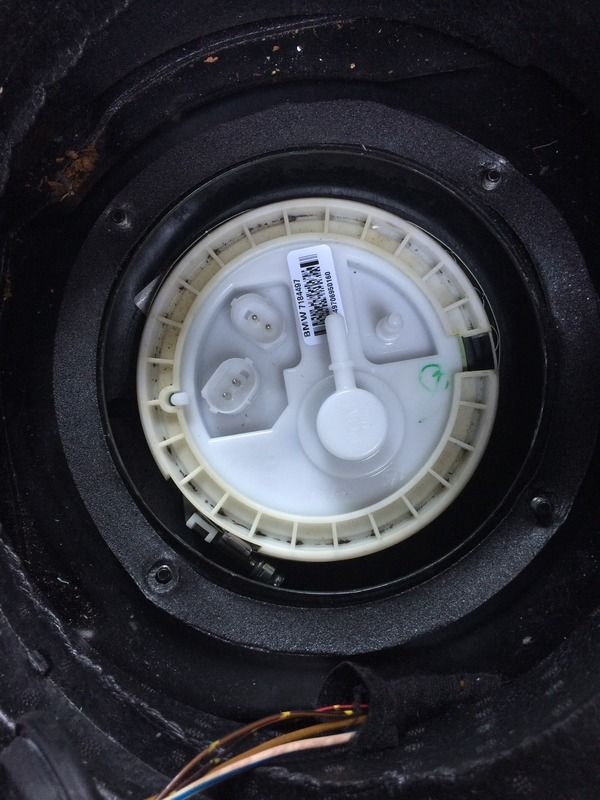
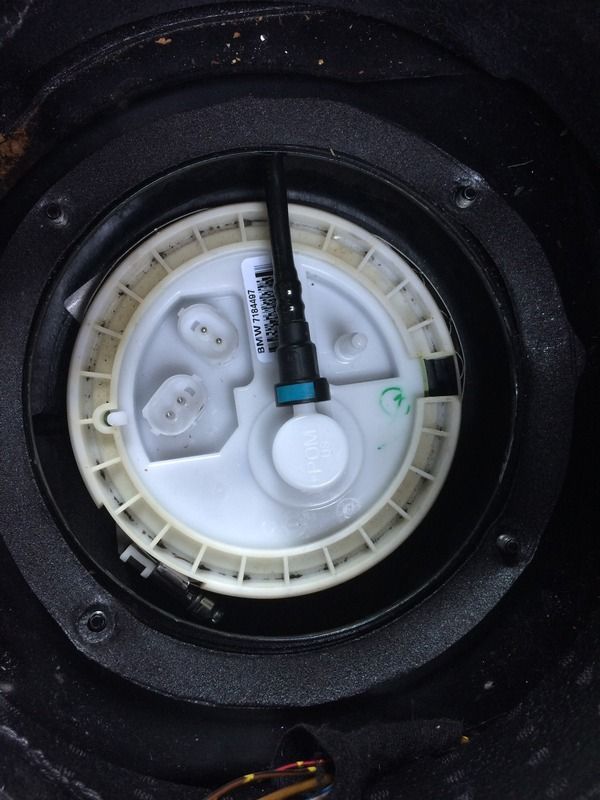
- remove black Styrofoam round cover located under the carpet to reveal fuel sending unit panel
- remove four nuts, 10mm, to remove cover
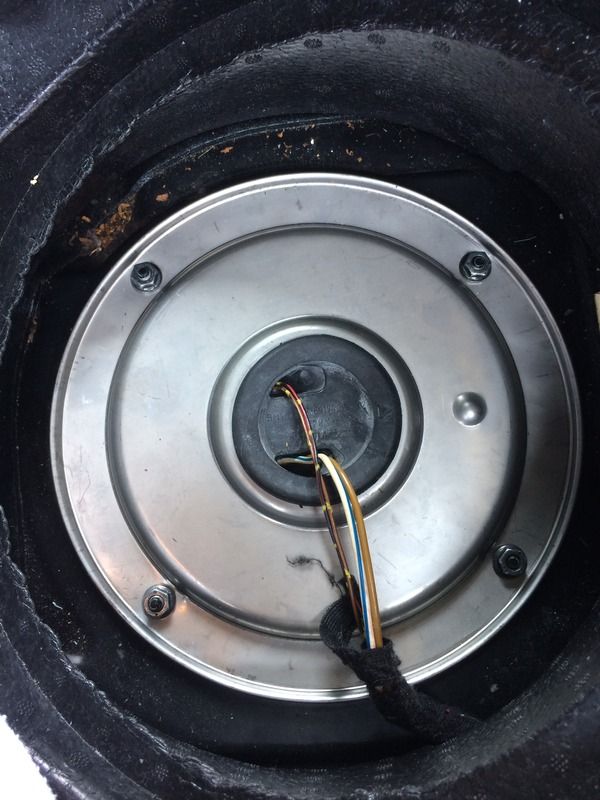
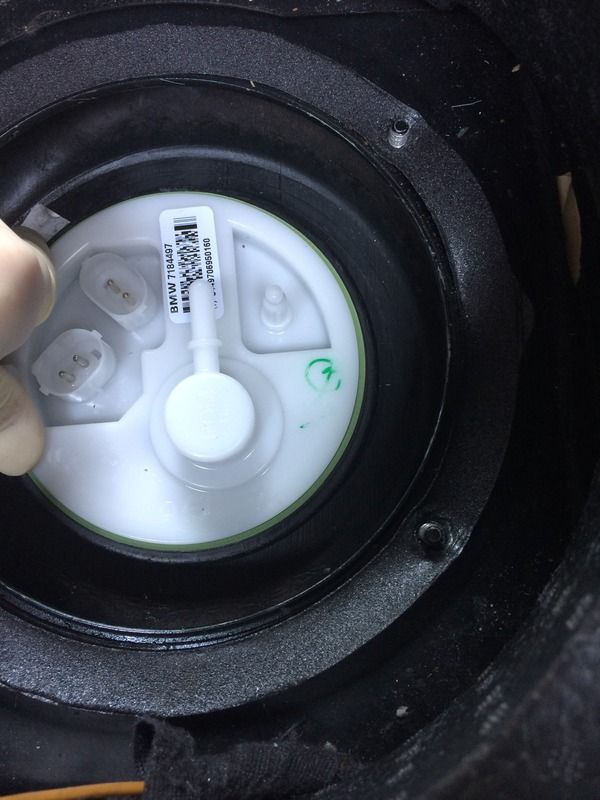
- remove the two electrical connections from the pump (compress two sides and the connector slides off)
- separate fuel cover panel from the electrical wiring
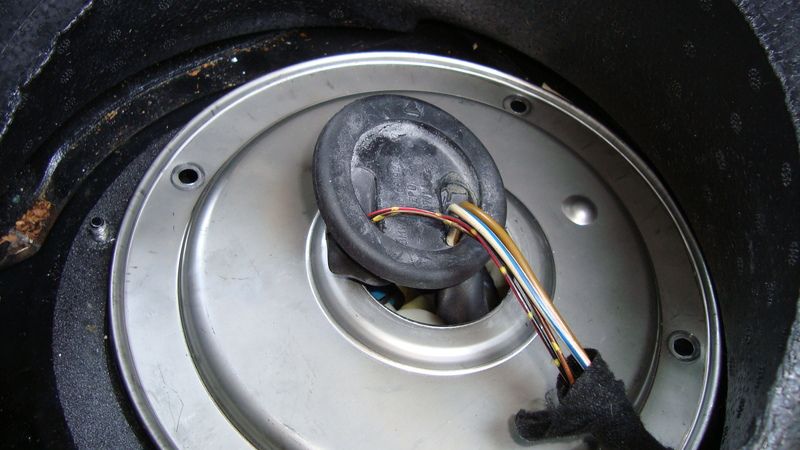
- disconnect return/vent line from the top of the fuel pump (push the blue clip in and slide off)
- hide the return/vent line off to the rear of the car (you can force it in and it will stay out of your way)
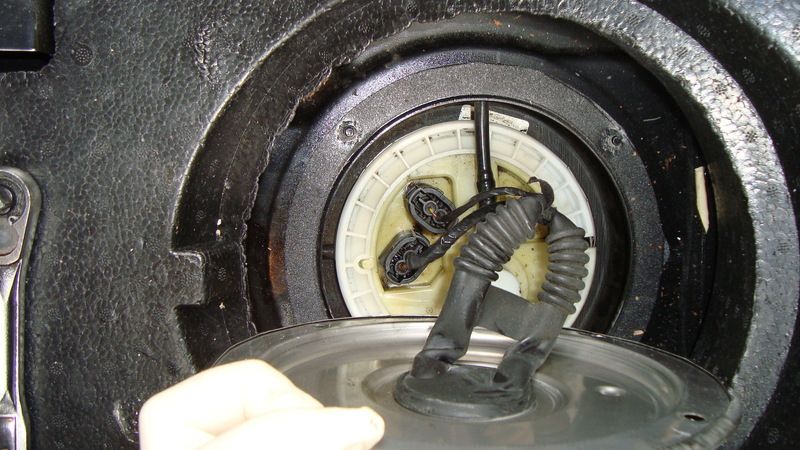
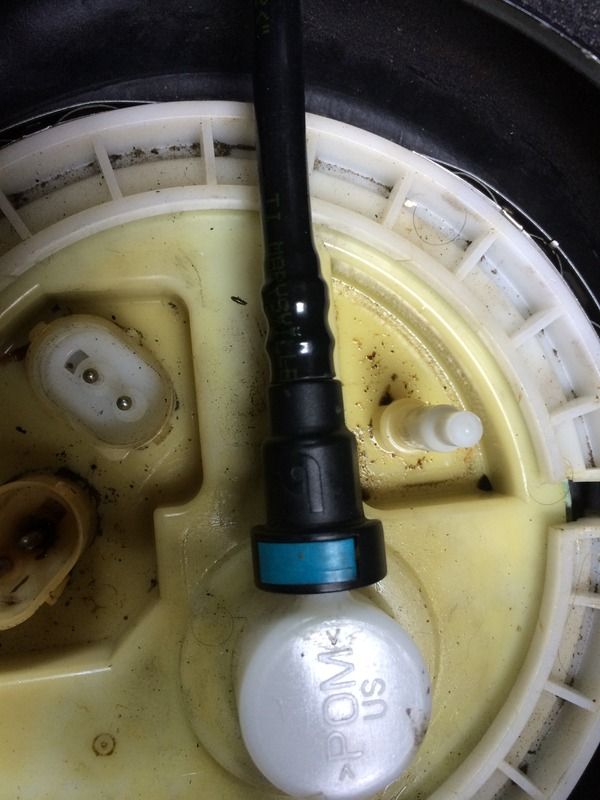
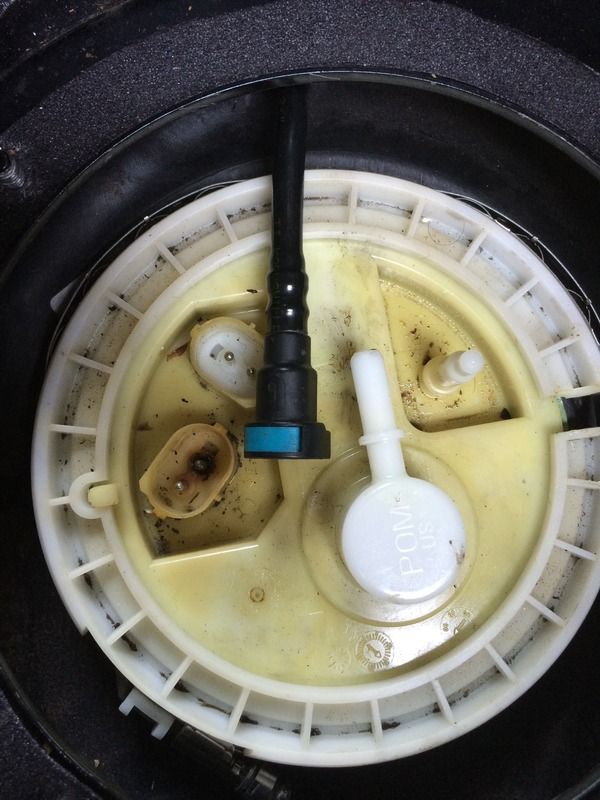
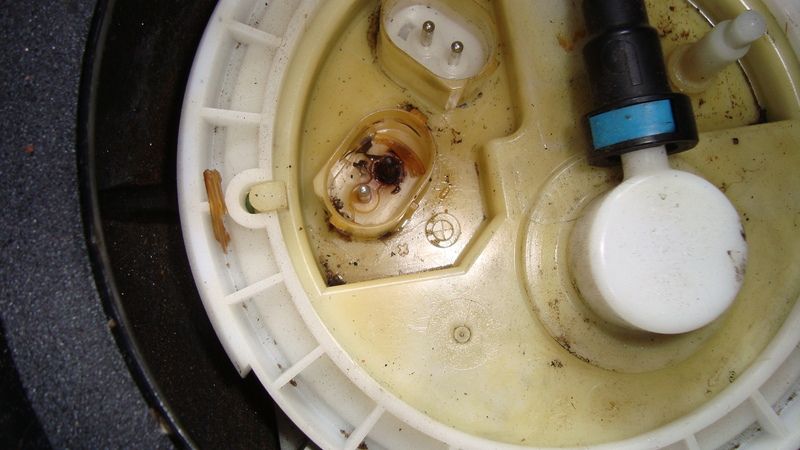
NOTICE: Take a look at the two connectors: the connector on top is the connector responsible for fuel level indication. The connector on the bottom, the burned one, is the connector responsible for Fuel Pump operation. The leak is between the plastic and the burned connector, this is the true reason for P0442 in this case.
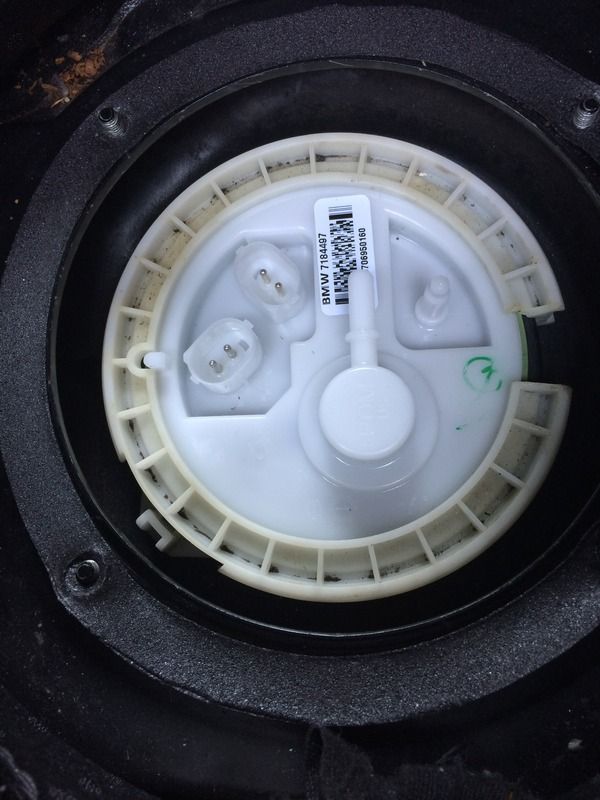
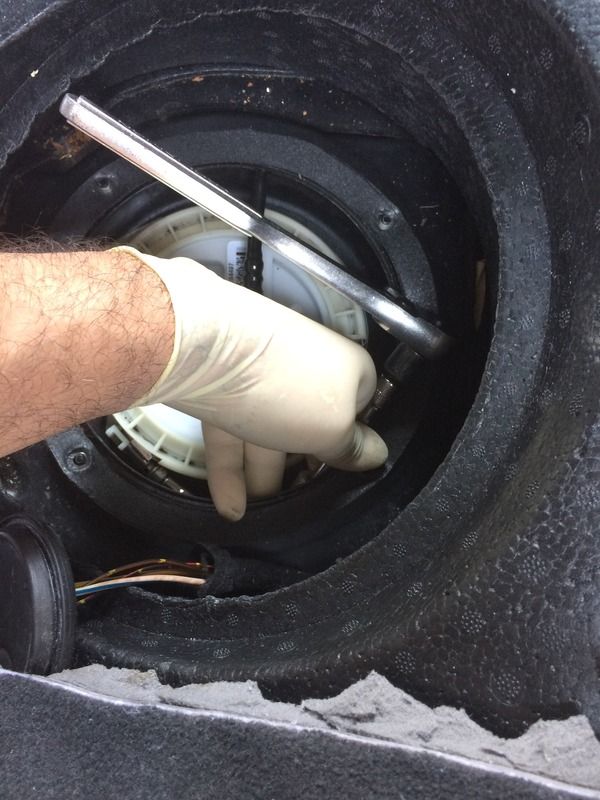
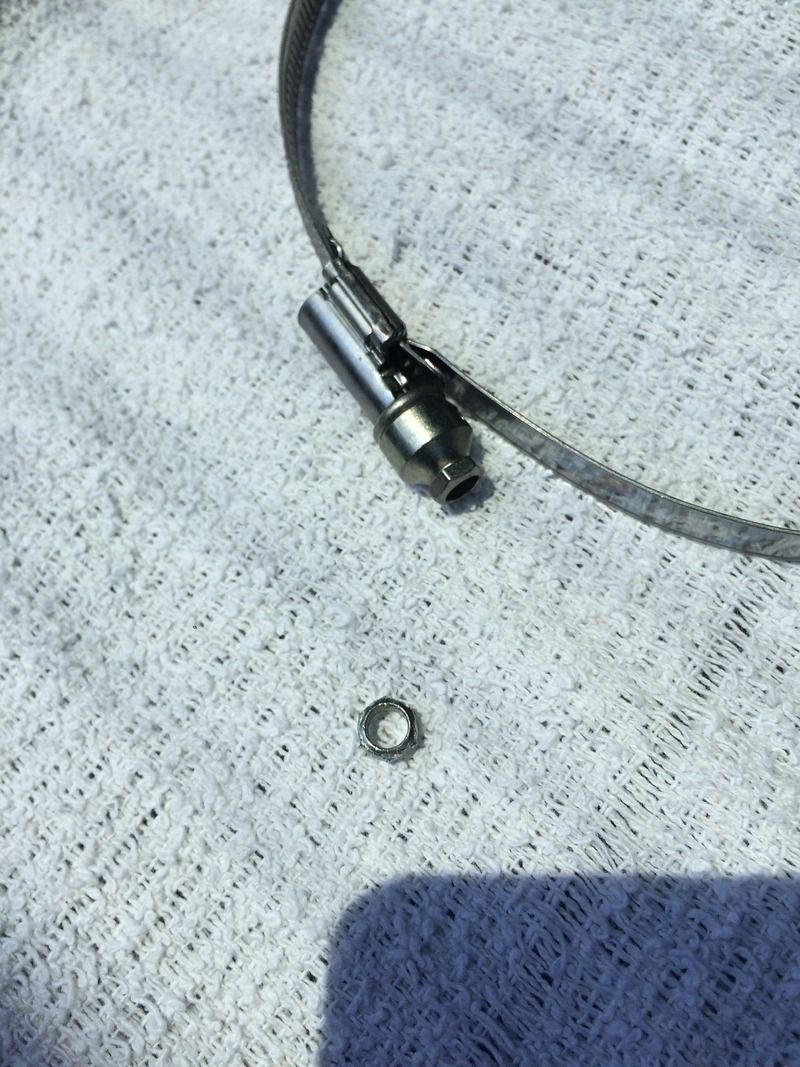
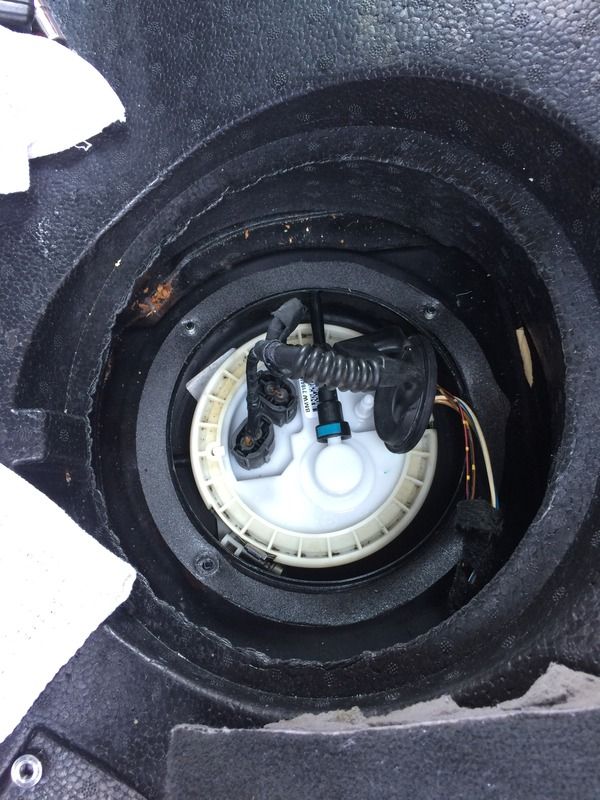
- using the 7mm socket and a 90 degree socket with short extension start removing the fuel pump assembly clamp
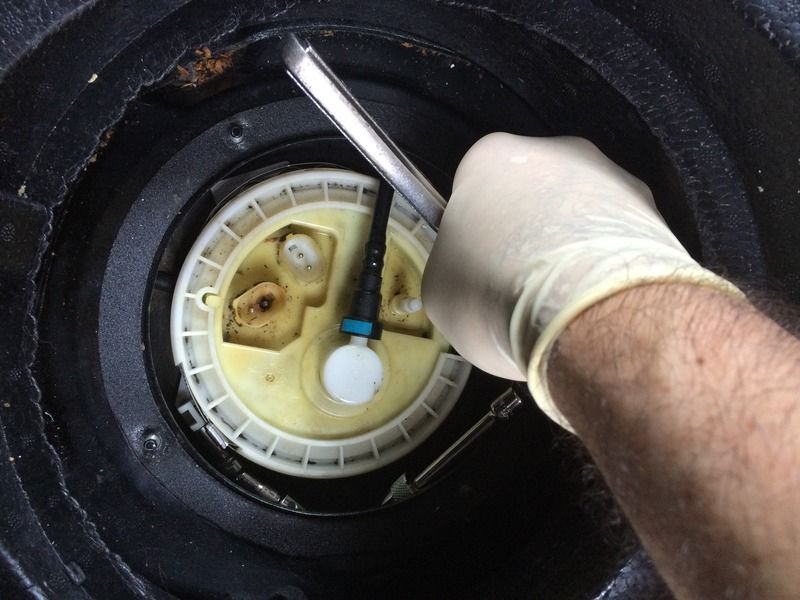
- at this time you should be able to remove the ring holing the pump in and remove the gasket from the fuel tank
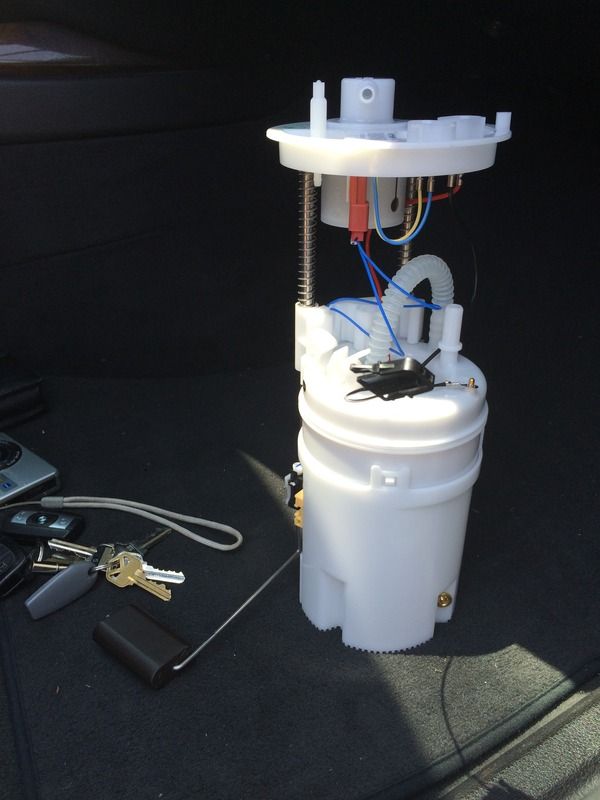
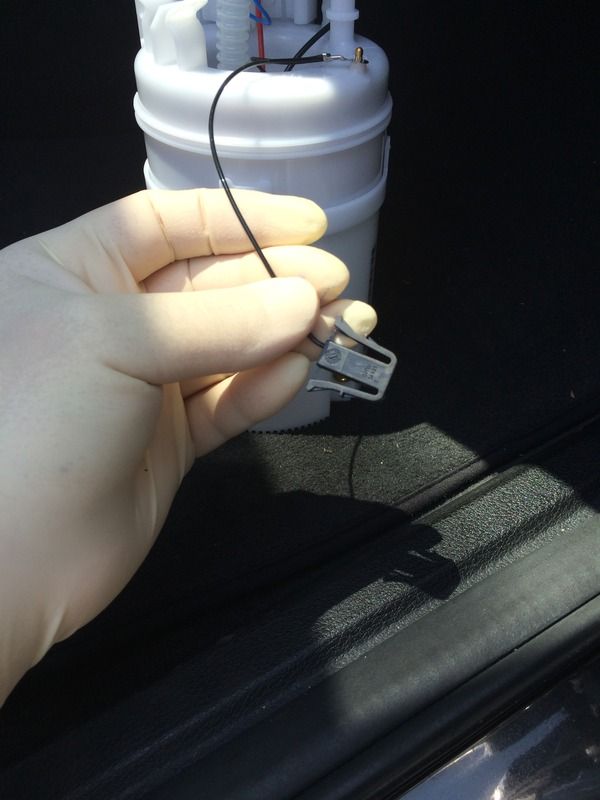
- take a look at the new pump and notice the following items: black connector, snap in fitting, and two hose clips. You will have to make these disconnections while the pump is still in the tank. This will be a little annoying
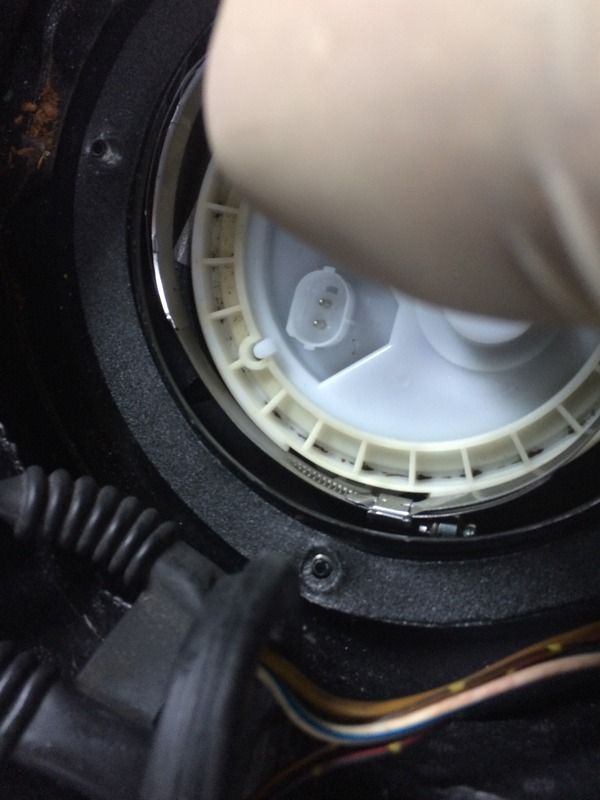
- unclip two fuel lines that come from the Left Delivery Unit (hump pump, assembly 4)
NOTE: The picture bellow shows you the two pumps. You can see towards the top of the image that there are three hoses connected to unit #1
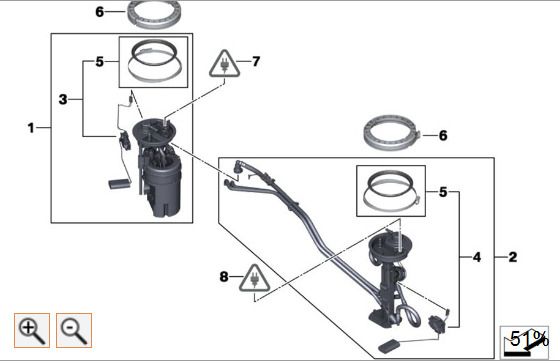
- disconnect black connector from the Left Delivery Unit to Delivery Unit with in-tank pump & filter
NOTE: This connector is located towards the driver side and is attached to hose coming from that side. You will have to do this in the dark.
- disconnect black pipe that is clipped into Delivery Unit with in-tank pump & filter from the Left Delivery Unit
- get trash bags ready
J and cover up as much of the space around the pump as possible to prevent fuel from spilling onto any car surfaces
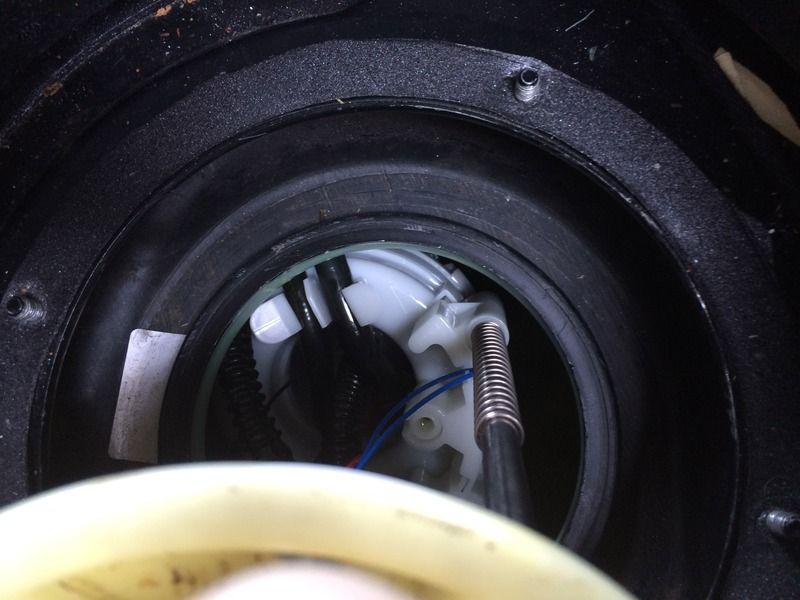
- remove the Delivery unit with in-tank pump filter. You will have to play with it a little but it will come out.
OK, you are now about half way through
- reinstall the new
pump into the tank, make sure to point the notch toward the back of the SAV
- reconnect black connector, snap in fitting, and two hose clips. You will have to make these disconnections while the pump is still in the tank. This will be a little annoying
- reinstall new seal on the outside rim of the tank
- push the pump into the tank
- reinstall retaining trim ring
- screw in the clamp as far as you can and leave enough loose to slide the clamp over the retaining trim ring. Install the side closer to you first as you have to key it in place.
- finish installing the clamp using 7mm socket on the 90 degree adapter: notice that if you over tighten the clamp the head of it will snap. I believe this is for your protection as not to destroy the tank by over tightening
- reinstall the return/vent pipe
- connect the electrical connections and test operation.
NOTE: If you are like me you do not have to reconnect the battery. If you did disconnect the battery you will have to put it back on line in order to start the car and test operation.
 Electrical Connector Repair DIY Link will be inserted here in few days
- disconnect the temporarily connected electrical connections and pass them through the fuel tank cover
- reinstall the four 10mm nuts
- reinstall the black grummet into the fuel tank cover
- reinstall the Styrofoam cover
- reinstall the carpet
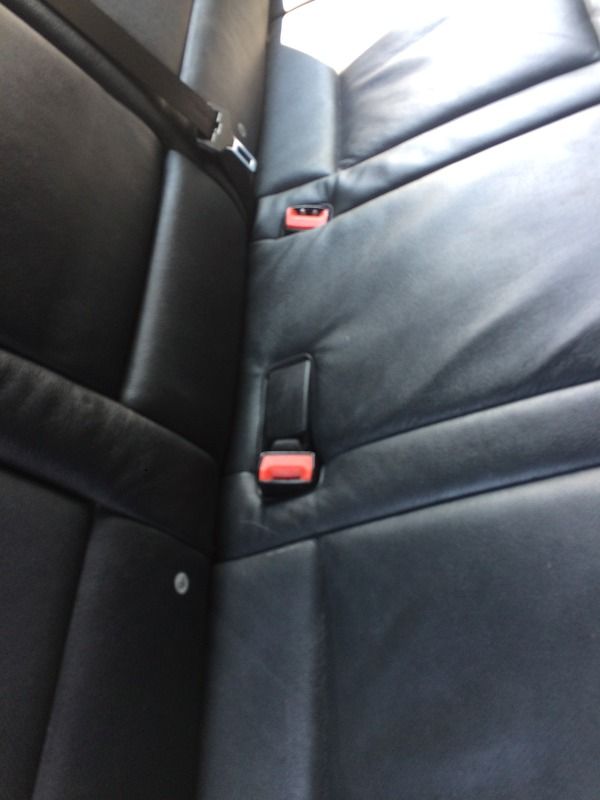
- reinstall the back seat make sure to work your seat belts through the lower bench seat
- using the OBD II scanner clear the P0442 error code
You are done, now go and driver the Beast.