DIY: 2006 BMW X5 Window Clips
OK,
This has been addressed in different places. A nice video on X5 front window regulator by
bimmermerchant is below:
https://www.youtube.com/watch?v=zYxh_mb7P5w
Another good link by
Frankie:
Frankie's BMW :: X5 :: DIY Procedures :: Power Window Fix
Another link:
http://www.xoutpost.com/bmw-sav-foru...ips-motor.html
- My clips are original at 115K, not broken yet but brittle and fell apart when removed.
- The LEFT FRONT glass sometimes bind and I cant raise it. A few minutes later it would work again! Someone said in forum that when it is uneven, the glass binds, and this stops the motor from going up. So I replaced the clips.
- The RIGHT FRONT has a loud click when the glass reaches the top. After replacing the plastic clips, the noise is gone!
PARTS
-
Chevrolet GMC Cadillac BMW Mercedes Benz Parts and Accessories (Lincoln, Nebraska BMW dealer)
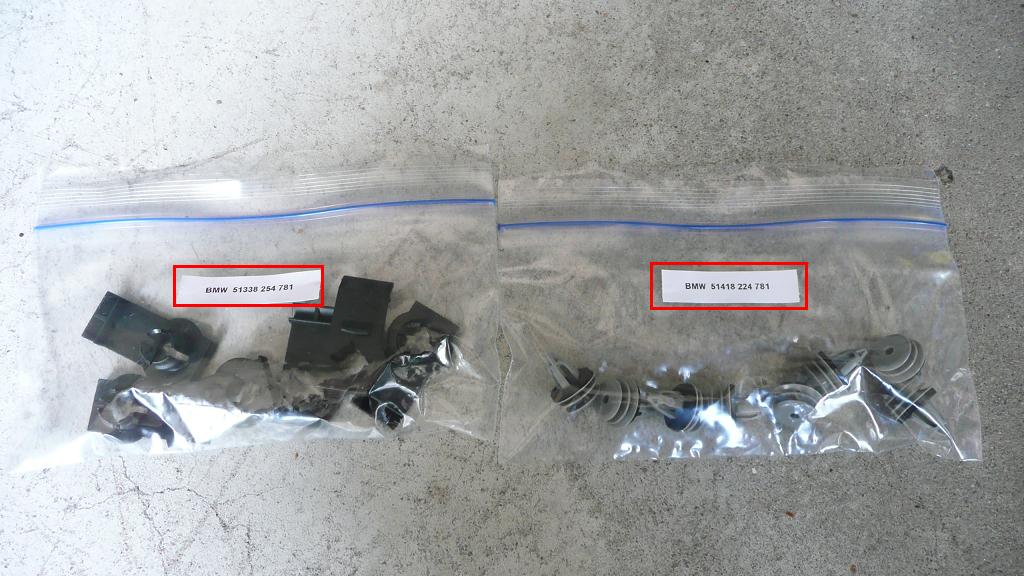
- Glass Clips: BMW
51338254781, 2 per door. About 90 cents/each; I got 6, 4 to be used, 2 as spare.
- Door Trim Clips
51418224781, 11 clips per door. About 61 cents/each, I bought 8. You will break a few clips during panel removal.
- Grease for greasing the pulleys and tracks
- Loctite
PROCEDURE
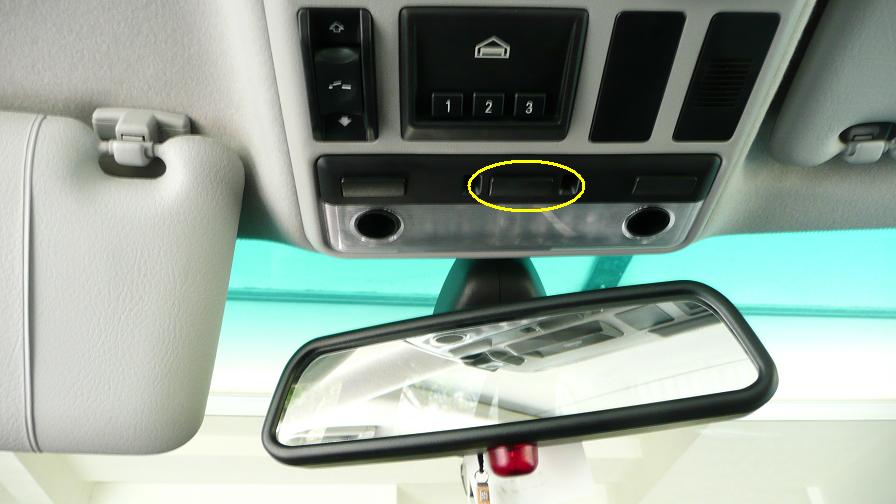
1. Open door and hit the dome switch to turn light off. Key out of ignition for now.
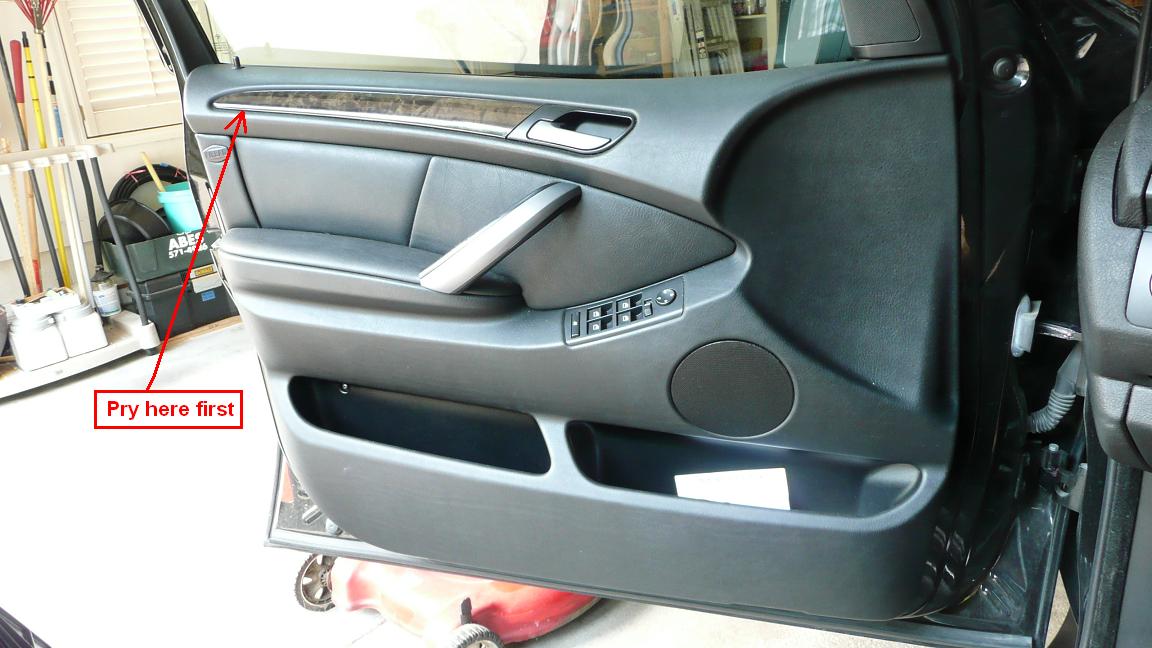
2. Wrap a screwdriver in cloth and pry the trim piece from OUTER edge toward the inner door handle.
3. There are 4 Torx #20 screws, one is hidden below the Airbag logo.
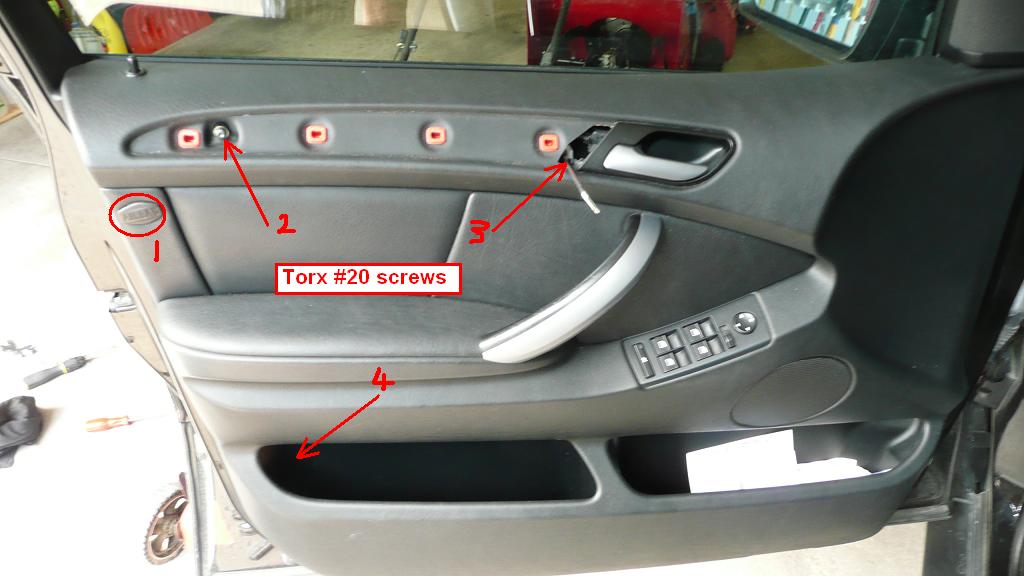
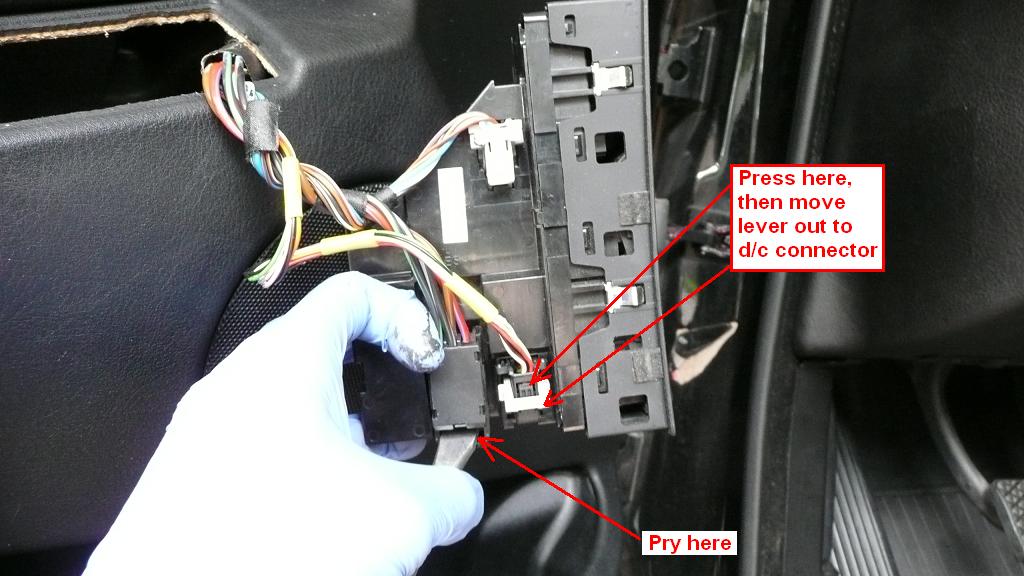
4. Wrap a screwdriver in cloth and pry window switch upward. Then undo the connectors as shown:
- To remove trim panel: screwdriver wrapped in cloth, gently pry around the bottom and around the 11 clips until they are loose. Then lift the trim panel UPWARD.
5. D/C the latch cable where it attaches to the inner door handle. Look CAREFULLY, you will see a tiny tab, release it and the cable will fall off (small red circle). NOTE: the door panel attaches to a BLACK plastic Clip (BLUE arrow) that engages the metal V-shaped prong. Study it so you know how to re-attach it.
- You can attach it to the panel and snap it in. The problem is it tends to fall off. So a bit of glue is fine.
- The other technique is to leave the BLACK clip there and somehow engage the panel on it during installation.
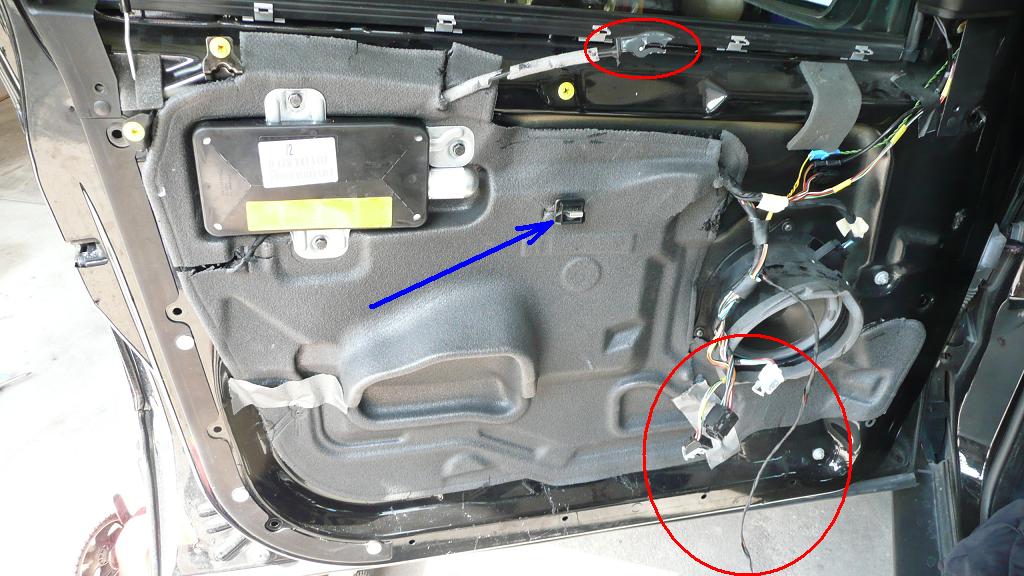
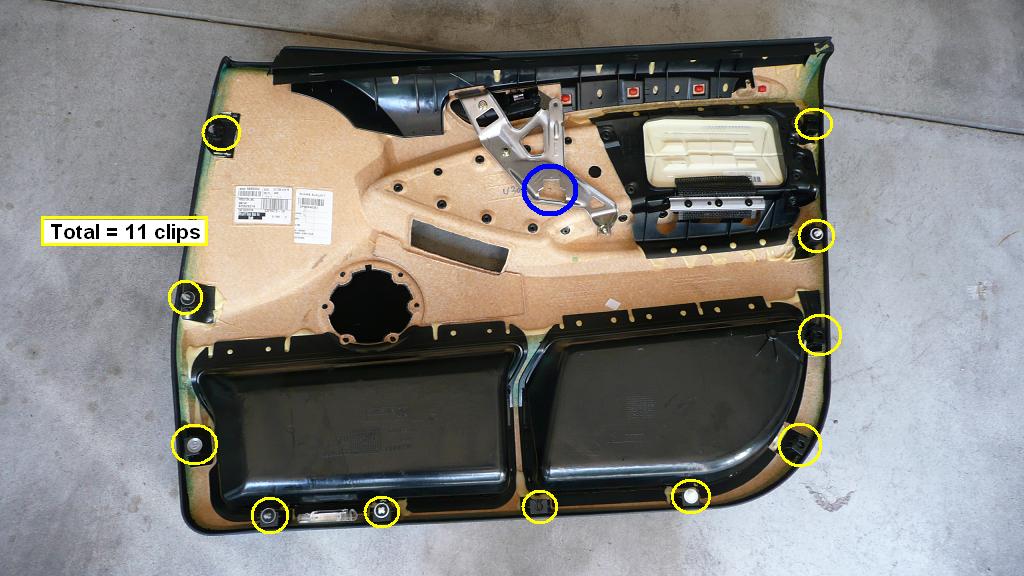
6. Door panel has a total = 11 plastic clips. Note the BLUE circle is where the BLACK Plastic Clip attaches to.
7. Remove only the bottom half of the Vapor Barrier, then tape it up. No need to remove the whole Vapor Barrier because you only replace the plastic clips.
NOTE: If you ever remove the Air Bag Device, research beforehand! Remove it and install it with key out of ignition. See the youtube video by
bimmermerchant above.
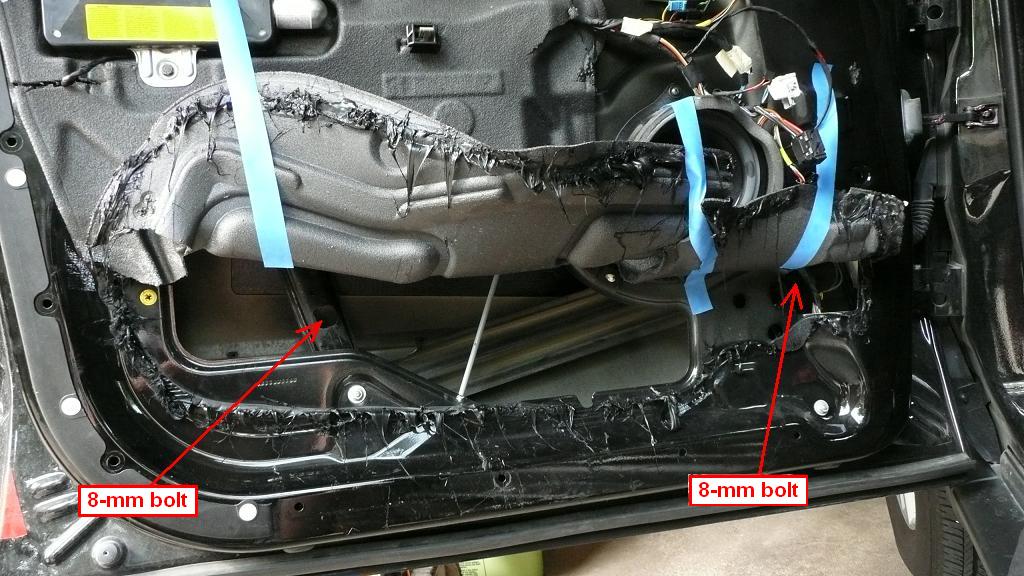
8. Re-attach the window switch (the bigger Black connector only), then lower the window until both 8-mm bolts appear in the holes.
- Then key out of ignition.
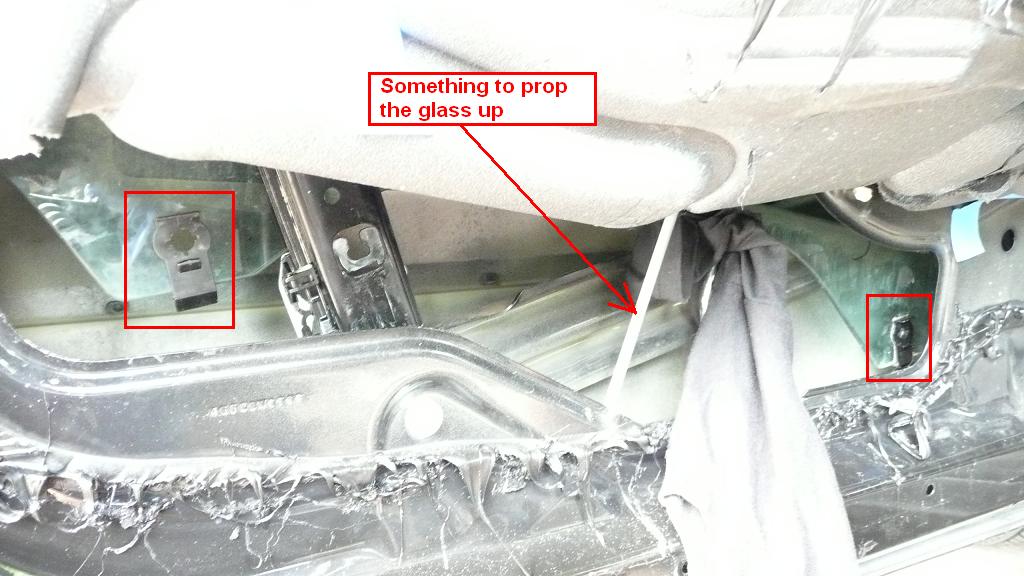
- Once the 8-mm bolts are removed, position the glass such that you have access to the clips. I placed a piece of wood below to support the glass.
- Make sure the plastic sits properly.
- Then I slide the nut: Loctite in the threads and a bit of grease on the outside, so it slides inside the clip better. The nut only fits one way: the flange (of the nut) faces away from you.
- Gently tighten each 8-mm bolt. Make sure both are even and sits properly in the guide rail holder. Then tighten both bolts. I dont know the torque but finger-tight, then a twist until it stops.
- If someone knows the torque, please post.
9. I take this opportunity to grease:
- Rails
- All Pulleys
Find a photo of the Window Regulator on the internet so you know where the pulleys are located.
That is boys and girls, very easy!
------