And of course the day after I last posted I got sick and that threw me off for a few days, ugh. I was finally feeling better last night so I got some more work done.
The first thing I did was drain the cooling system so I could remove all the hoses. Thankfully on the X5 there's a proper drain plug in the radiator on the driver's side, but you have to remove the expansion tank cap up top or else practically nothing comes out. Once I drained a lot of the coolant out I was able to remove the expansion tank and all the cooling hoses. More coolant came out when I removed the lower radiator hose, and some came out of the alternator housing as well, so keep those drain pans handy!
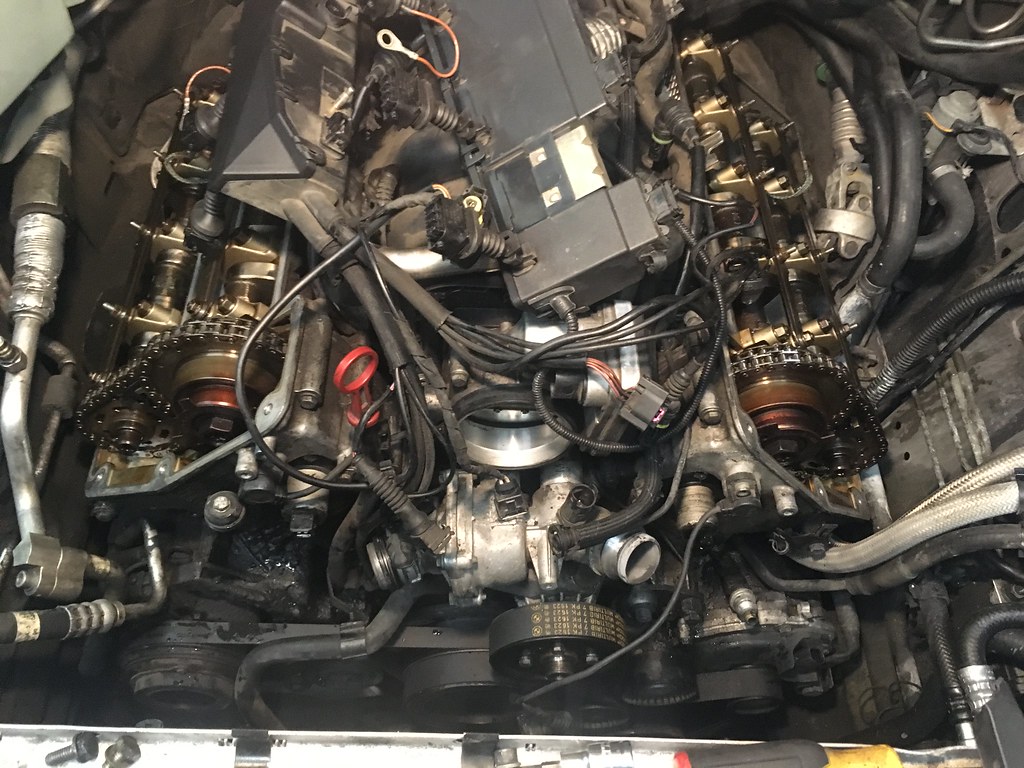
Once the cooling hoses were removed, I proceeded to removing the clutch fan. I do own the proper tool for this, but a friend is borrowing it, so I had to remove it with the redneck method. I sprayed the fan clutch nut with PB blaster, let it sit for a little, and then put a 32mm wrench on the nut and whacked the wrench with the mallet until the nut came loose. It's not the most glamorous method, but it does work every time! With the fan removed, I was able to remove the fan shroud, which is only secured with three push rivets. This is what the engine looked like at this point:
Look at the nasty gunk around the passenger side upper timing cover:
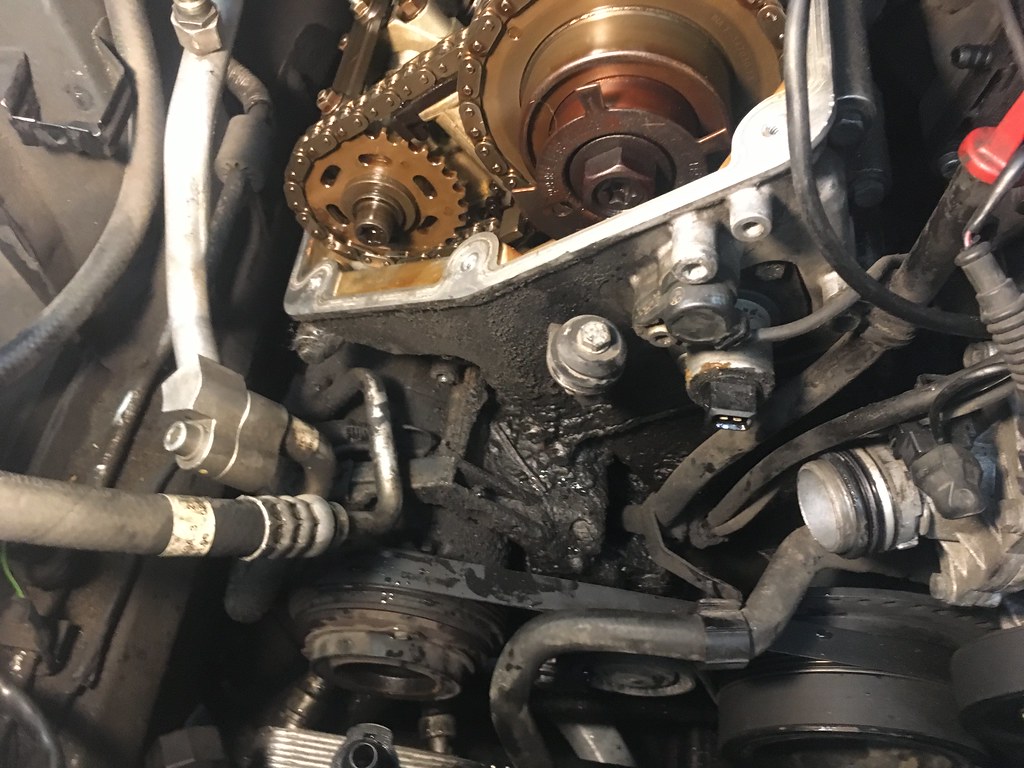
Yum.
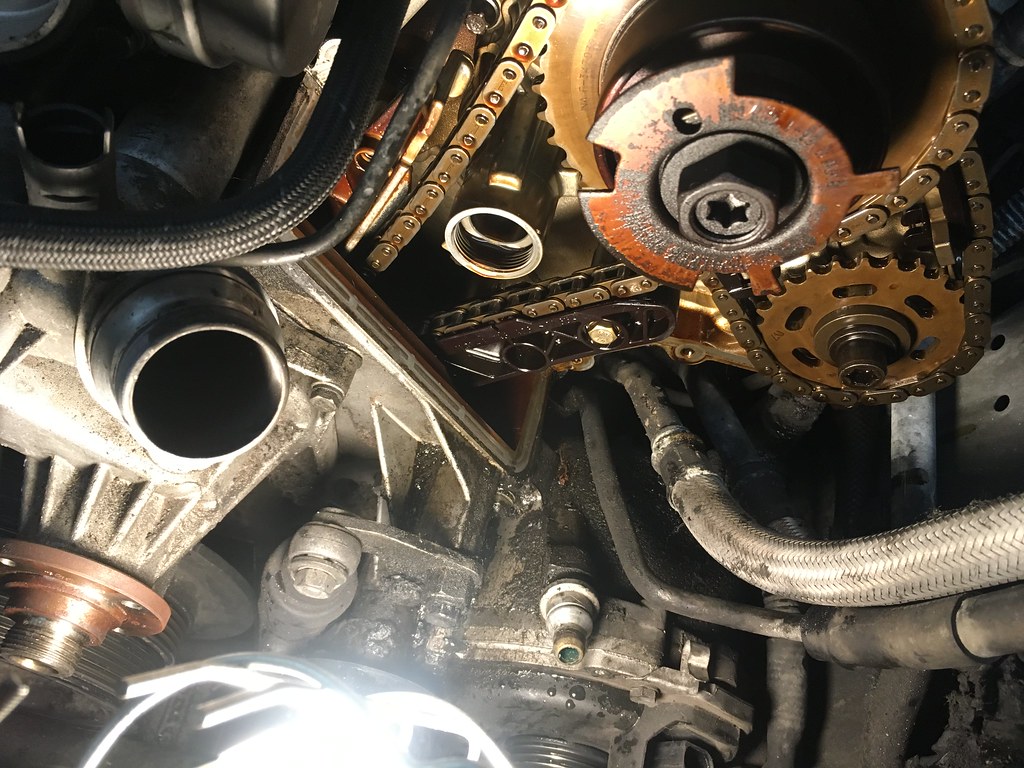
I removed the belts and continued the disassembly, moving on to removing the upper timing covers. I initially sprayed the timing covers down with brake cleaner so I could find the bolts in the sea of grime. The Vanos solenoid gaskets had a bunch of goopy black rubbery stuff around them, which makes me think somebody had messed with them before. The Vanos solenoids came out pretty easily with the proper socket tool. Once those were out, I undid the 6 bolts on each timing cover and removed the timing covers. Neither timing cover presented too much of an issue, and their gaskets were hard as a rock and practically disintegrated upon removal. Once the timing covers came off, that's when things got interesting...
The tensioner rail had been ground down quite a bit by the chain, indicating that the plastic had worn away a long time ago. There was no plastic at all on the U-guide.

Over on the other side, the U-guide was missing all of its plastic as well.
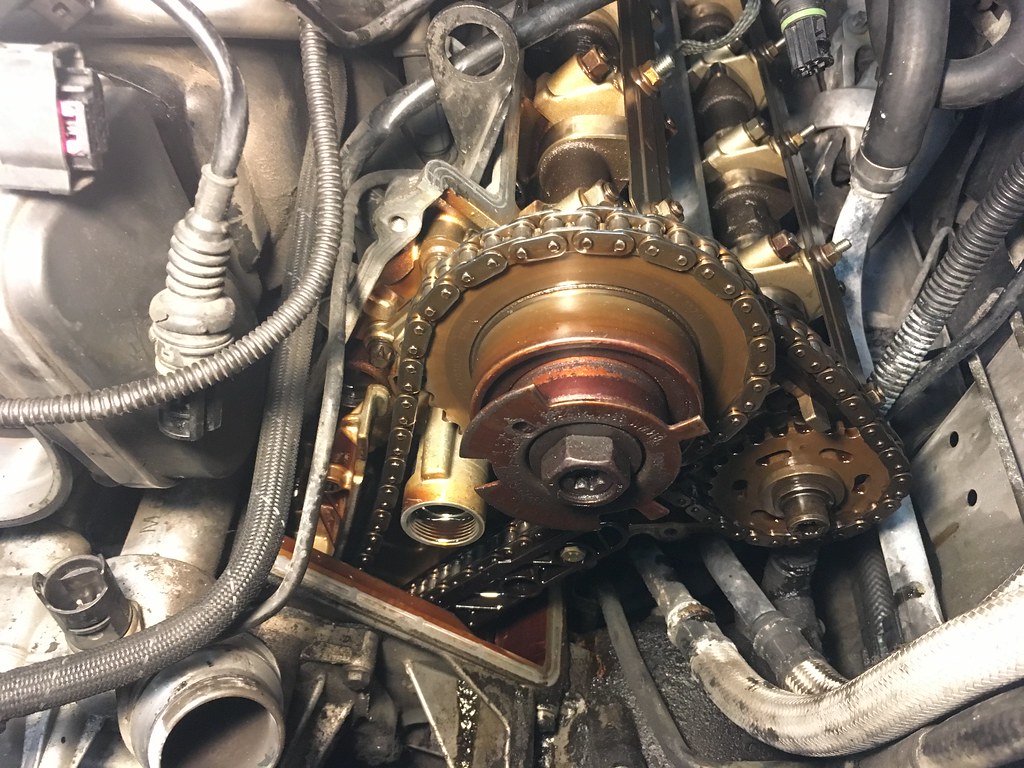
Curiously enough, the plastic guide on the driver's side looked pretty much intact.
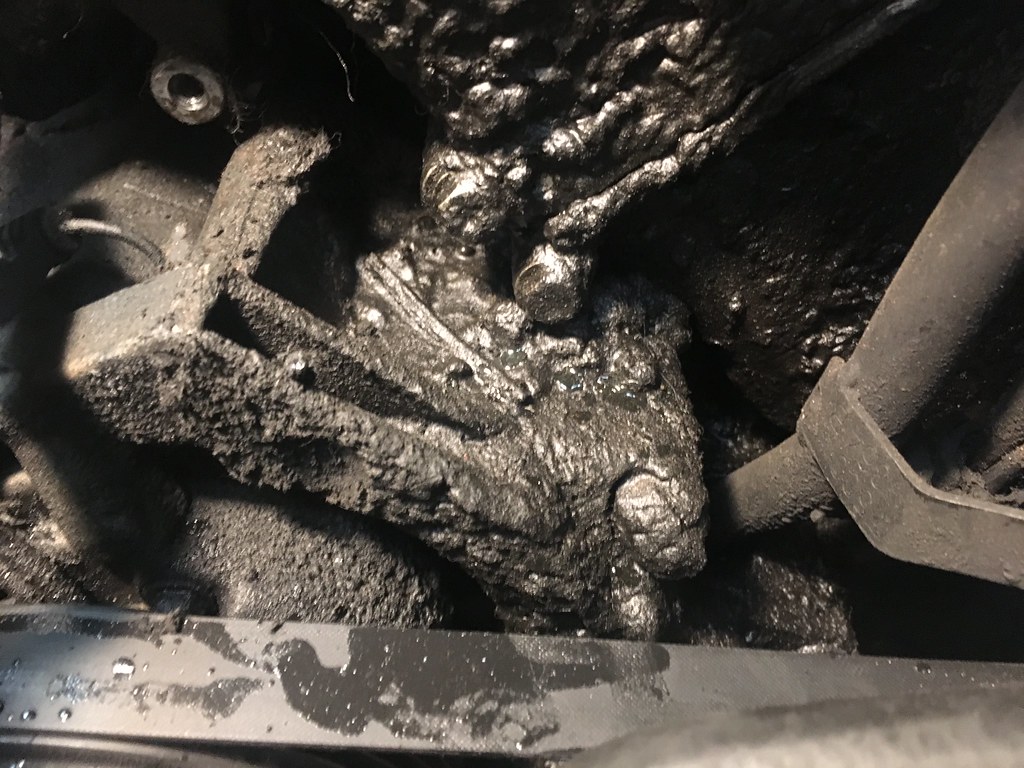
I also found a few interesting pieces of plastic laying around...
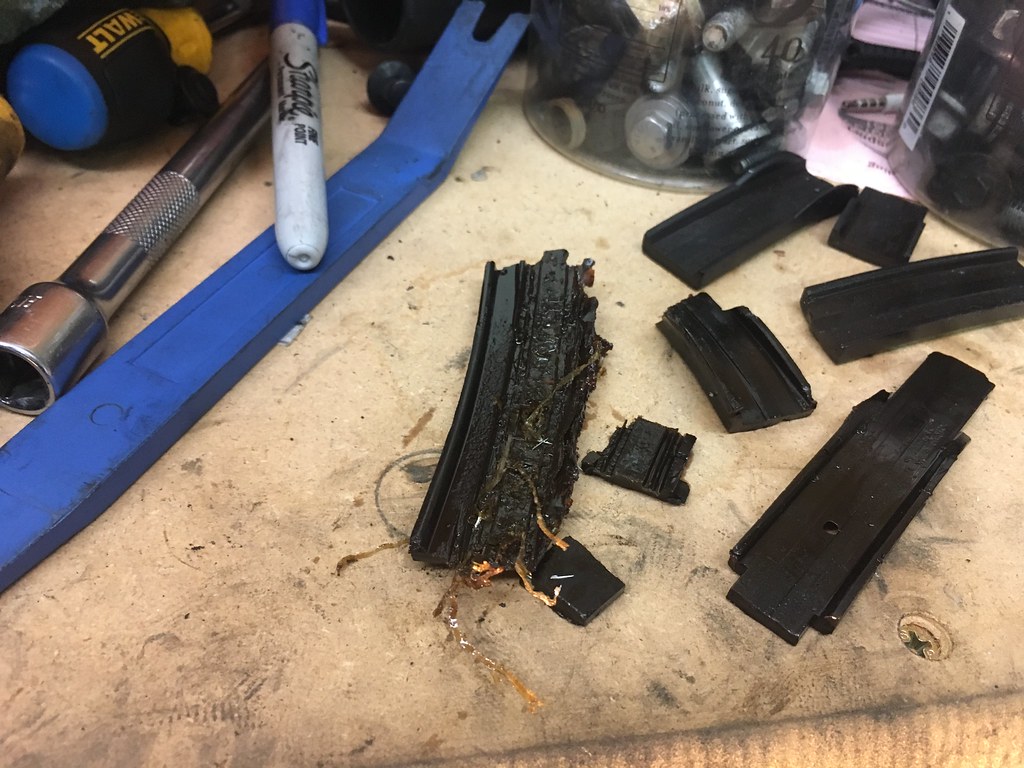
Looks like one of the guide pieces got caught somewhere particularly warm and started melting, how fascinating!
This is how the engine looked when I called it a night:
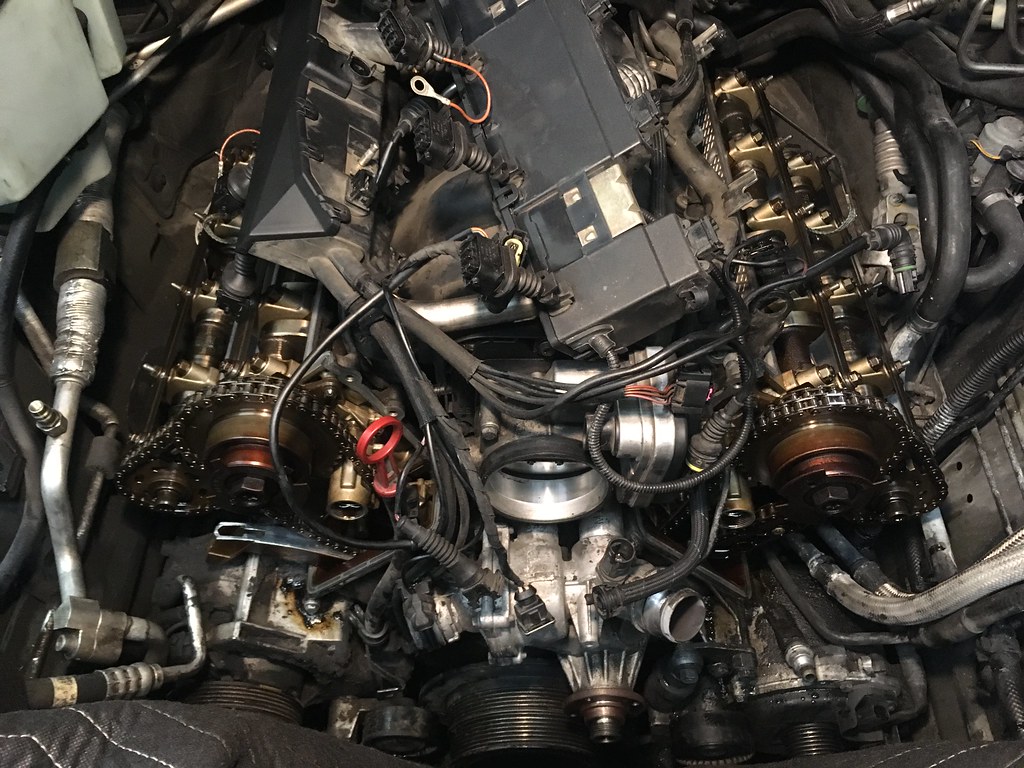
Next on the agenda is to disconnect the battery (which is annoyingly placed under the compressor in the trunk), remove the harmonic balancer, remove the water pump, remove the alternator, and then undo the big crank bolt (aka the Jesus bolt). Fun times ahead!