It's fixed! Which is good, because the wife made it abundantly clear I would not be buying another amp to replace it in the near future.
I could not find a suitable RCA terminal to replace this one so had to repair. Below I'll give more detail than anyone will probably care about... but I have some time on my hands so here we go.
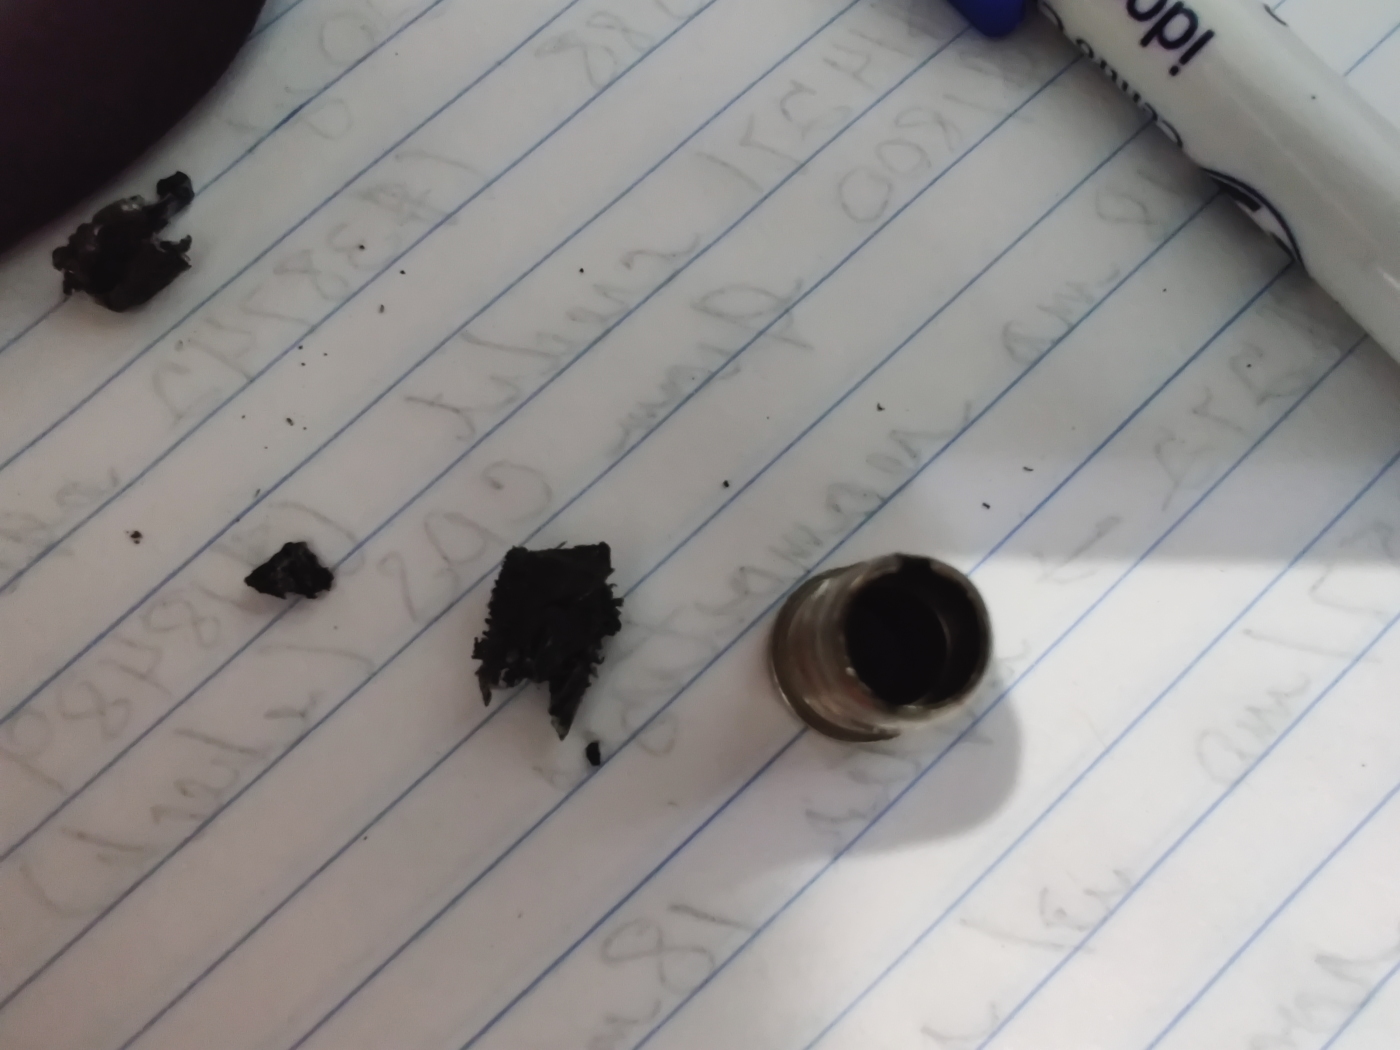

First steps above were to extract the terminal + signal center barrel. The heat gun and some needle nose made quick work of that. Then I had to use drill bits to extract the plastic that usually holds the center barrel in place inside the terminal. The way these are made, as it seems to me, is that the + signal center barrel is melted into the plastic that keeps it centered inside the RCA jack. The center barrels have "teeth" or "grabbers" that get formed into the plastic which holds it in place. That assembly is then inserted into the jack and the front of the jack is rolled inwards to clamp the plastic in place. There is a step to the RCA jack (you can see it in the second picture) that provides a stop to the assembly when inserted and clamped. The clamping prevents the plastic inside from twisting/rolling in the jack when an RCA is inserted or removed. The problem jack on this amp had broken free of that clamping and was allowing the inner assembly to rotate. That then shorted the center + on the blob of solder that the original "repairman" had placed to hold the ground barrel in place on the cage that gets soldered to the board. He had done a rather sloppy job of that, but it should have been functional had the inner signal barrel not been allowed to turn/rotate.


The next step was to find a suitable replacement for the center plastic that holds the center + barrel in place. Not wanting to make a mold and pour my own, because time and effort involved were way too high an investment to make, I grabbed my Harbor Freight kit of O-rings. Found a suitably sized O-ring and determined 4 of the #4 rings in the kit were almost perfect approximations for the inner/outer diameter and the depth required. Almost too good to be true really.
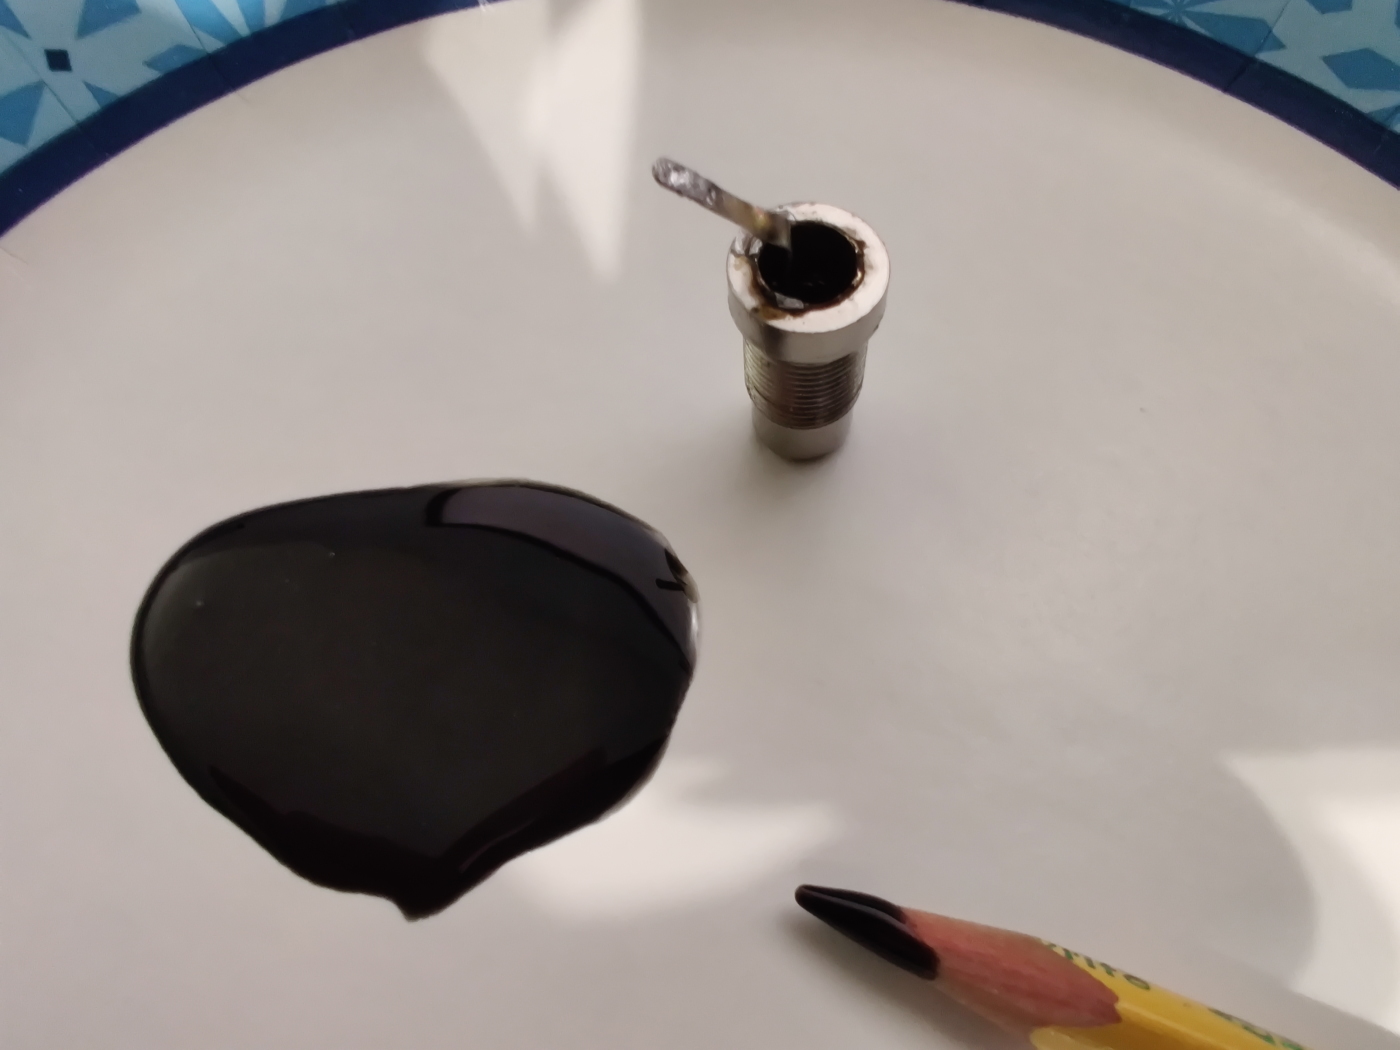
Next I needed to lock the assembly in place inside the outer barrel of the jack, as it was supposed to be originally. I mixed up some potting epoxy and let it sit for 10 minutes so it wouldn't run so easily when inserted into the barrel. I removed the o-ring/inner contact assembly and coated the inner barrel before the step with the epoxy. Then, inserted the assembly into the barrel and put some additional epoxy in the back to support the center pin and prevent any possibly future shorting/touching of the outer jacket of the RCA.
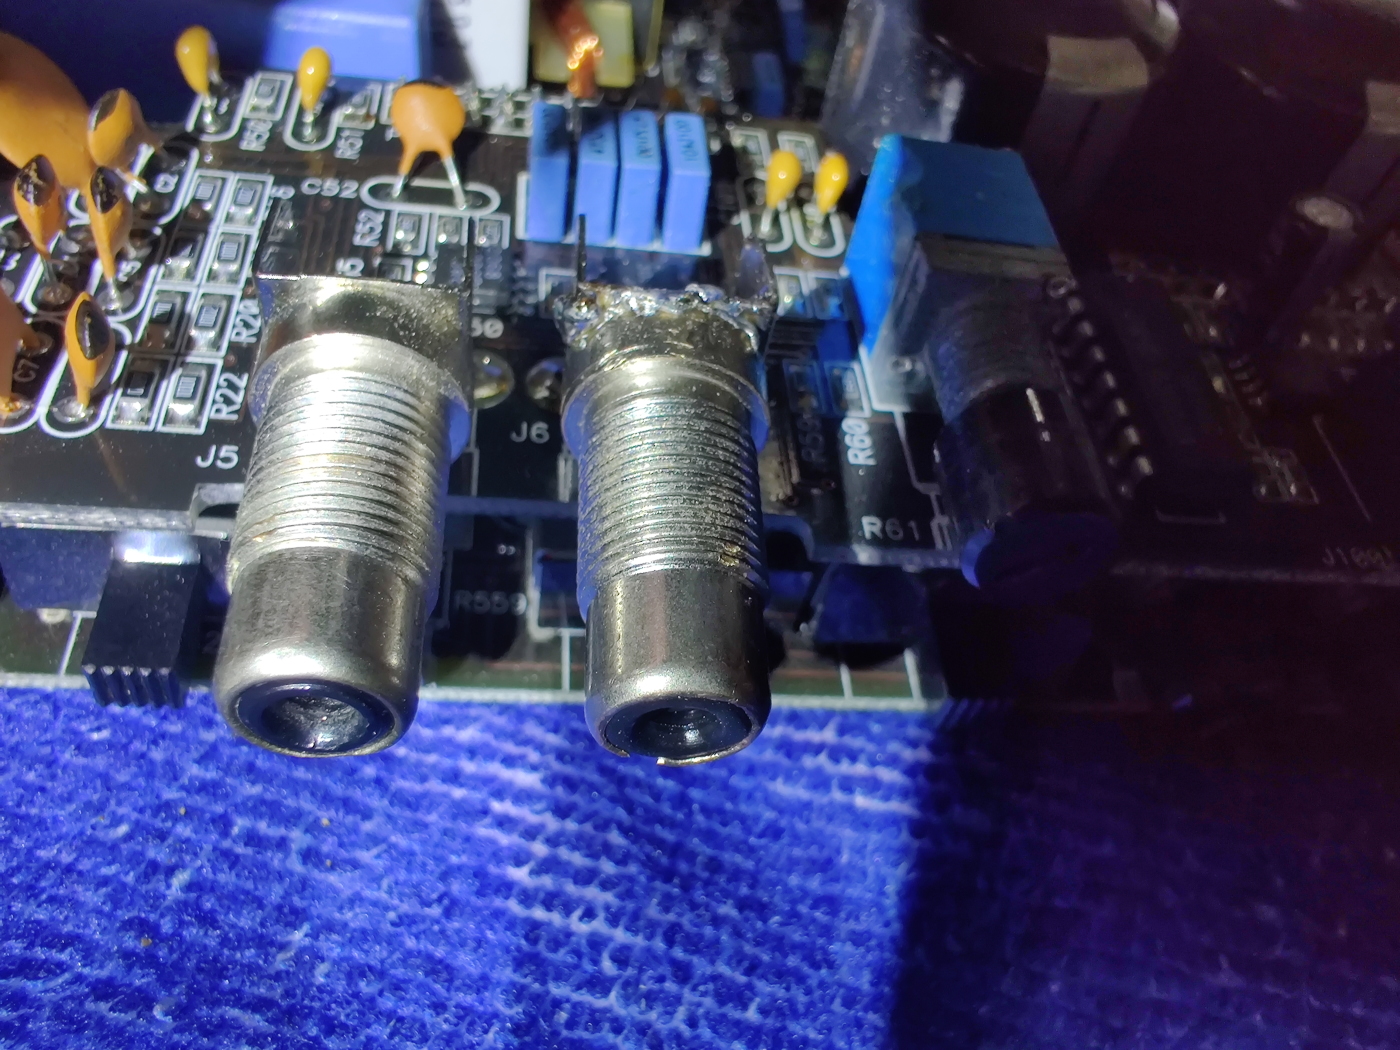

Next, went and installed the cured RCA jack onto the board after curing for 24 hours. I know the solder job looks a bit dodgy but those pads are so large I could not get solder to stay in place. It kept running down through the circuit board. So I got it as good as I could up top and made sure the solder job underneath was better in terms of full coverage. Which I was able to do, and it all tested out great with an RCA plugged into the jack when using a multimeter. You can see I also had to "mount" the RCA jack to the ground cage by using solder as the original guy did. That's because these jacks are originally held to the cage by use of some folded metal over the cage. My jack had none of that and so required a solder mount. Hopefully it's a little cleaner job than the first guy left...


Lastly, I reassembled the amp. Put some new heat sink paste on. Ordered some new white silicon paste instead of using my computer paste as the silicon stuff seems to last basically forever. And I don't see computer thermal paste making a big temperature difference anyway. Reinstalled the amplifier and crossed my fingers. No more interference screeching and noise. Success! Victory is mine! Externally, except for losing a tiny piece of the rolled end on the jack, you can't even tell there was a repair. The O-ring does an amazing job of approximating the black inner plastic visually.