I've performed this installation many times now but I've never found a comprehensive step-by-step guide before. I decided to document my most recent installation for the benefit of others. I've posted this as an article but just in case that doesn't work here it is on the forum.
The part number as I ordered it was 65 12 0 153 503 which includes the cable, some cable ties and very brief instructions (i.e. useless).
Here's a picture of the cable

1. The first step involves removal of the relevant fuses, but firstly it helps if you remove the pin that holds the glove box lid in position. This provides better access to the fuses and when drilling and fixing the external connector end of the AUX input cable. The pin pops out quite easily although you may need to use a blunt knife or screwdriver head to ease it loose.

Next you should remove the fuses that provide power to the radio, telephone and On-Board Monitor. Some instructions recommend disconnecting the battery but removing the correct fuses will accomplish the same thing. Remove the No.7 fuse in the front fuse box first

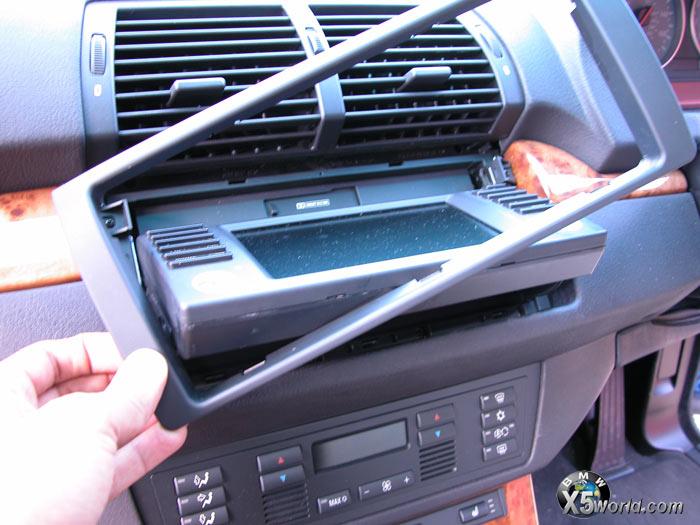
Before removing the rear fuses you should tilt the NAV screen by pressing the button to access the cassette slot. Remove the two knobs on the front. Once this is open you have between 10 and 15 seconds to remove the rear fuses which will freeze the screen in the tilted position and allow you to access the screws holding it to the dash.

Remove fuses 72,73,74 & 75 in the rear fuse box. This will freeze the screen in the open position.

2. The next step involves removing the OBM from the dashboard. To do so you must firstly tease the plastic surround. In principle this is easy but in practice it can be difficult to judge the necessary force. I used a flat screwdriver, covered it with a cloth and then gently teased the surround from the bottom. ALLWAYS START FROM THE BOTTOM.
It is connected by 4 clips and they are not easy to break. Just tease it up and then use your fingers to lift it on the other side, you should then be able to tease it all the way out with just your fingers.
Once you have removed the plastic surround you will see 4 Torx Head screws holding the OBM into the dash (see location from red circles in picture below)

Use a Torx 10 screwdriver to remove these screws and store somewhere secure

Now simply lift the OBM out of the dashboard and support with something soft. Its easy to allow the screen to make contact with the gearshift lever and this will tend to leave marks. Use something soft as a support

3. The next step of the installation is to feed the AUX Input cable through from the dashboard opening down and out through a gap near the bottom of the glove box. This gap should be obvious if you feel around the area and theres loads of room in the dashboard opening to put your hand and arm through. You may find it helpful to use a coat hanger and attach the cable head to this with sticky tape before feeding through. I didnt need to but it may help.

Once youve managed to poke it through, you can attach the other end to the spare connector on the back of the OBM unit. The module itself will plug into the factory/standard wiring harness and no additional work is required

4. Thus far it should have taken no more than about 20 minutes depending on how easy it was to remove the OBM and feed the cable through. Now comes the time consuming part. Some people choose to fit the connector end of the cable in the front ash tray or in-between the cup holders, but I just fitted mine in the glove box as BMW recommends. Even so, most of us become a little squeamish when it comes to drilling holes in our cars (even when its out of sight).
For this part of the job you need to mark out where you will fit the connector panel (and therefore where to drill the holes). I used a small drill bit to mark each hole (you will need to drill 5 holes in total) and then used a router bit attached to a power drill to open out the hole just enough to fit the AUX Input cable head through. Take time with this stage and make the hole just slightly larger than the connector itself. The head should be poked through to provide a tight and firm fit since youll need this to be secure when connecting cables into when finished. Dont rush this bit and it should take you around 20-30 minutes to complete. You will also need to drill two holes for the screws that hold the face panel on and a further two holes to feed a cable tie through and hold the cable secure to the side of the glove box. Make sure the glove box can move freely. When finished it should look something like this

5. Now you can pack up your tools and clean up the mess caused by drilling the glove box. Make sure the OBM is back in the dash board properly and the plastic surround is back on. Now re-fit the fuses in reverse order (rears first then front). The screen should return to its normal position once the rear fuses are back in. With the front fuse returned, re-attach the pin to secure the glove box damper arm.
6. Now you are ready to test it out. Plug in your audio source and press the MODE button until a new (previously hidden) AUX screen appears. You can use the preset buttons (radio station buttons as circled in red) to adjust the input volume of the AUX Input. The AUX Input will also allow you to control Treble and Bass as you can do already for Radio and CD, also DSP will be available for the AUX Input. I found that a setting of P3 or P4 was about right and maintained the same volume when switching between CDs, radio and the AUX source.

7. Thats it. Job Done, now go and enjoy CD quality sound and access to thousands of tunes at the touch of a button.