
|
|
|
|
||||||||||
| Xoutpost server transfer and maintenance is occurring.... |
| Xoutpost is currently undergoing a planned server migration.... stay tuned for new developments.... sincerely, the management |
|
|
LinkBack | Thread Tools | Display Modes |
|
|
|
#1
 01-09-2006, 11:05 AM
|
||||||||||||||||||||||||||||||||||||||||||||||||||||||||||||||||||||||||||||||||||||||||||||||||||||||||||||||||||||||||||||||||||||||||||||||||||||||||||||||||||||||||||||||||||||||||||||||||||||||||||||||||||||||||||||||||||||||||||||||||||||||||||||||||||||||||||||||||||||||||||||||||||||||||||||||||||||||||||||||||||||||||||||||||||||||||||||||||||||||||||||||||||||||||||||||||||||
|
BMW E53 X5 Camber Options - Track Review
Contributed by: hayaku
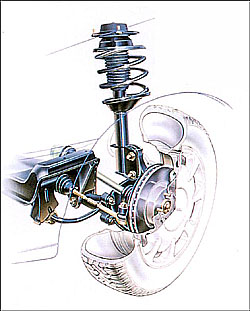
by hayaku for xoutpost.com December 3, 2005 A few years ago, my wife greatly enjoyed her 2001 X5 3.0. She constantly praised its braking and handling performance. Sadly, we decided to trade that in for an ultra pimp mini van with 17 cup holders. We always missed the X5 but had plenty of places to put our drinks. Fortunately a month ago, we decided to pick up another X5. We found a gorgeous example in a CPO'ed 2002 Steel Gray 4.4i with sport, navigation, dsp, and premium packages. This was my wife's daily car and I pretty much never drove it. During her first few days of ownership, she complained about a floatiness feeling at highway speeds. Some sort of unstableness. The car tracked straight and turned when told to, but it was an unnerving feeling at speed. Sortly afterwards, a Service Engine Soon light came on for a Cam Position Sensor. I took the opportunity to have the local dealer fix the SES issue as well as check the alignment. The sensor was replaced but the alignment tested to be within tolerances of the factory spec. The technician indicated that it felt normal for a 3 year old car. Hmmm... Since I knew our old 2001 X5 3.0i felt great and didn't exhibit any of these behaviors over the few years we owned it, I started looking at options to fix my alignment issue. Fortunately I got word from Ben Liaw of Rogue Engineering that he had camber plates for the X5 that were almost ready to launch. We chatted some and Ben had arranged to ship me a set of plates before they hit the market. 3 days later, a package arrived on my door step just as Ben had promised. This was a bit early as my lift had not been installed in my new garage yet. No matter. I needed time to come up with the test plan anyways. I didn't want to do a simple seat of my pants viewpoint of what the modification would do. I didn't want to post something as simple as "These Camber Plates ROCKED!!!" or "These Camber Plates are just about as useful as a third nipple on a turtle's back!". Instead I wanted to have something quantitative and qualitative to report, whether it be good or bad. In order to come up with the proper test plan, I needed to understand how the X5's suspension was setup and what owner's perceptions were on its handling. Several times along the way, I had to stop myself from doing too much research and investigation as it becomes non-applicable on a street vehicle or most of the data I was looking for only meant something to suspension designers and not regular drivers/owners. More importantly, I had to make sure what I was looking for had to stay relevant to the X5. Keep in mind that I am not a suspension engineer by trade nor work for a automotive engineering design group but rather have an extensive network of highly successful professional race team engineers as friends that provide me guidance, a slap on the back of the head when I go in the wrong direction, and an abundance supply of laughter whenever I ask them questions.
Ok, if the X5 was designed with understeer, what can we do about it?
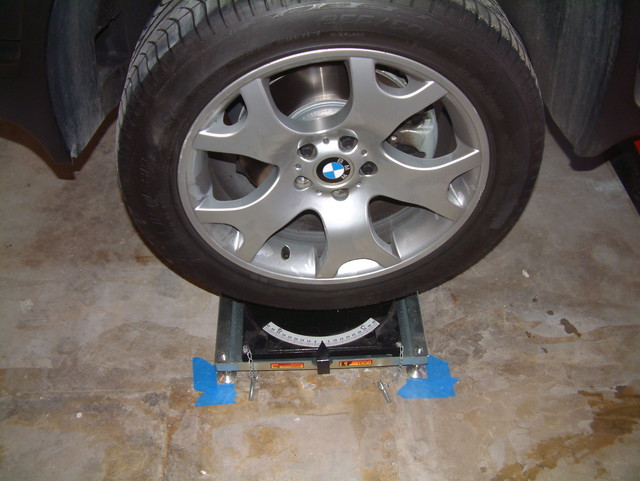
Currently, we have 4 options to deal with the differences in camber front to rear: Lessen the rear negative camber alignment Perform the Free Camber Adjustment on the front Add Camber Plates: Rogue Engineering or Dinan Or a combination of the above For this test, we used my wife's 2002 BMW E53X5 4.4i as the test mule. The X5 is equipped with the sports package (meaning air suspension rear) and the 19" Style 63 Y-Spoke OEM rims. Tires are Michelin Diamaris with about 5/32" thread left. The car weighed in at 4919 lbs with a near full tank of gas. I found out that the two companies that did make camber plates for the X5 utilized the same design. The companies were Dinan and Rogue Engineering. With the latest suspicious claims and products from Dinan (bulging e46m3 air box, z8 frame fiasco, m5 torque loss, etc) I figure the best bet was with Rogue Engineering. All things being equal, Rogue Engineering had the better price point ==> which was what I selected. The Test Method
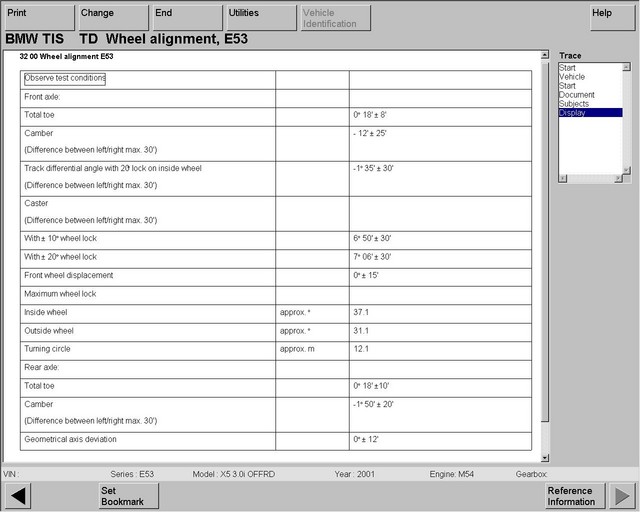
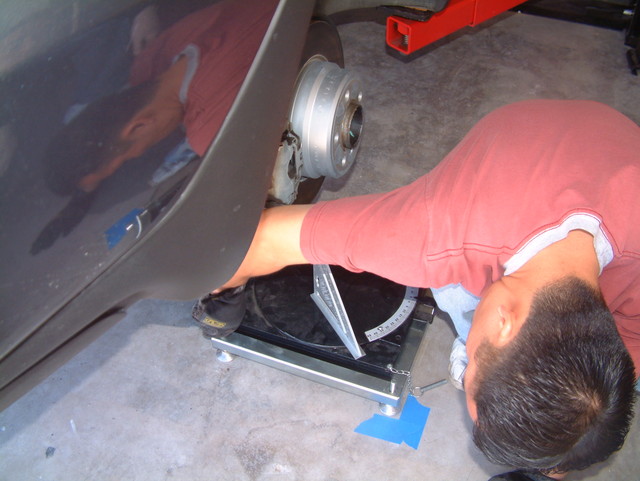
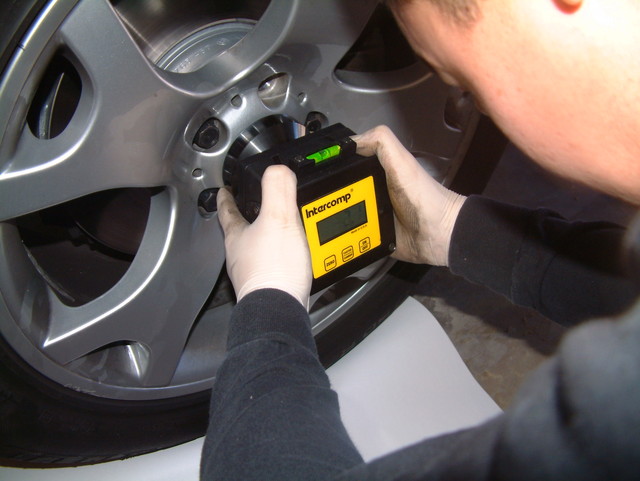
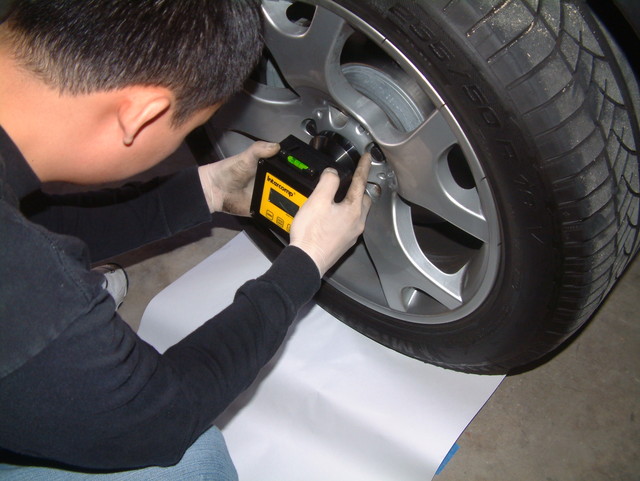
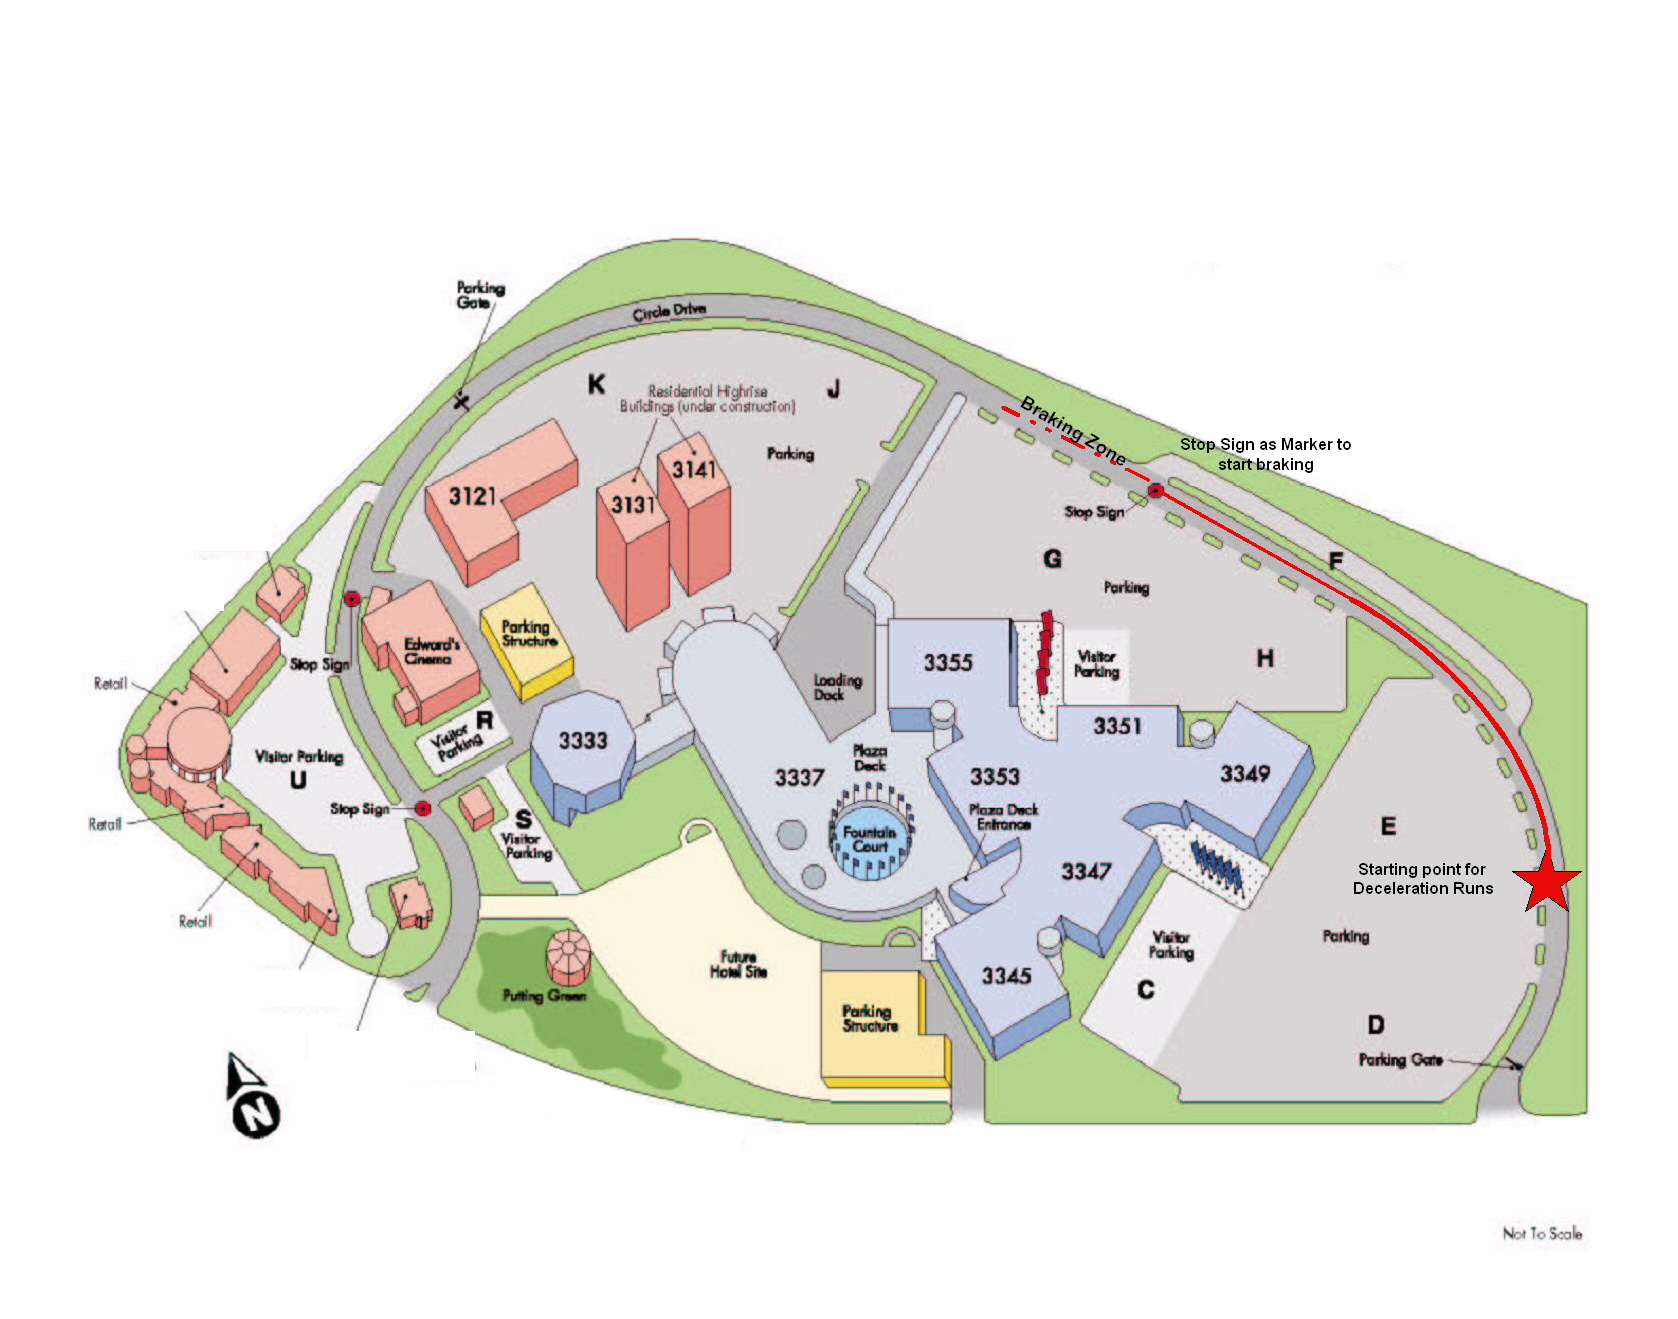
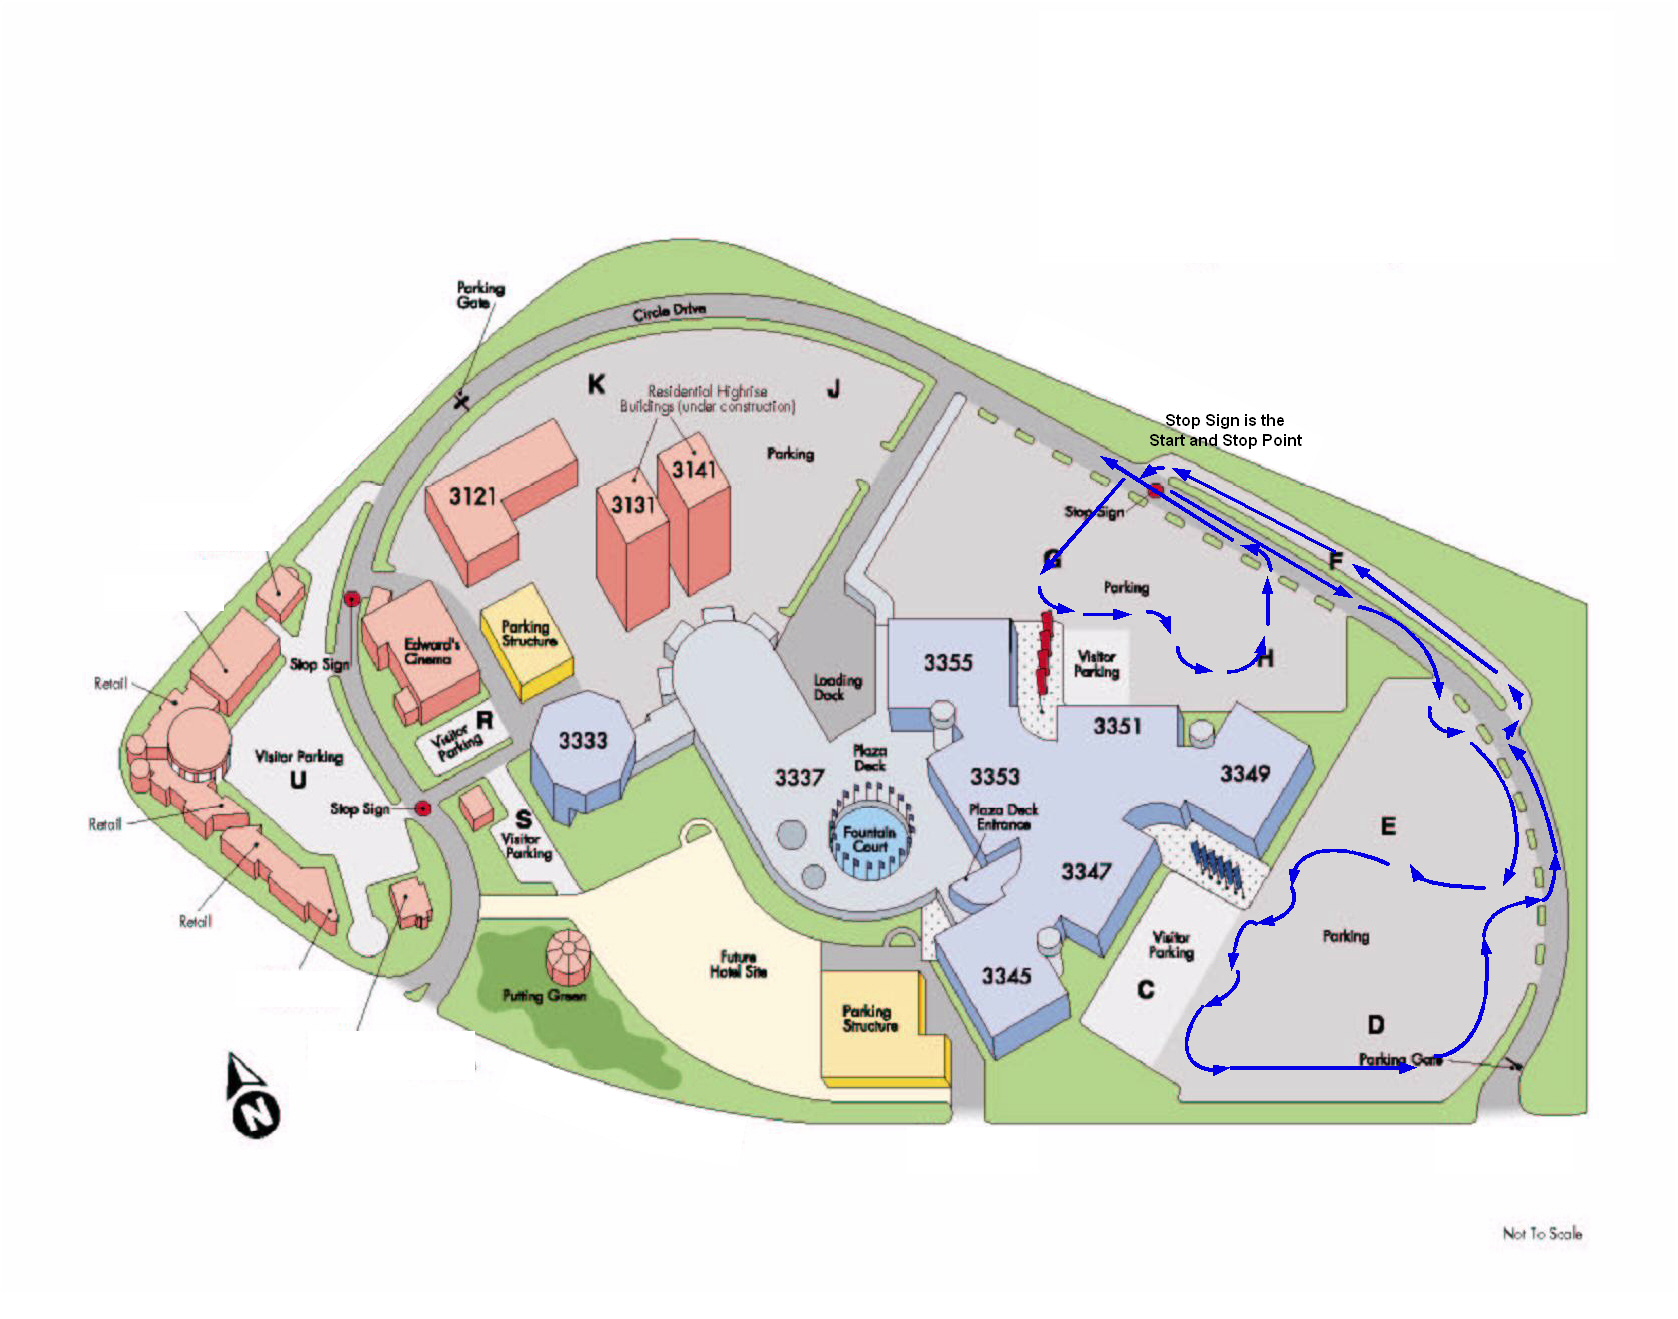
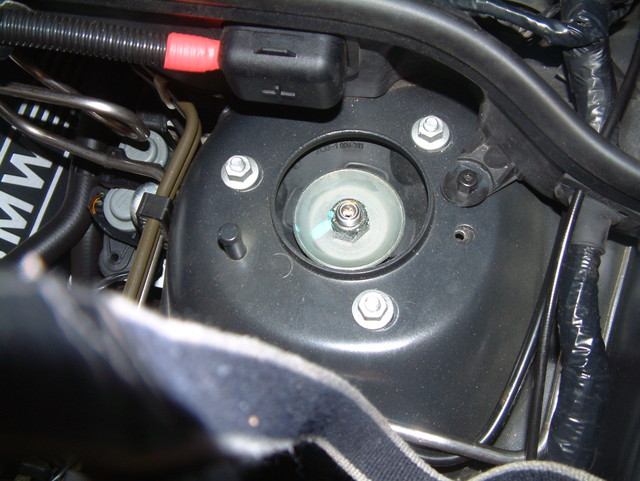
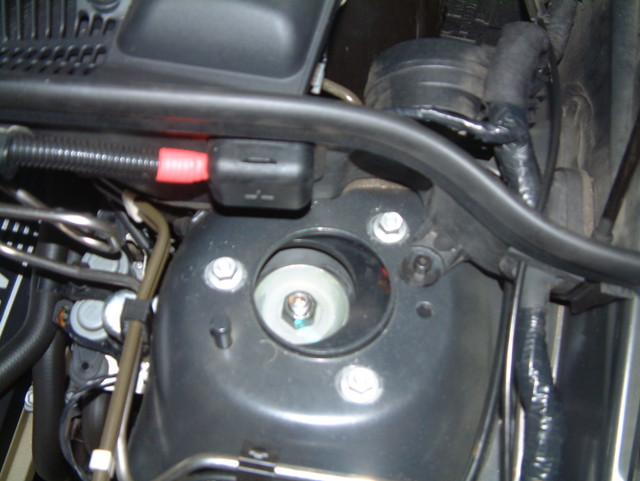
The Results: The Stock setting as a baseline. We all fell in love with this car on our test drives from the dealership. We were all greatly impressed at how well mannered and easily controlled a car of this size and height was. After all, this is really the first production street performance SUV. err.. SAV. It handled just like a car. Nothing at all reminded us of a truck like all its competitors did. We could really leave the car at 100% stock and fiddle with the alignment to make feel better. In fact, I was sure I could resolve the floaty feeling my wife was experiencing with a proper alignment. We had the dealer check the alignment and it was all in "spec". I wasn't surprised. From the experience of my professional motorsports friends, I know that just because the factory published the spec, it didn't mean that is what works best on the car. In fact, most high performance cars out there have a horrible spec (Porsche GT3, GT2, Corvette Z06's, BMW M3, etc) Many owners have deviated from the factory spec and been much happier since. Since my car was in "spec", that's how we decided to test it. Toe alignment was very interesting. Yet it was "in spec". This confirmed my thoughts on the floaty feeling coming from a "weird" alignment. It was not even side to side. But yet the car tracked very straight and exhibited correct turn in and turn radius. So off the the proving grounds I went in the middle of the night. Below you will find the data I collected. Examination of the strut tower mount shows that the piston rod/nut of the strut is pretty much dead center in the 3" hole on top of the strut tower.
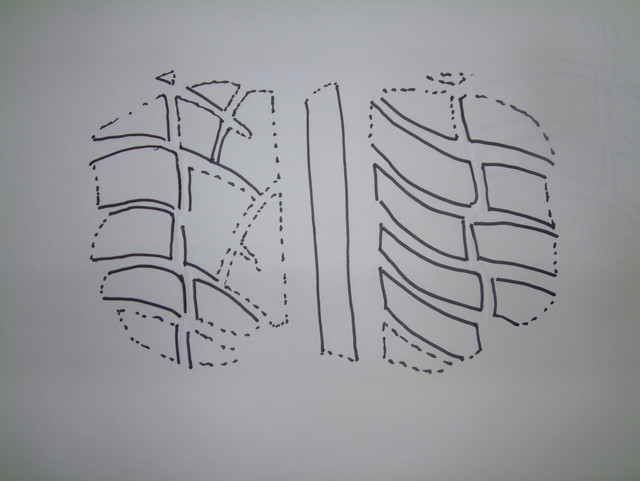
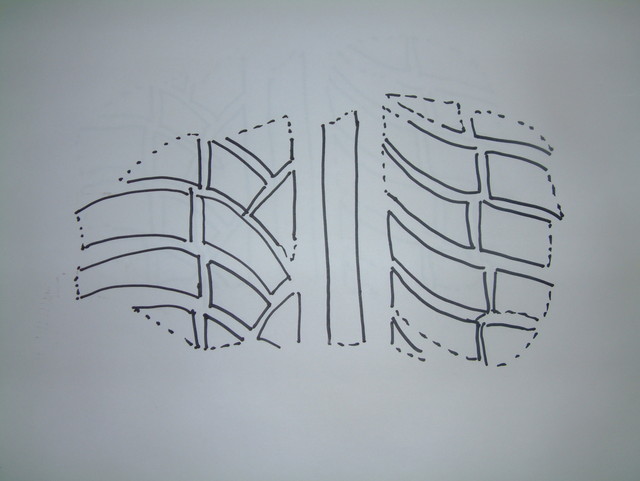
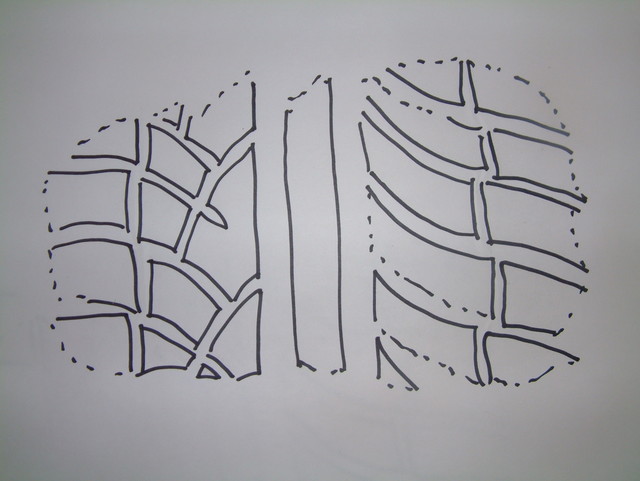
At -2.0 degree of camber, the front tire contact patch still is pretty oval and flat looking. This would mean that it still has excellent grip. I have no way of plotting the actual stopping points in this article. I used cones to mark where the car had stopped and marked the floor with chalk as I moved the cones per test session. The cones spread was about 5 foot of difference from the two extremes. I couldn't take a picture of the area where I had the cones as I didn't want to attract the attention of the security guards patrolling the area with a flash. Each section below will have comments on what the observed changes were. The Free Camber Setting This is probably the most popular suspension modification in the BMW enthusiast community as it is easily performed and 100% free. All that is required is to remove the alignment pin, loosen the 3 strut nuts and slide the strut all the way in and then tighten the strut nuts. Instructions to this can be found here (--->insert link<---) With the large difference in camber that the X5 has front to rear, any bit will help with getting the car to become closer to neutral. I'm sure lessening the rear camber and performing the Free Camber setting will have an impact that you can feel right away. However, I've put constraints on changing anything in the rear so I can measure what the changes in the front were doing. 15 minutes of adjustment to add the Free Camber setting and I was ready to drive off to the proving grounds again. Once the alignment pin was removed, the strut hat was slide about 1/8" inwards, max. The results are below:
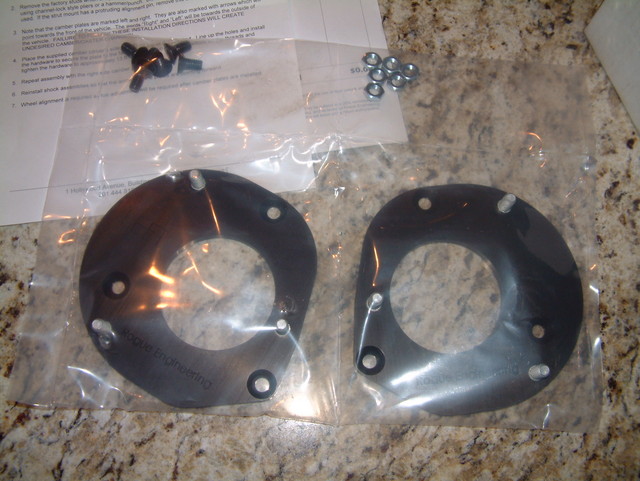
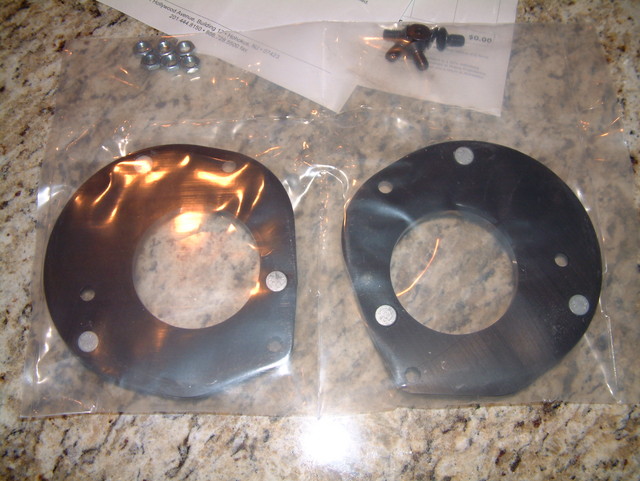
* - Note that we left the rear camber alone to isolate only the changes in the front camber. At -2.3 we start to see the contact patch taper off on the outside and load a little more on the inside. I was surprised to see how quickly we could observe the change. When I overlapped the 5 stock braking points to these 5 braking points, they were pretty much in the same 5 foot range with the except that 2 were out further by 6 inches and 8 inches. Rogue Engineering Camber Plates setting There are only 3 ways that I know of to get more camber then what the factory design allows for: Lower the car, make the mounting slots longer, or changing the strut hats to camber plates. Each has its own sets of pros and cons. The elongation of mounting slots is often the worst choice to do as it weakens the strut tower unless properly reinforced, which means you are gonna pay big bucks so you should have done camber plates in the first place. When I first received the plates, I was surprised they were not a full top hat replacement. Instead they are add-on spacer plates that change the stud mount locations. I asked Ben about this design. Ben had pointed out at the plates were have been cost prohibitive to produce as a one piece unit and would require a new bushing to mount the strut. A high performance bearing like a monoball (used in race cars) would not last for street duty and requires to be replaced too often. In Ben's own words "The biggest issue with factory mounts is that they are great for 99% of all BMW owners/leasees, since they won't modify the car at all. For those looking to "tweak" BMWs already superlative engineering, there are products such as these plates which make it possible. Not trying to redesign the mount, just improve it a little." Ben also explained that the plates are aircraft grade aluminum and anodize to protect it against the elements. the studs used to mount are rated at 10.9 hardness, the same as the factory studs. Since there is no shear forces at the strut mount, this design is absolutely safe. The bushing allows for movement of the strut already. Keep in mind, the factory strut nuts are only tightened down to 18 ft-lbs. That's pretty much the same as hand-tight. This is the same design as the Dinan camber plates. In fact, they are very similar in every dimension.
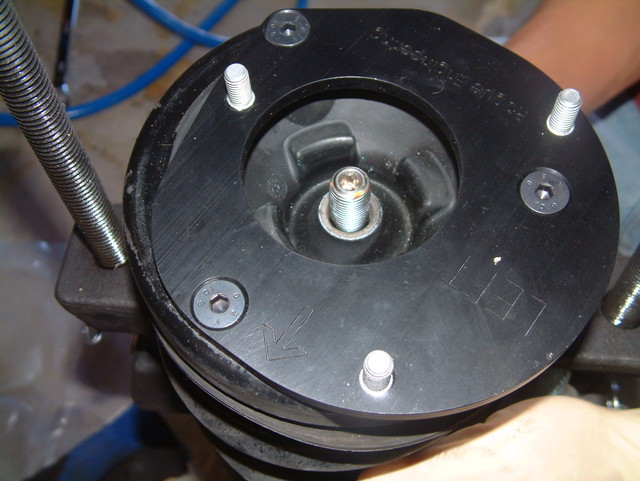
The installation on this very straight forward but does require a fresh alignment as the front will increase in toe out beyond factory specs. After our installation, we aligned the car. However, we took the opportunity to correct the front toe this time and made them not only even, but set it so that under rolling resistance, we had zero toe for a faster response in turn in. You can find the installation instructions here. I wasn't able to test immediately as it was rather difficult to get the keys back from my wife. But eventually I was able to do another midnight madness run at the proving grounds. The results are below:
* - With the Rogue Plates in, we still had the adjustment option of sliding the studs in the slotted holes. The measurements above are the 2 extreme ranges. We opted to go with the maximum negative camber to closely match the rear as much as possible. ** - Again, we opted not to change the rear camber settings to isolate only the changes in the front. At -2.8 degrees we are seeing the contact patch definitely morph into a tear drop shape. Technically this would have less grip on a straight flat surface then the stock setting but would flaten out as we cornered giving us a little more lateral loading. The Rogue Engineering plates positioned the strut piston/nut almost 1" inward from its original position, the center of the hole on top of the strut tower. This changed the Steering Axis Inclination, resultant Included Angle and the scrub radii significantly. However, the changes were uniform from side to side. When I let go of the steering wheel after I turned, the steering wheel did return to center by itself like normal. I couldn't tell a difference in how long it took to self center. Braking is finally observed to require a little further distance. The 5 cones that marked the braking points with the Rogue Camber plates started at the middle of the stock and ended 3 feet from the maximum distance on the stock setting. The wife's impression: After the installation of the Rogue Camber plates, we gave the car a fresh alignment. My wife then drove the car the rest of the week as normal. After her first day with the car, her first comment to me was "Either I'm really tired from the test, or the car drove itself home." I left that comment alone. A few days later, she accused me with: "You did something to the car didn't you?!?!?" To which I replied: "What do you mean, Dear?" Then she beamed as she said "The car handles beautifully!!! Its no longer floaty nor feel like crap anymore!" Then I told her "Yah, we just put some camber plates on the front and gave it a fresh alignment." Her final comment was "Its like a night and day difference. Before the car was very floaty above 70mph. Steering was very light and barely any feedback. Now, it feels like it carrrrves into turns. I'm driving like a mad woman now! To my wife's credit, she does have high performance driving experience and can truly appreciate a well sorted car. As soon as she is done with med school, we do plan on completing her training in my Porsche 996 cup prepared race car. Summary
Out of options that we tested, the Rogue Engineering camber plate definitely had the greatest impact on improving the overall handling and feeling of the car. The camber more closely matches that of the rear giving the car a much better balance while cornering and maintaining a little understeering characteristic to keep the car very well mannered and safe. Perfectly safe for beginner drivers as well as experienced road race drivers. My impressions were that turn in was the sharpest with the camber plates. Feed back was immediate and accurate through the steering wheel. The car had lost all signs of floatiness and was extremely stable at all speeds I tested at in straight line acceleration and braking, cornering and braking while cornering. If you noticed in the data collections, the ride height remained the same with the Rogue Engineering camber plates and the stock setting. When the strut angle was moved inward, I expected that the car would be lowered somewhat, after all, the weight is the same but there is increased angle. However, the thickness of the spacer fills the gap difference and raises the car back to normal height preserving much of the car's original engineering specs (dive/anti dive, squat/anti squat, brake bias, etc) With the free camber adjustment, I measured a 1/16th inch drop in ride height. Not much at all really, since there really isn't much movement of the top mounting point. The changes in Steering Axis Inclination (SAI) where consistent on both sides which resulted in identical scrub radii. The included angle remained less the SAI, as with stock specs. What this basically means is that the car is set to track straight and the steering wheel still returns to center after a turn when you let it go. Through my primitive performance tests, I could not find any significant difference in contact patch effectiveness and but was able to gain handling confidence; more with each level of modification. Both the Rogue Engineering camber plates and the free camber adjustment with proper alignment will be a change that you can feel. Obviously the camber plates will have a greater impact. Are these plates a world of difference? Probably not, but they do bring a new level to accuracy in the handling of your X5 and make it more enjoyable. I truly believe that the combination of added camber and a correct alignment is what contributed to why my wife loves the handling of her X5 so much. Did the plates really add significant handling performance? I don't know for sure. As you can see, the acceleration and deceleration runs were pretty much the same all around. You have to factor in some time for driver error, reaction, different daily conditions, etc. Its also highly possible that the drop in my autocross times were due to having more runs/practice with the course. Without proper data acquisition and a controlled environment to re-run the test, we don't have factual data representation of the changes. What we do know is that the data we collected strongly suggests that there is a great improvement in handling. We know that we feel much more confident with the setup and that the car does take a more neutral balance going through corners at speed where it normally exhibited understeer behavior. Since I didn't buy a set of the Dinan camber plates, there's not much I can say about it, but do expect it to have a similar effect on handling and road feel as the Rogue Engineering ones, albeit it at a higher price tag. My wife is extremely happy with the camber plates that we installed. I asked her, if she test drove an X5 that had the plates and compared it to her car when it didn't have the plates, yet it was in spec alignment form, would that test drive be enough to persuade her to spend the money for the camber plates? Her answer is a definite yes. And this is coming from someone who is adamant about not spending money on performance for a street only vehicle and was perfectly happy with the handling in her previous X5 3.0i. I then qualified the question again to her by comparing the camber plate equipped X5 to her perfectly handling X5 3.0i, which car would she choose? She just smiled and said "You wouldn't get your lovely wife an X5 without the camber plates would you?" See boys, THIS is the perfect example of "it's better to beg for forgiveness then to ask for permission" =) For more details and purchasing information, please visit Rogue Engineering. At minimum, I would suggest people who feel dull turn in, annoyed by the factory set understeer limits, or a vagueness in steering feel, to get a proper alignment from a qualified shop. Even better, would be to give yourself the free camber adjustment and an alignment. And the best option would be to get these camber plates installed and an alignment. References: Free Negative Camber for the E53 BMW X5 Rogue Engineering Camber Plates for the BMW E53 X5 |
||||||||||||||||||||||||||||||||||||||||||||||||||||||||||||||||||||||||||||||||||||||||||||||||||||||||||||||||||||||||||||||||||||||||||||||||||||||||||||||||||||||||||||||||||||||||||||||||||||||||||||||||||||||||||||||||||||||||||||||||||||||||||||||||||||||||||||||||||||||||||||||||||||||||||||||||||||||||||||||||||||||||||||||||||||||||||||||||||||||||||||||||||||||||||||||||||||
| Bookmarks |
|
|
|
|


 Hybrid Mode


