
|
|
|
|
||||||||||
| Xoutpost server transfer and maintenance is occurring.... |
| Xoutpost is currently undergoing a planned server migration.... stay tuned for new developments.... sincerely, the management |
|
|
LinkBack | Thread Tools | Display Modes |
|
#1
 07-19-2015, 06:36 PM
|
|||
|
|||
|
2004 X5 Auxiliary Fan Replacement DIY -part 1
...had to do this with two posts because of limit on number of pictures....
2004 X5 E53 Auxiliary Fan Replacement -Part 1 First off, thanks to everyone on the XOutpost Forum for contributing knowledge/details for the many DYIs I’ve utilized. I’ve done everything from changing sparkplugs to replacing the blower fan (total bee-otch) and without the community, all would have been more difficult if not impossible for me…and I’m a DYI-kind of guy!!. Overview: My fan went up at 172,000 so I can’t complain too much. However, the auxiliary fan design/installation changed model year 2004. Also, the Bentley Manual shows replacement for the earlier models, so it isn’t very helpful for ’04-‘06. For the ’00-’03 models, the procedure seemed pretty straightforward. Design change in ’04 requires a bit more part removal than in the earlier models. I rate the difficulty of this job a “5” on a scale 1-10. For time requirement, I’d say average 3-4 hours for experienced persons. I’ll be the first to admit, I’m SLOW when repairing stuff…but I seldom screw things up or have to backtrack/disassemble because I forgot something…this took me 6 hours including lunch break, kids asking for stuff, wife asking for stuff, etc etc etc…. For the 2004 and later models, I think you really need to remove the bumper skin and front bumper. Also, to keep track of “…which screws go where…”, I use a piece of cardboard and “pattern” on the cardboard where the screws are coming from and just push them into the cardboard for safekeeping….I’ve done this for years and it’s a good way to know positively where the screws go and it keeps them out of the way. Removing the bumper provided the room I needed to get to the fan and remove through the bottom. Here’s the fan I used…I’m not endorsing it, but it fit and the price was right and I’ve had good luck with Dorman stuff in the past. (and it has been in the car a few weeks now with no problems): More Information for DORMAN 621213 Use these previous instructions in tandem with mine…they were very helpful: 1) http://www.xoutpost.com/bmw-sav-foru...ditioning.html 2) http://www.xoutpost.com/bmw-sav-foru...tioning-4.html 1) Remove the bumper skin…Here’s a good reference from Pelican Parts (I had to remove my fog light covers to get to bolts covered by them but this was easy with a non-marring plastic pry tool) Pelican Technical Article - BMW X5 - Front Bumper Replacement E53 Also, this post shows the screw outlay for removing the bumper skin and bumper (though the model is a 2001, screw layout is very close to the same…only difference I think being those behind the fog light covers. The .pdf link didn’t work for me, but this is still a good reference. http://www.xoutpost.com/articles/x5/...r-removal.html Steps: Before removing the bumper skin, remove all the screws, and disconnect the fog lamps, horns, and any other ancillary connectors/sensors that may be unique to your model. Also, don’t forget these screws under the wheel well: 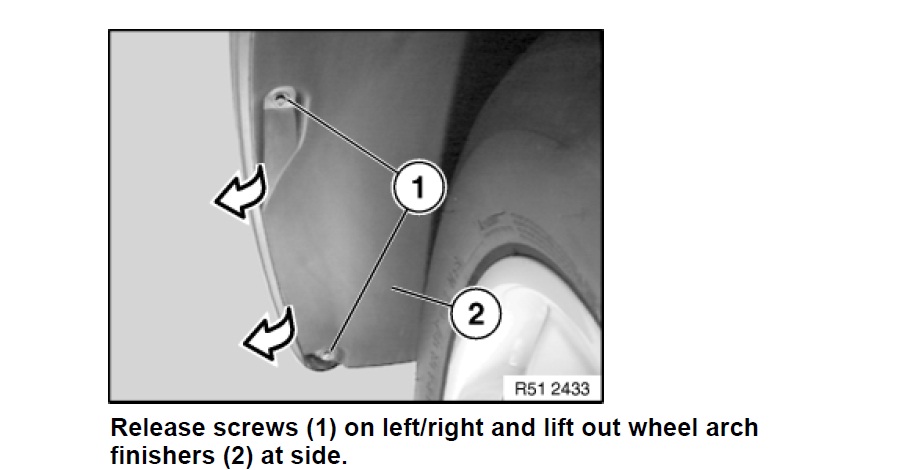 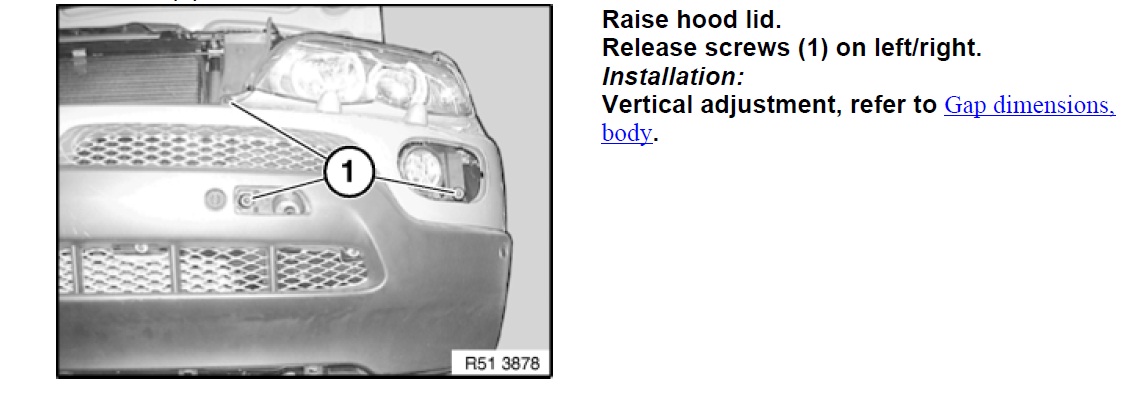 On the illustration below, I’ve red-circled these two locations where I DIDN’T have any screws…just blank plastic so yours may too! 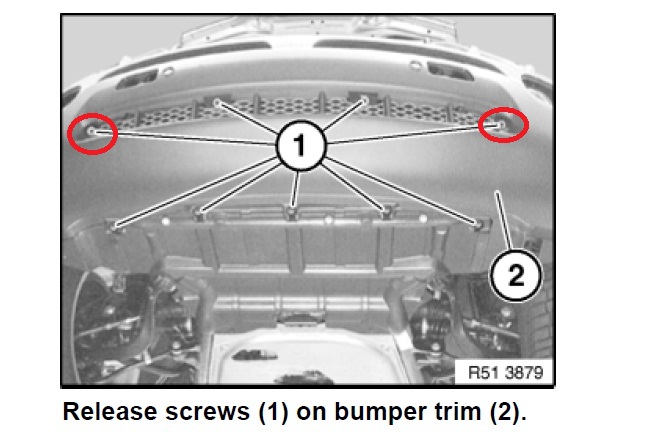 A challenge in removing the bumper skin in the 2004 and later models where the “tabs” on the front fender that snap into place on the bumper skin. Here is a picture of the tab area on the removed bumper skin and on the front fender: 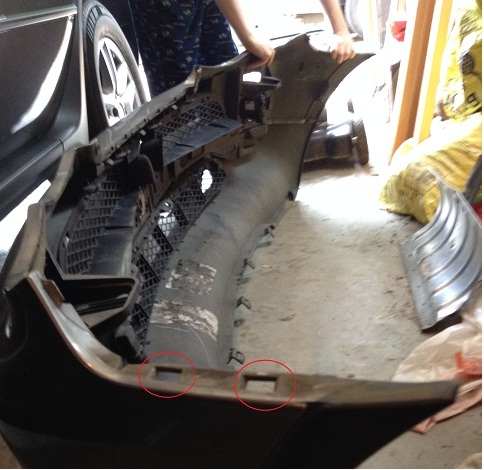 These are the tab areas on the front fender: 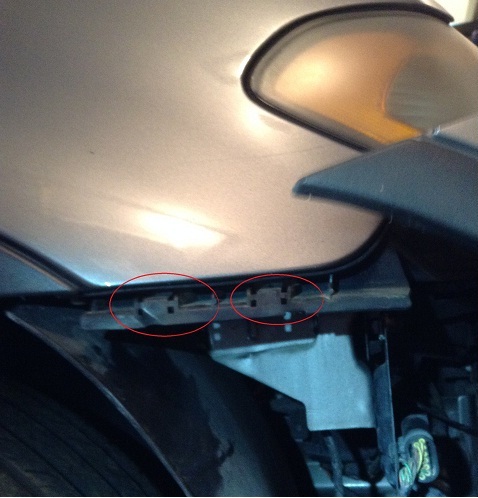 It’s hard to describe the motion that succeeded separating the skin from the bumper in this tab area….it is a combination of pulling down, out toward the outer edge of the tire, and then forward to remove the skin from the bumper….remember, don’t do this until you’ve removed all the screws and disconnected the fog lamps and any other connectors. Bumper skin off: 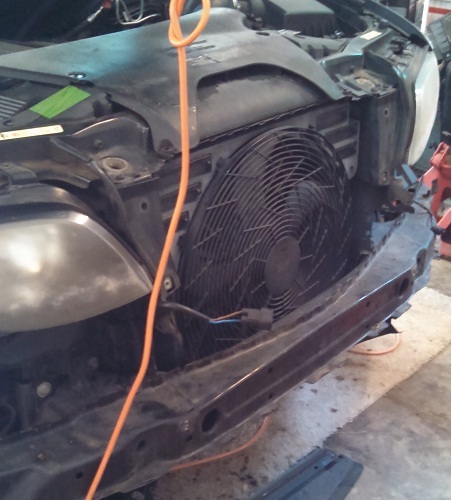 Next, remove the bumper. Just remove the bolts that attach it: …here’s a graphic of some of the bolts that attach it….both on passenger and driver side…. 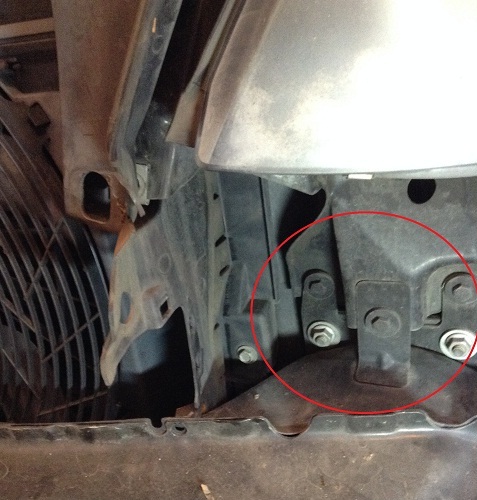 Bumper removed…..with help from my 14 and 12 yr old sons!! rest it on 5 gal buckets worked for me!! 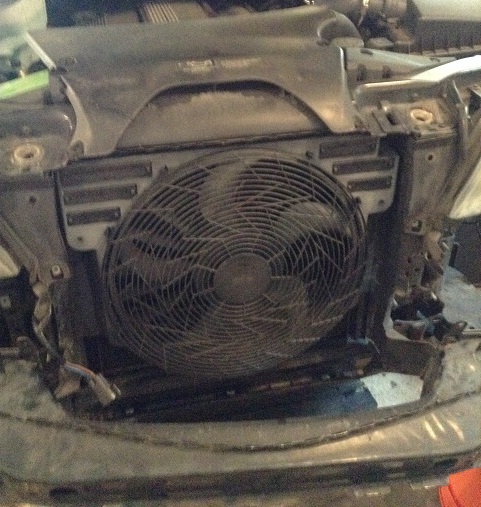

|
| Bookmarks |
|
|
|
|


 Threaded Mode

