
|
|
|
|
||||||||||
| Xoutpost server transfer and maintenance is occurring.... |
| Xoutpost is currently undergoing a planned server migration.... stay tuned for new developments.... sincerely, the management |
 |
|
|
LinkBack | Thread Tools | Display Modes |
|
#1
 06-28-2015, 06:36 AM
|
||||
|
||||
|
BMW X5 double DIN aftermarket installation / integration
Key criteria / reason(s) for change: 1. DAB+ capability (Switzerland and other European transitions over next 2-3 years) 2. Bluetooth capability (required in some European countries for cell phone use) 3. iPod & other USB interface 4. Double DIN unit (screen size, aesthetics, color match with instruments) My X5 (2002 E53) had the BMW Business radio (option S661) and separate in dash CD player (option S650) with the upper CD unit hidden by a flap. My procedures are for those with this system. My car didn’t have a factory NAV 16:9 unit, nor a trunk amp or similar. If you do have this system, the removal and installation instructions will still give you a general guide. • Head unit: JVC DB60ATE (European unit - ideal unit for CD, iPod inputs, AM/FM, DAB+). It allso has provisions for Bluetooth and aux inputs if needed. • Bluetooth adapter: JVC KS-BTA100 • ISO antenna adapter: CT20BM02 (close-out at Best Buy) • Steering wheel control adapter: Axxess ASWC-1 • Head unit mounting bracket kit: striker1980 on Ebay.com or Janus on Ebay.de • BMW to head unit harness adapter: Europe. It will have a large plug to connect to the BMW wiring harness and two ISO standardized ends to plug into the JVC (or other brand) head unit harness. • BMW to head unit harness adapter: North America. It will have a large plug to connect to the BMW wiring harness but have free wires at the other end – so you will have soldering to do to mate this to your new head unit harness. Solder the connections and use head shrink tubing, rather than bullet or other connectors. • Head unit / dash bezel: Richard Silva ([email protected]) • Tools: Soldering iron, solder and heat shrink tubing. A cordless Dremel was invaluable. Various other hand tools. Shop vacuum. How to do it Remove radio (remove the knob and use a hex or Torx screwdriver to move the locking lever to permit removal). Remove CD unit (hex head screws). Remove the “protective” flap / door on the CD or cassette unit. You can find instructions on Xoutpost, other forums or Youtube. Your radio opening should look like THIS (below). You should remove left & right dash trim (just in case) as you carry out the installation. Head unit mounting. Unlike the big brother 5 series (E39), the head unit mounting frame is integrally molded in the dashboard itself. As such, if you have a lattice webbing (two units), you will need to cut and remove webbing as well as the “roof” webbing. I did so with a cordless Dremel unit as well as shop vacuum to remove plastic shavings. For the head unit bracket I used (nicely made from stainless steel) I needed to remove the lattice to the left and right vertical faces. A note on the “roof” webbing. I used an X-Acto saw to make vertical cuts and then carefully bent the piece roof webbing piece back and forth until it snapped and then was removable. When done, both left and right sides need to reasonably smooth as they are your vertical reference and mounting faces for the side mounting brackets. On my kit, the left & right mounting brackets are perfect for the E39 but too wide (left-right) for the E53. I modified them by shortening some 1.5 to 1.8 mm of each side (measure your needs). Before you cut, be sure to mark horizontal lines with a permanent marker at the three threaded holes – you will need this as a reference. After cutting, file ends smooth to avoid cutting yourself. Install left & right mounting brackets with double sided carpet tape as you position them in place. Same for the head unit box for trial fits. Careful measurement of center lines and head unit box with the facia will help. Use the photos below for what I found to be the ideal mounting position for my set-up. Drill 3 mm pilot holes (Dremel cordless) to mount the left & right backets. Install them permanently with fender lag screws (the heads take a 8 or 10 mm socket), ideally with panel clips on the opposite side. Leave the carpet tape in place as it increases the plate to side panel coefficient of friction so that the lag screws to clamp effectively and lessen any vibration issues. Install ISO to antenna adapter on the car’s wiring harness. Build wiring harness (Euro ISO or US/Canada version) to connect your head unit harness to the BMW apator harness. If you chose to add the Axxess ASWC-1 steering wheel adapter & Bluetooth apaptor, you’ll need to add this to the harness. If you opt for a steering wheel adapter, you will need to add an extra pin & wire at pin 9 wire for BMW I-bus harness end for steering wheel controls. This is NOT pin 9 of the A or B part (see below). I found it was easier and cheaper to buy a second BMW adapter harness to cannibalize. pin connector main connector A connector B 1 Speaker FR+ line out L tape in L+ 2 Speaker RR+ cd-changer line in gnd tape in L- 3 Speaker RL+ line out GND AUX L 4 Speaker FL+ vcr line in R+ AUX R 5 Speaker FR- vcr line in L+ navi/tv in + 6 Speaker RR- vcr line in gnd telefon + 7 Speaker RL- line out R tape in R+ 8 Speaker FL- cd changer line in L+ tape in R- 9 I-BUS cd changer line in R+ navi bus 10 tel mute tv line in R+ AUX GND 11 tel in tv line in L+ navi/tv in - 12 gnd tv line in gnd telefon - 13 amplifier remote x x 14 backlight x x 15 +12V x x 16 +12V ACC x x 1. I needed to add one extra ground wire with a loop end, which I mounted on the metal structural tube inside the dash – drill a pilot hole for this. 2. I needed to reference both the JVC head unit wiring diagram and and JVC Bluetooth unit diagrams to resolve the Bluetooth wiring connections (three wires). 3. The Axxess controller wiring instructions are straightforward. Download the specifics from their site. 4. I would also recommend you update the flash file for the Axxess controller – straightforward software and instructions are on their website. 5. Check your connections SEVERAL times before you solder anything. The completed wiring harness with the following: • extra ground on far left • Axxess steering wheel interface unit on left • JVC Bluetooth module just behind Axxess box • connector to BMW car harness in middle left • BMW car adapter plugged into head unit ISO ends on middle right • JVC head unit harness end on far right Install head unit in mounting bracket (see photo) Test fit head unit and align center (of three) mounting holes with center horizontal lines on left & right mounting brackes. CRITICAL STEP: Ensure that the head unit is centered in location. Use the vent as a vertical line reference, also measure left & right gap (I used a dial indicator to be VERY precise). Ensure that the head unit is level. Mark mounting holes with a punch. Remove head unit and drill mounting holes: 2 mm pilot hole, enlarge to 4 mm and then M5 (thread) tap. Final test fit. Place wiring harness in dash opening and lay out to accommodate connections. Install extra ground wire (if you needed to add one). Connect wiring harness to BMW car harness, then antenna wire(s) to head units, Bluetooth unit (if used) and LASTLY the wiring harness to head unit. Power up head unit (your ignition key must be in accessory position). Set-up head unit for test (time, radio setup, other head unit parameters). Follow AXXESS set up procedure for steering wheel control. It tries to do it right away, as you are setting up the radio, so you may need to reset the controller and follow instructions. In my case, everything worked the first time – no need to redo anything (wiring, mounting, etc.) but I was very cautious and checked things several times before cutting, drilling, soldering, etc. Mount head unit (2 x M5 bolts). Update head unit (as needed) with new flash file with a thumb drive. In the case my JVC unit, it shipped with V106 firmware, updating to the current V111 version notably helped my DAB+ reception. INSTALLATION is 100% functional. I drove the car for a few days, to ensure all worked fine. There were no issues, so I proceeded to facia and dash trim re-installation. Install bezel / fascia piece. File and modify to fit head unit (I needed to widen by 3-4 mm to 178 mm wide x 99 mm tall for my JVC head unit), install fascia piece. I used a dial indicator to ensure I was enlarging the bezel head unit hole evenly (left & right sides) and well as evenly (enlarge the rectangle as needed but don’t create a parallelogram). I checked for fit a few times before I was certain that clearance was acceptable. Carry out any touch-up paint on bezel (BMW black chrome trim touch-up paint was perfect). Mount Bluetooth controller on dash with Velcro. Re-install dash trim. Install bezel / fascia piece (plastic dead blow mallet and soft towel to protect finish). The length of the bezel piece is made to fit snug against the soft part of the dash opening. Admire the finished result with a factory like result.
__________________
2002 Euro X5 (E53) 3.0 diesel (M57) 5 speed manual with UUC short shifter. Pre-xDrive NV125 transfer case (chain & gears). Factory Xenon headlights, Spyder LED tail lights Updated vortex crankcase breather. Motorsport dead pedal, factory fire extinguisher, factory first aid kit, factory F&R mud flaps, factory PDC Bilstein B6 shocks F&R Redline oil has replaced "lifetime" fluids (F&R diff, manual transmission, transfer case and P/S). Dimple magnetic drain plugs in all compartments. 
|
| Sponsored Links | |
|
|
|
|
#2
06-28-2015, 06:42 AM
|
||||
|
||||
|
More photos on intallation
Missing photos from upload...
For those who would like this as a PDF "installation instructions and vendor file" - PM me privately.
__________________
2002 Euro X5 (E53) 3.0 diesel (M57) 5 speed manual with UUC short shifter. Pre-xDrive NV125 transfer case (chain & gears). Factory Xenon headlights, Spyder LED tail lights Updated vortex crankcase breather. Motorsport dead pedal, factory fire extinguisher, factory first aid kit, factory F&R mud flaps, factory PDC Bilstein B6 shocks F&R Redline oil has replaced "lifetime" fluids (F&R diff, manual transmission, transfer case and P/S). Dimple magnetic drain plugs in all compartments.
|
|
#3
07-06-2015, 11:04 PM
|
||||
|
||||
|
uhm...
|
|
#4
07-07-2015, 12:45 AM
|
||||
|
||||
|
Nice work... and good info. Seriously.
 But man is that a terrible looking head unit to put in there after all that work.  Just my opinion... and if you love it. Cool.
__________________
2005 X5 4.4i Build 04/05 Maintenance/Build Log Nav, Pano, Sport (Purchased 06/14 w/ 109,000 miles) (Sold 8/15 w/121,000 miles) 2006 X5 4.8is Build 11/05 Maintenance/Build Log Nav, DSP, Pano, Running Boards, OEM Tow Hitch, Cold Weather Pckg (Purchased 08/15 w/ 90,500 miles) 2010 X5 35d Build 02/10 Nav, HiFi, 6 DVD, Sports Pckg, Cold Weather Pckg, HUD, CAS, Running Boards, Leather Dash, PDC, Pano (Purchased 03/17 w/ 136,120 miles)
|
|
#5
07-07-2015, 01:24 PM
|
||||
|
||||
|
I have a Kenwood system I just put in mine....awesome unit. My phone becomes the units and all hands free and steering wheel function all work. Also back up camera. Better system than what's in my 2014 MB
I'll take a picture but it's much larger than that.
__________________
2002 X5 4.4i Sport Wheels 2014 X5 35i M Appearance & suspension package 1995 Porsche 993 1972 Porsche 914-6 2020 GLE 450 Twin Turbo 2019 Alfa Stelvio 500hp Quadrifogilo Many motorcycles 
|
|
#6
07-07-2015, 05:02 PM
|
|||
|
|||
|
Quote:
|
|
#7
07-07-2015, 09:44 PM
|
|||
|
|||
|
^ I`ll 2nd that , but if you like it thats all that matters, I just wouldn`t replace my factory unit with that unit. just my opinion ,don`t take it too hard.
__________________
 2003 bmw x5 3.0i ,219000km build date 2003-08-18 2003 bmw x5 3.0i ,219000km build date 2003-08-18
|
|
#8
04-24-2018, 04:15 PM
|
||||
|
||||
|
The depth of the photo doesn't do it justice, you can also select from 15+ different display colors - I went with a hue that nearly matches the inside lighting at night. FM is going away in many countries in Europe for a digital system - DAB+ - so changing gives you more radio channels, better sound quality. Choice of head unit was to retain CD use (I have a lot), add Bluetooth and iPhone/iPod use.
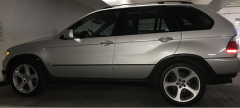
I understand some comments, but road wheel selection if MUCH more personal than the head unit
__________________
2002 Euro X5 (E53) 3.0 diesel (M57) 5 speed manual with UUC short shifter. Pre-xDrive NV125 transfer case (chain & gears). Factory Xenon headlights, Spyder LED tail lights Updated vortex crankcase breather. Motorsport dead pedal, factory fire extinguisher, factory first aid kit, factory F&R mud flaps, factory PDC Bilstein B6 shocks F&R Redline oil has replaced "lifetime" fluids (F&R diff, manual transmission, transfer case and P/S). Dimple magnetic drain plugs in all compartments.
|
|
#9
04-24-2018, 06:29 PM
|
||||
|
||||
|
Quote:
Now you get with android : dab+ tv nav all the factory settings and controls you lost are restored with the android unit backup camera 360 cameras dash cam with dvr recording dvd video all over kinds of video playback Bluetooth wifi the list goes on and on.
__________________
Just BMW's - All cars and trucks was two pages long 1994 318is 1997 528i 2000 323i 2001 X5 3.0 auto 2005 X5 3.0 auto 2011 535xi auto 2013 X5 xdrive35 Turbo More are at my website Aftermarket E53 Radio Install
|
|
#10
04-24-2018, 08:26 PM
|
||||
|
||||
|
Quote:
__________________
'05 E53 X5 4.4i, '97 E39 528, '07 E92 335i, '16 F86 X6M. Last edited by X5only; 04-24-2018 at 10:50 PM.
|
|
| Bookmarks |
|
|
|
|









 Linear Mode


