
|
|
|
|
||||||||||
| Xoutpost server transfer and maintenance is occurring.... |
| Xoutpost is currently undergoing a planned server migration.... stay tuned for new developments.... sincerely, the management |
 |
|
|
LinkBack | Thread Tools | Display Modes |
|
#1
 04-01-2020, 10:58 PM
|
|||
|
|||
|
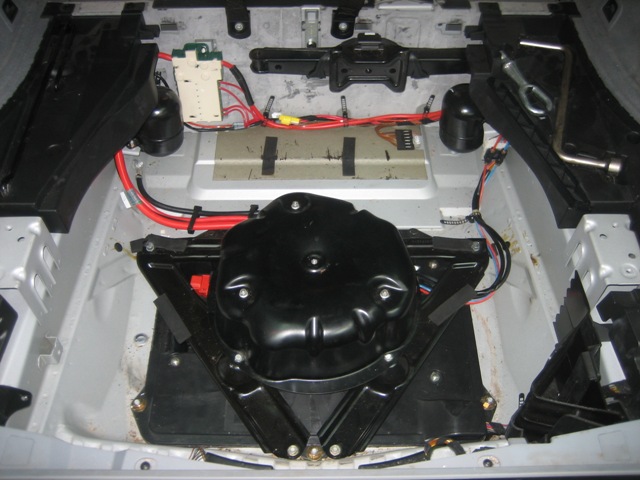
Rear Trunk Trim
A)The tire tray: I removed it so that I could run wires around it's mounting points easier. Does it go on top of, or underneath of the jack? B) The two shorter, rearmost side pieces come with lots of little plastic nuts, black ones and white ones. Which ones go where? Also when I went to put the rearmost driver side piece, it overlaps a loop with the rear driver side piece. Which one of the two goes on top? P.S. Sorry I post so many threads, I just have a lot of questions 
__________________
2005 X5 E53, 167k Miles: Kenwood DNX893S Head Unit, Mud Flaps (Rear Only) , Rim Shopping(WIP), Full Spectrum RGB Halos, 
|
| Sponsored Links | |
|
|
|
|
#2
04-02-2020, 04:23 AM
|
||||
|
||||
|
A: Note sure what you mean here. The jack is held in place by a rubber strap, in front of spare tyre, below floor panel. The tyre tray is bolted to the trunk (boot) floor.
 B. There are only a couple of black plastic nuts used to hold down each of the two rear trays in my car, as per RealOEM https://www.realoem.com/bmw/enUS/sho...diagId=51_3915 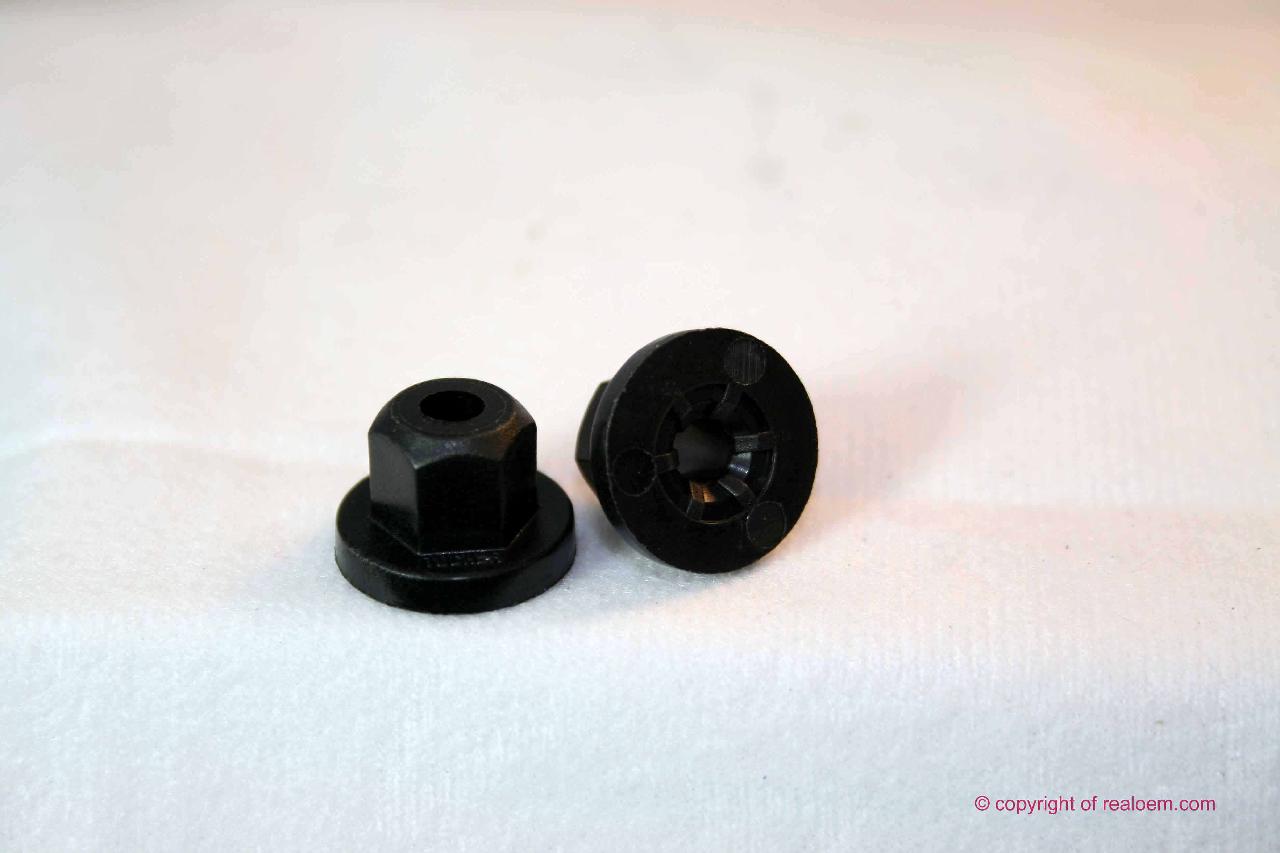
__________________
Wayne 2005 BMW X5 3.0d (b 02/05) 2001 BMW F650GS Dakar (b 06/01) 
|
|
#3
04-02-2020, 09:21 AM
|
|||
|
|||
|
Quote:
B) Maybe some of mine were lost because I only have 4 black ones and 2 white
__________________
2005 X5 E53, 167k Miles: Kenwood DNX893S Head Unit, Mud Flaps (Rear Only) , Rim Shopping(WIP), Full Spectrum RGB Halos,
|
|
#4
04-02-2020, 07:23 PM
|
||||
|
||||
|
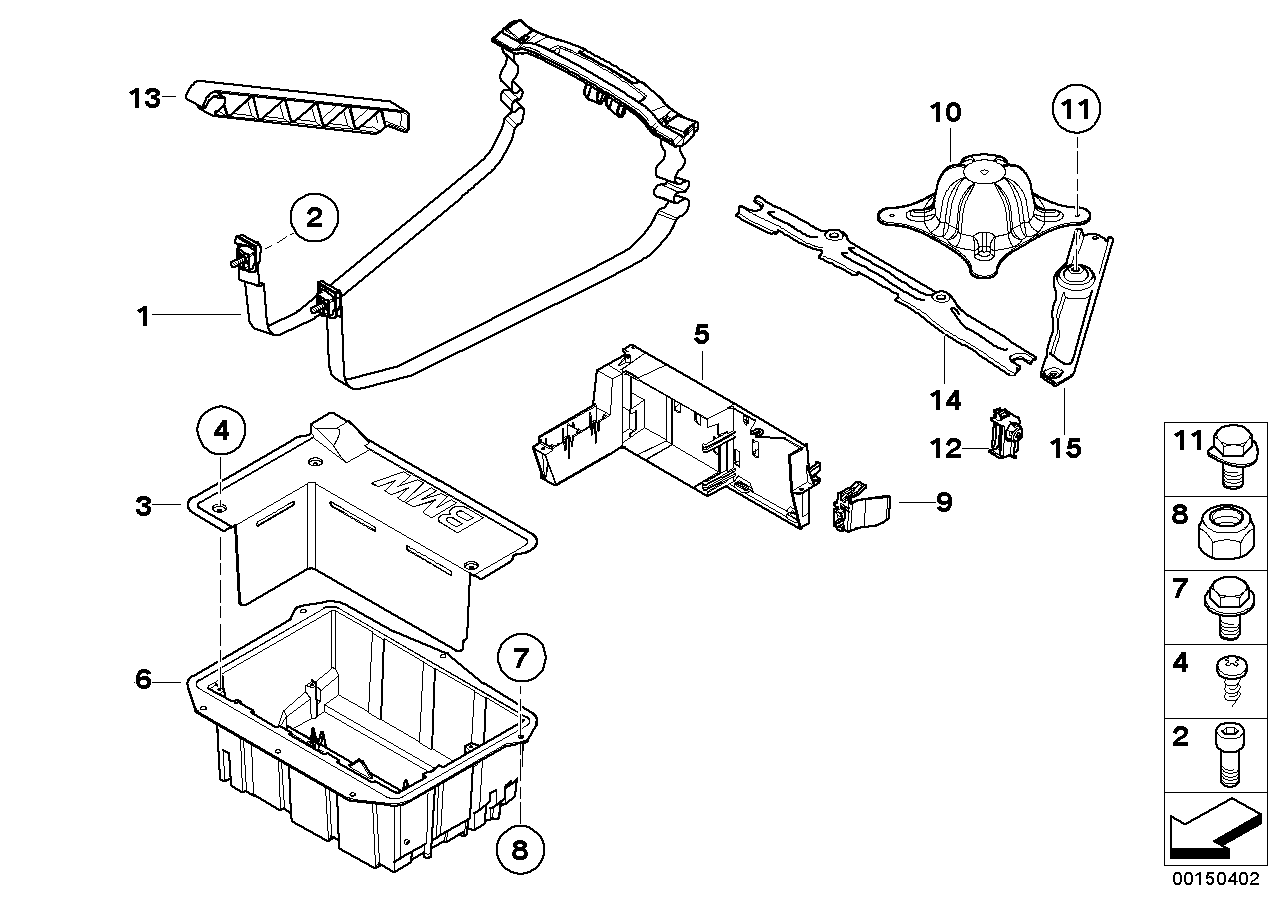
Im still somewhat confused as to what youre asking in regards to the spare tire removal set-up. In regards to the straps...they should not be underneath anything because they need to be unencumbered from being able to lift or lower the spare tire back into the well.
If putting the spare back inside the car...you have the plastic thingy (#1) plugged into the lock of the lower tailgate and item #13 (the lock pin) in place to keep the tailgate lowered...you slide your spare upon the straps...center it...then remove the locking pin which allows you to use the lower tailgate to lower the spare into the well. You do the reverse to remove the spare. So again, the straps need to be free to do that...if you run them underneath something...you wont be able to use this apparatus correctly...or as it was designed.  Like WPoll suggested...I, too recommend that you use one of the online part database sites to help you reinstall what you removed. The diagram shows you (sort of) how things go together...but more importantly it indicates the hardware (the encircled numbers in the illustration) which also usually includes an additional key inside the illustration to help identify what type of hardware is being used. For example, below item #1 is the spare tire removal device (straps and plastic piece that levers the lower tailgate section):
__________________
Become a BMW CCA member! Click HERE to join and feel free to use my BMW CCA member #191509 as a referral.

Last edited by Qsilver7; 04-02-2020 at 07:37 PM.
|
|
#5
04-02-2020, 07:31 PM
|
|||
|
|||
|
Quote:
__________________
2005 X5 E53, 167k Miles: Kenwood DNX893S Head Unit, Mud Flaps (Rear Only) , Rim Shopping(WIP), Full Spectrum RGB Halos,
|
|
#6
04-02-2020, 07:41 PM
|
||||
|
||||
|
Quote:
 ...no problem. And in most cases (sometimes not)...you can also tell the quantity of the hardware required...just look down at the part number index below the diagram...theres usually a QTY column or the info is listed. ...no problem. And in most cases (sometimes not)...you can also tell the quantity of the hardware required...just look down at the part number index below the diagram...theres usually a QTY column or the info is listed.The only time this can be off is if a particular hardware is used in multiple locations within that diagram. In those situations it may add up the sum of all of the hardware...or it may just list xxx because the quantity needed may depends on which piece you are looking to secure.
__________________
Become a BMW CCA member! Click HERE to join and feel free to use my BMW CCA member #191509 as a referral.
|
|
| Bookmarks |
|
|
|
|


 Linear Mode


