
|
|
|
|
||||||||||
| Xoutpost server transfer and maintenance is occurring.... |
| Xoutpost is currently undergoing a planned server migration.... stay tuned for new developments.... sincerely, the management |
 |
|
|
LinkBack | Thread Tools | Display Modes |
|
#1
 02-28-2009, 09:06 PM
|
||||
|
||||
|
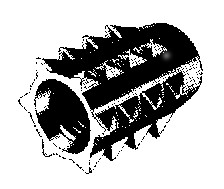
How to install the Skid Plate
 Also, does anybody have a fix for those that may have drilled to big of a hole . 

|
| Sponsored Links | |
|
|
|
|
#2
02-28-2009, 09:54 PM
|
||||
|
||||
|
I have a fix. Knurled tapered inserts available at Orchard Supply in the specialty hardware bins. The instructions provided with the skid plate specify a hole too big for the well nuts they provide.
|
|
#5
03-01-2009, 05:24 AM
|
||||
|
||||
|
I went to Orchard Supply and picked up some knurled inserts and screws. You can find them in the bins where automotive, closet, window, grommets, etc. are located. They look like this (1/4 ~ 3/8"):
 Screws should be about 1" long if I remember correctly. Test them out with the inserts and match the threads. Make sure the holes are smaller than the inserts. Use a pair of pliers to sink them in the bumper snug. This method worked great for me and the skid plate is totally secure. I'm confident it will not come loose (unlike many other members here who used the OEM hardware and have problems) You can use the decorative caps with the new inserts:  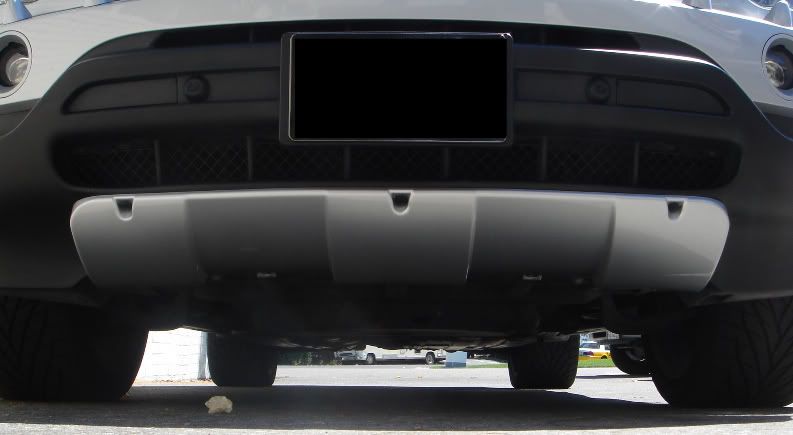 Good luck on the install.
|
|
#6
03-01-2009, 11:47 AM
|
||||
|
||||
|
You are the man....
 thanks a million!!! thanks a million!!! One more thing, I have a 2006 Sterling Gray X5 4.4i and I was thinking of painting the skid plate this same colour. Do you think it would disappear under the black bumper? I was going to add the 4.8is rear bumber and wanted to do the skid plate instead of purchasing the much more $$ bumper.  Your thoughts...
|
|
#7
03-01-2009, 12:16 PM
|
|||
|
|||
|
I just installed the skid plate this past week. I ran into a couple of problems. First, the rubber screw inserts for the 3 leading edge attachments do not work as indicated. I drilled a 3/8 inch hole and popped in the blind nut. The blind nut has 3 functions; the lip which keeps it from sliding through the hole, a short (about 3/16 inch) portion that has no threads, and the threaded portion furthest in. The way they are suppose to work is that as you screw in the supplied screw the rubber part that has no threads is suppose to expand and keep the blind nut behind the valance. The problem is that there is a gap between the lip on the blind nut and the inside of the skid plate. So as you turn in the screw the initial response is to pull the blind nut out from the valance and the expanding part expands on the outside of the hole. I found that placing 2 washers between the lip of the nut and the inside of the skid plate took up this space and allowed the blind nut to expand as designed. Unfortunately, because this took me 3 tries to figure this out the sticky tape that holds the lead edge tight to the valance was no longer sticky. So, I made a command decision to super glue the front edge. Otherwise it sags between the 3 front screws and I felt that with the gap the air pressure at 70 -80 mph would put a great deal of pressure on the attachment points. It seems to work and look good at this point. By the way, I had the skid plate painted a semi-gloss aluminum to match the running boards and pedal set. My X5 is titanium silver and this looks pretty good. It is about the color of the truck but not as shiny.
|
|
#8
03-01-2009, 01:08 PM
|
||||
|
||||
|
I think this looks great and I am looking at purchasing one of these for my X5. Just curious, isn't this piece made of plastic/urethane? Not what I would consider good material for a "skid plate".
 I think this is more asthetic than functional.....and it certainly, in my opinion, is an attractive accessory. I think this is more asthetic than functional.....and it certainly, in my opinion, is an attractive accessory.Do you happen to have the P/N for this piece and how much did you end up spending on it, not including the paint, which I will do myself. Am thinking of painting it Titanium to match the grill and hood inserts on my Highland Green Metallic 4.4i. I would just go with silver, but there is no other silver anywhere else on the vehicle. Really appreciate the installation tips.
__________________
D. Jeff Gomon 2005 X5 4.4i Sport- Highland Green Metallic / Natur 2005 330ci ZHP- Imola Red / Alcantara 1991 ///M5 - Alpine White / Black 1970 BMW 2002 - Red / Tobacco "It's not how fast you drive, it's how you drive fast!"
|
|
#9
03-01-2009, 03:04 PM
|
||||
|
||||
|
I used OEM hardware and had no problems, I just added crazy glue to the 3M tape attached to the lip for additional grip. OEM part # is(82-11-0-021-339 FRONT SPOILER) BMW has it listed as front spoiler but it is the decorative skid plate. I paid $180 including Titanium Silver paint (you can't go wrong with this color it will complement any body color). When you drill the holes use 2 sizes smaller than what the intallation guide sez'. Good luck and keep us posted if you run into problems. You also can apply windshield glue on the inner lip of the plate for maximum grip and seal.
__________________
..................  The Marines already have a few good men ...............The Navy CORPSMAN 
|
|
#10
03-01-2009, 03:22 PM
|
|||
|
|||
|
there is no comparison between the whole bumper spoiler kit and the front skid plate. your x would look 100 times better with the kit.
__________________
2002 X5 3.0 Siena Red Premium, Cold Weather, Rear Climate Packages, 19" Wheels Aluminum Running Boards, Clear Tail Lights, Clear Side Markers Titanium Kidney Grills, Titanium Trunk Lid, Xenon Headlights 4.6is X5 exhausts, 35% Tint, Aluminum Pedals 2005 530I Mystic Blue Premium Package, Sport Package, Xenon Headlights 18" Sport Wheels, 35% Tint all around Mods to come: M-Tech Front Bumper, M5 Side Skirts, M5 Rear Bumper Quad Exhausts, Style 172 19" Wheels
|
|
| Bookmarks |
|
|
|
|


 Linear Mode


