
|
|
|
|
||||||||||
| Xoutpost server transfer and maintenance is occurring.... |
| Xoutpost is currently undergoing a planned server migration.... stay tuned for new developments.... sincerely, the management |
 |
|
|
LinkBack | Thread Tools | Display Modes |
|
#1
 06-10-2009, 12:06 AM
|
||||
|
||||
|
LED tail light DIY
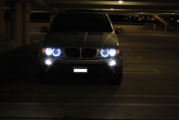
 -Step One: pop out reflectors on both sides to reveal the screws, and remove them 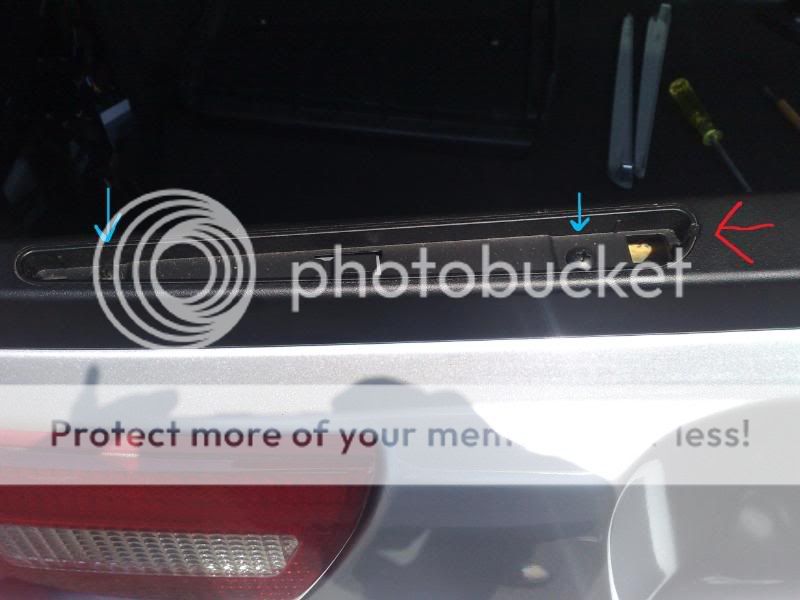 - Step two: pop out plastic caps to reveal two more screws, and remove them as well 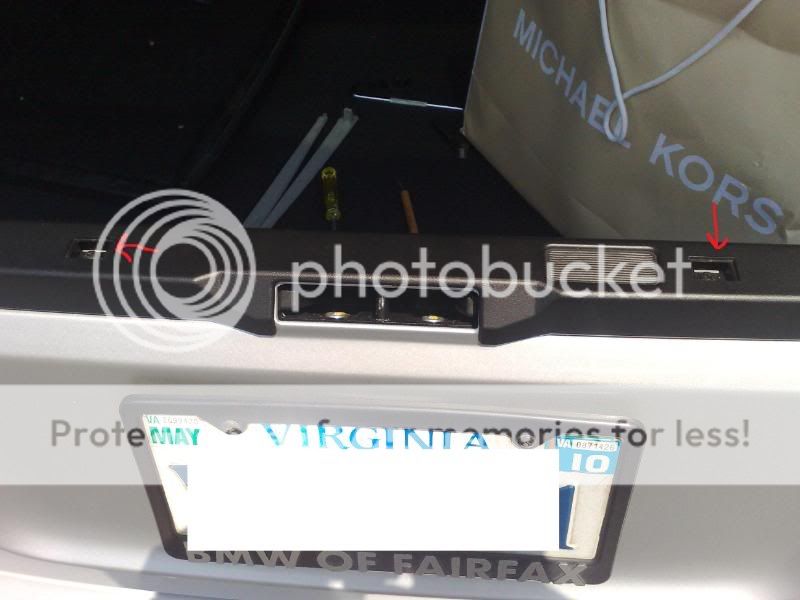 - Step three: open lower trunk lid and pop out the black plastic covering. you can start at the arrows or the opposite side, i found the arrows easier. 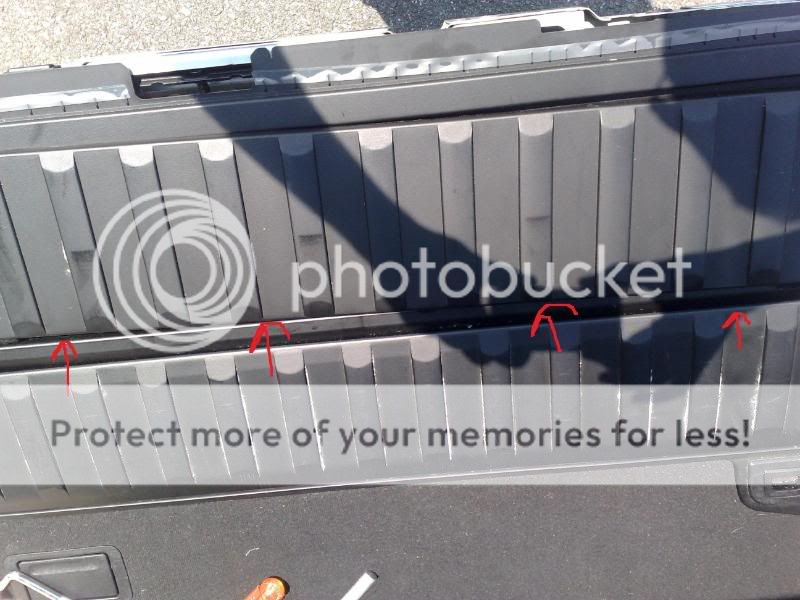 be careful not to break the plastic tabs! 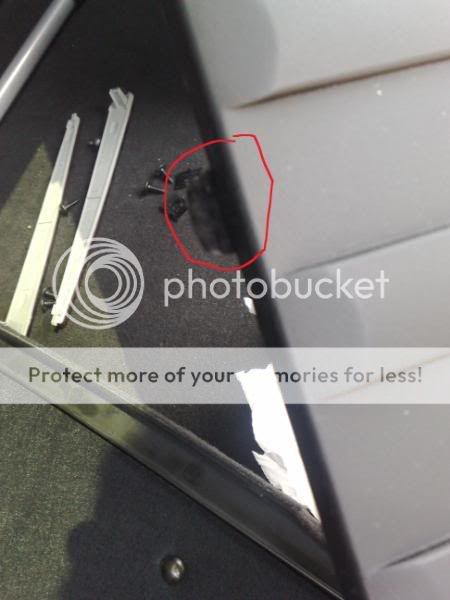 - step four: once the plastic covering is removed, begin to remove the bolts holding the trim/insulation. you do not have to remove the insulation. 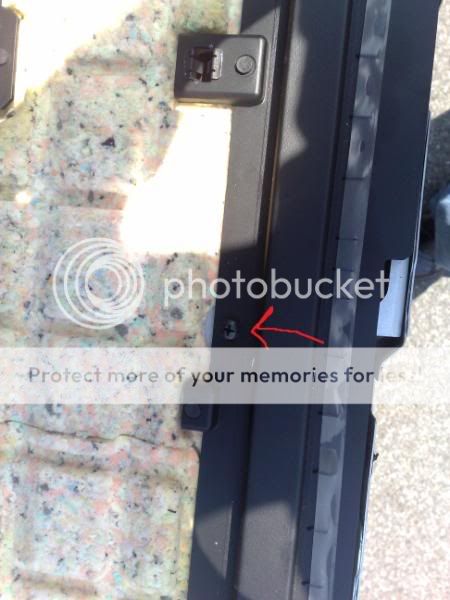 push the other plastic part up to reveal more bolts to remove: 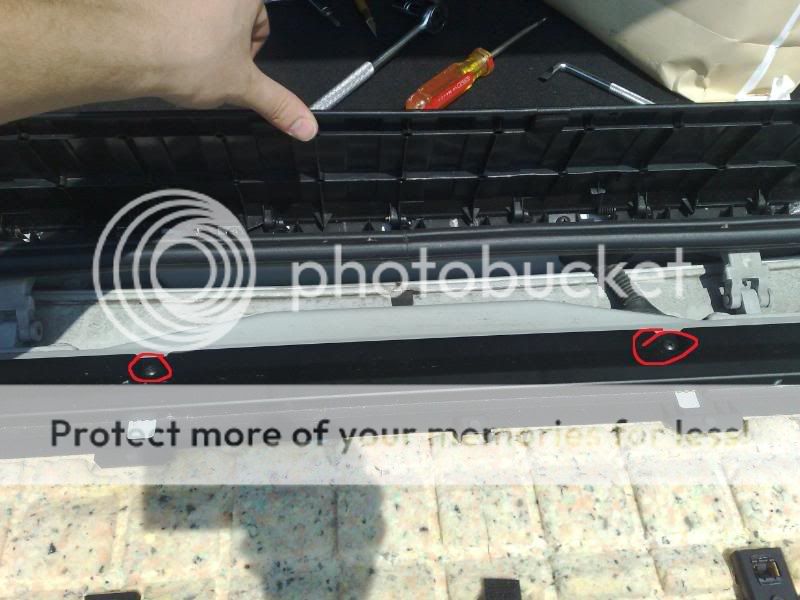 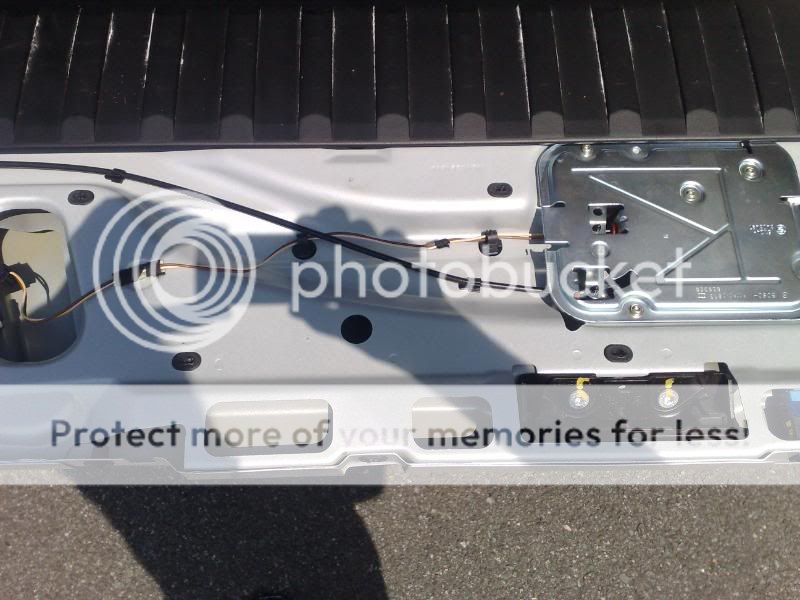 -step five: remove the three bolts holding the cargo tail lights, and unplug the connector for the reverse light. dont forget to remove the reverse bulb and put it in your new unit (and rear foglight bulb for european models) 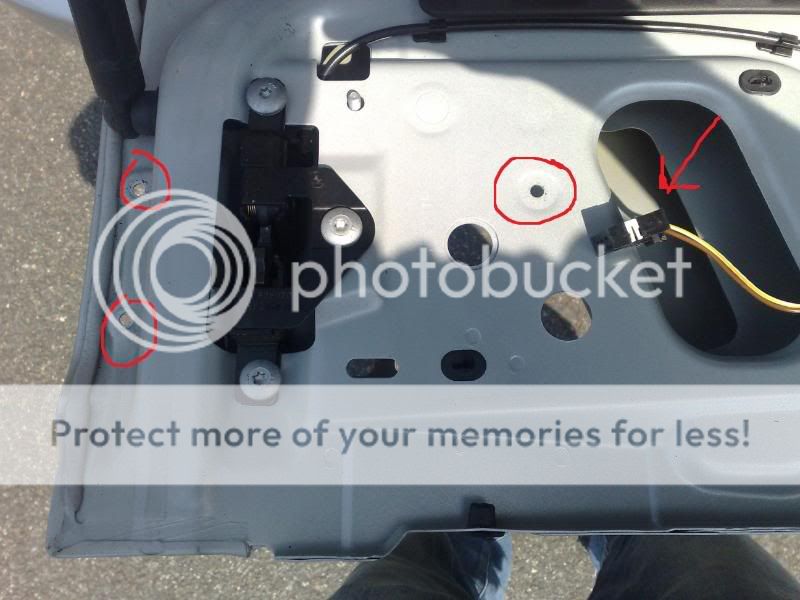 reattach everything and test to make sure the reverse lights work before putting everything back. 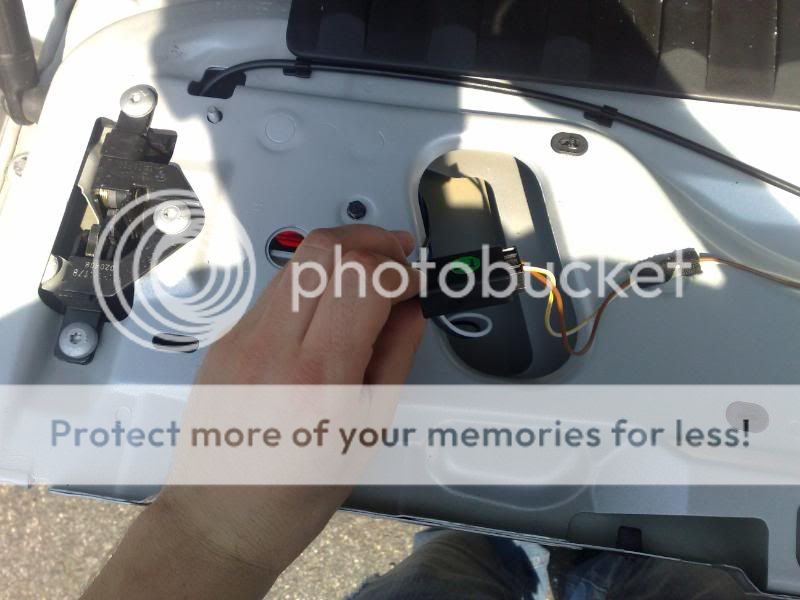 step 6: remove three bolts holding the tail light in and connector, and replace with the new sonar led tail lights. don't forget to put in your turn signal bulb (only bulb you will need). and if you have a cd changer/nav/amp on the drivers side be careful not to let the bolt drop, its a hassle to get it out. 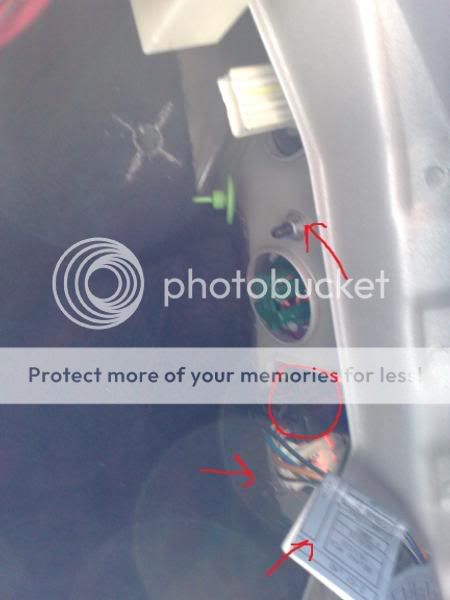 OEM unit to give you a better idea of what three need to be removed. 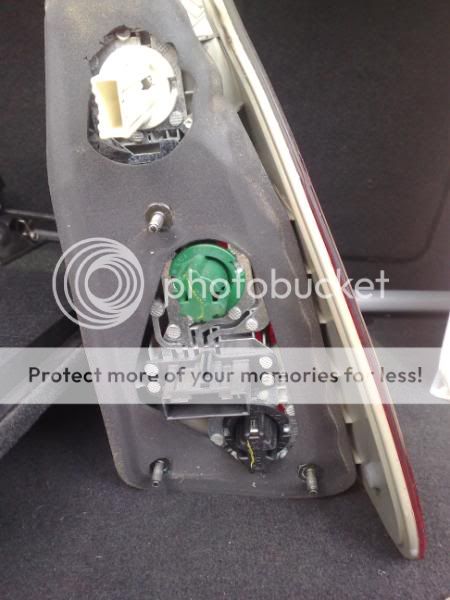 Test to make sure everything works, and your all set! A few things to look out for: -damage to the tail lights (mine as well as another members arrived chipped) -LEDs do not flicker (shouldnt happen on models 02 or before, for later models a capacitor is needed) -LEDs light up! (the pins in the LED connector might not all be exposed, causing the unit not to work. I also had this issue as well) If you do have any issues, the sellers usually have great service and will ship out new units (hopefully) lol. Step 7: ENJOY your new, updated look
__________________
___________________    ___________________ 2002 BMW X5 3.0i ----sold---- 2008 BMW X5 3.0si 2010 BMW 335i M Sports Package & BMW Performance Kit

|
| Sponsored Links | |
|
|
|
|
#2
06-10-2009, 03:12 AM
|
||||
|
||||
|
mt,
Very nice write up. Well explained with good pics Q: How do you remove the small plastic caps in pic 2 without damaging them? Would have been nice to see cose up pics of the final product (on & off). Foomph
__________________
2002 - 3.0i - Topaz Blue - Beige - Samana Beige Go hard or go home or go hard going home
|
|
#5
06-10-2009, 01:27 PM
|
||||
|
||||
|
and the expert speaks...
__________________
 "Lapit mga kaibigan at makinig kayo, ako'y may dala-dalang balita galing sa bayan ko Nais kong ipamahagi ang mga kwento at mga pangyayaring nagaganap sa lupang ipinangako..."
|
|
#6
06-10-2009, 02:36 PM
|
||||
|
||||
|
Quote:
__________________
BMW 1M 2012 - Current Jeep Grand Cherokee Limited 2011 - Current BMW E93 330i Convertible 2009 - Sold BMW E46 320i 2004 - Sold BMW X5 4.4i 2002 - Sold VW Golf GTI 2000 - Sold BMW 740i 1996 - Sold
|
|
#7
06-10-2009, 03:57 PM
|
||||
|
||||
|
haha tom your right i did notice that. but i found it easier to work with everything out of the way, it only took like 2 extra minutes
 and x foomph, i had those two small caps removed with this tool i found in my tool box (i don't even know what to call it). it looked like a pocket knife and had like 15 different pieces of metal which got thinner and thinner. i used one of the thinnest ones to pop the two caps out. so i guess just find something really thin. the reason there is no pictures is because i received a defective unit (one chipped and one didnt work at all) now i have the chipped LED tailight in and the OEM one on the right, so its ghetto  . i'll take some pictures when the new unit arrives. . i'll take some pictures when the new unit arrives.
__________________
___________________ ___________________ 2002 BMW X5 3.0i ----sold---- 2008 BMW X5 3.0si 2010 BMW 335i M Sports Package & BMW Performance Kit
|
|
#8
06-10-2009, 05:08 PM
|
||||
|
||||
|
Quote:
Feeler gauge - Wikipedia, the free encyclopedia 
__________________
 Xoutpost.com - where you come for the information but stay for the friendships
|
|
#9
06-10-2009, 05:13 PM
|
||||
|
||||
|
Quote:
wow good call haha. i thought my description made no sense. thanks
__________________
___________________ ___________________ 2002 BMW X5 3.0i ----sold---- 2008 BMW X5 3.0si 2010 BMW 335i M Sports Package & BMW Performance Kit
|
|
| Bookmarks |
|
|
|
|


 Linear Mode


