
|
|
|
|
||||||||||
| Xoutpost server transfer and maintenance is occurring.... |
| Xoutpost is currently undergoing a planned server migration.... stay tuned for new developments.... sincerely, the management |
 |
|
|
LinkBack | Thread Tools | Display Modes |
|
#1
 09-09-2009, 04:49 AM
|
|||
|
|||
|
DIY - Replacing lower radiator hose and temp sensor
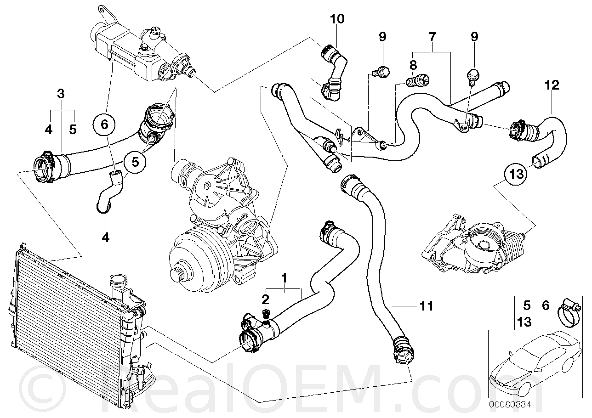
I took some pictures while I was doing this work, and thought I should put together this simple DIY for those who prefer to see how it is done before they start on their own. Working on a cold engine: - I took off the plastic undercover/dirt shield under the engine. This was as easy as removing ten or so 8mm and 10mm bolts. - Drain the coolant from the radiator. (open the blue color drain plug on the driver side of the radiator, and open cap so air can get in.) - Looking down on the passenger side, you can see the electrical connector on top of the temp sensor: 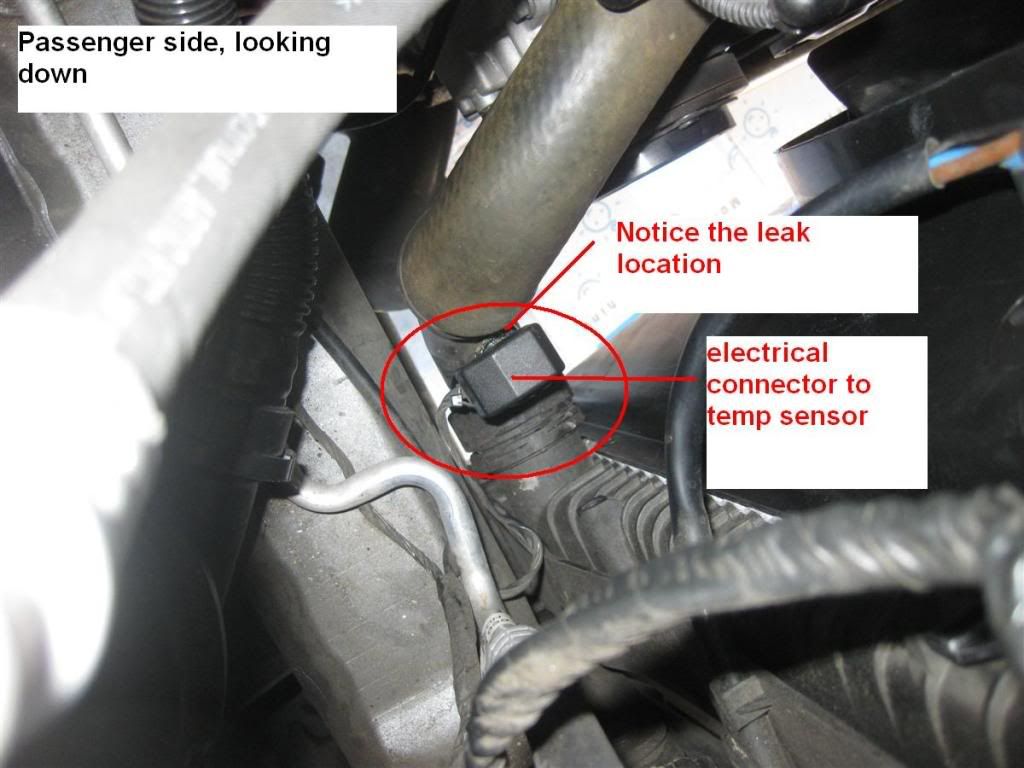 - remove the electrical connector by pushing in on the metal clip and pulling the connector directly upward 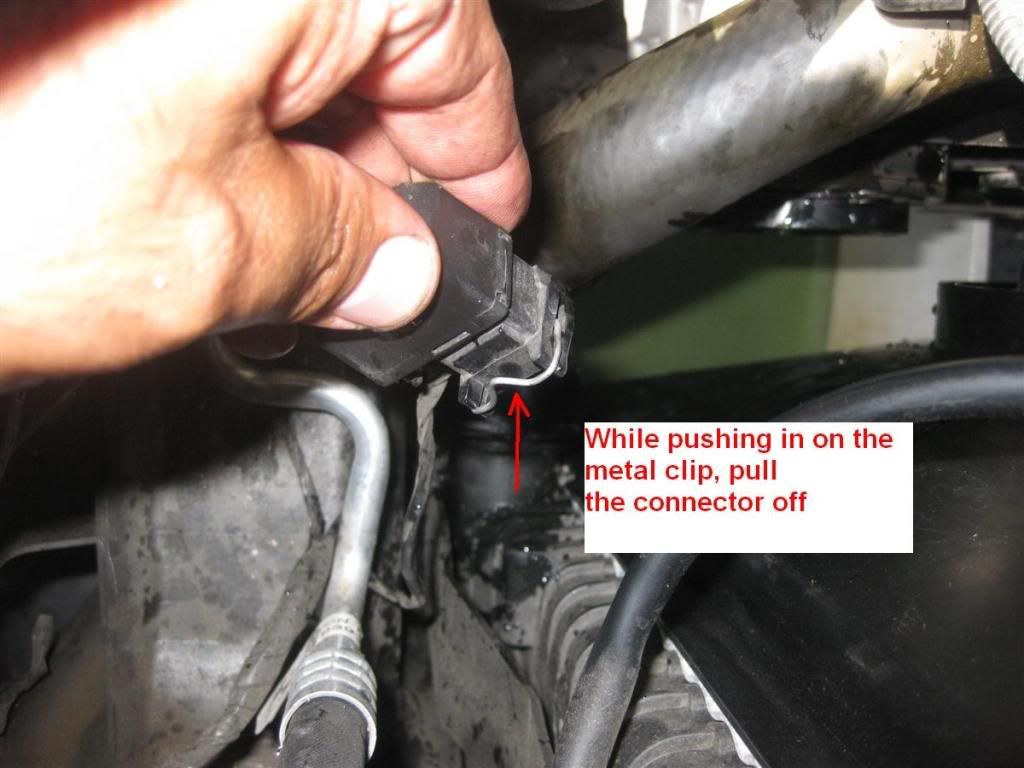 - remove the temp sensor by pushing in on its side clips and pulling/wiggling it directly upward: 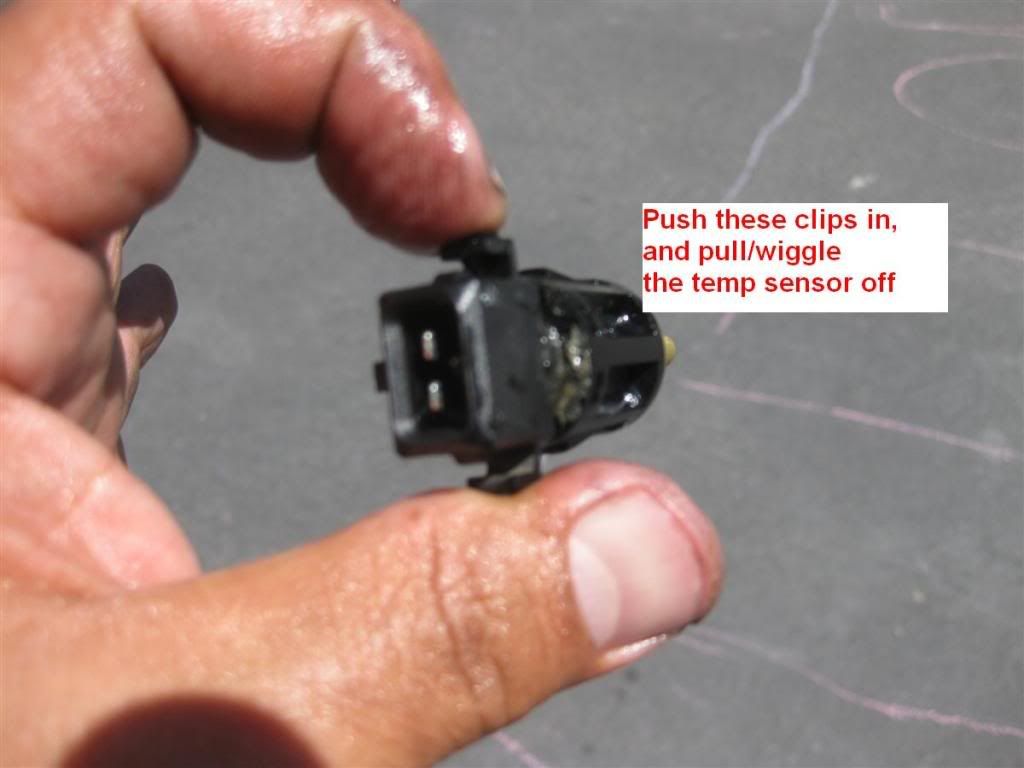 - both ends of the hose have metal clips that help lock it in place. These clips must be pulled off half way to release (using a needle nose pliers or flat screw driver), and then the hose comes off by pulling it directly away from its connection point. I started with the top part (thermostat side) first. This was no problem and the hose came off easily after the metal clip was released.  On the bottom part (radiator side), that was a different story. The hose seemed to have been baked into the radiator... after releasing the metal clip, no amount of pulling/wiggling on it worked. I finally went from the bottom side, and used a couple of screw drivers as levers to pull the damn thing off, all the while worried that I might be damaging the radiator or some other plastic part around it. 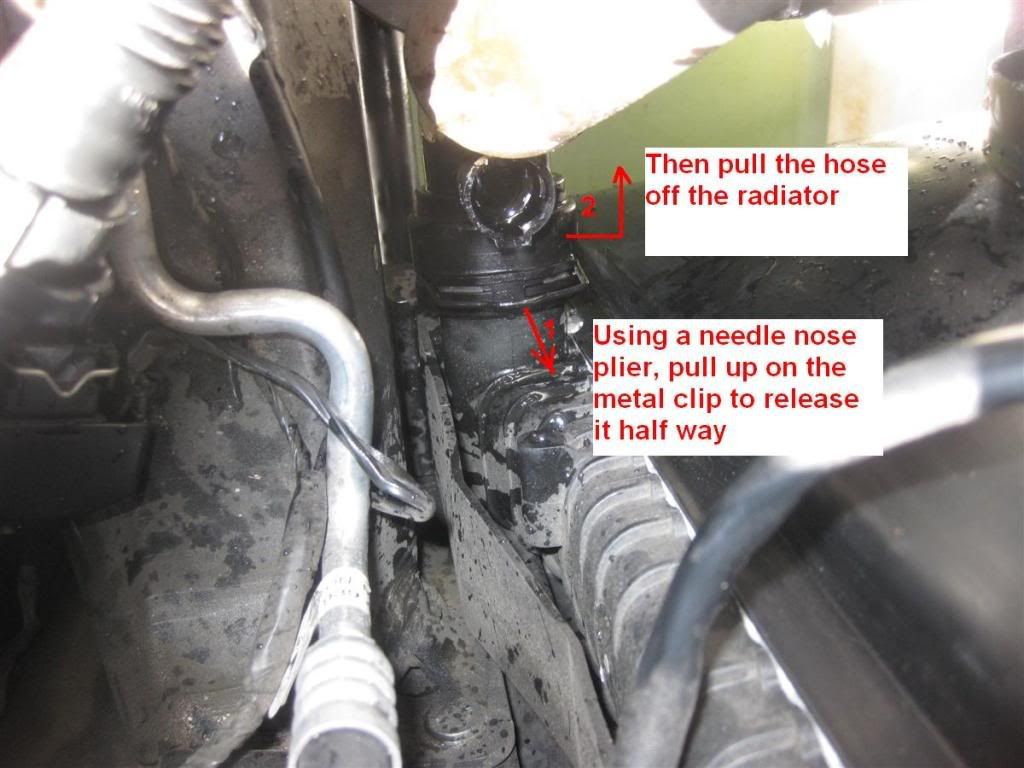 Here are the new parts: 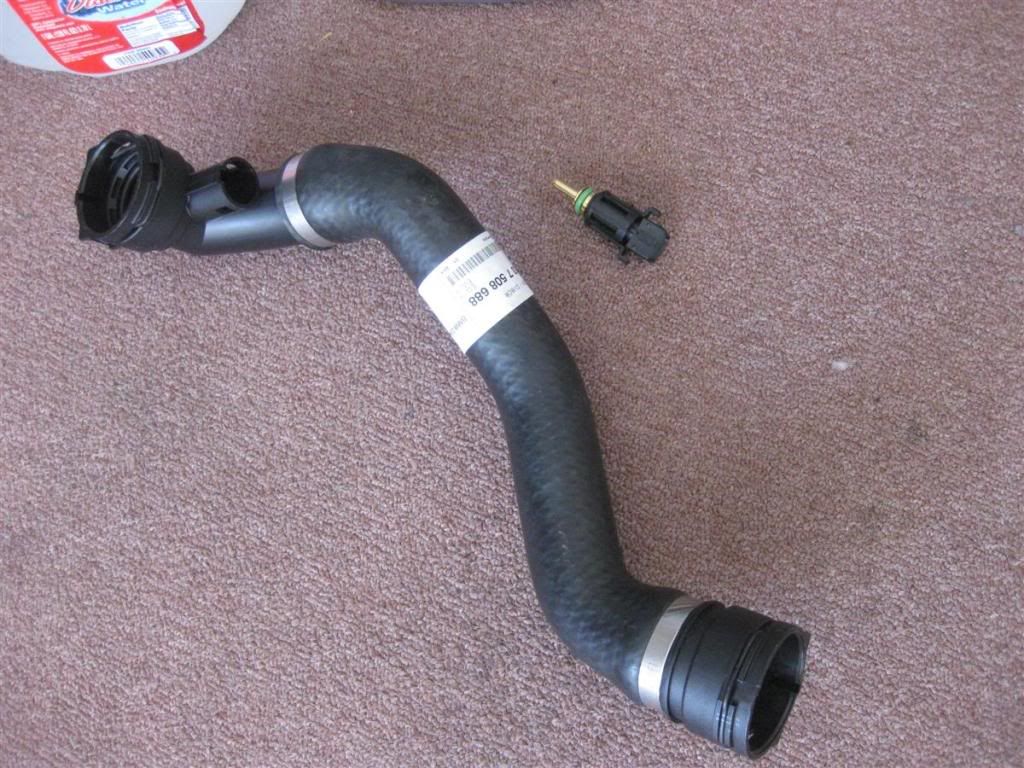 I applied a little bit of fresh coolant to the orings inside the hose, and first connected the top part (thermostat side), followed by the bottom part (radiator side). Pulled the metal clips half way out, then slide the hose all the way in, then push the metal clip back in to lock. 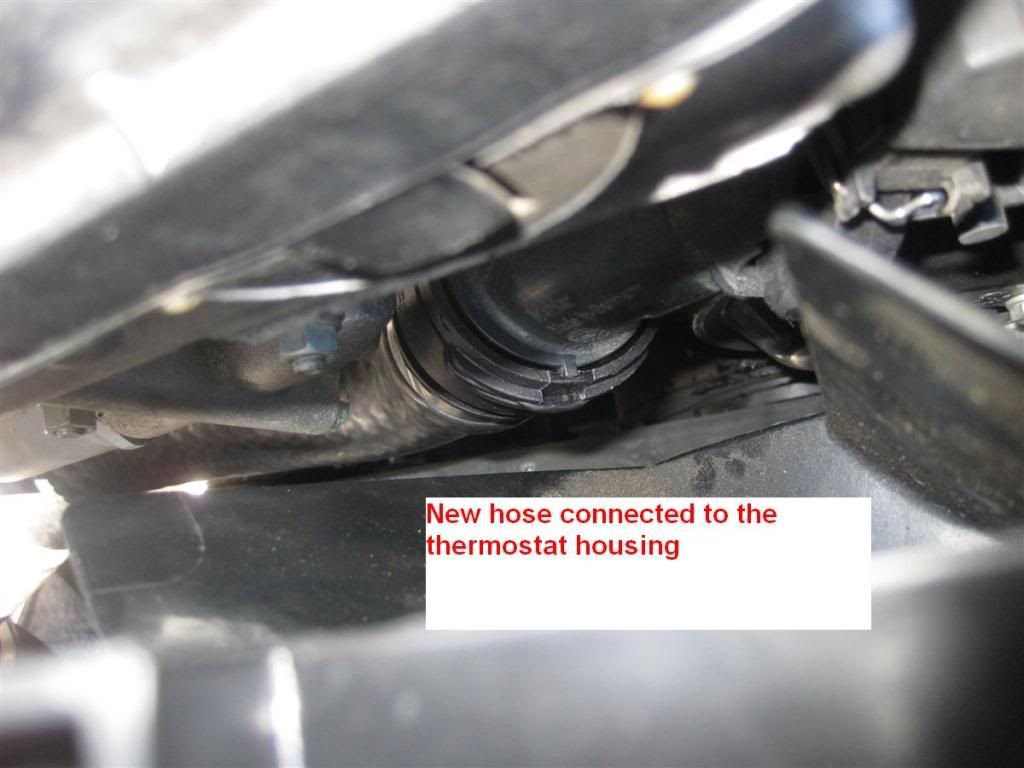 With both ends of the hose connected, I applied a bit of coolant to the oring of the new temp sensor and put it in. Then plugged in its electrical connector. 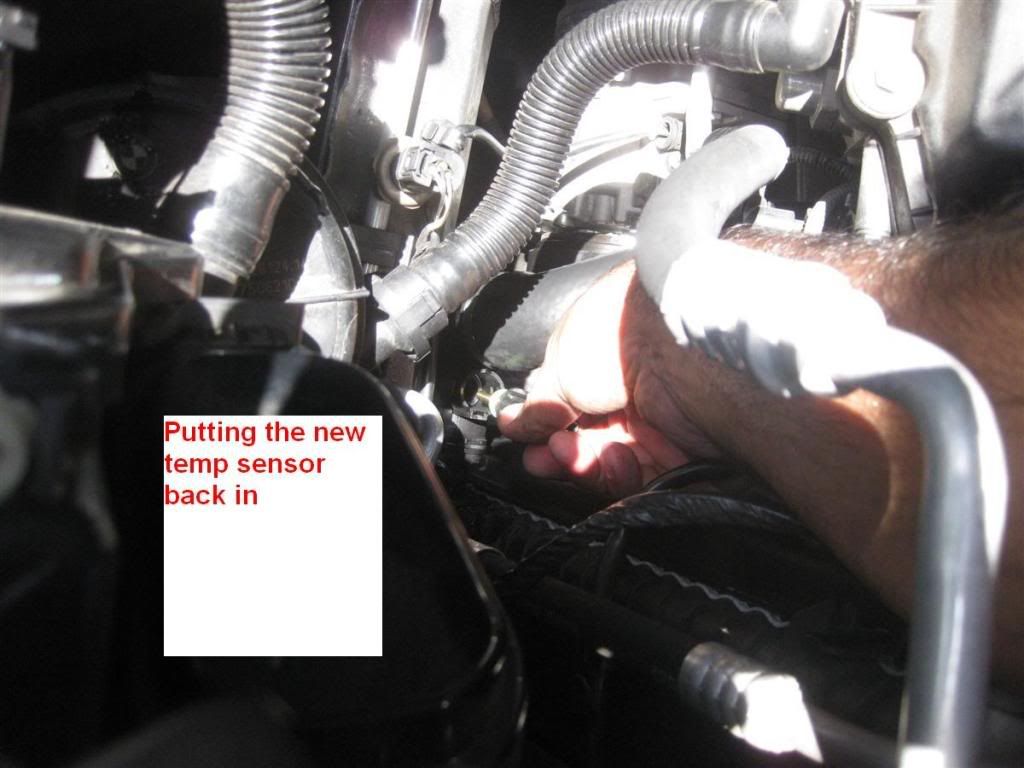 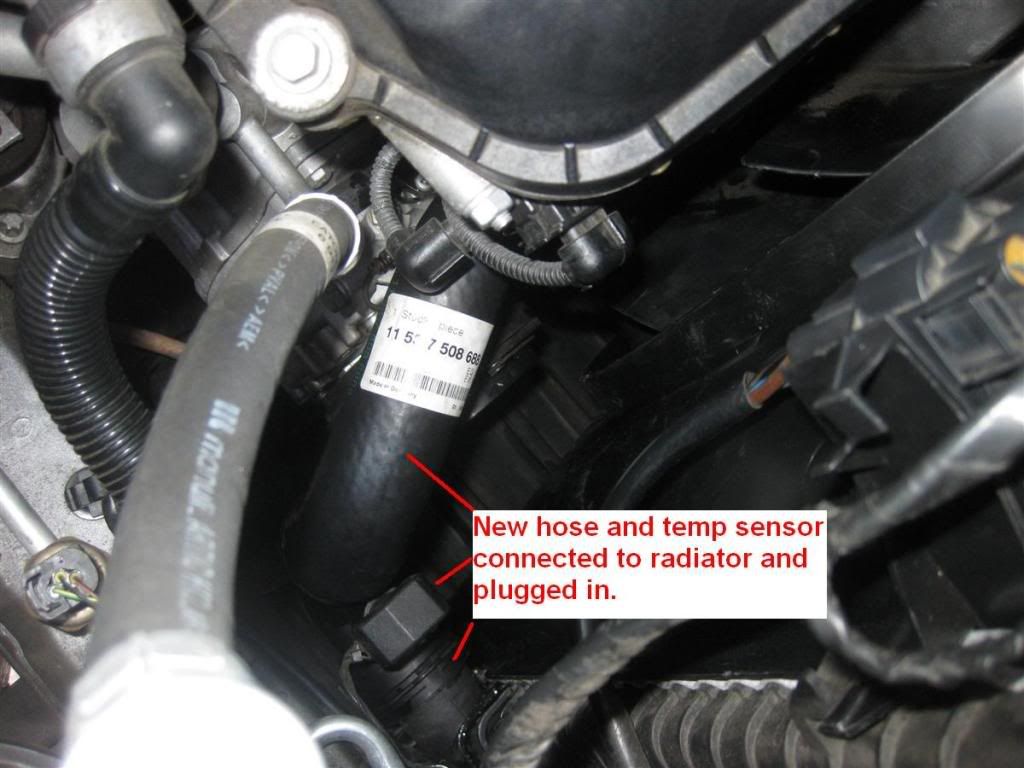 I tried to reach the engine block's coolant drain plug, but I did not have a long enough extension to reach this plug. For now, I settled for just replacing the coolant that is in the radiator (not optimal, I know), until perhaps the next oil change where I will do a complete flush/refill. Anyhow, since some people in other threads had mentioned they couldn't see/find this plug, here is a picture of it and its location: 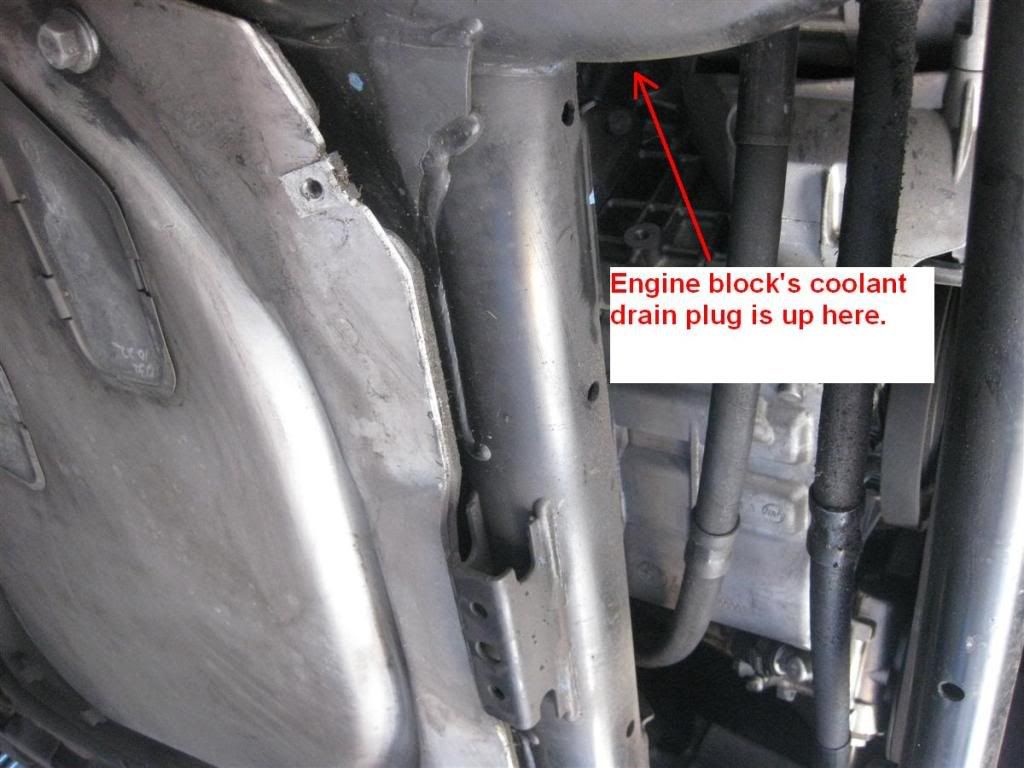 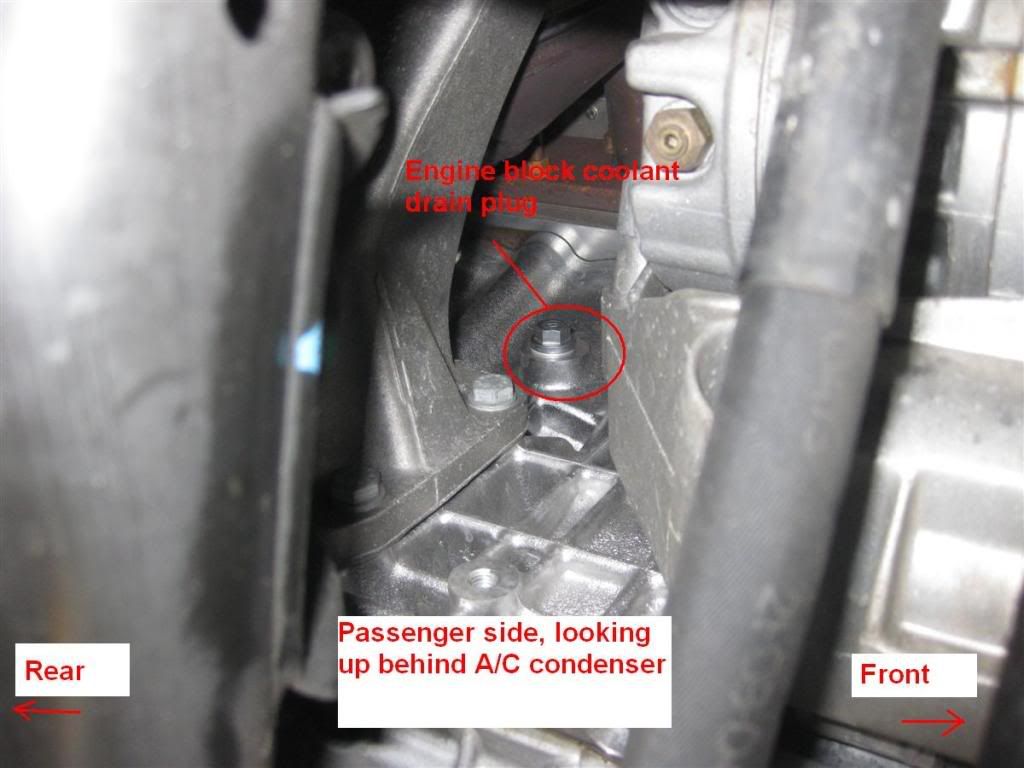 To refill the radiator, I used a mixture of 50/50 of BMW coolant and distilled water ($1.xx per gallon). As per instructions found in other threads on this site: - turn ignition on to 2 (engine not running) - set inside temperature to MAX (this opens up valves to heater core apparently), start the fan (speed set to low) - open the bleeding screw located on the upper hose - start filling with 50/50 solution until no air from bleeding screw (this spit out and wasted a lot of coolant.) -close bleeding screw and complete the fill up as needed. - turn ignition off - and of course, put the bottom under cover/ shield back on. I went for a drive and it was all good. No leaks, no overheating. I will check the coolant level tomorrow morning to make sure it is at the right level. Hope this helps someone out there. Many thanks to Weasel and youry for various inputs to my questions in these threads ( pointers and fan shroud/leak ) Last edited by faz; 09-12-2009 at 07:44 PM. 
|
| Sponsored Links | |
|
|
|
|
#3
09-10-2009, 12:02 AM
|
|||
|
|||
|
Thanks.
Even though it is a pretty straight forward DIY, I always feel better myself if I have seen some pictures before starting any work. The whole thing including drain and refill should not take more than an hour start to finish.
|
|
#4
09-10-2009, 05:31 AM
|
|||
|
|||
|
Faz so you had a coolant leak? I see how did you manage to locate?was it visible without taking the cover off the front of the radiator?I have a mystery leak too , very gradual though half a mug aevery 1000 miles...not located it yet
|
|
#6
09-10-2009, 01:35 PM
|
|||
|
|||
|
Quote:
If it is a leak through that sensor, it is very little and sometimes hard to see. One way to see it if you drive around until it gets hot, then stop (say for lunch) and when you get back to the car, check that location. You should see some fluid on the bottom side of the hose (right below the sensor). At least that was the scenario in my case.
|
|
#7
09-11-2009, 03:04 AM
|
|||
|
|||
|
Thanks faz so I should be able to do a visual inspection of my temp sensor by easily removing the plastic panel under the radiator?excellen post by the way and am hoping it maybe the solution to my mystery coolant loss
|
|
#10
11-26-2013, 01:14 PM
|
||||
|
||||
|
sos
i was getting ready to follow your amazing diy. then i ran into this piece as i removed the dirt cover. looking up from the front on the passenger side, i think i located the origin. please tell me anything you can and advise next steps to take. thanks a mil
|
|
| Bookmarks |
|
|
|
|


 Linear Mode


