|
||||||||
| Xoutpost server transfer and maintenance is occurring.... |
| Xoutpost is currently undergoing a planned server migration.... stay tuned for new developments.... sincerely, the management |
![]() |
|
|
LinkBack | Thread Tools | Display Modes |
|
#21
|
|||
|
|||
|
Quote:
|
| Sponsored Links | |
|
|
|
|
#22
|
|||
|
|||
|
For those of you doing your own scheduled maintenance, how are you resetting your service light?
I know some of the code reader/OBD II diagnostic tools won't reset oil service and scheduled maintence codes, they'll only read diagnostic or "check engine" codes. AND...what does BMW say about doing your own maintenence instead of paying them in regard to voiding the CPO warranty? |
|
#23
|
||||
|
||||
|
BMW can't say anything about you doing your own maintenance, as long as you use warranty-approved fluids and filters, and the work is done correctly. If the work isn't done correctly, then that isn't warranty, it is service redo. And if you did the service yourself, you would be on the hook for any consequential damage.
To reset the service indicator lights, no need for a reset tool. You can do it with the dash buttons. http://www.xoutpost.com/bmw-sav-foru...val-reset.html There are lots of other threads on the subject if you do a search.
__________________
2007 X3 3.0si, 6 MT, Premium, White Retired: 2008 535i, 6 MT, M Sport, Premium, Space Grey 2003 X5 3.0 Steptronic, Premium, Titanium Silver 2002 325xi 5 MT, Steel Grey 2004 Z4 3.0 Premium, Sport, SMG, Maldives Blue |
|
#24
|
|||
|
|||
|
Quote:
Thanks for the great info JCL, great to have people like you on these forums, it's why they exist! |
|
#25
|
|||
|
|||
|
Ok, I finally got a chance to change the oil on the 4.8 and take some pictures. I'll post a full writeup in a few days, but in the meantime I'll post a picture of what you need to get to under the engine. On my X5, there were no covers. In the picture, the drain plug is closer to the front of the truck and the oil filter canister is farther back. In the picture you can see the round silver drain plug at the bottom of the oil filter canister. After draining the oil, you need to remove that drain plug before unscrewing the canister cap. The drain uses a hex socket or key and the canister itself uses a large socket. The filter kit has a crush washer for the oil pan drain and rubber gaskets for the oil canister plug and cap.
__________________
|
|
#26
|
|||
|
|||
|
Quote:
Thank you for the picture, it's really helpful. I'll wait for your write up, I want to do my oil change ASAP. |
|
#27
|
|||
|
|||
|
nicely done! thanks!!! will be doing this soon
|
|
#28
|
|||
|
|||
|
Changed mine today....couple of notes:
The hex bolts are on tight....tighter than you will expect. I would say to make sure you have the proper tools. The filter case nut is a 24mm. It is a plastic housing so a crescent wrench will not work. Make sure your oil bucket is a big one and it comes out in a hurry...5w-30 is a pretty thin oil so it likes to splatter. My 4.8 took 8.2 quarts of Mobil one and could use a quart more.... I changed oil at a gas station through college and that being said....this was pretty easy compared to some. |
|
#29
|
|||
|
|||
|
I changed mine yesterday as well and everything went fairly smooth. Both allen keys are different sizes. make sure you have those on hand first. I don't have the sizes off the top of my head but I will check the next time I am in the garage.
Couper93 is right. I used about 8.75L of oil because the new filter will soak in quite a bit and yes, a big oil container is necessary as it spits out...FAST! |
|
#30
|
|||
|
|||
|
So here's a few more pictures of when I did my oil change. Do this at your own risk, safety first, I'm not responsible if something goes wrong, etc...
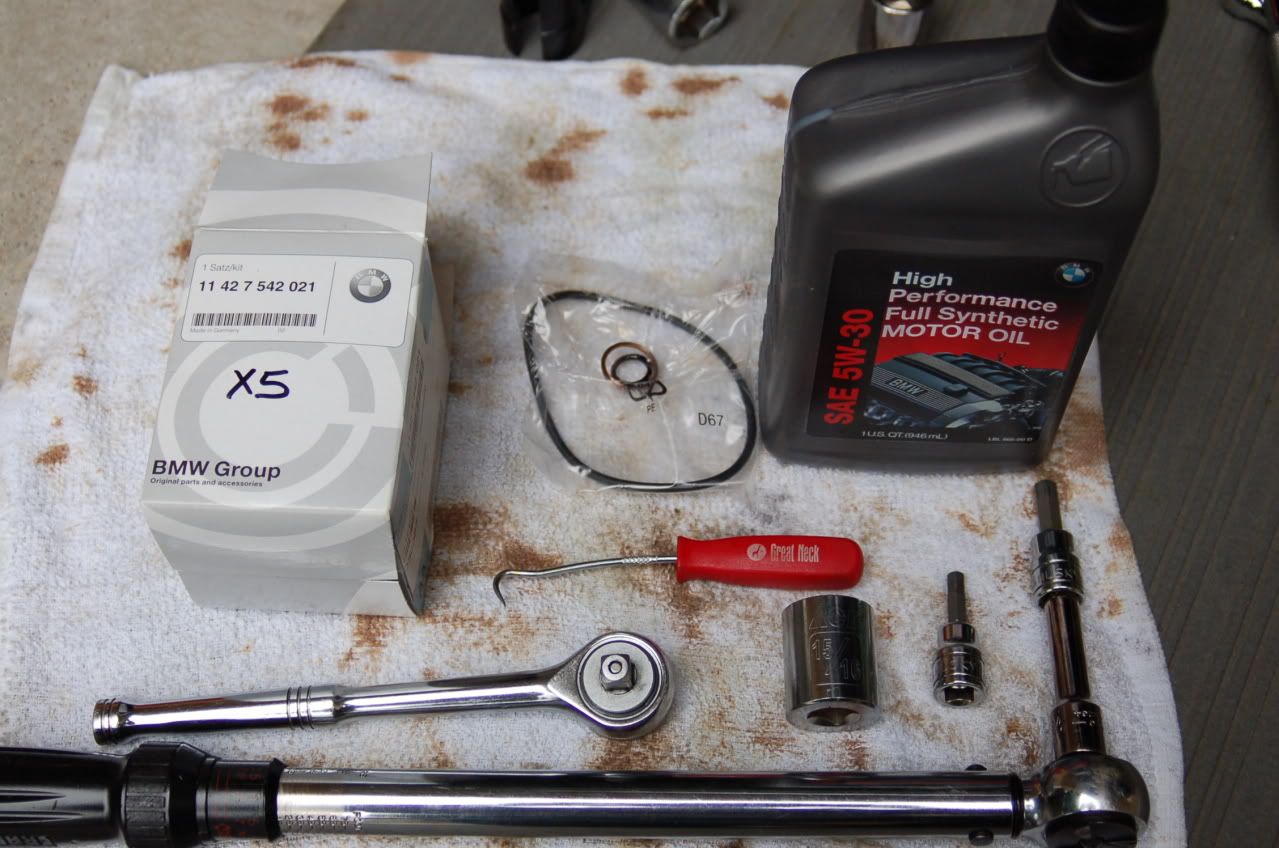
Stuff you'll need. 8mm hex socket for the oil drain plug and a 6mm hex socket for the oil filter drain (not sure if this should be a torx, but the hex worked fine). I used a 15/16 socket for the filter cap although it probably is a 24mm. ![]() Remove the drain plug with the 8mm hex socket ![]() 
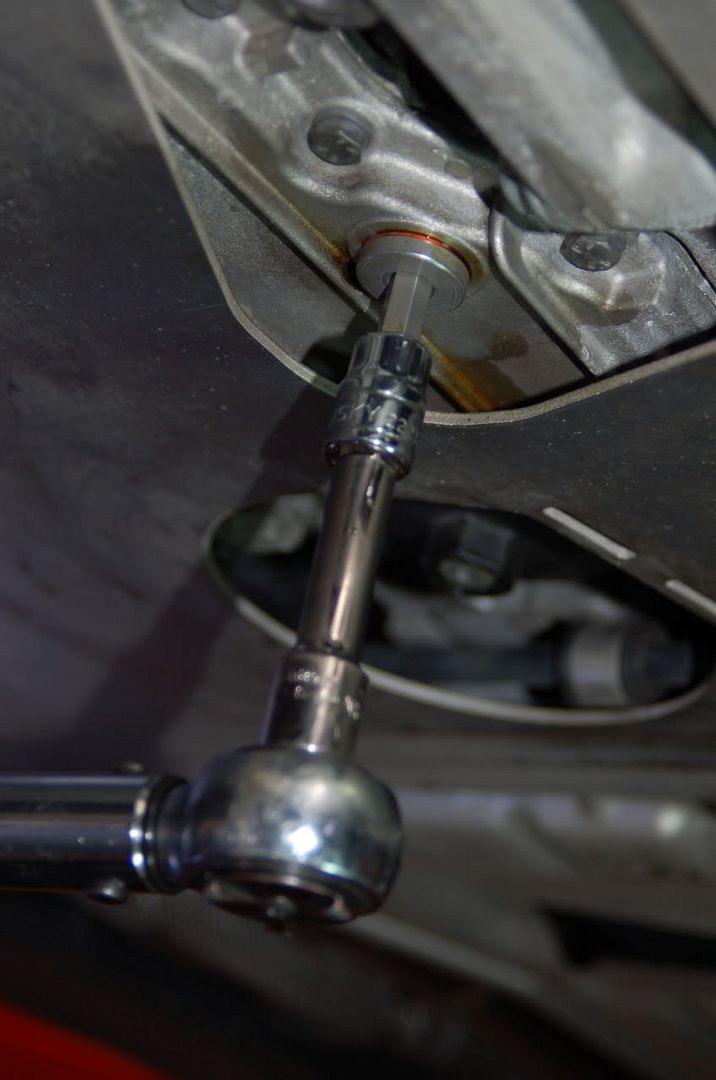
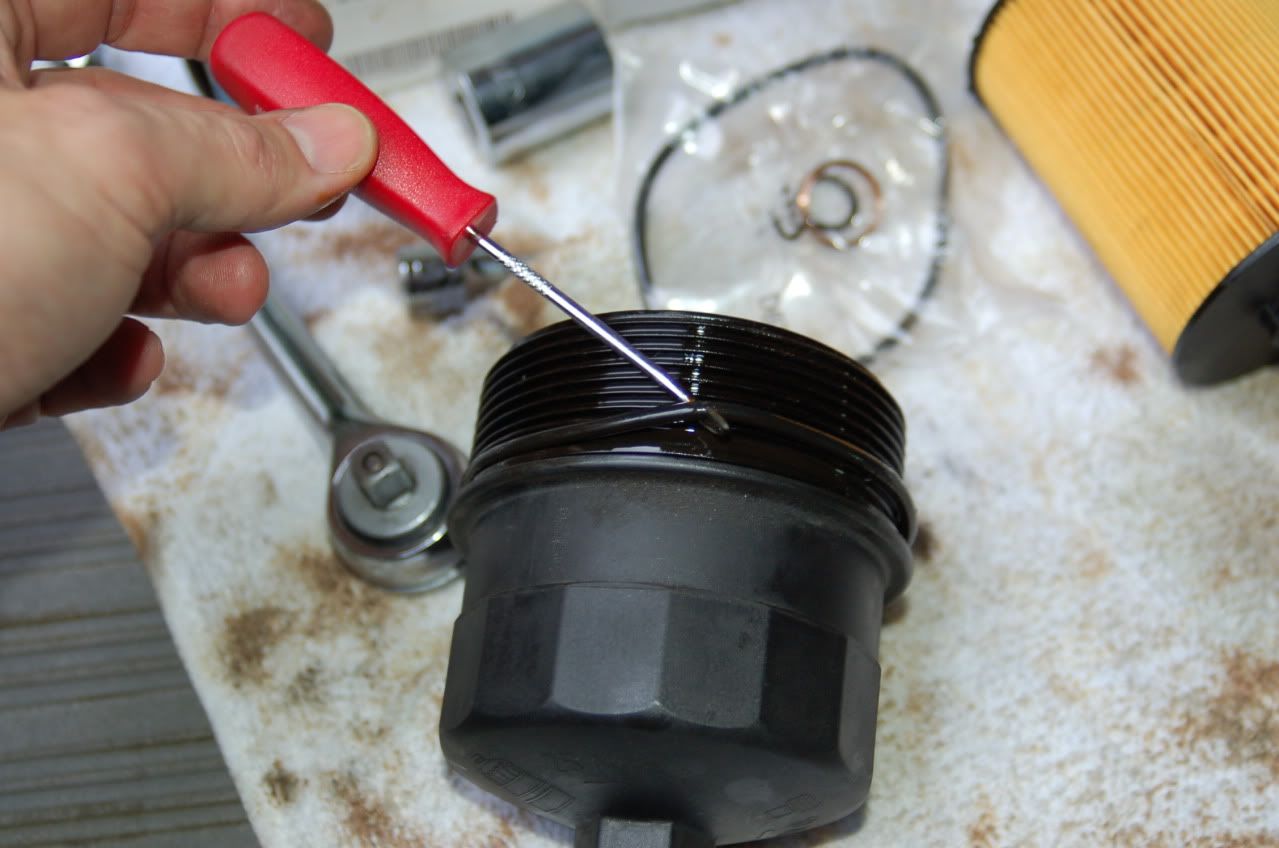
Next, drain the oil filter cannister by removing the silver plug from the bottom of the oil filter "cap". Here's a picture showing that drain plug. ![]() After the small amount of oil drains, replace the plug with a new rubber O-ring which comes in the oil filter kit. Tighten to 10Nm. ![]() 
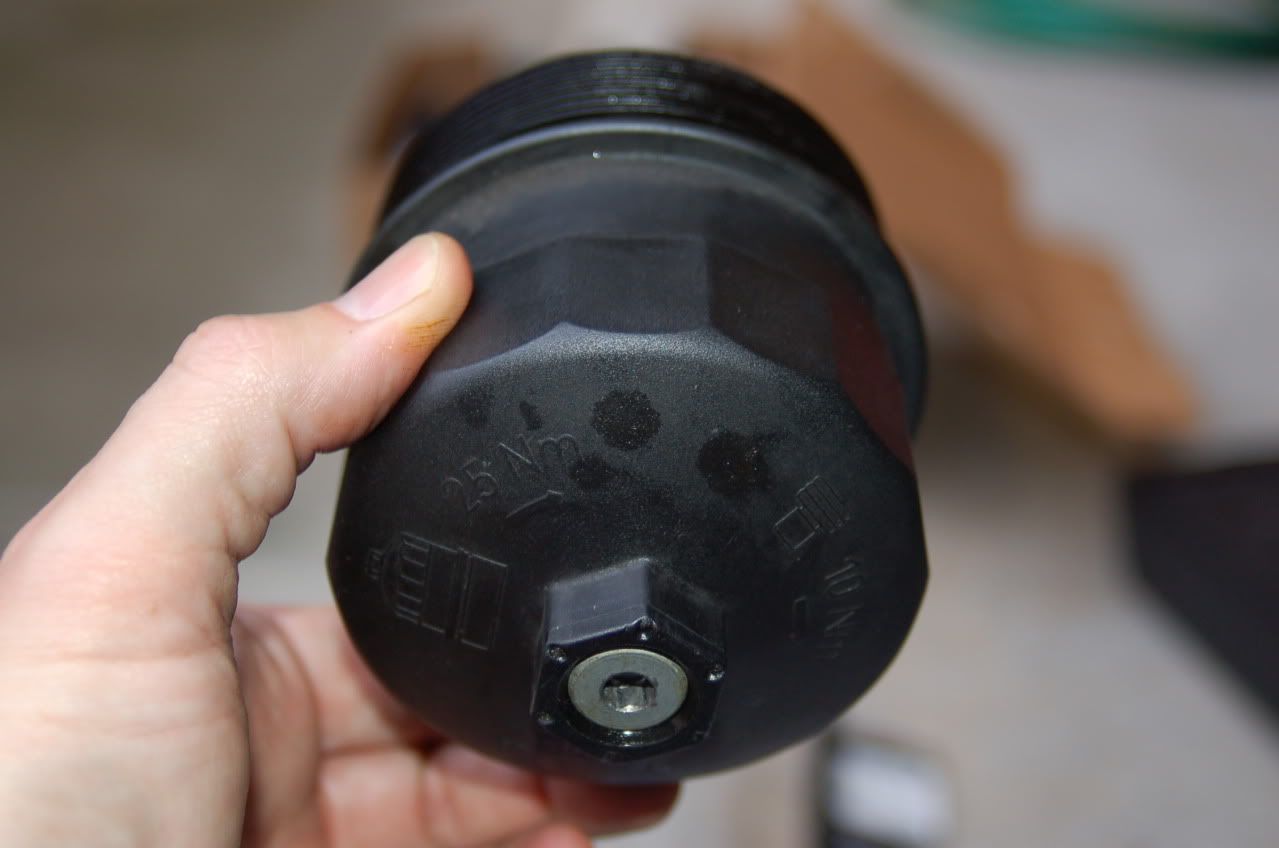
Next, remove the oil filter cap with the 15/16 or 24mm socket. ![]() Pull the oil filter out of the cap. Replace the large rubber gasket, and insert new oil filter. It should snap into place. Reinstall the cap with the oil filter. ![]() 
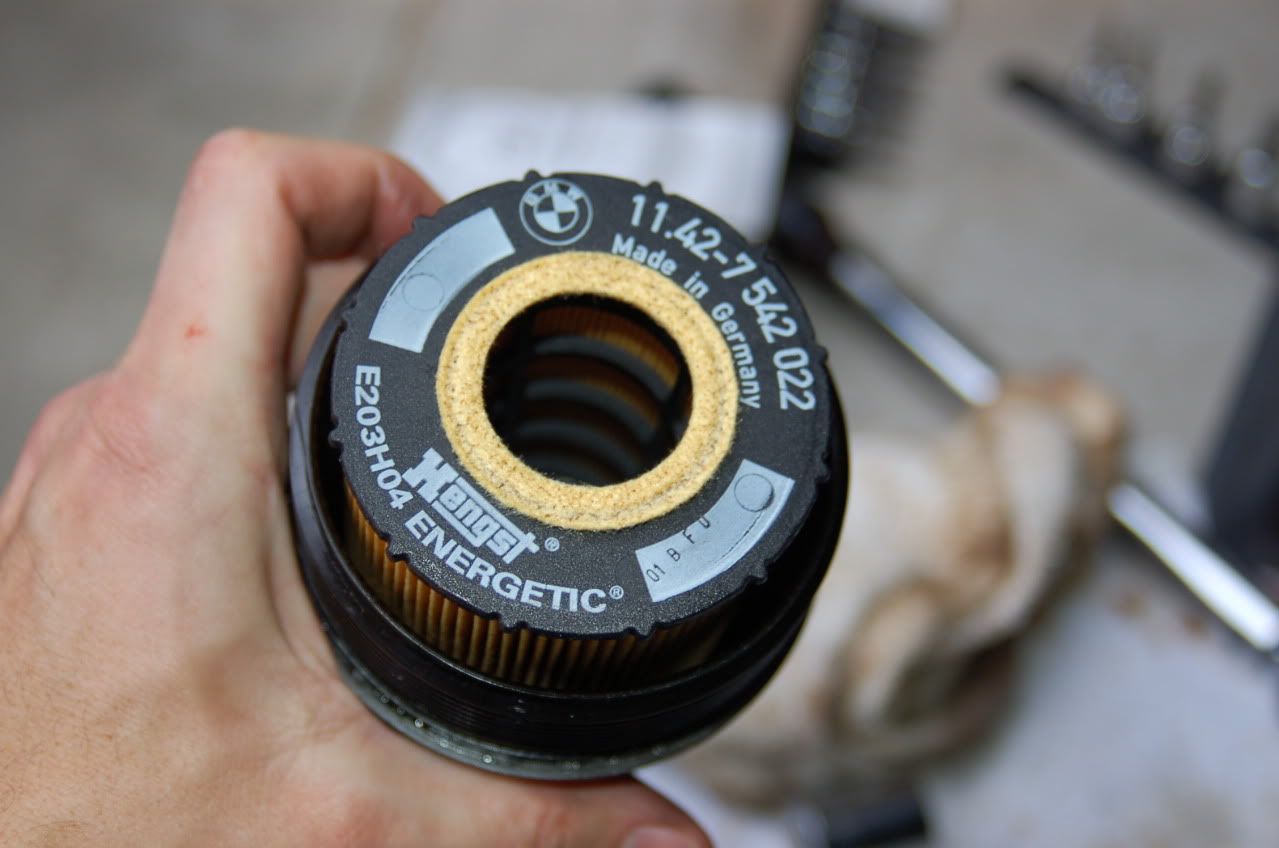
Replacing the gasket on the oil filter cap. ![]() 
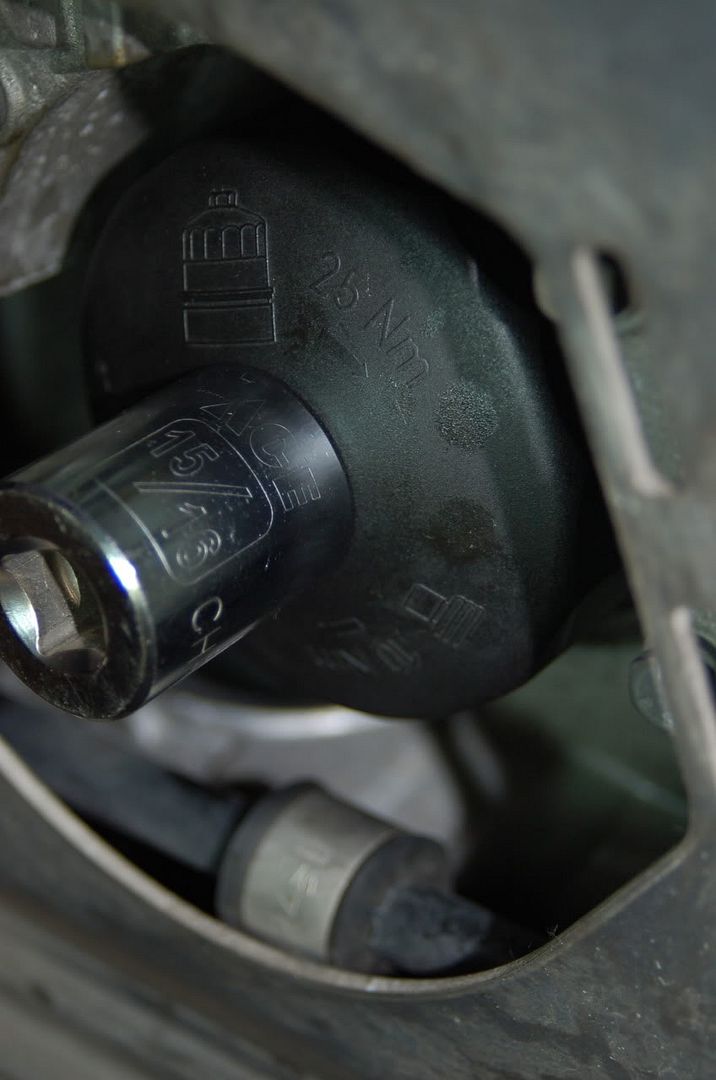
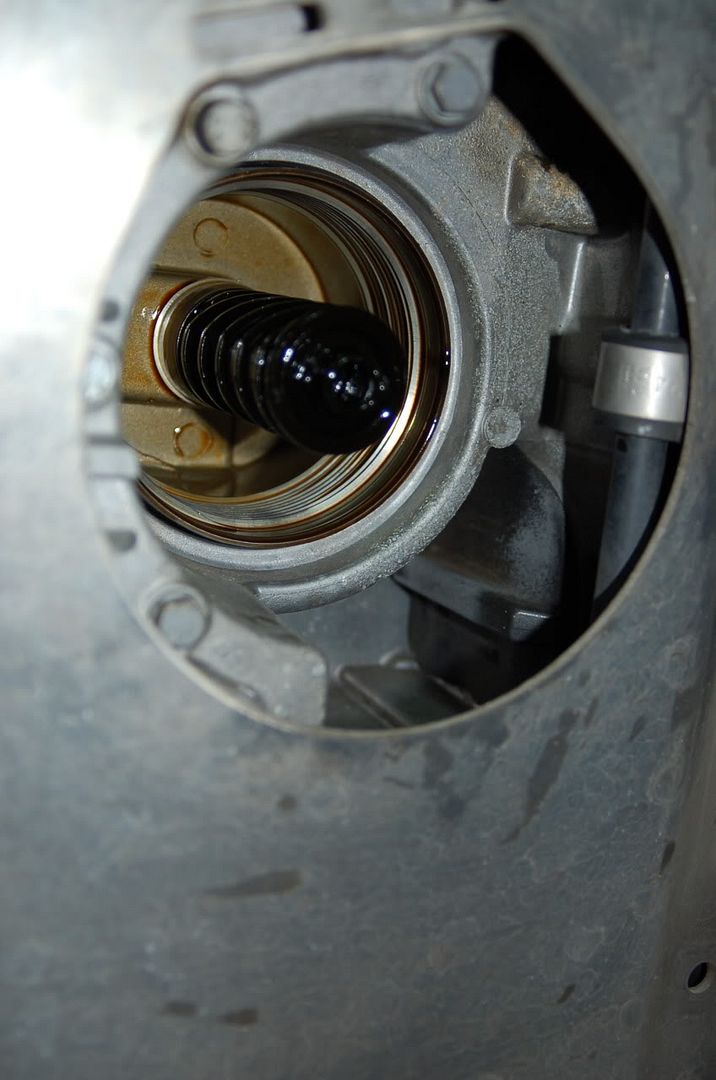
This is where the oil filter cap screws into. ![]() Tighten the cap to 25Nm. Replace the copper crush washer on the oil pan drain plug and tighten to 22 ft-lb. Couldn't find the torque spec, but that should do. Fill with new oil and check the level. It's always easier to add some oil than to remove it. I think I started with 8 liters and added half a liter after measuring.
__________________
Last edited by Xtony; 01-25-2013 at 07:20 PM. |
![]() |
| Bookmarks |
|
|
|
|