
|
|
|
|
||||||||||
| Xoutpost server transfer and maintenance is occurring.... |
| Xoutpost is currently undergoing a planned server migration.... stay tuned for new developments.... sincerely, the management |
 |
|
|
LinkBack | Thread Tools | Display Modes |
|
|
|
#1
 04-13-2011, 06:03 PM
|
||||
|
||||
|
UPDATE #3:
So as this project stands now were about 80% of the way done, the only major remaining part is to install the struts and bags. At this point however i do just want to take a second to point out that this is not a project for the faint of heart as it does require much more work than I had originally anticipated as well as some irreversible modifications. Ride Sensors The fronts were pretty straight forward as there is plenty of room to mount and work around the front suspension. The front sensors were bolted to brackets we fabbed up and welded to the frame just rear of the front axle support mount. The adjustment/measurement arm attaches to the lower control arms. The rears were a bit more of a challenge due to the size of the sensors and the overall tight quarters in the rear. Finally, we decided to go with mounting the sensor on the back side of the upper control arm mounting flange. 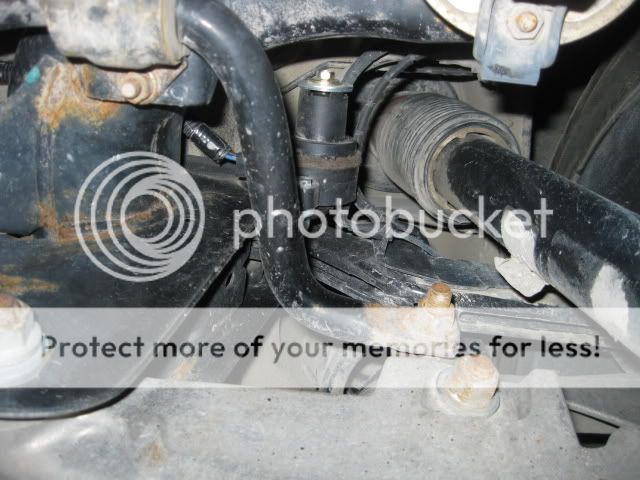 Air The compressed air comes from the compressor through the main line running underneath the passenger side of the vehicle to the rear compartment, into the tank. On the tank is the safety blow off, pressure switch, as well as the main 1/4 line out to feed the valves. Going from the tank, the air first travels through an inline filter and through air driers before getting to the valves or bags. I went ahead and mounted the valves, manifold (with air driers and pressure sensor) and air filter in a pvc box mainly to keep everything neat and out of the way while still in one location. The pressure sensor on the manifold keeps taps on the tank pressure and will automatically switch the display to the tank pressure when it drops below a certain psi. The connector on the top right of the box is the power/ground wires for the air valves. Assembling the pins into that bad boy was a major PITA!! Tank: 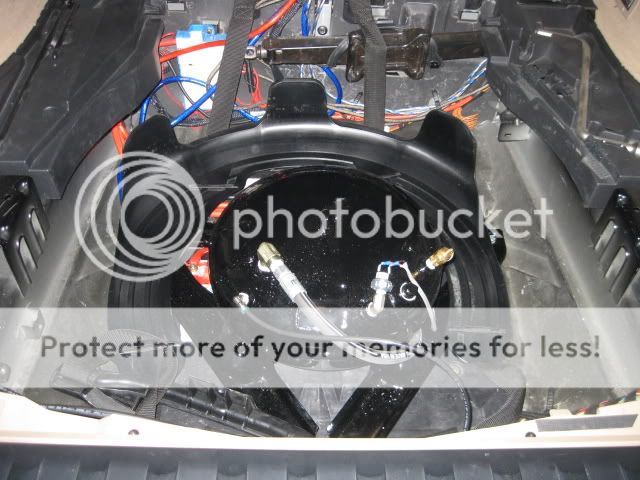 Box: 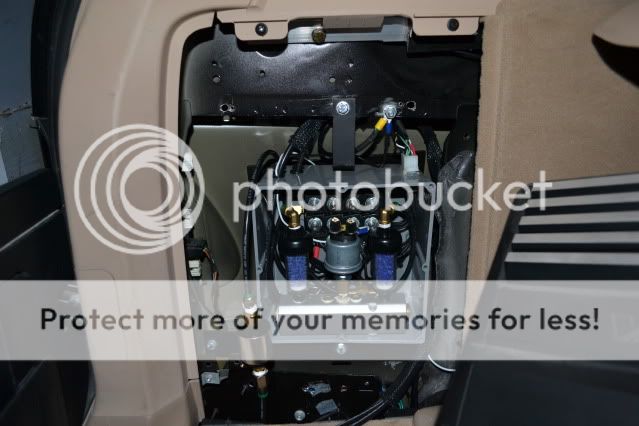 The airlines exit the box through the top and drop down into the spare compartment where they then split. The lines for the rear bags go through the rubber boots above their respective bag, and the fronts follow the same path of the main air line back up front to each strut. Electrical The control unit I have relies solely on the values from the level sensors for automatic ride adjustment, (think BMW's self-leveling), same basic concept. Going into this thing is: 1 - 8 pin harness for valve control 2 - 6 pin harness', 1 for power; the other to connect to the control display. 4 - 3 in one wires which come from each level sensor. I figured the best place to mount the module was behind the glove box in the rack with the rest of the million wire boxes ") . It finally fit comfortably after some hot knife surgery to the rack...(Yes I did take the time to remove it from the vehicle, and yes I removed all of the other modules from the rack, and yes my knuckles weren't to happy by the time it was all back in). . It finally fit comfortably after some hot knife surgery to the rack...(Yes I did take the time to remove it from the vehicle, and yes I removed all of the other modules from the rack, and yes my knuckles weren't to happy by the time it was all back in). Brains: 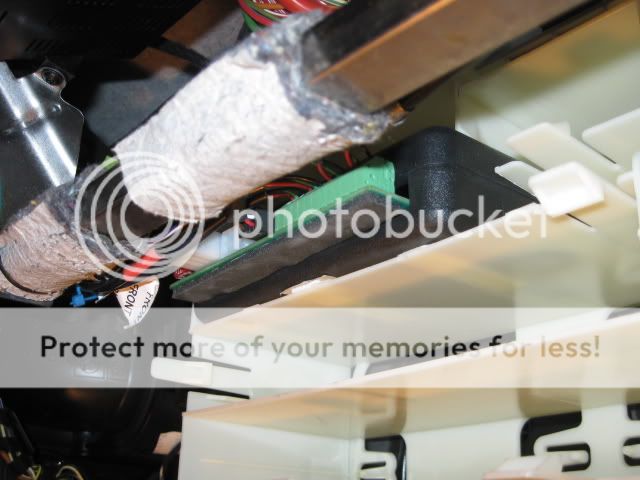 It might be worth mentioning that for both the control unit and the compressor, relays were used. The compressor relay may already be obvious, but if not....it will kill a battery rather quickly. This way it will only run when the key is on. The relay for the "key on" power wire to the control unit was used because I didn't want to start tapping multiple wires unnecessarily. It uses the same signal wire, and dedicated 12v source as the comp. relay but this way does not draw anything off the factory harness wires. That is the majority of the project... Its not an overly difficult project, just there is a lot of tedious little sh*t involved, which consumes most of the time. Last edited by X5SND; 04-13-2011 at 07:49 PM. 
|
|
| Bookmarks |
|
|
|
|


 Hybrid Mode


