
|
|
|
|
||||||||||
| Xoutpost server transfer and maintenance is occurring.... |
| Xoutpost is currently undergoing a planned server migration.... stay tuned for new developments.... sincerely, the management |
 |
|
|
LinkBack | Thread Tools | Display Modes |
|
#1
 05-22-2006, 04:55 AM
|
||||
|
||||
|
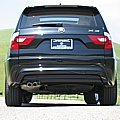
Trailer Hitch Install/Rear Bumper Removal
Does anyone have any instructions on this or maybe a TIS page that shows how to remove the rear bumper? I bought a TIS disc on ebay, but keep getting application errors with it. A screen shot of the TIS page would work. Let me know if you need help doing that. Any help would be appreciated. I will take some good pics while doing the install... Thanks! 
|
| Sponsored Links | |
|
|
|
|
#2
05-22-2006, 10:16 AM
|
||||
|
||||
|
Do you want to DIY for the challenge or to save what the dealer will charge? I am fairly adept with mechanics and such, but I hear this is a real PITA job and doing it was just not appealing. I had a complete hitch with wiring installed for around $500 with no cut knuckles, cursing, fault codes, or throwing of tools. PM me if you want the name of the hitch manufacturer or call around--ask who does Cayenne, Touareg, and X5 installs. Good luck--the X5 is a great towing rig.
__________________
2004 X5 4.4i Sterling Grey/Black Sport Prem 132s/Diamaris Rear Climate OEM Nav/Sirius RBs AngelBrights Roundel Valve Caps, 35% front tint. Sold MArch 2012
|
|
#3
05-22-2006, 04:39 PM
|
||||
|
||||
|
No, I don't necessarily need any more challenges, just want to save money. This is for an X3 and others have said it wasn't too bad for an X3. I have seen some posts for the X5 install and it does look more involved. I believe you have to drop the mufflers and all. Thanks for the comment!
|
|
#4
05-23-2006, 11:14 AM
|
||||
|
||||
|
I've installed a Euro hitch and UK wiring harness which is considerably more complex than the US version due to 13-pin electrics and absence of pre-wiring in UK cars. The hitch part is very straight-forward once you know how to remove the bumper.
To remove the rear bumber cover (assuming the older black unpainted version): 1. Remove the two top plastic covering pieces (approx triangular covers 2" x 3" x 3") at the bottom corners of the rear door. These lever out revealing two screws. Remove these. 2. Lying on your back looking at the underside of the bumper cover, remove the various underside attachments (screws and nuts) at the back of the X3. From memory there are four of these, one is hidden to the side of the rear silencer and hard to get at. You'll need a socket set with an extension bar. Others are obvious. 3. Working on one rear wheel at a time, jack the vehicle and remove the wheel. Chock the front wheels. Remove the two obvious screws that secure the back (bumber cover side) of the wheel arch liner. 4. Bend the liner inwards away from the bumber cover a few inches to reveal 3 additional screws behind the liner that secure the bumper cover to side carrier brackets. One of the three screws is hard to see - look to the top of the bumber side cover to find a vertically driven screw. Remove all three. Refit the wheel and lower the car. 5. Repeat for other rear wheel well 6. Secure rear wheels and lower the car onto it wheels 7. Prepare a support (I used the hitch box) to take the weight of the bumber cover. With help from a friend, pull the bumber cover directly backwards and a little outwards at the sides. This is tricky - mine was clipped-in tight and hard to remove. BE CAREFUL NOT TO DAMAGE REAR PARKING SENSORS. There's about 5 inches of slack in the cables at most. 8. Unclip the Park Distance cables from the sensors, remove the cover to expose the inner metal bumber carrier and you're done. 9. If you have rear mud flaps, you'll need to drill out and remove the pop rivets to get to and behind the wheel arch liner. Hope this helps Best of luck David
|
|
| Bookmarks |
|
|
|
|


 Linear Mode


