
|
|
|
|
||||||||||
| Xoutpost server transfer and maintenance is occurring.... |
| Xoutpost is currently undergoing a planned server migration.... stay tuned for new developments.... sincerely, the management |
 |
|
|
LinkBack | Thread Tools | Display Modes |
|
#31
 10-06-2017, 12:25 PM
|
|||
|
|||
|
Quote:
BTW - tip for those cases where you've got a non-sealing seal and can't immediately replace with new ... sometimes one side of the gasket is harder than the other, so just flipping it over and reinstalling it will improve or even fix things for a while.
__________________
2001 X5 3.0i, 203k miles, AT, owned since 2014 
|
| Sponsored Links | |
|
|
|
|
#32
10-06-2017, 12:44 PM
|
|||
|
|||
|
Quote:
It charges while in the ignition with the key ON, but with an old key and a lot of short trips (using the remote but not enough drive time to recharge it), we would eventually get flaky performance from the remotes. Solution (I've done this twice now, with spectacular results): Park in driveway, hooked up to battery charger at the convenient ports in the engine bay. Key in ignition, turned to ON All other remote keys (we have 4 total) taped in place as close to the first one as possible Leave it there overnight to charge up The battery charger is of course to make sure the car battery does not die. Yes a lot of effort to get some charge into those tiny key batteries, but this has worked perfectly for me. Other methods I've read on here, such as using an electric toothbrush inductive charger, have not worked at all. Other than the few cents of electricity you burn keeping the car powered on overnight, unless your car gets stolen, there's really no downside to trying this first. And I know it seems to make sense that if the key battery is the issue, then all doors would either open or not, rather than flaky, differing behavior between different doors. But I've learned that these cars are so complex that it's good to always keep a little doubt in mind when debugging. Last time this happened to me (when my son finally let me know he'd been having issues with the key remote), I methodically went through all keys and all buttons, etc. logging results trying to scientifically isolate the problem. The answer I got was that basically things were flaky, although somewhat repeatable. The recharging solution above fixed them all - going from flaky to rock solid, overnight. On the first time I did this, things had got so bad that I think I had to reprogram the keys (easy procedure, given on here in a few places).
__________________
2001 X5 3.0i, 203k miles, AT, owned since 2014 Last edited by oldskewel; 10-06-2017 at 12:50 PM.
|
|
#33
10-07-2017, 06:15 PM
|
||||
|
||||
|
Remote works just two doors don't work properly. I just need to figure out if I need to replace the motors on the lock or a clean and lube can fix them.
Sent from my iPhone using Tapatalk Pro
__________________
2011 E70 N55 (me) 2012 E70 N63 (wife)
|
|
#34
10-10-2017, 01:13 AM
|
||||
|
||||
|
What is/was broken on your E53 today?
Replaced wife's driver side front bearing and CV axle.
Got to finally take advantage of my upgraded bearing press! Wow that was a huge improvement! It was very loud and I was surprised how much time it took for the 700 ft·lb tool to knock that sucker out. I did heat the carrier up to about 240°F to help things along. I've gone through three hardened 3/4" threaded rods before I figured out to upgrade to a 1" grade 8 bolt. Using the bearing press tool I started with the bolt inside I held it with a wrench and used the monster impact to turn the nut on the outside. That works until it doesn't: as the bearing moves out the wrench can no longer hold the bolt. A problem that could be resolved with a socket and breaker bar inside. I flipped the bolt to the inside and held the nut on the outside. That was way better as I could see the progress as the bolt worked it's way through the nut. I cheated to get the impact tool back behind the carrier because I was also replacing the CV axle. I cut the inner boot to quickly get it out of the way. It did take about 6-9 minutes of impact to push out the bearing and I did loosen up and start over three total times including swapping orientation so I could lubricate the bolt and the thrust bushing. I will make a thread about the job because I have a number of solid tips not that I've done 3/4 of mine and wife's front bearings (both of hers and one of mine). It takes maybe a 3' extension on a socket wretch to do this without the big impact. My small impact (220 ft·lb) won't budge the thing. I did the first two with a ratchet, lots of effort and lots of heat and cold (put bearing in the freezer over night to cool to -10°F. This new way is a huge huge improvement!  After and before: 1" bolt rated for 62,000# vs 3/4" bolt rated for about 25,000#. I stripped three of the 3/4" bolts changing two bearings before I wised up. The new bolt is rated higher than even my 700 ft·lb impact can torque. The math worked out to an estimated 58,000# I think. It was a joy to use today. Wasn't quite as fast as a hydraulic press but not having to remove from the car is a huge bonus.
__________________
2011 E70 N55 (me) 2012 E70 N63 (wife) Last edited by andrewwynn; 10-10-2017 at 01:50 AM.
|
|
#35
10-10-2017, 01:36 AM
|
||||
|
||||
|
Replaced the left front CV axle on Lumba2 (wife's x5). I've had it for more than a year (I bought both sides but after replacing the right side the problem I had was cured: shaking while in reverse and not moving).
I took it out in pieces as it was in my way to remove the front bearing. I cut the inner boot and pulled out the outer 3/4. After I was done removing the bearing I proceeded to remove the inner part and that was a beech! What finally worked was getting a crowbar on opposite sides and pull. There is just a tiny space before it goes into the differential where I could get the crowbar on one side and the other side I think I pried on the bump that is about 1/2" from the end. It fought me tooth and nail. It took maybe 40 minutes to get it out. It shot out about a foot once it released! I used the method of only removing the two bolts that hold the wheel carrier to the strut and discovered that it's far far more difficult to push the axle into the hub if even ONE of those bolts is installed. I fought for a few minutes to push the axle into the hub and no go. I pulled out the strut bolt and it went all the way in without effort! A tiny bit of sideways force from the CV boot caused a huge headache! All back together and no more moaning and vibration in the steering wheel. That car is like whack a mole with bearings. I replace one to find out it was masking the noise of another one! There is only one more I'm planning to preemptively strike and replace before it starts moaning. This last one instantly got noisy when I upgraded the wheels from 235 to 255. Flipping which race of the bearing was holding the load. The same happened to my car when I switched temporarily from 255 to 245. Very happy that the bearing and CV finally done I've had the CV for a year and the bearing has been getting worse slowly for a few months. It was pretty subtle only really moaning above 70 and very difficult to tell for certain which corner.
__________________
2011 E70 N55 (me) 2012 E70 N63 (wife)
|
|
#36
10-10-2017, 03:50 AM
|
||||
|
||||
|
Quote:
I WILL buy an axle puller before I do another one. Well let me rephrase that. I will buy an axle puller that fits. I bought a front wheel drive car axle puller from autozone but it was way to small to fit the bmw's cv axles.
__________________
Just BMW's - All cars and trucks was two pages long 1994 318is 1997 528i 2000 323i 2001 X5 3.0 auto 2005 X5 3.0 auto 2011 535xi auto 2013 X5 xdrive35 Turbo More are at my website Aftermarket E53 Radio Install
|
|
#37
10-10-2017, 09:40 PM
|
|||
|
|||
|
I DIY 99% of everything and even I didn't want to deal with doing the CV on our X5's. Local german shop replaced it for one hour labor, totally worth it to not do it myself.
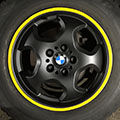
In other news, mounted an E70 wheel on my E53 to see what a set might look like: https://www.youtube.com/watch?v=7-hlHmvWn1I
|
|
#38
10-10-2017, 10:12 PM
|
|||
|
|||
|
Last week I fixed all my windows/locks/security by cleaning the contacts on the door harness.
Today I replaced the front pads and rotors...They were in terrible shape. One side already had the set screw broken off. I ended up using the lug bolts + drilled out the plastic cap from some tea bottles to keep the rotor in place until the calipers/pads were fitted. Waiting to do the rears until I get my new suspension bits in, needs a total overhaul in the rear. Now my Yellow exclamation light is on. This also happened after I fixed my door harness, but went away. It's staying on after doing the front brakes, I'm guessing the computer is confused as now one brake sensor is working and the other is still tripped. Otherwise... Any other thoughts on this? I also noticed a little platic switch connected to a front suspension arm. Maybe height control? The fastener to the arm was looking rough. That could be an issue too..
|
|
#39
10-10-2017, 10:23 PM
|
||||
|
||||
|
I thought there is only one brake sensor on the front left and one back right. There is a process for resetting the brake worn indicator. Smart on the bottle cap idea I think one of my rotor holding screw is broken so I may need to copy you in the future
Sent from my iPhone using Tapatalk Pro
__________________
2011 E70 N55 (me) 2012 E70 N63 (wife)
|
|
#40
10-10-2017, 10:24 PM
|
|||
|
|||
|
Quote:
Just make sure the cap is from a wide mouth bottle. 
|
|
| Bookmarks |
|
|
|
|


 Linear Mode


