
|
|
|
|
||||||||||
| Xoutpost server transfer and maintenance is occurring.... |
| Xoutpost is currently undergoing a planned server migration.... stay tuned for new developments.... sincerely, the management |
 |
|
|
LinkBack | Thread Tools | Display Modes |
|
#1
 01-31-2011, 02:21 PM
|
|||
|
|||
|
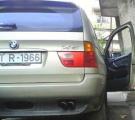
BMW X5 tail and brake light problems

|
| Sponsored Links | |
|
|
|
|
#2
01-31-2011, 03:06 PM
|
|||
|
|||
|
The same thing happened to me and ended up replacing the whole tail lights and problem solved. With time they loose the "connectivity" (for lack of a better term). On some old ones, you can even see "black" spots around the connectors in the back of the taillight. I am sure you'll get more replies, but just sharing my experience.
|
|
#3
01-31-2011, 03:46 PM
|
||||
|
||||
|
NebHurr8
Welcome to the site.  You may want to have your girlfriend sign in to the site. We have quite a few female drivers on board. However if your gonna hang around, the search feature works great and can help you/her solve a lot of common problems associated with her SAV. http://www.xoutpost.com/bmw-sav-foru...ation-fix.html Here's a general listing of FAQ's ect. Xoutpost.com - Xoutpost.com x5tips.htm
__________________
"What you hear in a great jazz band is the sound of democracy. The jazz band works best when participation is shaped by intelligent communication. Harmony happens whenever different parts get to form a whole by means of congruity, concord, symetry, consistency, conformity, correspondence, agreement, accord, unity, consonance . 
|
|
#4
01-31-2011, 03:53 PM
|
||||
|
||||
|
Quote:
 Also, check out post #14 of the following thread.. http://www.xoutpost.com/bmw-sav-foru...t-working.html Also, check out post #14 of the following thread.. http://www.xoutpost.com/bmw-sav-foru...t-working.html
|
|
#5
01-31-2011, 04:22 PM
|
||||
|
||||
|
Before, I had that problem, Bulb was ok, but Taillight socket itself got hot and melted. Indy did some work on it, corrected the contacts somehow. After a few it went out again. Then I took it off and cleaned it, Recently found out that bulb was dead.
 Happy now. Happy now.
|
|
#6
01-31-2011, 09:43 PM
|
||||
|
||||
|
Quote:
Then pull the entire light assembly out: open the the side panels on both sides of the trunk to reveal the back of the lights. There are two hex nuts that need to be removed on either light and unplug the wire connector. The whole assembly should slide right out the back of the car. Remove all the sockets/lightbulbs assemblies and pay attention to where the socket prongs touch the contact board (the metal plate that is attached to the back of light assembly). It seems that you may have some burning of the prong and/or contact board. Look for any holes, black spots or oxidation on the metal then sand or scrap off any oxidation on prongs and board. Fill any holes you find with solder, then file it down to be flush with contact board. Then gently pull/bend the prongs up a little to create firmer contact with the board when you re-install the bulb/sockets. It seems that light-bulb grease (99cents at any auto shop) will help with the contact points, so I used it where the bulbs connect to the sockets and where the prongs on the socket connect to the contact board. If you take it to the dealership they will tell you to replace the whole assembly or charge you a ridiculous amount of money for the procedure mentioned above. If you already have a soldering iron you may be able to fix it without spending any money!  I hope this helps... Rui
__________________
SENNA IS MY CO-PILOT!
|
|
#7
02-13-2011, 04:23 PM
|
|||
|
|||
|
Thanks everyone for the suggestions and advice. I followed your links and found that my GF's X5 had a right lower taillight metal socket with a hole in the metal due to electrolysis at one of the contact points where one of the light bulb prongs touches the metal socket. The plastic underneath the affected metal socket was also moderately melted, such that is bowed backward.
Solution: I cleaned the corroded metal with acetone, sanded the corrosion away with 1500 grit sand paper, cleaned it again with acetone, and then soldered the hole in with solder metal and then put a healthy amount of solder on the side of socket that was bowed backward to fill in the gap caused by the bowed plastic. I then sanded the solder smooth with 60 grit sand paper and took needle nose pliers and lifted the prongs of the right lower light bulb to make sure a more secure metal-on-metal contact occurred. Finally, I coated the contact points of the repaired socket and the prongs of light bulb with dielectric grease from Advanced Auto to prevent future corrosion or possible open circuit electrolysis. Total cost: $1.29 for the dielectric grease + borrowed a solder gun from a friend + 15 minutes total labor time Result: Works like new!!! Last edited by NebHurr8; 02-13-2011 at 11:11 PM.
|
|
#9
12-23-2015, 06:23 PM
|
|||
|
|||
|
I have a similar problem on '04 X5 3.0. Rear left taillight wiring harness connector has a bad ground brown wire, which when I twist it makes a good contact & lights come on, but hard to keep in that position & lights go out. Dealer's asking $550 to replace the entire rear left light assembly & repair the ground wire. I know this is highway robbery. Does anyone know how I can replace the wiring harness connector? Please help, much appreciated.
|
|
#10
12-23-2015, 07:40 PM
|
||||
|
||||
|
Quote:
__________________
2005 X5 4.4i Build 04/05 Maintenance/Build Log Nav, Pano, Sport (Purchased 06/14 w/ 109,000 miles) (Sold 8/15 w/121,000 miles) 2006 X5 4.8is Build 11/05 Maintenance/Build Log Nav, DSP, Pano, Running Boards, OEM Tow Hitch, Cold Weather Pckg (Purchased 08/15 w/ 90,500 miles) 2010 X5 35d Build 02/10 Nav, HiFi, 6 DVD, Sports Pckg, Cold Weather Pckg, HUD, CAS, Running Boards, Leather Dash, PDC, Pano (Purchased 03/17 w/ 136,120 miles)
|
|
| Bookmarks |
|
|
|
|


 Linear Mode


