
|
|
|
|
||||||||||
| Xoutpost server transfer and maintenance is occurring.... |
| Xoutpost is currently undergoing a planned server migration.... stay tuned for new developments.... sincerely, the management |
|
|
LinkBack | Thread Tools | Display Modes |
|
#1
 08-04-2011, 12:43 AM
|
||||
|
||||
|
Water pump experience 2001 4.4i M62
Hello friends,
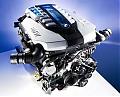
Recently on my way home from work the X5 died on me 1 block from home but I was able to start her up and finish the trip. I noticed it was very hard to steer so I assumed it was the power steering pump. Then a quick look under the hood revealed this:  So I made my calls and ordered new accessory belts but I then noticed that it wasn't really the belt that was the cause of the failure it was the shaft of the WaterPump that locked up causing the belt to jam and shred itself to pieces. I had a difficult time removing it from the various pulleys especially the water pump:  The parts came and I replaced the thermostat, water-pump , and a complete flush/bleed of the cooling system. All went well its not the worst DIY out there but there were a couple of "gotchas" I just wanted to share with you guys. 1) removing the harmonic balancer takes some care to remove. After you remove the bolts that go around the perimeter (not the large one in the middle that can stay on) of this heavy pulley if doesn't just pop-off the crank shaft... oh no that would be toooooo easy. I had to resort to soaking it with WD40 and then getting coffee and some cookies, then going back out and firmly but not violently tapping it with a rubber mallot and it eventually popped free. On reassembly I cleaned the harmonic balancer and put a thin coat of lubro-molly anti-sieze compound on the mating surface. 2) removing the engine block drain bolts was, well not fun. I ended up only being able to remove one side. These are just plain hard to get to even if you have a lift. 3) When placing the new pump back on the block I used a thin dab of Hylomar around the cleaned mating surface of the pump and the block then placed the gasket on the the block side and let it setup for a couple of mins. This is really a great help as the hylomar keeps the gasket nicely adhered to the block so you can just position the pump and bolt it on without worrying about where the gasket is. I know Bently and others say to use the gasket dry I have used Hylomar before and its great stuff for gaskets so this was a no-brainer. 4) The temperature sensor/ sender that is located on the pump housing I reused from my old pump since I never had any issues and my failure was mechanical I saw no issues with this see below:  Well this really threw me for a loop! Once I was finished with everything I started to fill/bleed the system using the well documented procedure for the M62 engine. This seemed to me to be working fine and the engine sounded great and the coolant looked good. I stepped in the cabin just to rev the engine to 2000rpm to get the last remaining micro-bubbles out and as I was doing this my eye caught the temperature gauge in my cluster was pegged to right on HOT. Of course I panic thinking bye bye head gasket you fool how could you not check this before! Quickly shut the engine off and double check all my connections but the all look good. Its gotta be that thermostat I thought but its brand new and made in Germany, not the other country that we owe all our money to, how could it be bad out of the box? I decide to leave it until morning. The next day I go down pop the hood and check the coolant which has dipped a bit thats expected I top it off, and go inside to turn the key to start and see how the engine temperature rises. surprisingly as soon as I turned the key the needle pegged to the right again and the engine was COLD. This sounds like computers to me! I decided to do a reboot and yanked the negative battery terminal wait 5 mins and reconnect. This solved the temperature gauge problem! I think after disconnecting the sensor the ECU gets an error reading and it doesn't clear itself when you replace/reconnect it, the result is the pegged temperature gauge to hot. The ECU reset does the trick it clears the state of that sensor. Well that's it I hope these tips help someone else trying to do this DIY. Enjoy! -stephX5 
|
| Bookmarks |
|
|
|
|


 Threaded Mode

