|
||||||||
| Xoutpost server transfer and maintenance is occurring.... |
| Xoutpost is currently undergoing a planned server migration.... stay tuned for new developments.... sincerely, the management |
 |
|
|
LinkBack | Thread Tools | Display Modes |
|
|
|
#1
|
|||
|
|||
|
I had mine out for a trip on the weekend, and performed this mod before I left on Saturday morning. One thing I noticed was that the vacuum hose was perished, so have ordered another to replace it. However that did not prevent the hose being blanked and the EGR valve isolated. And all weekend she ran like a charm.
__________________
Cheers, Anthony |
|
#2
|
||||
|
||||
|
Update - Modifications - Suspension
Whiteline Rear Sway Bar Lower Control Arms I picked up this sway bar on eBay on a whim. I am well aware that the X5 in diesel format is no race car, but I put in an offer on a Whiteline RSB for $99 (which is about 1/3rd of RRP) and I won the auction. Stock swaybar is 23mm - the Whiteline is 26.5mm....call it 26mm I guess? I have put sway bars on multiple cars before and been amazed at how they transform the handling, particularly by fitting a rear sway bar only on a car that has under steer tendencies. In theory stiffening the rear pushes more grip to the softer front end. In practice, my Mazdaspeed3 with Hotchkis was case in point. Moving on, so this weekend I also installed new Meyle lower control arms in the front end, which immediately got rid of the feeling like I was steering the car with a piece of rope connected to the front steering knuckles. The OEM items didn't look all that bad, there were some cracks/tears in the main bushing but they were very small - I expected them to be falling to pieces based on how violently the wheel shook when braking at hwy speed. Took it for a drive, was happy with my work, no knocks or noises, no shimmying on light braking, job done. So decided to throw the sway bar in next. (I didn't want to do both at the same time in case something did knock - it can be tricky sometimes with suspension to work out where the knock is coming from so I didn't want to introduce too many variables.) RSB took about 2 hours from start to finish. With a hoist and a workshop setup, it would probably take 30 minutes. I greased the poly bushings with CV & axel grease as I know from past experience they can get squeeky with time. Took the car for a spin and hit a particular down hill S-curve I know well. The car sat so much flatter, and hussled through the corner at a speed I had never taken it at before. However, with every improvement, a deficiency in other areas is highlighted. I noticed that as I loaded up the front wheel and powered out of the corner, the unloaded front wheel would start to 'wheel hop' and fight for grip. This is without doubt further evidence that my front shocks are FUBAR'd as they're just flapping about in the breeze and influencing no control over the wheels. The Bilsteins can't come soon enough! Sorry for the photos, didn't realise how bad they were until now....  
__________________
2005 3.0d Sport - Sapphire Black Engine : Bluefin Superchip Tune, Wheels & Sus: Style 168s (10.5s all round), H&R RDA Spacers, Bilstein B12, Eibach 40mm drop, Whiteline RSB Exterior: Le Mans flares, 4.6is kit F&R Interior: Dynavin N6, Blackvue DR650 dash cams My Build Thread: http://www.xoutpost.com/bmw-sav-foru...run-sheet.html Last edited by SMOKEY53; 02-16-2015 at 10:20 PM. |
|
#3
|
|||
|
|||
|
I Love your wheel setup. Hows the ride quality with the 20s?
|
|
#4
|
||||
|
||||
|
SMOKEY - My 2005 E53 3.0D Run Sheet
Thanks, the ride is fine. It is on the firm side, but the Style 168s came fitted from the factory, so I guess they intended it to be that way. All I have done differently is put 25mm spacers on the rear and fitted a set of 10.5" rears up front. Steers and handles great! Sent from my iPhone using Tapatalk
__________________
2005 3.0d Sport - Sapphire Black Engine : Bluefin Superchip Tune, Wheels & Sus: Style 168s (10.5s all round), H&R RDA Spacers, Bilstein B12, Eibach 40mm drop, Whiteline RSB Exterior: Le Mans flares, 4.6is kit F&R Interior: Dynavin N6, Blackvue DR650 dash cams My Build Thread: http://www.xoutpost.com/bmw-sav-foru...run-sheet.html |
|
#5
|
||||
|
||||
|
Update - Maintenance - Exterior
Passenger Side Mirror Replacement I always thought the visibility over the passenger side was really poor. I never trusted my mirrors and would always do a frantic head check before changing lanes as most of my driving is in city traffic. Too many times I'd find a small econo box in my blindspot, or a motorbike etc. One day I noted my passenger mirror was a different color and didn't have the defrost element running down it. Turns out that mirror had been replaced at some stage with a flat glass version. So bought an aespherical mirror (blue tint) with heating element off eBay to match the D/S mirror and hopefully open up the field of vision. Removal is easy. Using controls, put mirror as far up as motion allows. Get a large trim removal tool under the edge of mirror and lever off the mirror housing until it pops off. If you have heating element, remove wires. The miror I got off ebay didn't have a bracket so I had to remove that off the existing mirror. It is a large circular piece with four locking tabs, just slide downwards, takes some force. Put onto new mirror taking note of the marking that indicates 'top'. Reconnect heating wires. Putting it back into place requires some force. You're trying to get that circle in the middle of the mirror bracket to lock onto the ball joint of the mirror motor housing. Centre it as best you can, then push like hell with one hand on the back of the mirror housing, the other on the mirror face. I used a bit of silicon spray to lube up the process. Visibility is now so much better, can see clearly 3 lanes of traffic beside me over my passenger side. Not to mention the blue tint now matches the drivers side and looks much better. A solid improvement for $30 if it saves me side-swiping someone or knocking a rider over! Dip Switch Cleaning While I was in here, I also took the opp to take apart the motor and clean the tracks on the dip switch sensors. Normally when the car reverses, it should dip the mirror to look at the wheel so you don't kerb your rims. Mine stopped doing that soon after I bought the car, for a few weeks it would just spaz out and go up and down rapidly then it stopped doing it all together. I followed this guide. Worked a treat, thanks @Bulk http://www.xoutpost.com/bmw-sav-foru...d-writeup.html
__________________
2005 3.0d Sport - Sapphire Black Engine : Bluefin Superchip Tune, Wheels & Sus: Style 168s (10.5s all round), H&R RDA Spacers, Bilstein B12, Eibach 40mm drop, Whiteline RSB Exterior: Le Mans flares, 4.6is kit F&R Interior: Dynavin N6, Blackvue DR650 dash cams My Build Thread: http://www.xoutpost.com/bmw-sav-foru...run-sheet.html |
|
#6
|
||||
|
||||
|
Quote:
 ..Good tips too .Mine still fine but its a matter of time . ..Good tips too .Mine still fine but its a matter of time .
|
|
#7
|
||||
|
||||
|
Good choices, well done!
__________________
Dallas |
|
#8
|
||||
|
||||
 After 5 months, these fckers finally arrived from Zee Germans. Scared to open them because the box is full of those foam balls that go absolutely everywhere and I'd spend the next 3 weeks picking them up......but that's ok, still waiting on the springs! Sent from my iPhone using Tapatalk
__________________
2005 3.0d Sport - Sapphire Black Engine : Bluefin Superchip Tune, Wheels & Sus: Style 168s (10.5s all round), H&R RDA Spacers, Bilstein B12, Eibach 40mm drop, Whiteline RSB Exterior: Le Mans flares, 4.6is kit F&R Interior: Dynavin N6, Blackvue DR650 dash cams My Build Thread: http://www.xoutpost.com/bmw-sav-foru...run-sheet.html |
|
#9
|
||||
|
||||
|
UPDATE - Suspension - Bilstein & Eibach Lowering Springs Install
Finally, after 5 months of waiting for these things to turn up, they arrived and I had a free weekend to install them. My front shocks had been leaking ever since I bought the car. Aside from the generally floaty ride quality that blown shocks deliver, this was most noticeable if I tipped it into a tight corner and put the power down, the inside front wheel would just flap and wobble about as it tried to decide if the wheel should be travelling up or down. I went with the Bilstein B12 as these shocks are developed by Bilstein to match a set of 40mm lowering springs from Eibach. Seemed like a sound theory. After reading up on people's disappointment with Bilstein HD's I was a bit worried, but after speaking with a contact in Germany, I was assured these were different and I'd be very happy with the outcome. As a side note, my car has coil springs all round (no airbags). I purchased new shock mounts front and rear, new gaskets and new strut bearings because I figured mine could be a bit worse for wear after 115kms. Turns out they were fine, but I like having one less thing to worry about. Anyway, onto the install. On counting back, I've done full suspension change outs on 9 cars now. I generally dislike the job because its heavy lifting, working in confined spaces, and working with spring compressors which are pretty dangerous at best. I always feel like I've gone 10 rounds with a prize fighter after I've finished, but it's a rewarding job and saves me money so I keep doing it. This might be the last time in retrospect.....having the right tools always helps but the main saving grace was my 18V Milwaukee Impact gun, it saved me a lot of physical work, I love this thing. I did the rears first. The issue with the rears is the springs. There is no way to get spring compressors onto them, it's too tight. Dropping the shock out and disconnecting the swaybar link does nothing to increase clearance. You have to undo pretty much everything - brake calipers, control arms, guide arms and the friggn integral link in order to get enough clearance. The only thing I didn't have to disconnect was the wishbone from the subframe (even though the workshop manual said to do so). And getting it all apart is the easy bit. Putting it back together was a nightmare, mainly due to the integral link not wanting to line up because you've disconnected everything and the wheel carrier just goes pretty much wherever it wants, a situation not helped by the spring putting tension on the whole assembly and making the wheel carrier move laterally. It takes some careful jack placement and a lot of muscle to hold everything kinda in alignment so that you can slide the bolt through the integral link and out the other side. It took me 3 hours each side. I was not a happy camper. That was day 1. Day 2 was fronts, thankfully a lot easier. Hardest part was getting a spanner onto the inside of the sway bar end links. Recommend purchasing an 18mm 'cone wrench' for this job. I will probably have to do end links at some stage as I reckon I ruined one of the end link bushes. The other issues I faced was the shock nut being rusted to the shaft. My pro tip on this is a bit sketchy, but basically I recommend hitting the top nut on the shock with an impact gun before you take it out of the car, but only JUST enough to break it loose. You don't want to completely remove the nut without the springs compressed - chaos will ensue. Verdict: Height before was Front (790mm) Rear (810mm). Height after is Front (780mm) Rear (790mm) These measurements are straight off the jack and with a quick spin around the block to check for noises. I'll update these numbers once the springs have settled, normally takes a few weeks. I'm not overly impressed with the drop, was expecting more visual impact - it was hard for me to believe that it had dropped anything at all but the tape measure suggests otherwise. Ride quality is not too different to stock. It is a touch sharper, mostly due to the increased dampening and rebound - but in a good way. Feels very 'German' and quite similar to my C300 with AMG pack. The largest difference is when tipping into corners. The car sits a lot flatter now. Virtually no body roll, it feels almost sports car like. I need to get it onto a freeway to see how it manages undulations at speed, but so far I'm quietly impressed. Overall I'm happy with the result. It was huge sense of achievement getting it all buttoned up, especially after the 5 month wait, getting mucked around by a seller for 3 months of that, losing money on my refund due to exchange rate fluctuations, and having to find a new supplier. My only real alternative would have been to go the BC Coilover route, as KW V3s are just too damn expensive - but it was very hard to find any solid info on the BCs. In hindsight I'd be willing to give the BC's a shot as this combo probably came out 50% more expensive by the time you replace all the shock mounts, bearing struts etc etc which you wouldn't have to with coilovers. Finally, I recommend anyone else wanting to go this route to get in touch with Kai Ackermann from fahrwerke24.de - his English is great and he was extremely helpful in answering my barrage of questions and actually getting the product to my doorstep. This was the last major modification I plan to do to this car, but will update with little things as I go along. Cheers Mat 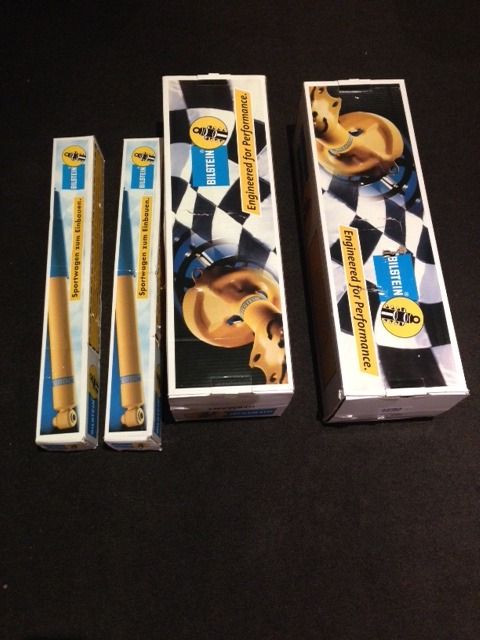 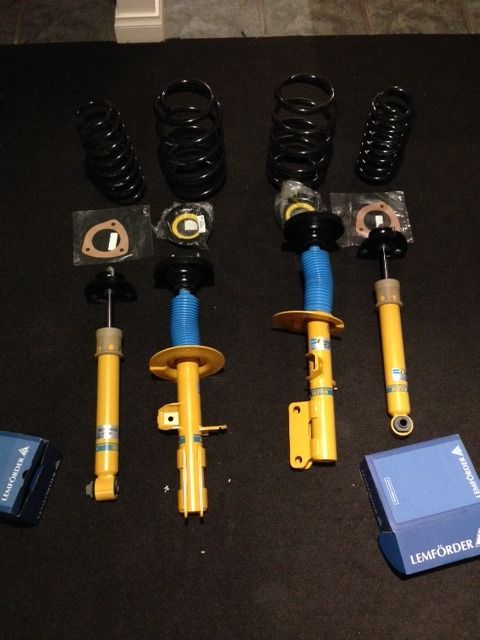 Rear Springs Height Difference (OEM Sport Springs vs Eibach 40mm) 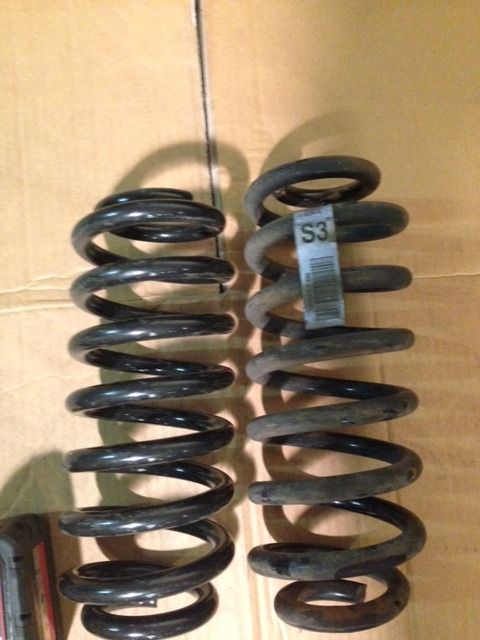 Front Springs Height Difference (OEM Sport Springs vs Eibach 40mm) 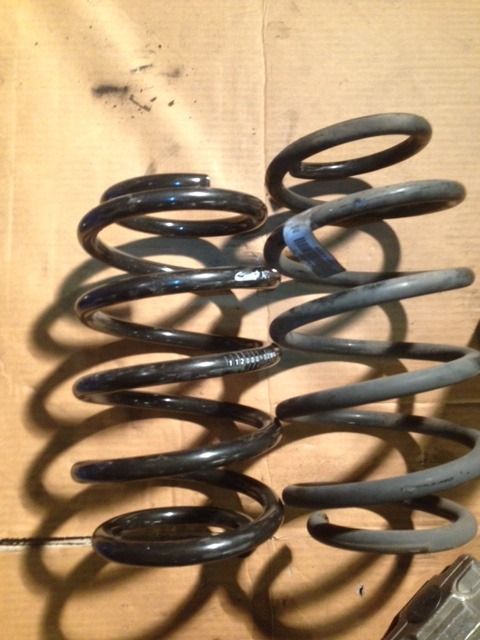 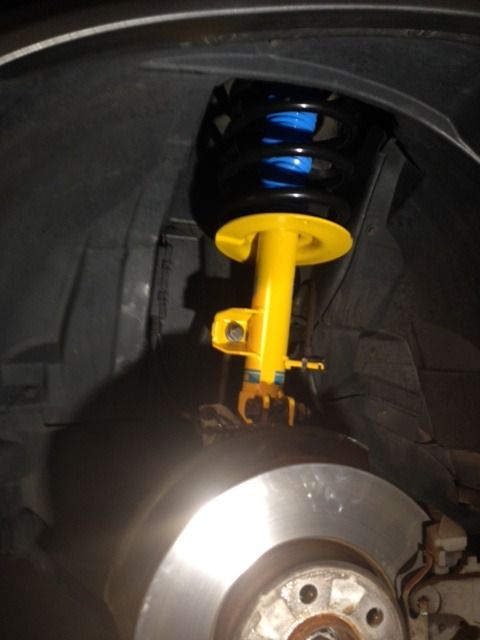 Gettin it done! Basement carpark style! 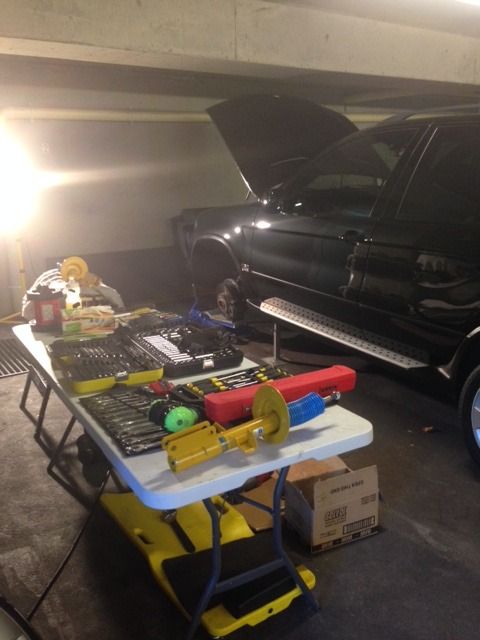 End result. Think springs will settle a bit lower over the next couple of weeks. Will update if so. 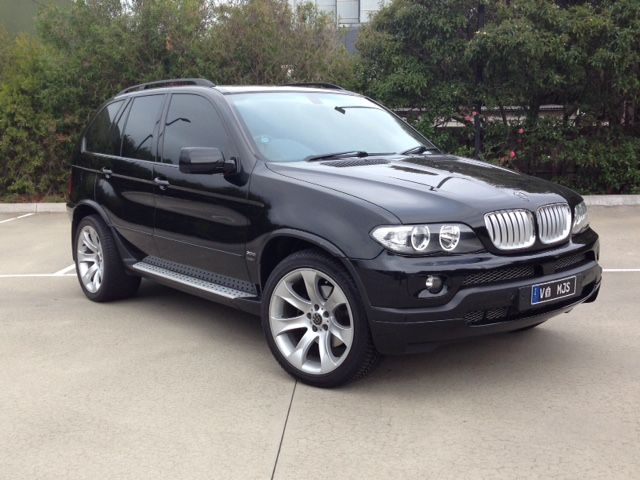
__________________
2005 3.0d Sport - Sapphire Black Engine : Bluefin Superchip Tune, Wheels & Sus: Style 168s (10.5s all round), H&R RDA Spacers, Bilstein B12, Eibach 40mm drop, Whiteline RSB Exterior: Le Mans flares, 4.6is kit F&R Interior: Dynavin N6, Blackvue DR650 dash cams My Build Thread: http://www.xoutpost.com/bmw-sav-foru...run-sheet.html Last edited by SMOKEY53; 03-24-2015 at 12:56 AM. |
|
#10
|
|||
|
|||
|
Looks Great. Good work and write up. Time to enjoy your E53.
Chris. |
 |
| Bookmarks |
|
|
|
|