
|
|
|
|
||||||||||
| Xoutpost server transfer and maintenance is occurring.... |
| Xoutpost is currently undergoing a planned server migration.... stay tuned for new developments.... sincerely, the management |
|
|
LinkBack | Thread Tools | Display Modes |
|
#1
 04-24-2017, 12:44 PM
|
|||
|
|||
|
DIY: Front strut rebuild with new shock absorbers - 2009 Xdrive 4.8i Adaptive drive
Complaints: Front end knocking noise when suspension drops abruptly. Compression and ride comfort do not seem to be affected on smooth roads.
Previous suspension work: Thrust arms, sway bar links. Diagnosis: You might see pieces of foam shock absorbers/bump stops showing up on top of strut towers upon close inspection. These pieces will look like dirt, brown colored sand: 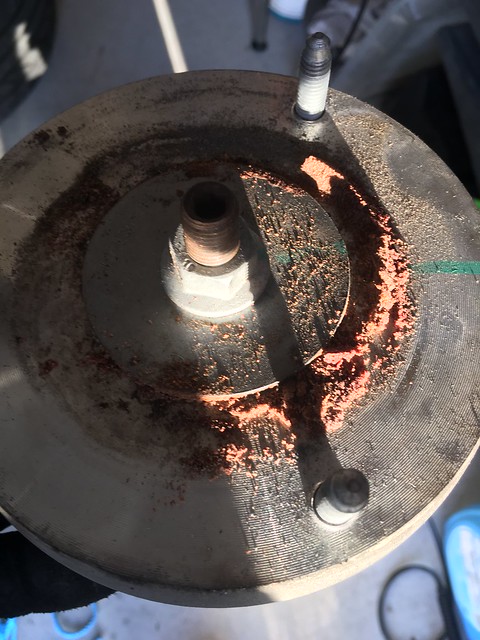 Solution: Remove the struts, and rebuild them with new bump stops/shock absorbers. This will bring back the ride comfort and suspension compliance on rough pavement  I will also be replacing the lower control arms while I'm at it. If all goes smoothly, this is a 4-hour job at the most, but we all know that that's bs, so plan to work on this job over a weekend. Part numbers (I got them from rmeuropean and ecstuning, lemforder/BMW parts for about $100, plus the bolts and nuts from thebmwminipartstore.com for about $50): 31336788776 (strut mount x2, mine were ok, wish I hadn't gotten them, comes with the upper spring pad) 31336776389 (strut mount support x2) 31336776390 (strut mount support x2) 31336771516 (bump stop x2) If you're also doing the lower control arms (~$150): 31126771893 (lower control arm) 31126771894 (lower control arm) In addition to these main parts, you should also replace various bolts/nuts. This DIY can also be used to rebuild the front struts without adaptive drive and to replace the front struts and/or springs with aftermarket ones (like KW V3 coilovers). I also found the pdfs in this link very useful: https://xoutpost.com/1034127-post2.html Tools needed: -1/2'', 3/8'', 1/4'' drive ratches -Although not absolutely necessary, battery/air powered ratches and impact wrenches will make the job go easy. -10, 13, 16, 17, 18, 21 mm sockets, wrenches. -T25, T40 socket -Various extensions, adapters. -Breaker bar, pry bar. If you're also going to replace the lower control arms: -plastic trim tools -8 mm socket -Ball joint separator. -Dremel tool to cut the lower control arm ball joint stud so that the ball joint separator fits on there ") If you're only doing the strut rebuild, skip this whole mess. If you're only doing the strut rebuild, skip this whole mess.-27mm 12-pt wrench. Disclaimer: You should not try this at home unless you're absolutely certain that you can complete the job. Even then, I do not claim responsibility for what you do with your car. Step 0: Disconnect the negative battery terminal (I did not do this, and nothing blew up, but it is cheap insurance). Step 1: Jack up the front end, and use jack stands to properly secure the car. Step 2: Remove the front tires. Step 3: In what follows, I will refer to the driver's side, but the process is the same on passenger side. Support the swivel bearing end from underneath the brake disc using a jack. 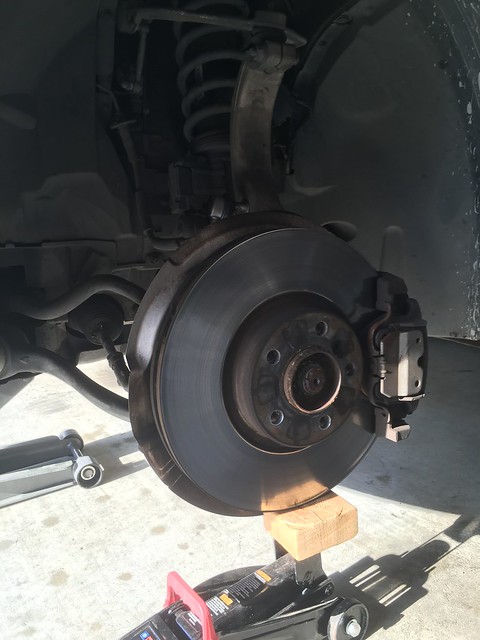 Step 4: Disconnect the upper sway bar link from the swivel arm. Once you break it free, you'll need a T40 socket to hold the ball joint in place while loosing the 18mm nut. When reinstalling, tightening torque is 44 ft-lbs (give or take). 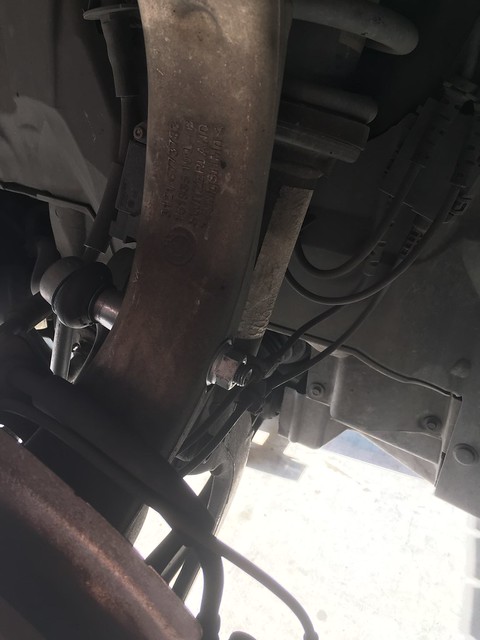 Step 5: Using a 16mm socket and wrench, unbolt the swivel bearing from the upper control arm. When reinstalling, make sure the screw rests correctly in groove of ball stud. Tightening torque is 41 ft-lbs. 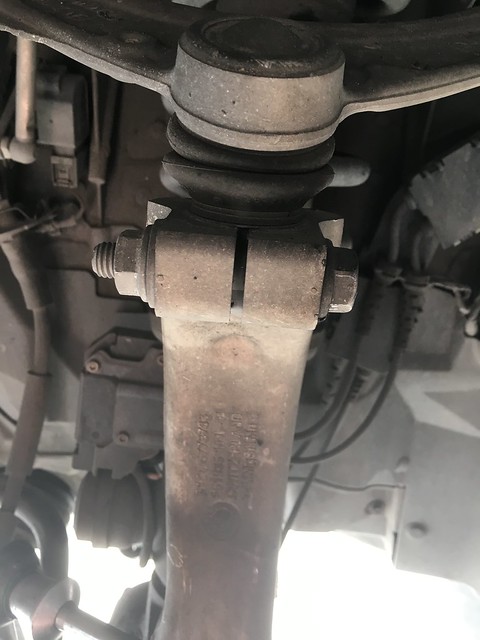 At this point, tie the upper control arm to the swivel bearing in case the jack underneath gives up  Also disconnect the blue and black adaptive drive connections as shown below. Also disconnect the blue and black adaptive drive connections as shown below. Step 6: Now we're going after the strut pinch bolt (18mm, #3 in diagram below, scroll down) and the strut holder to lower control arm bolt/nut (21mm). The only two visible bolts in pic below. The one up top is the pinch bolt, and down below is the other one. Remove them. Pry the spring strut holder using a pry bar or BMW's special tool. Tightening torques are 62 ft-lbs for the pinch bolt, and a lot for the 21 mm bolt/nut (102 ft-lbs) plus 90 degrees. Just tighten it and make sure it won't come out when reinstalling. 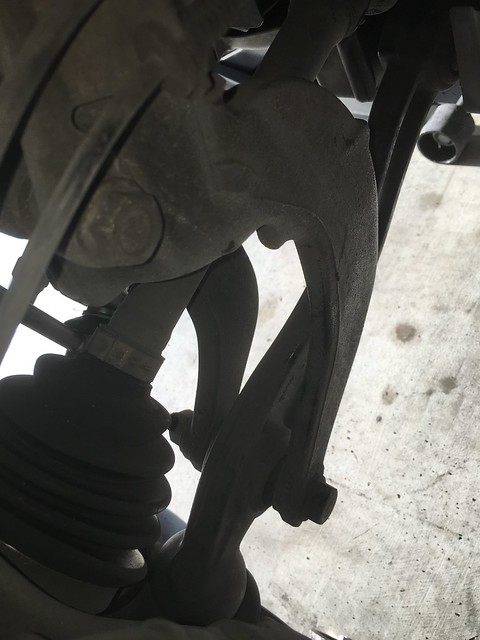 Step 7: At this point, carefully lower the jack (while the swivel bearing is being supported by the rope tied up to the A-arm), and remove the strut holder (#2 in diagram below). Note the direction the bolts are going in and set aside the strut holder. Turn the output shaft and carefully loosen the rope up top to make more room for the strut holder removal. Step 8: Open the hood, appreciate how clean your engine bay looks, and remove the partition walls to gain access to strut mount studs. You'll need T25 and 10mm sockets for partition walls. 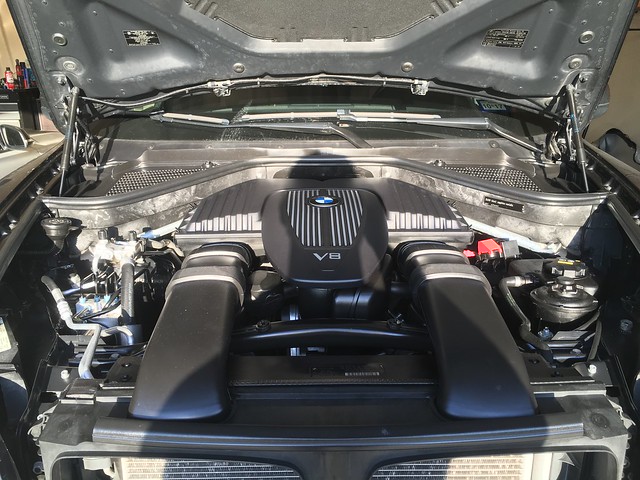 Step 9: Remove the strut mounting bolts (13mm, tightening torque 28 Nm). On the last one, make sure you support the whole strut from down below, so that it wouldn't drop. Get a friend's help with this step. Remove the strut/spring assembly. 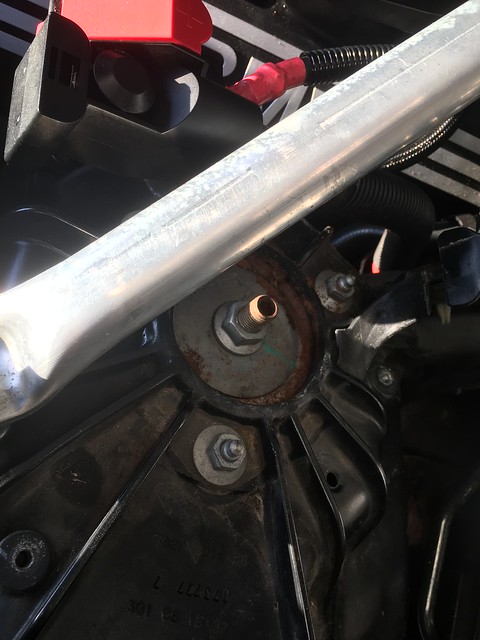 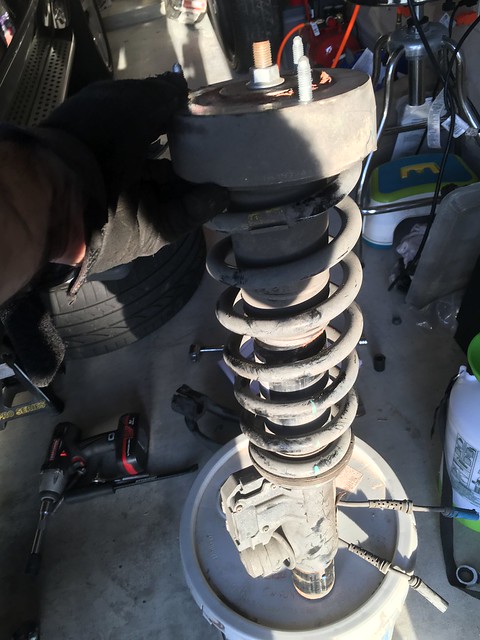 Step 10: Using a spring compressor (Ebay, ~$80), compress the spring. Handle the whole thing carefully so as not to damage the connections and/or control unit/valve. 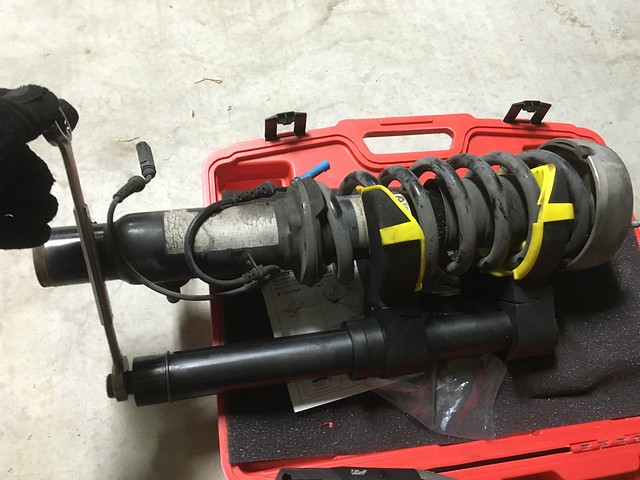 Step 11: Once you're positive that the spring is compressed enough, go ahead and take the collar nut off (18mm, tightening torque 41 ft-lbs or so). Use a T40 socket to keep the strut shaft from rotating while you remove the nut. Use of an impact wrench on this bolt is not recommended. 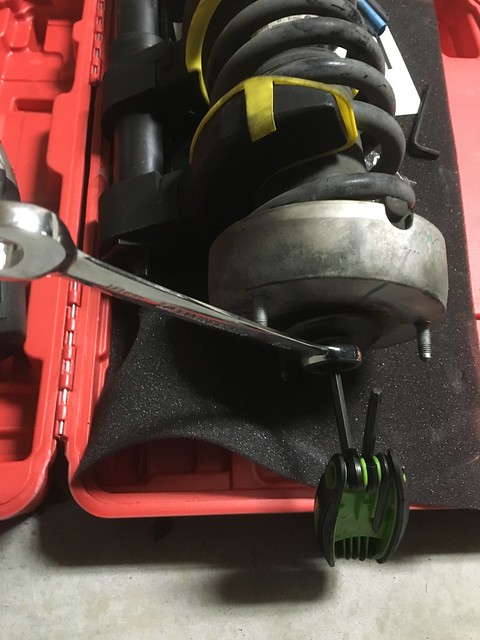 Step 12: You may now remove the strut mount and the rest off the strut spring assembly apart. Note the two ends of the spring and how they are seated on the spring pads. You will want to re-assemble everything the way they were before taking them apart. There are a total of 3 auxiliary dampers/bump stops that you need to replace. The big one shown in the picture below came out in two pieces (and half the size). The one between the collar nut and strut mount was completely disintegrated (hence it's not shown in the pic).  Important: Before you put everything back together, make sure you clean up as much as you can. Read and understand the instructions in file 5b.pdf in this link: https://xoutpost.com/1034127-post2.html. The instructions there must be followed so as to make sure the correct stud bolt must be flush with positioning pin that goes into the spring holder groove. You can avoid a lot of the trouble by marking their original positions before taking the strut apart, and making sure you do the same on the new strut mount. The correct order of putting the strut back together is shown in this figure:  Strut rebuilt and ready for installation: 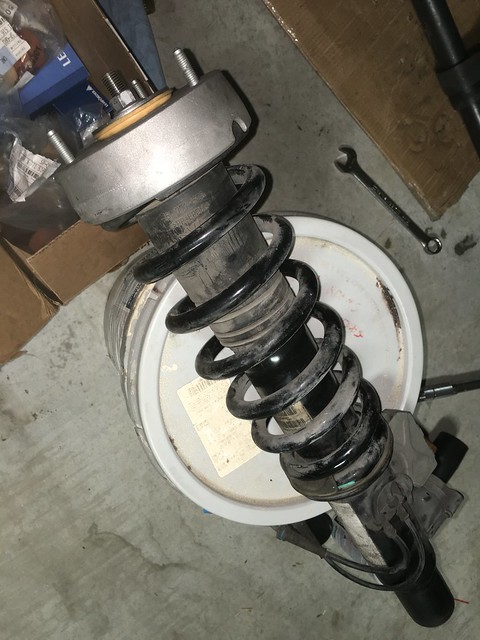 At this point, if you're also changing the lower control arms, go ahead and remove the lower control arm using a 21mm socket and wrench where it connects to the frame. Use a breaker bar first if it's too tight on there. You will need to remove the plastic cover using 8 mm socket and plastic trim tool to gain access to the nut. The tightening torque is 122 ft-lbs. Move onto the 27mm combination nut and remove it next. Using a ball joint separator, pop the ball joint out of the spindle (swivel bearing). I suggest you use something like:  I used the following and had to cut the ball joint stud to make the separator fit on there 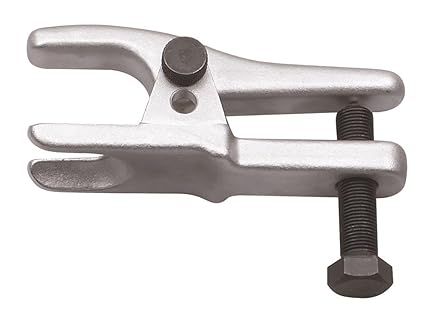 Installation is reverse of removal (always wanted to say that). Final tightening on the lower control arm bolts must be done under full load. Go get an alignment if you need to. Enjoy a comfortable ride with no knocking noise whatsoever. It's not like getting a new suspension, but comes pretty damn close Cheers! 
__________________
Black Sapphire MetallicNevada BrownDark Bamboo e70 X5 xDrive4.8 Alpine WhiteCoral RedAluminum f30 328i Sportline/6MT Imola RedBlackBlack Aluminum e46 330i ZHP/6MT Last edited by SeanC; 07-27-2017 at 12:38 PM. 
|
| Bookmarks |
|
|
|
|


 Threaded Mode

