
|
|
|
|
||||||||||
| Xoutpost server transfer and maintenance is occurring.... |
| Xoutpost is currently undergoing a planned server migration.... stay tuned for new developments.... sincerely, the management |
|
|
LinkBack | Thread Tools | Display Modes |
|
#1
 07-31-2010, 04:28 PM
|
|||
|
|||
|
2011 x5 35i Painted Reflector Install DIY
Finally got my painted reflectors yesterday from IND, thanks Epacy! They weren't cheap but I gotta say they do it right. The quality is very good and the color match is perfect, I think they paint and bake them themselves.
As big and ugly as the orange reflectors are on 2011 LCI x5's, this simple mod made a *HUGE* difference... pictures don't do it just justice. I know that KEF already has a DIY for e70 painted reflectors but 2011 is slightly different so thought I'd do another. This DIY is for my 35i, I presume 50i will be the same but 35d is a bit different due to the radiator on passenger side making it more difficult to access the inside of the fender to get the reflector out. Last but not least, please pay no attention to my ugly wheels, I'm working on the replacement as I type  Step 1: Use the hole in the grill to remove it. 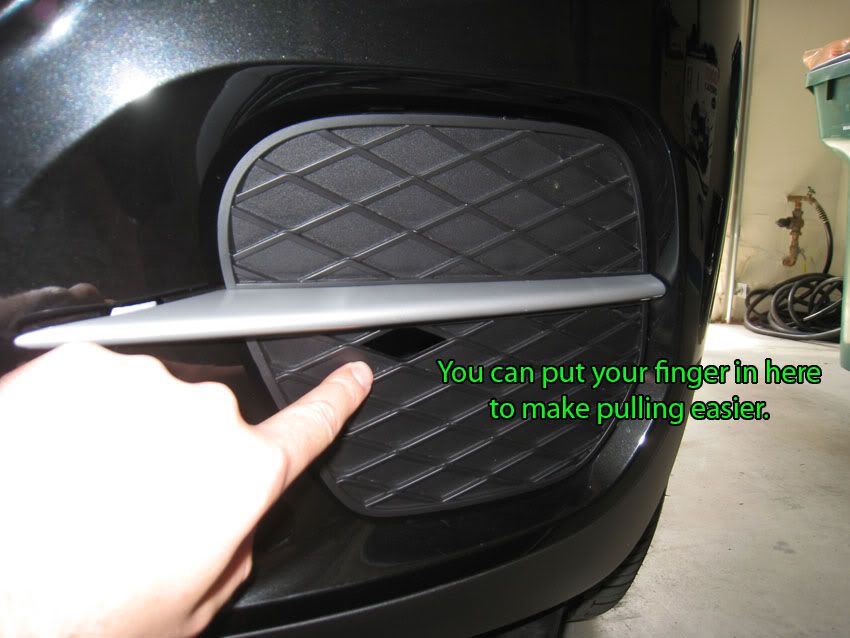 Step 2: Grill pops out easily (I know there's no "e" in Grille, but I was hungry)  Step 3: Locate the reflector inside the fender.  Step 4: *VERY IMPORTANT*, this one will make your life a lot easier. Use a hair dryer on High/Hot setting inside the grill for 3.5 minutes. Make sure the *outside* of the reflector is hot to the touch when you stop. This loosens up the glue/adhesive and makes things a lot easier on you. This is also my wife's contribution to the mod, so that she feels more involved.  Step 5: Start by pushing the reflector inwards from the outside, while simultaneously pulling/holding the fender from the inside. You should do this with 2 hands, but my other hand was on the camera. If you press too hard, the bottom part of the fender may separate from the black plastic, but don't worry it pops right back in.  Step 6: If you hair dried properly, you should be able to get a pretty clean break without leaving much adhesive behind as shown here.  Step 7: Make sure you get out allllll the sticky junk before moving on.  Step 8: Take a minute and enjoy the lack of orange while the fender cools.  Step 9: No brainer.  Step 10: Wait until fender is cool, put the reflector in place and put back the grills.  Step 11: Enjoy. 

|
| Bookmarks |
|
|
|
|


 Threaded Mode

