
|
|
|
|
||||||||||
| Xoutpost server transfer and maintenance is occurring.... |
| Xoutpost is currently undergoing a planned server migration.... stay tuned for new developments.... sincerely, the management |
 |
|
|
LinkBack | Thread Tools | Display Modes |
|
#1
 12-11-2012, 10:20 PM
|
|||
|
|||
|
E70 Rear Air Strut / Airbag Replacement DIY
So I had been noticing over the past 6 months, off and on, that the left rear of the truck would sometimes begin to sag overnight...at totally random intervals and seemingly unrelated to minor ambient temperature flucuations. In the morning it would always pump right up if it was required and the compressor did not seem to run more than usual. I finally took the time to pull the left rear wheel off and soak down the airbag with soapy water and was able to determine that there was a pinhole (if not smaller) sized leak near the bottom of the strut where the metal band goes around it...you had to look very closely to even see it and it was easy to miss. In any case, I ordered the replacement part from John at the Davis Automotive Group (Cleveland BMW) where I get all of my parts from and the following are the steps I took to rectify the problem. A big thanks to "HaroldC" for the pic of the jacking points and "Jarola" for the write-up. NOTE: I assume no responsibility for injuries, death or improper installation as a result of this write up. Tools required: 17mm Socket and Ratchet to remove the wheel Large jackstands (I used 6 ton ones) Large Floorjack 10mm open-ended wrench Small prybar 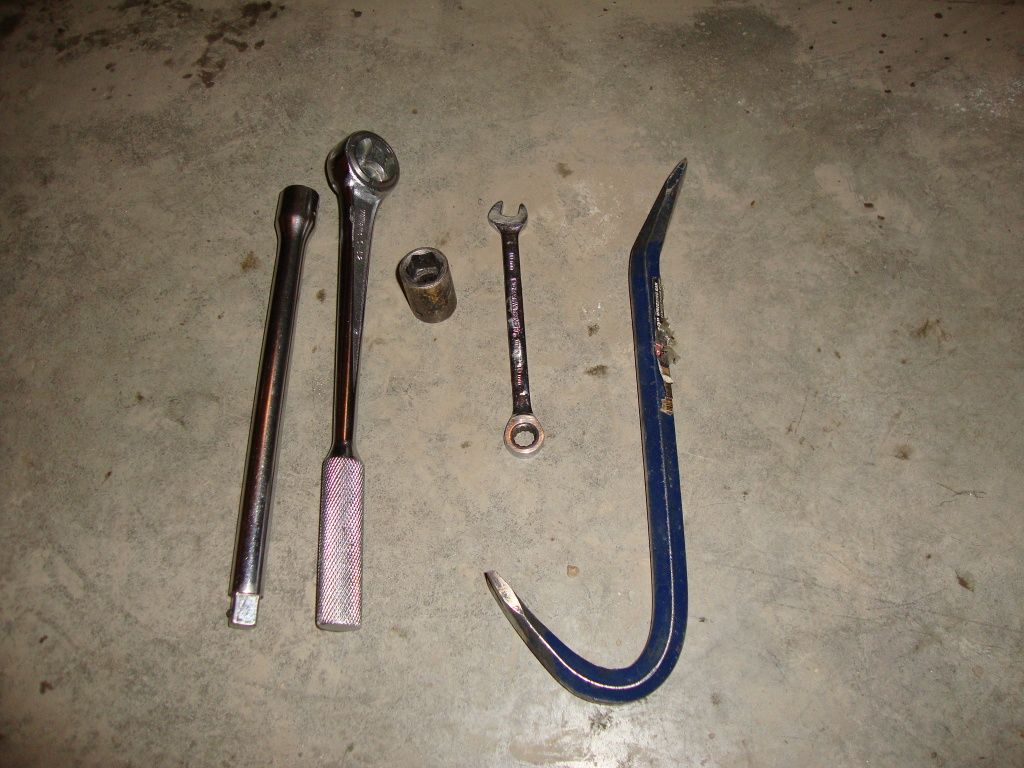 Part ordered: 37-12-6-790-078 - $200 + shipping (this part alone costs over $400 at a Canadian dealer) 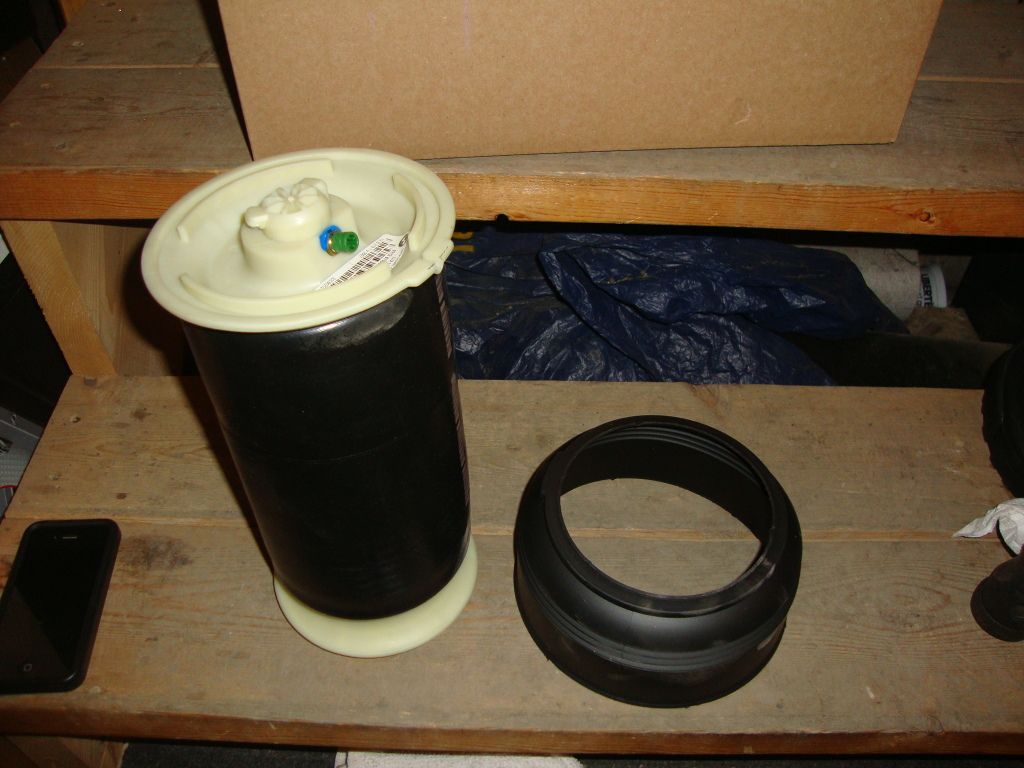 This is how much the X5 was sagging in the mornings  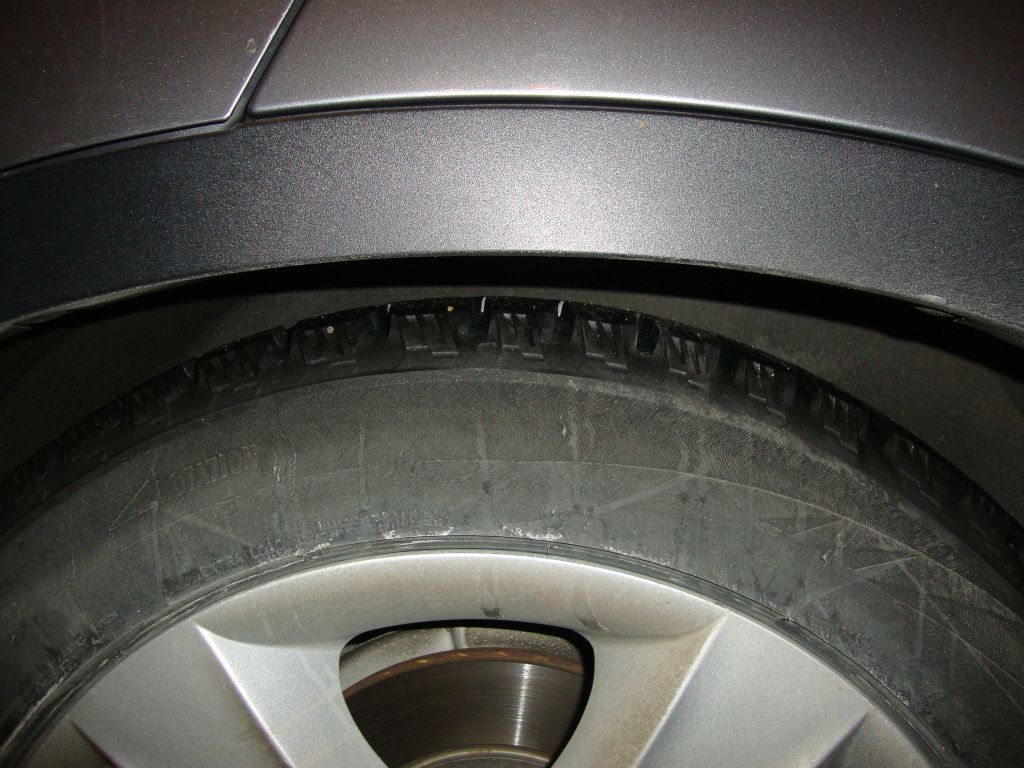 Here is Jarola's write up and the differences to how I did mine: 1. Used BMW software to deflate the airbags. Removed the fuse under the glove box to prevent the air pump from turning on. I skipped this step and just waited until the next morning when the airbag was fully deflated. I also didn't bother removing the fuse as I had no plans on opening any doors which would energize the system. 2. Jacked up the rear end via jack on the rear diff (I always use a hockey puck in the cup of the jack to avoid damaging anything) and used 6 ton jack stands.  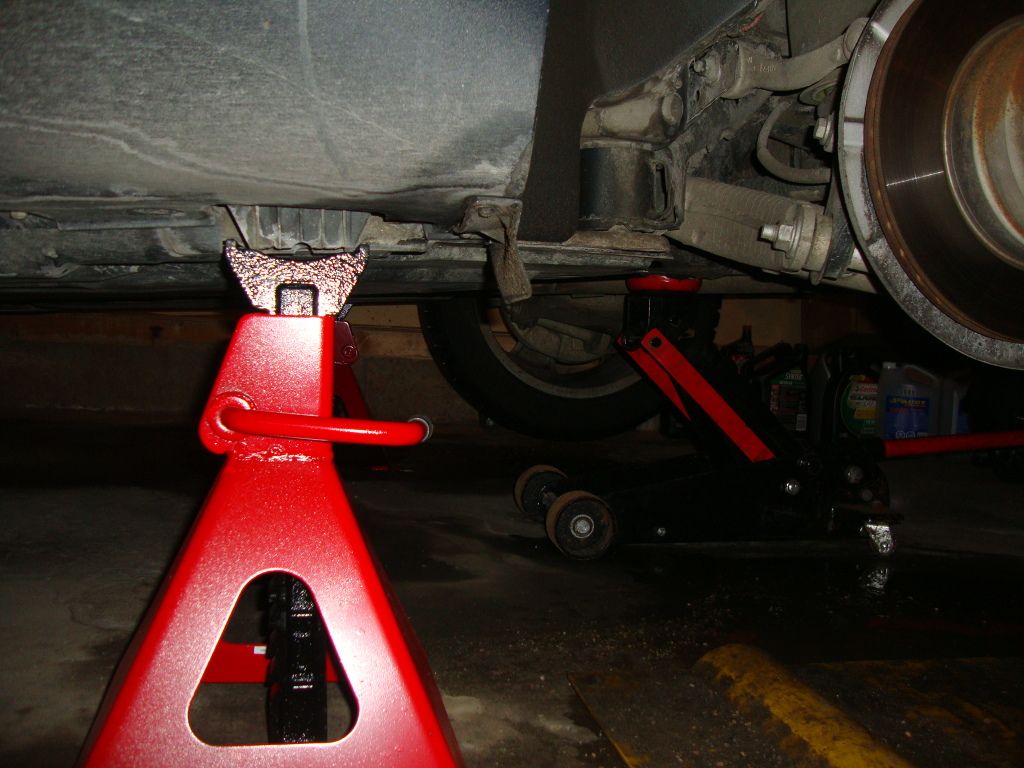 3. Removed wheels. 4. Removed nut from rear shocks to lower the suspension to give room for the removal and replacement of the springs. I skipped this step as there seemed to be a lot of room available. 5. Popped up the bottom of the air spring with a pry bar, it is plastic and very easy to pop up. Twisted the top of the air spring to unlock it from the body. 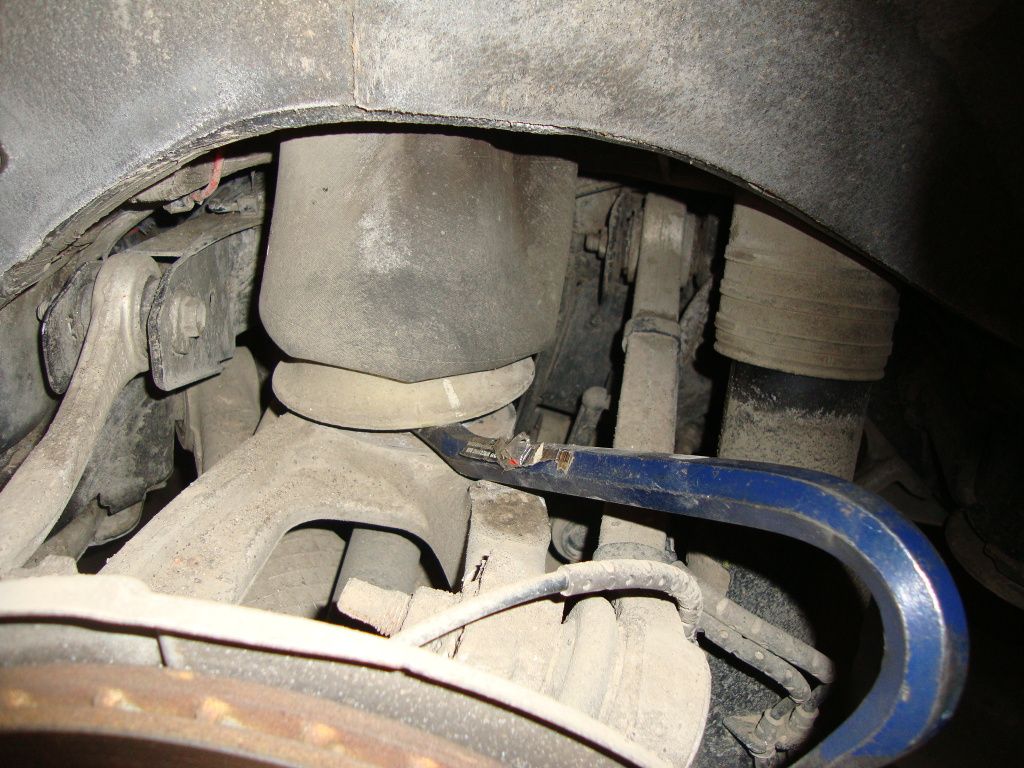 6. Removed the air supply line by removing the 10mm nut. Replaced the nut and hose on the new spring (this is delivered with it already inserted into the top of the replacement spring/airbag so you'll have to carefully remove it and put the brass ring on the air line, DO NOT LOSE THIS - the old ring will break off when you remove it). Made sure not to pinch the air supply line. 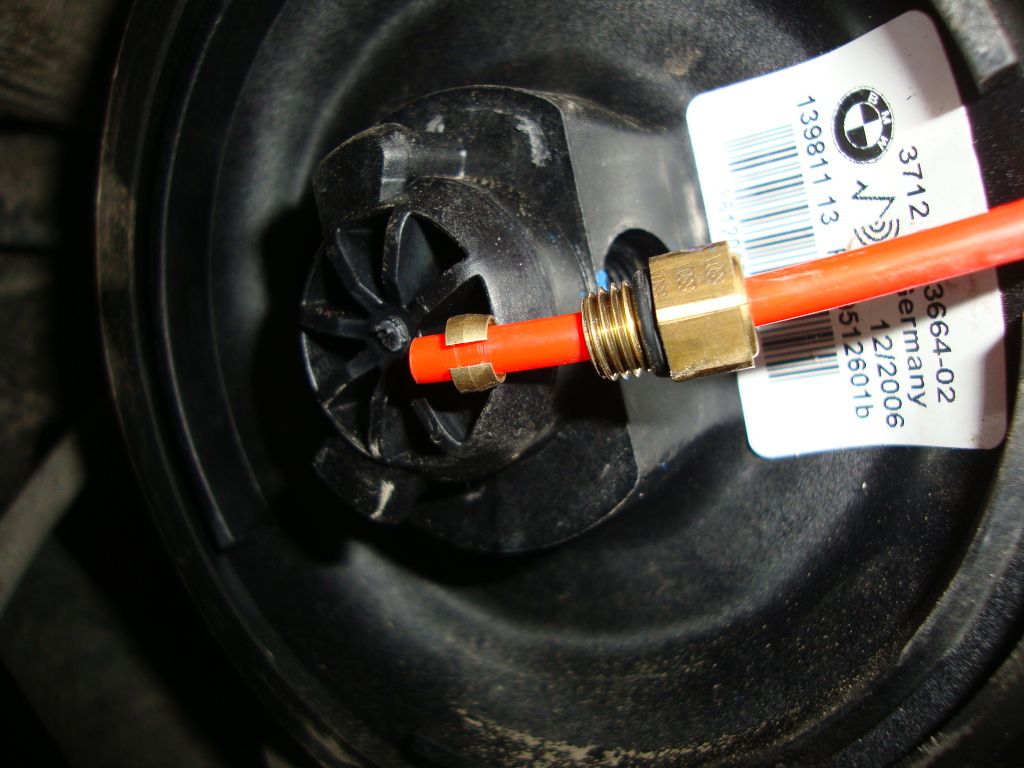 7. Replaced the air spring by locking it into place in the upper body location, again making sure not to pinch the air line. What I did different here was to slightly compress the airbag and then tighten the nut so that it would stay that way before reinserting it (twisted counter-clockwise IIRC). It may also stay slightly compressed on it's own. 8. Lifted the suspension to pop in the bottom of the air spring, popped in very easily. Since I had never removed the shock bolt I simply kept the airbag hanging and had someone turn on the car so while that airbag inflated I guided it into the lower mount. I waited a few minutes then remounted the wheel and lowered the X5 in increments which allowed the airbag to slowly fill with air...you should hear the compressor working as this happens. 9. Replaced shock bolt. I obviously skipped this step as it was not required in my case. 10. Replaced wheel. 11. Repeat on other side. I only did the one side. 12. Lower truck and replace the fuse. The pump will turn on and pump up the springs. In my case I started up the X5 prior to lowering it all the way but I suspect that since it was still in "lift mode" (see below for more information about the BMW air suspension and the various modes) it only pushed in a minute amount of air. After gently lowering it all the way in increments it should be fully filled and the vehicle level. NEVER allow the full weight of the X5 to sit on an empty airbag!!! All in all on a scale of 1-10, with an oil change being a 2, this is about a 2. Very easy and quick and should take no more than roughly an hour to do for one wheel from the time you lay out your tools to the time you've put everything away. BMW Self-Leveling Suspension Information (5-Series and X5): BMW Self-leveling suspension Last edited by heizervr6; 02-08-2013 at 08:05 PM. 
|
| Sponsored Links | |
|
|
|
|
#7
12-12-2012, 06:18 PM
|
|||
|
|||
|
I paid $200 for the airbag + $30 or so for shipping to Canada. The stealer here likely would have charged roughly $600-700/wheel...that would be my best guess anyway. I prefer to not let them touch my vehicle whenever possible...
Quote:
|
|
#8
12-14-2012, 01:20 AM
|
|||
|
|||
|
Great info! Thanks! Happy holidays!
Quote:
|
|
#9
12-15-2012, 07:36 PM
|
|||
|
|||
|
Quote:
") one Warranty is up I will DIY my repairs as well. Nice write up one Warranty is up I will DIY my repairs as well. Nice write up 
__________________
X5M Eisenmann exhaust, de-Catted down pipes, 22" HRE wheels, ECUProgram stage II (700hp) tune X5 35d Tuned and Lowered
|
|
#10
12-16-2012, 04:25 PM
|
|||
|
|||
|
Thanks and hopefully your E70 is back in the road ASAP. If you ever have repairs needed after your warranty runs out that you don't want to or can't deal with, I recommend using: Vitek's AutoWorks - HOME
I have them do my transmission fluid flushes as I can't be bothered to get under the vehicle to do the change all the while monitoring temperatures and rowing through gears...Vitek, the owner (absolute stand-up guy and the one person that gets to touch my BMW's in town) tells me we have the cleanest tranny fluid in Calgary.  Quote:
|
|
| Bookmarks |
|
|
|
|


 Linear Mode


