
|
|
|
|
||||||||||
| Xoutpost server transfer and maintenance is occurring.... |
| Xoutpost is currently undergoing a planned server migration.... stay tuned for new developments.... sincerely, the management |
|
|
LinkBack | Thread Tools | Display Modes |
|
#1
 01-25-2014, 09:40 PM
|
|||
|
|||
|
DIY: Coolant Exchange Pipe / Valley Pan Replacement. e70 n62 4.8L
Most of these steps may be used for a general tear down to access: Alternator, Water Pump, Serpentine Belt, Serpentine Accessory Belt, Throttle Body, Thermostat, Knock Sensors.
I, as many of you, have developed a coolant leak on my e70 X5 4.8L. What follows is this little write up (since there is no good info out there). During the tear down I’ve determined that the Coolant Exchange Pipe was still good but developing oxidation. My problem was a Valley Pan Gasket. Enjoy. What you need: - e70 x5 (my 2008 X5 E70 4.8i, N62, 99k on the clock), or a BMW with a 4.8 engine like the 7 series. - ramps - basic tools to include: metric sockets, screwdrivers, short hacksaw (or cut-off wheel), star sockets, allen sockets, torx sockets - distilled water - bmw coolant (5galons total mix, if you are draining all the coolant) - new replacement valley pan, pipe, gaskets and all associated bits - new water pump (in my case, and why not since this is a hell lot of work to begin with) - liquid removal tools: small pump or some other fluid evacuation tool. - thermostat housing gasket - intake gaskets (8 rubber “O” rings) Additional work I’ve performed: - Replace and install new Spark Plugs - Service a seal on Air Pump (mounted on passenger side, front of the head) - Replaced Water Pump - General cleanup of engine bay Disclaimer: in no way does reading this post authorize you to do this repair yourself. You should always service your BMW at an authorized BMW Service point. Death and injury may/will result if you undertake this repair. Things to know/review: Parts Link / Installation overview: - All German Auto | Expanding Cooling Pipe/Tube On the problem - BMW 7 Series Cooling Leak Repair - YouTube On bleeding the Cooling System (in X5 there is no need to press accelerator pedal) - BMW Coolant Bleed Procedure For Electronic Water Pump After Repairs On Cooling System - YouTube On Water Pump Replacement instructions (locate the 4.8 engine inside this post) - | Repair Guides | Water Pump | Removal & Installation | AutoZone.com - BMW Workshop Manuals > X Series E70 X5 4.8i (N62TU) OFFRD > 2 Repair Instructions > 11 Engine (N62TU) > 51 Water Pump With Drive > 1 RA Removing And Installing_replacing Water Pump (N62_N62TU) > Page 558 On Electrical Interconnects - BMW Workshop Manuals > X Series E70 X5 4.8i (N62TU) OFFRD > 2 Repair Instructions > 12 Engine Electrical System (N62TU) > 51 Engine Wiring Loom > 1 RA Replacing Wiring Harness Section For Engine (N62) > Page 662 A much more concise write-up by Alamento in another thread (It's good to read a few of these) - http://www.xoutpost.com/bmw-sav-foru...ristmas-3.html - start by driving the truck on the ramps and removing belly pan - next, remove the skid plate that covers the bottom of oil pan - disconnect oil sensor and move the connector as much forward as you can (the cable runs from top of engine to behind ac compressor and onwards to bottom of oil pan, this sensor cable will need to be removed later on) - if you are short like me; drive the SAV off the ramps and into position you will be working on the car (you will notice a warning message, “Oil Sensor Malfunction”, disregard it as the sensor is already unplugged) - disconnect the battery: located in trunk under the cover; remove phillips screws, remove battery cover tray, undue positive connector, make sure the connector will not accidentally touch the terminal by possible placing a clean rug in between the two 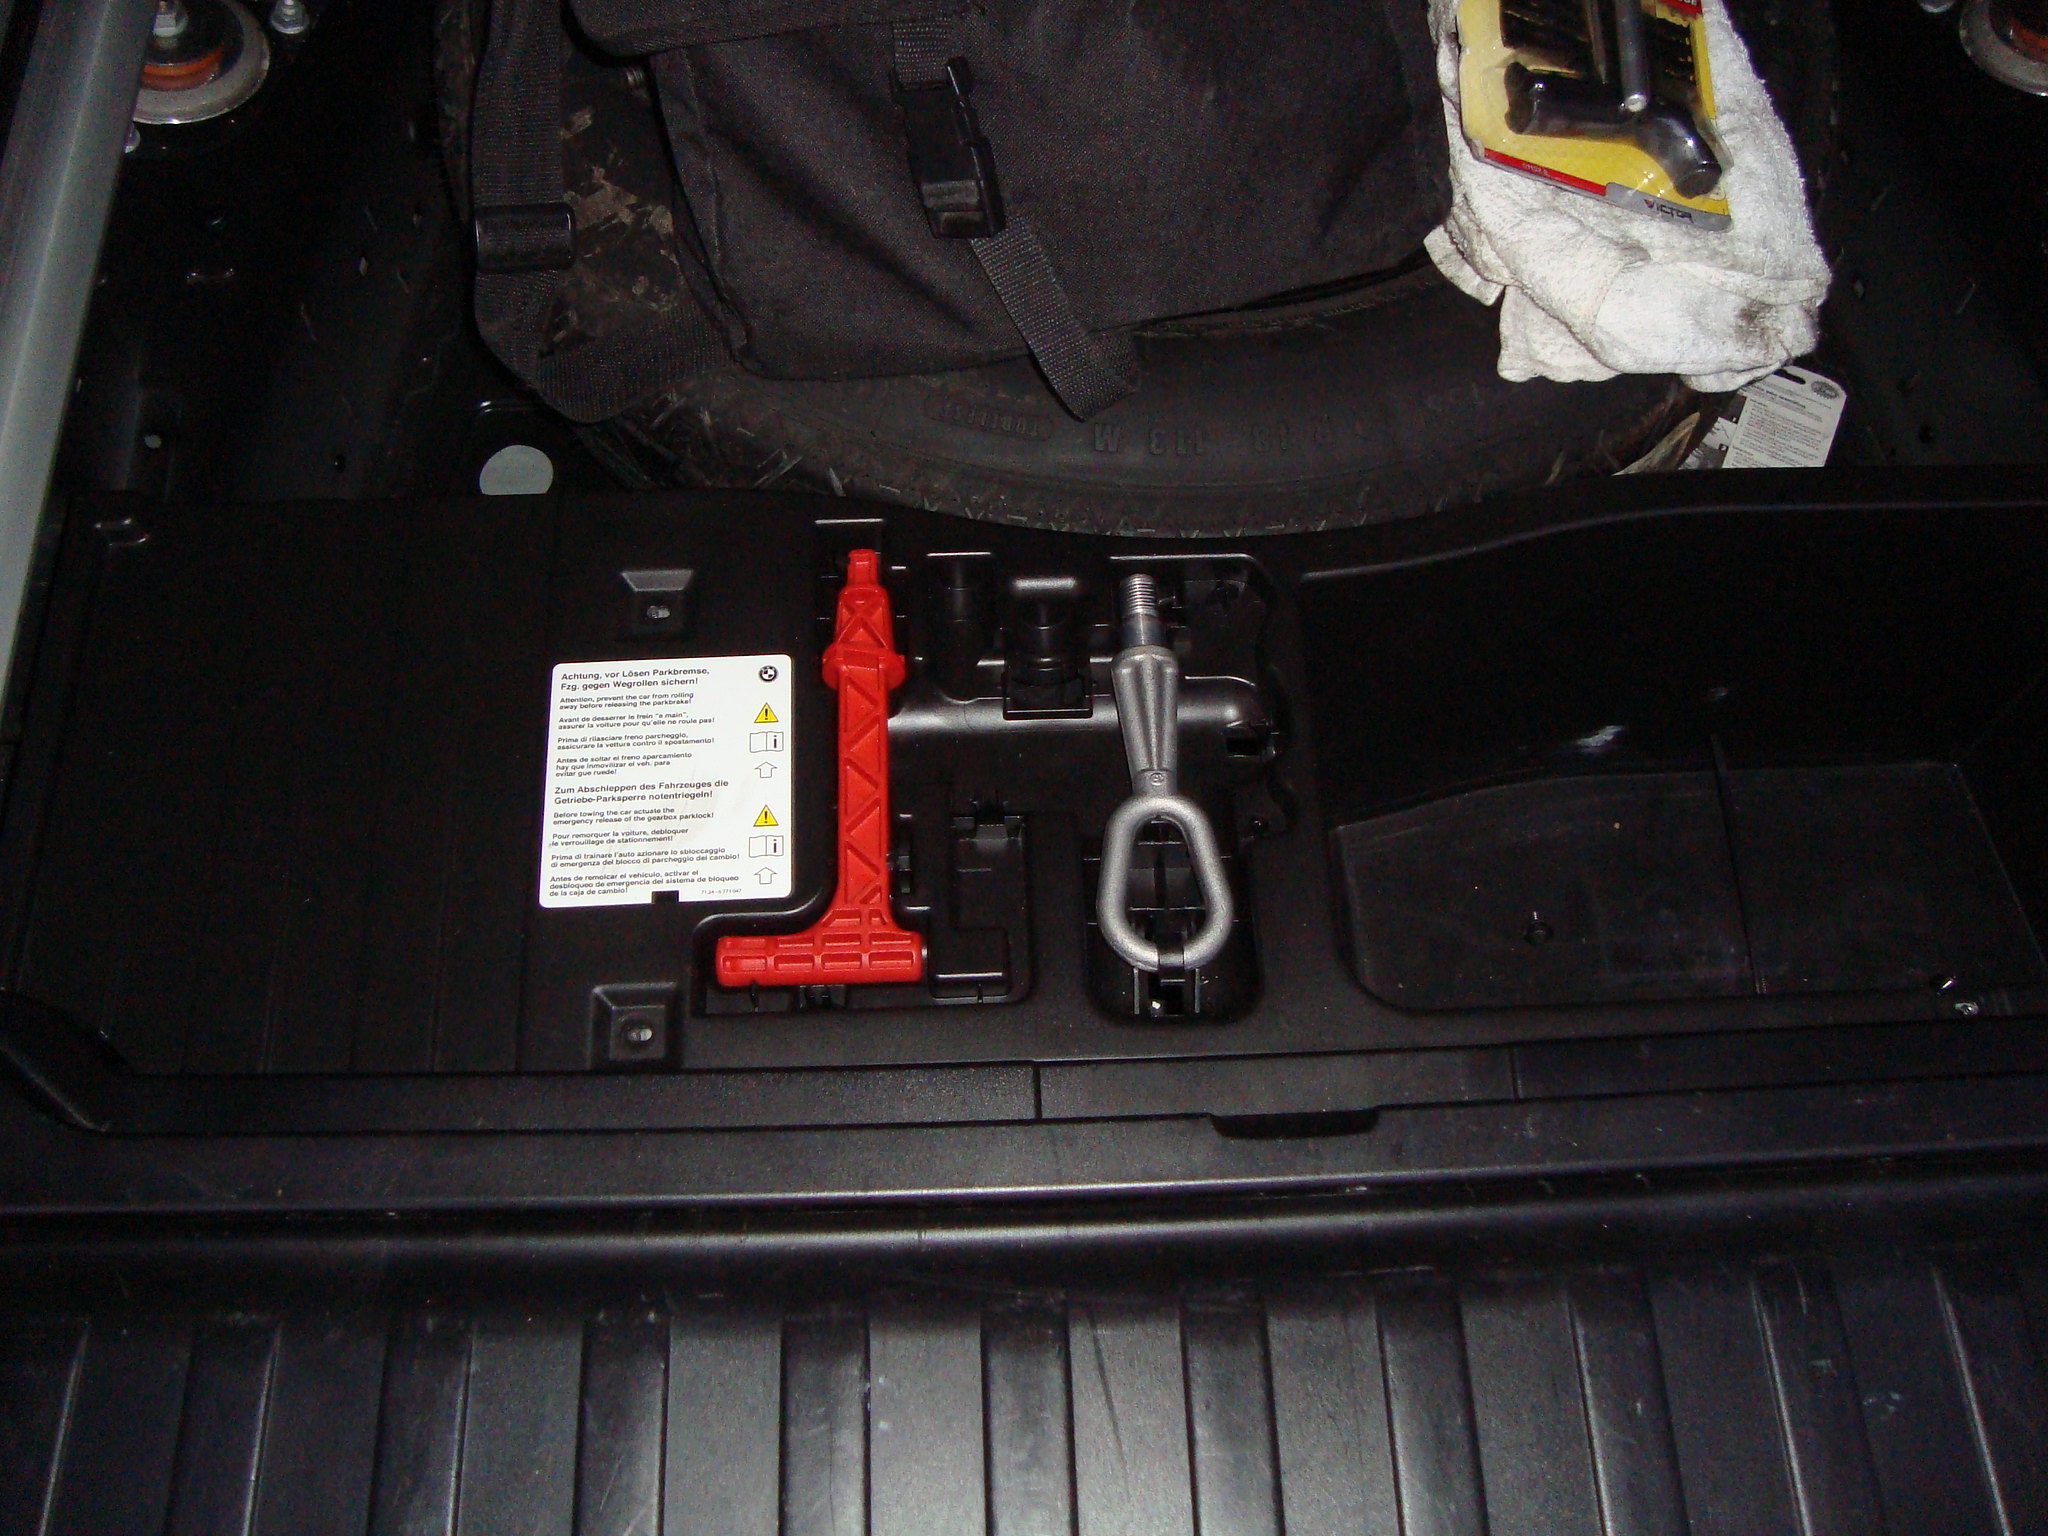   - pop the hood  - start of by removing pins holding air ducts in place (there are four pins, 2 on each side of each duct). I like to use dikes to pull the head of each pin out, then followed by removal of the plug. 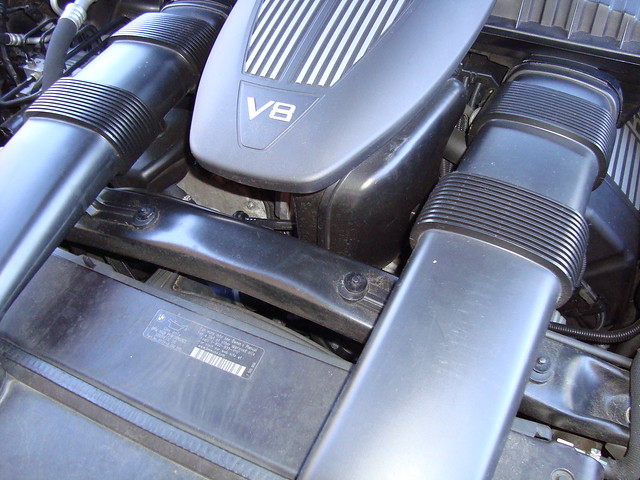  - remove the cover that hides the MAF (it’s the one with V8 on it. Pull it up and get it out of the way) 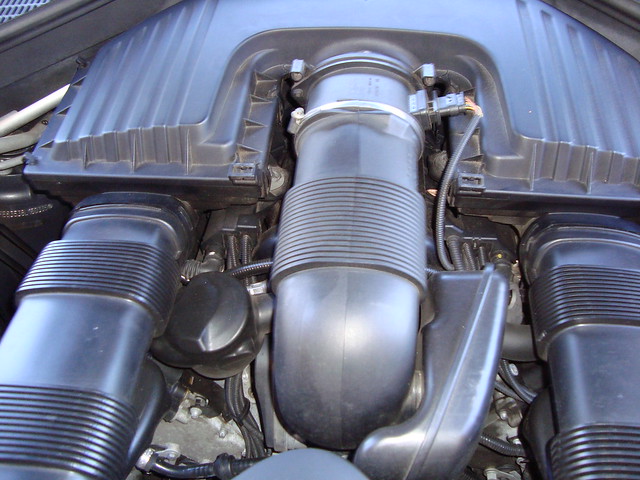 - disconnect the MAF sensor cable 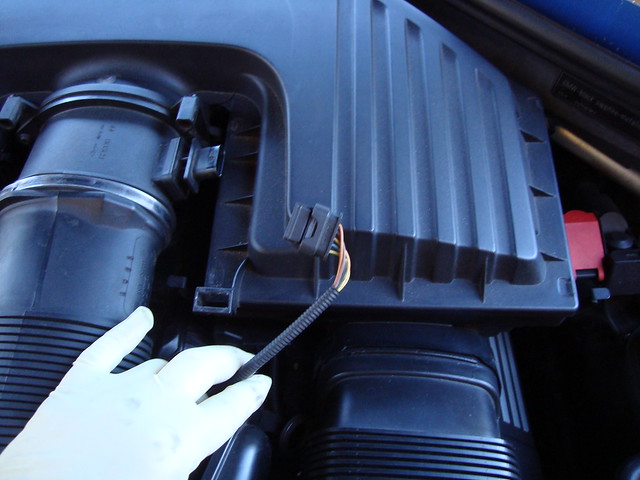 - unclip the top of Air Box - loosen the clamp connected from Throttle Body to Air Box - remove the top of the Air Box  - remove left and right Lower Air Box structure that holds Air Filter, with ducting  - unclip Hood Release Cable from the front cross member 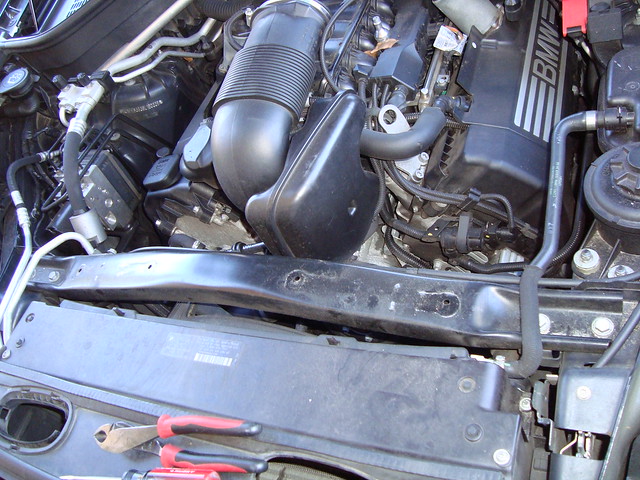 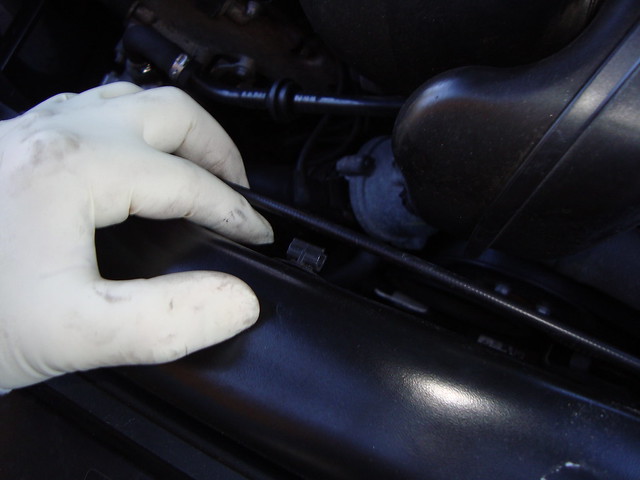 - also, undo a nut holding said cable to the cross member (its on passenger side) - remove 4 bolts holding the cross member and remove the cross member (if you like, you can reinstall bolts as not to loose them, they will not be in your way)  - disconnect Radiator Fan electrical connector (located on passenger side next to fan shroud) 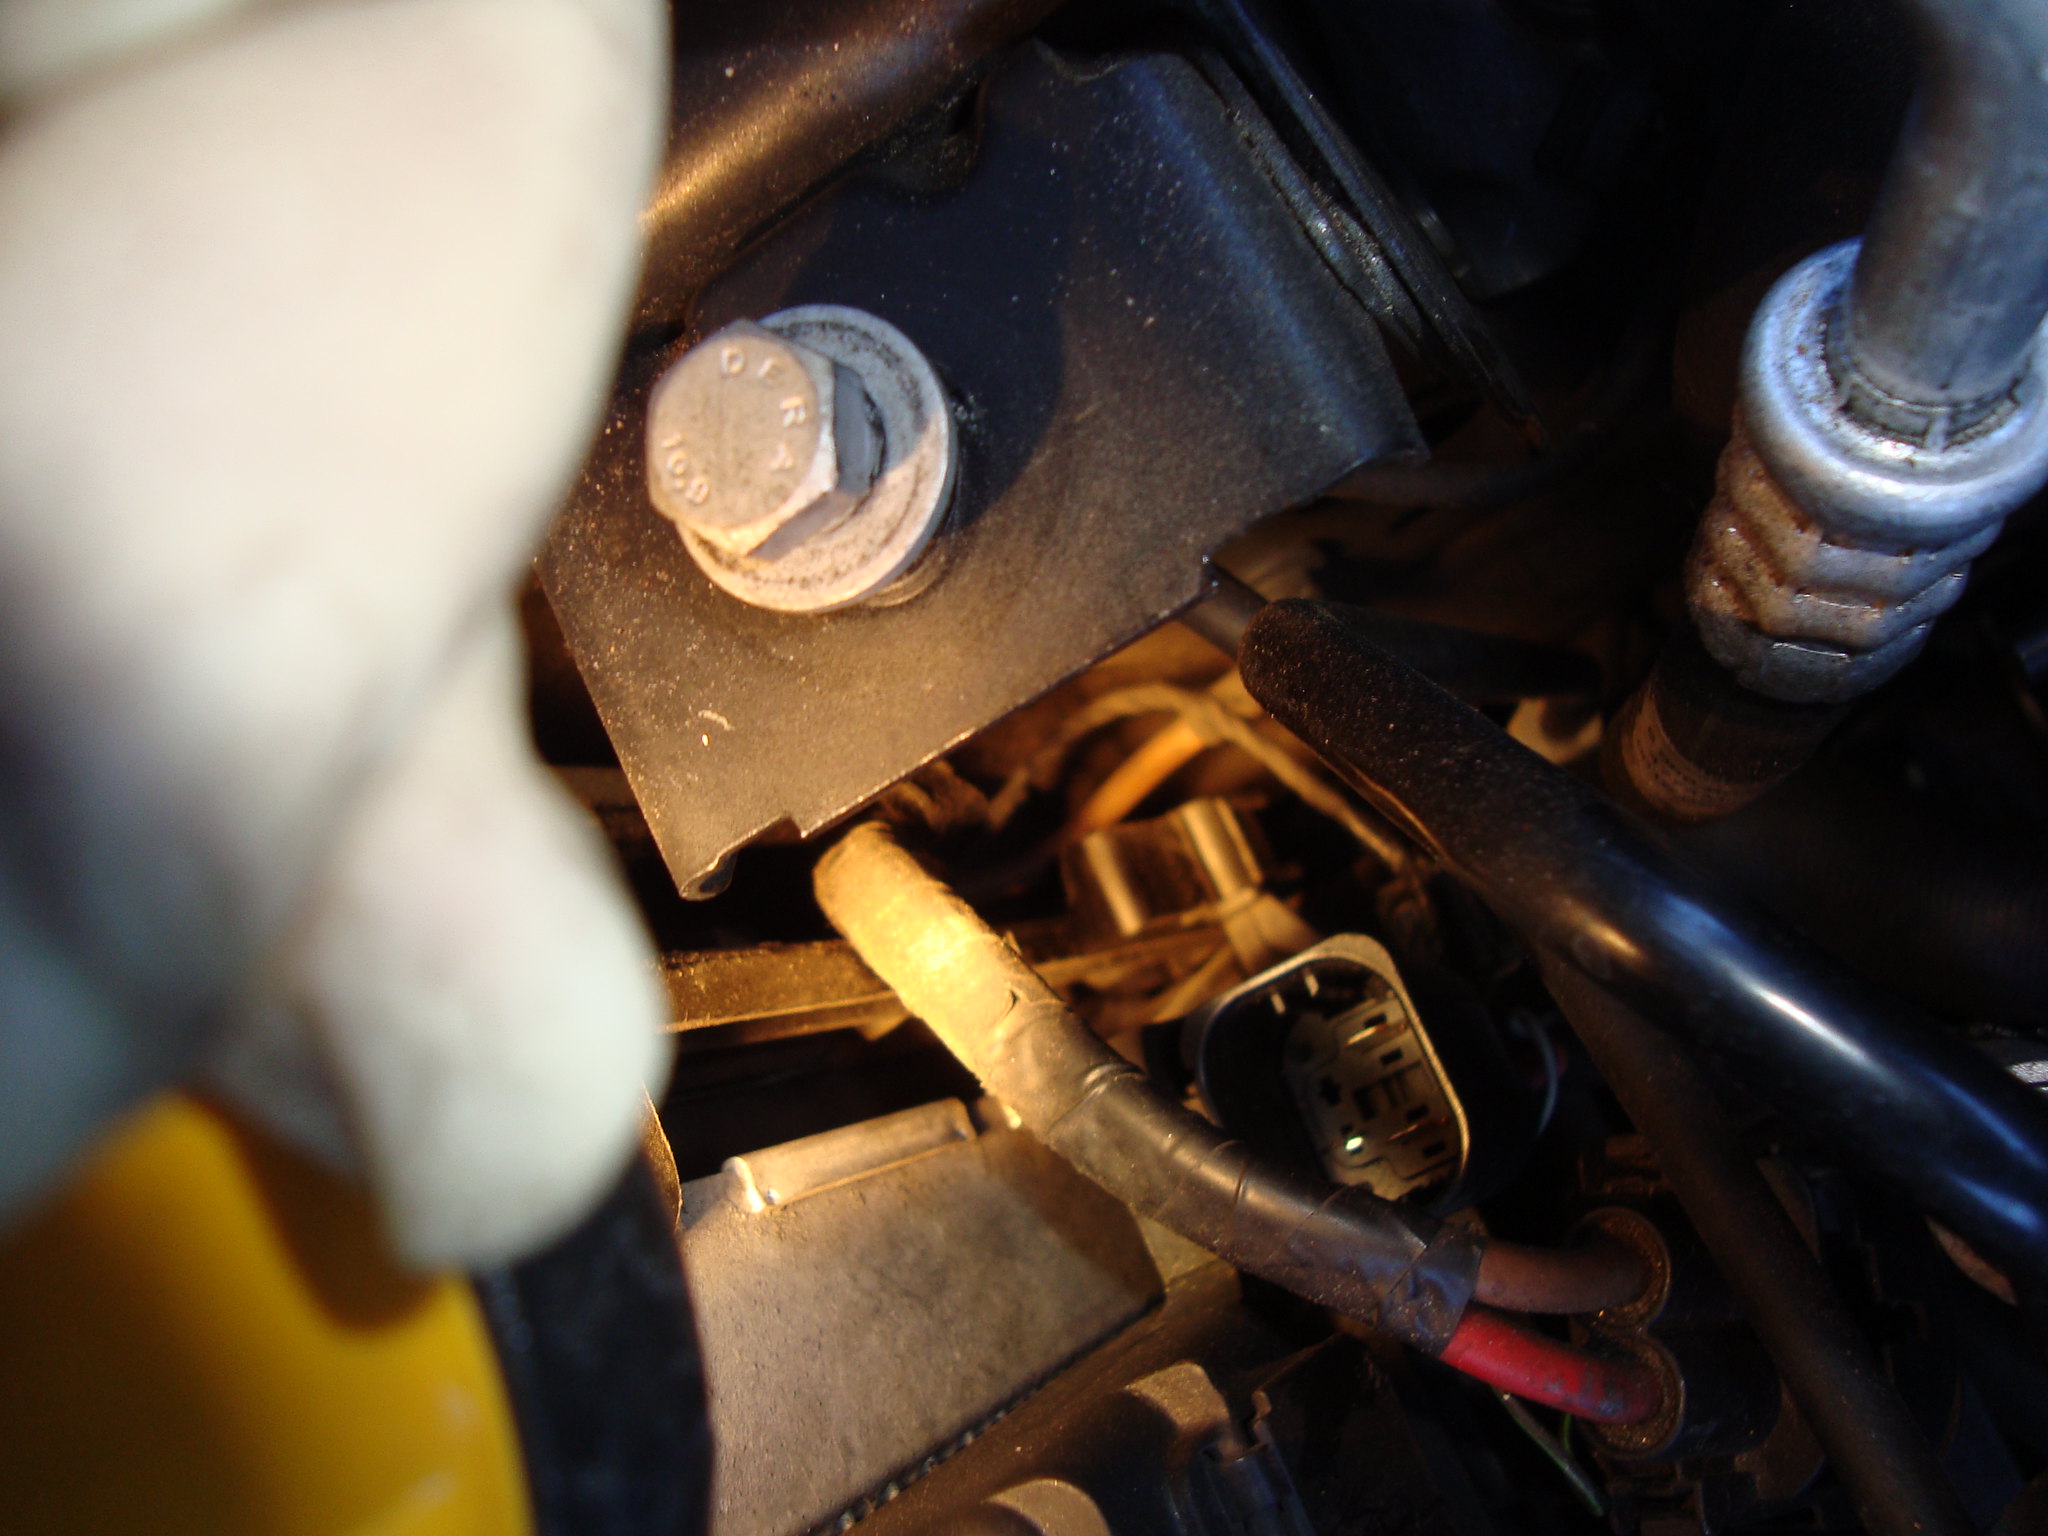 - unclip fan shroud on left and right side of the fans (the driver side once unclipped will fold to allow removal pass radiator hoses)   DSC04068 DSC04068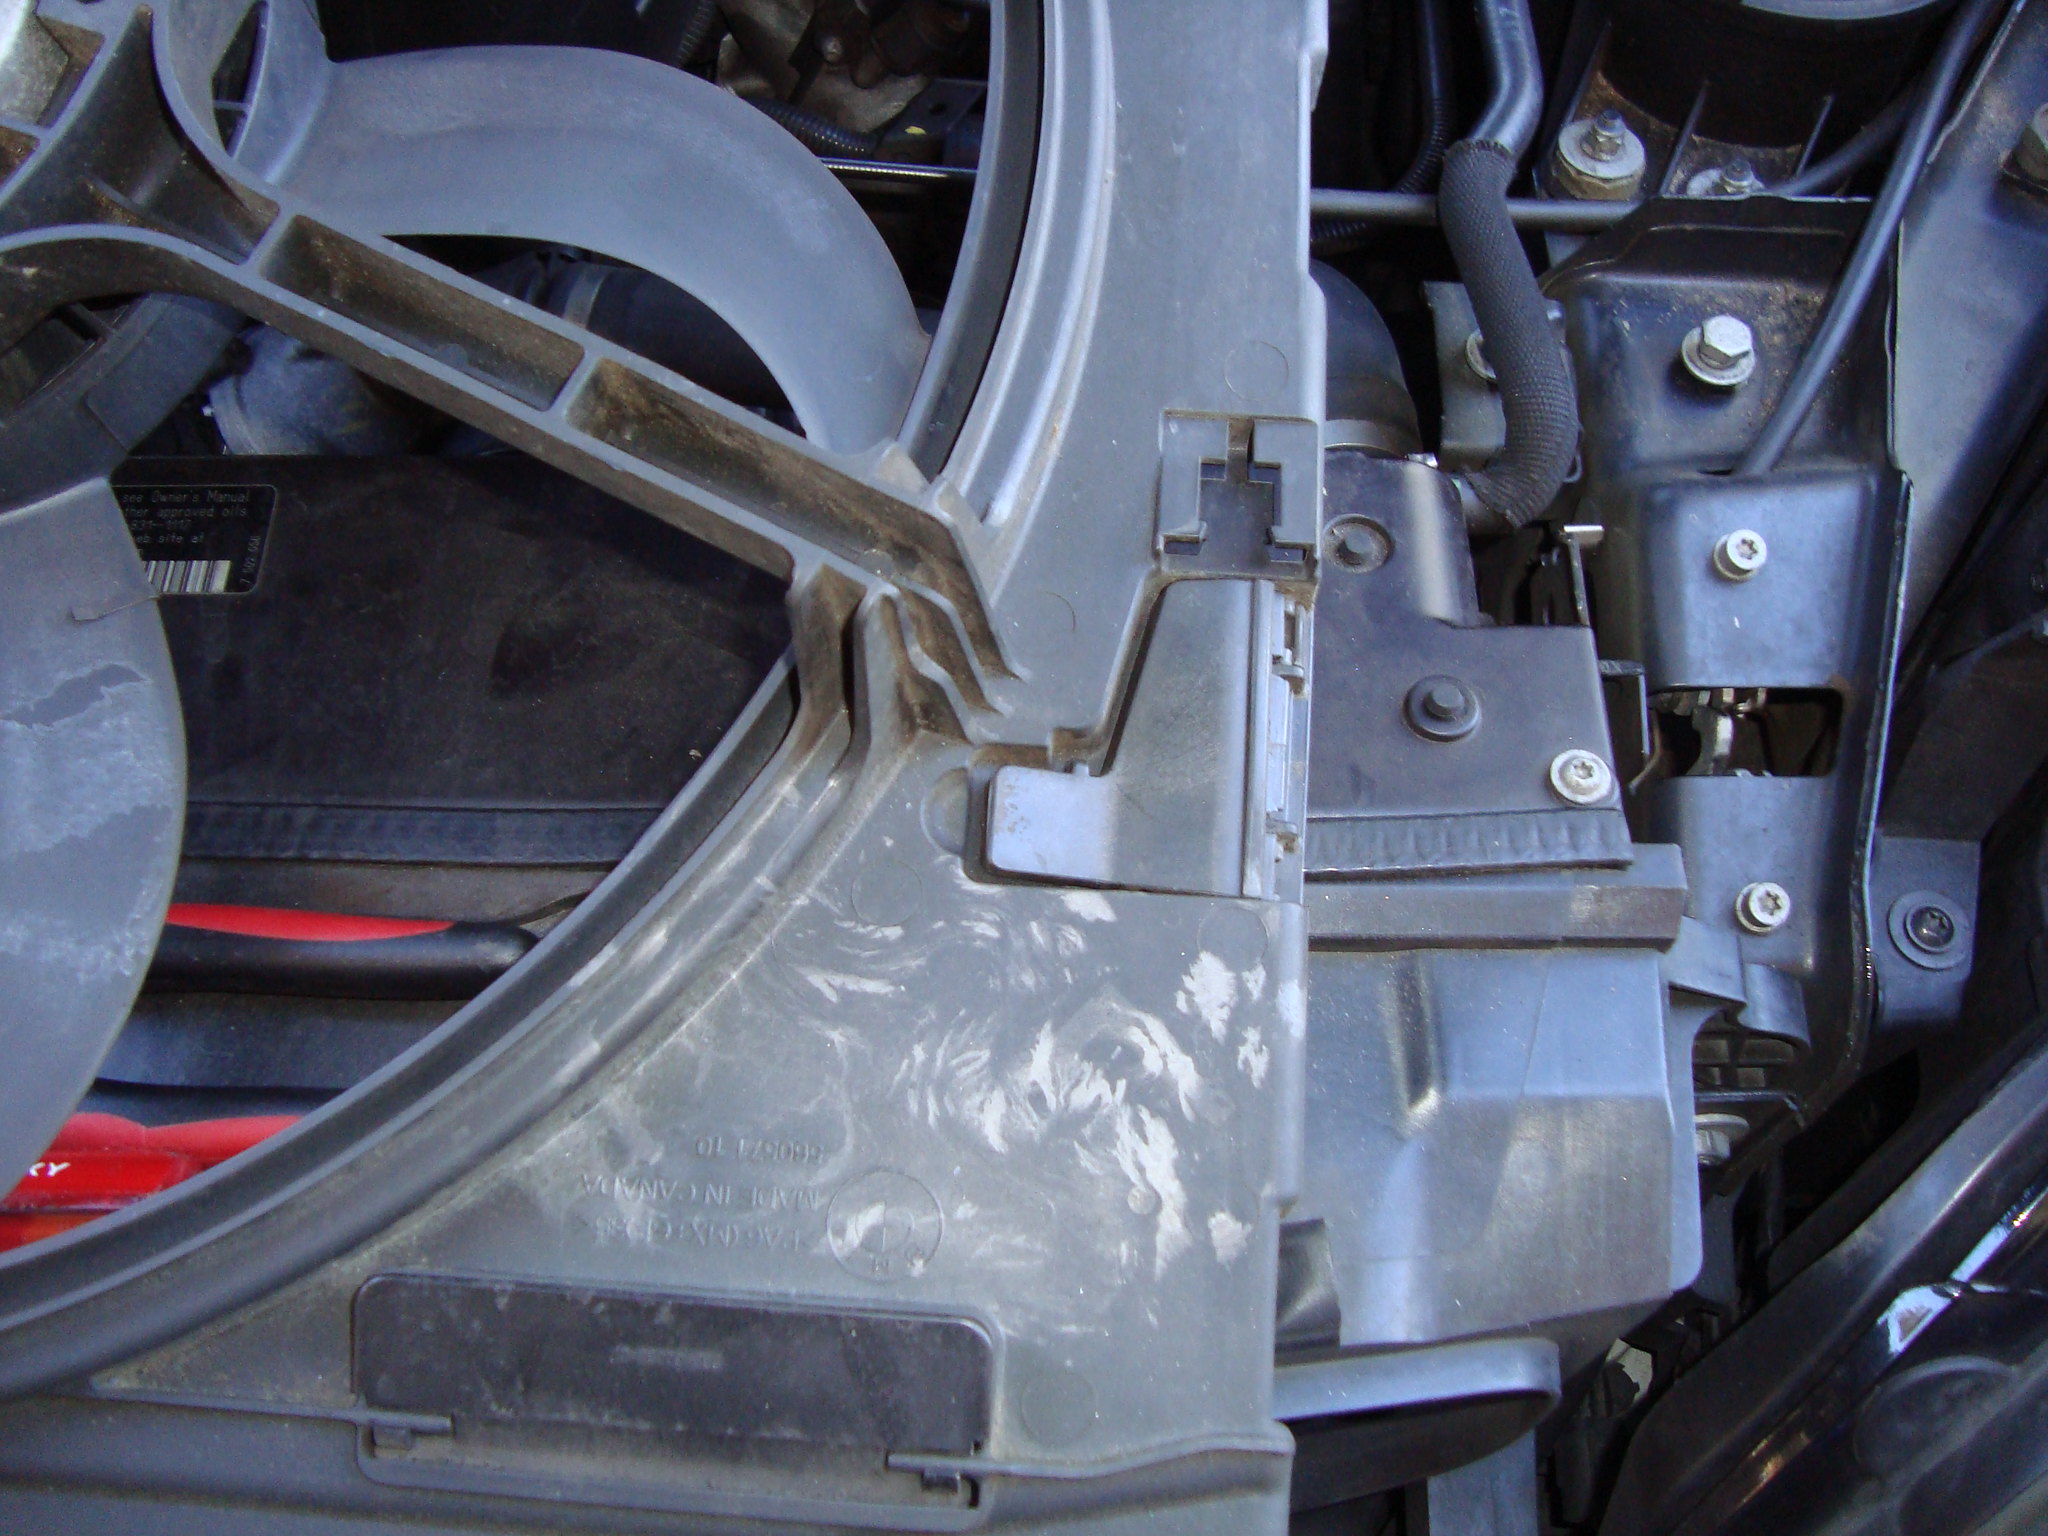 DSC04069 DSC04069- pull Fan Shroud Assembly straight up and out of the way - unbolt hoses running in front of the Power Steering Pump (there are three small bolts, 10mm). Once unbolted place out of the way.  DSC04071 DSC04071 DSC04072 DSC04072- remove tension from the Serpentine Belt (there is a little hole that will allow for a drill bit or a pin to be installed as to allow for easy reinstallation of the belt.) It helps having two people to do this. 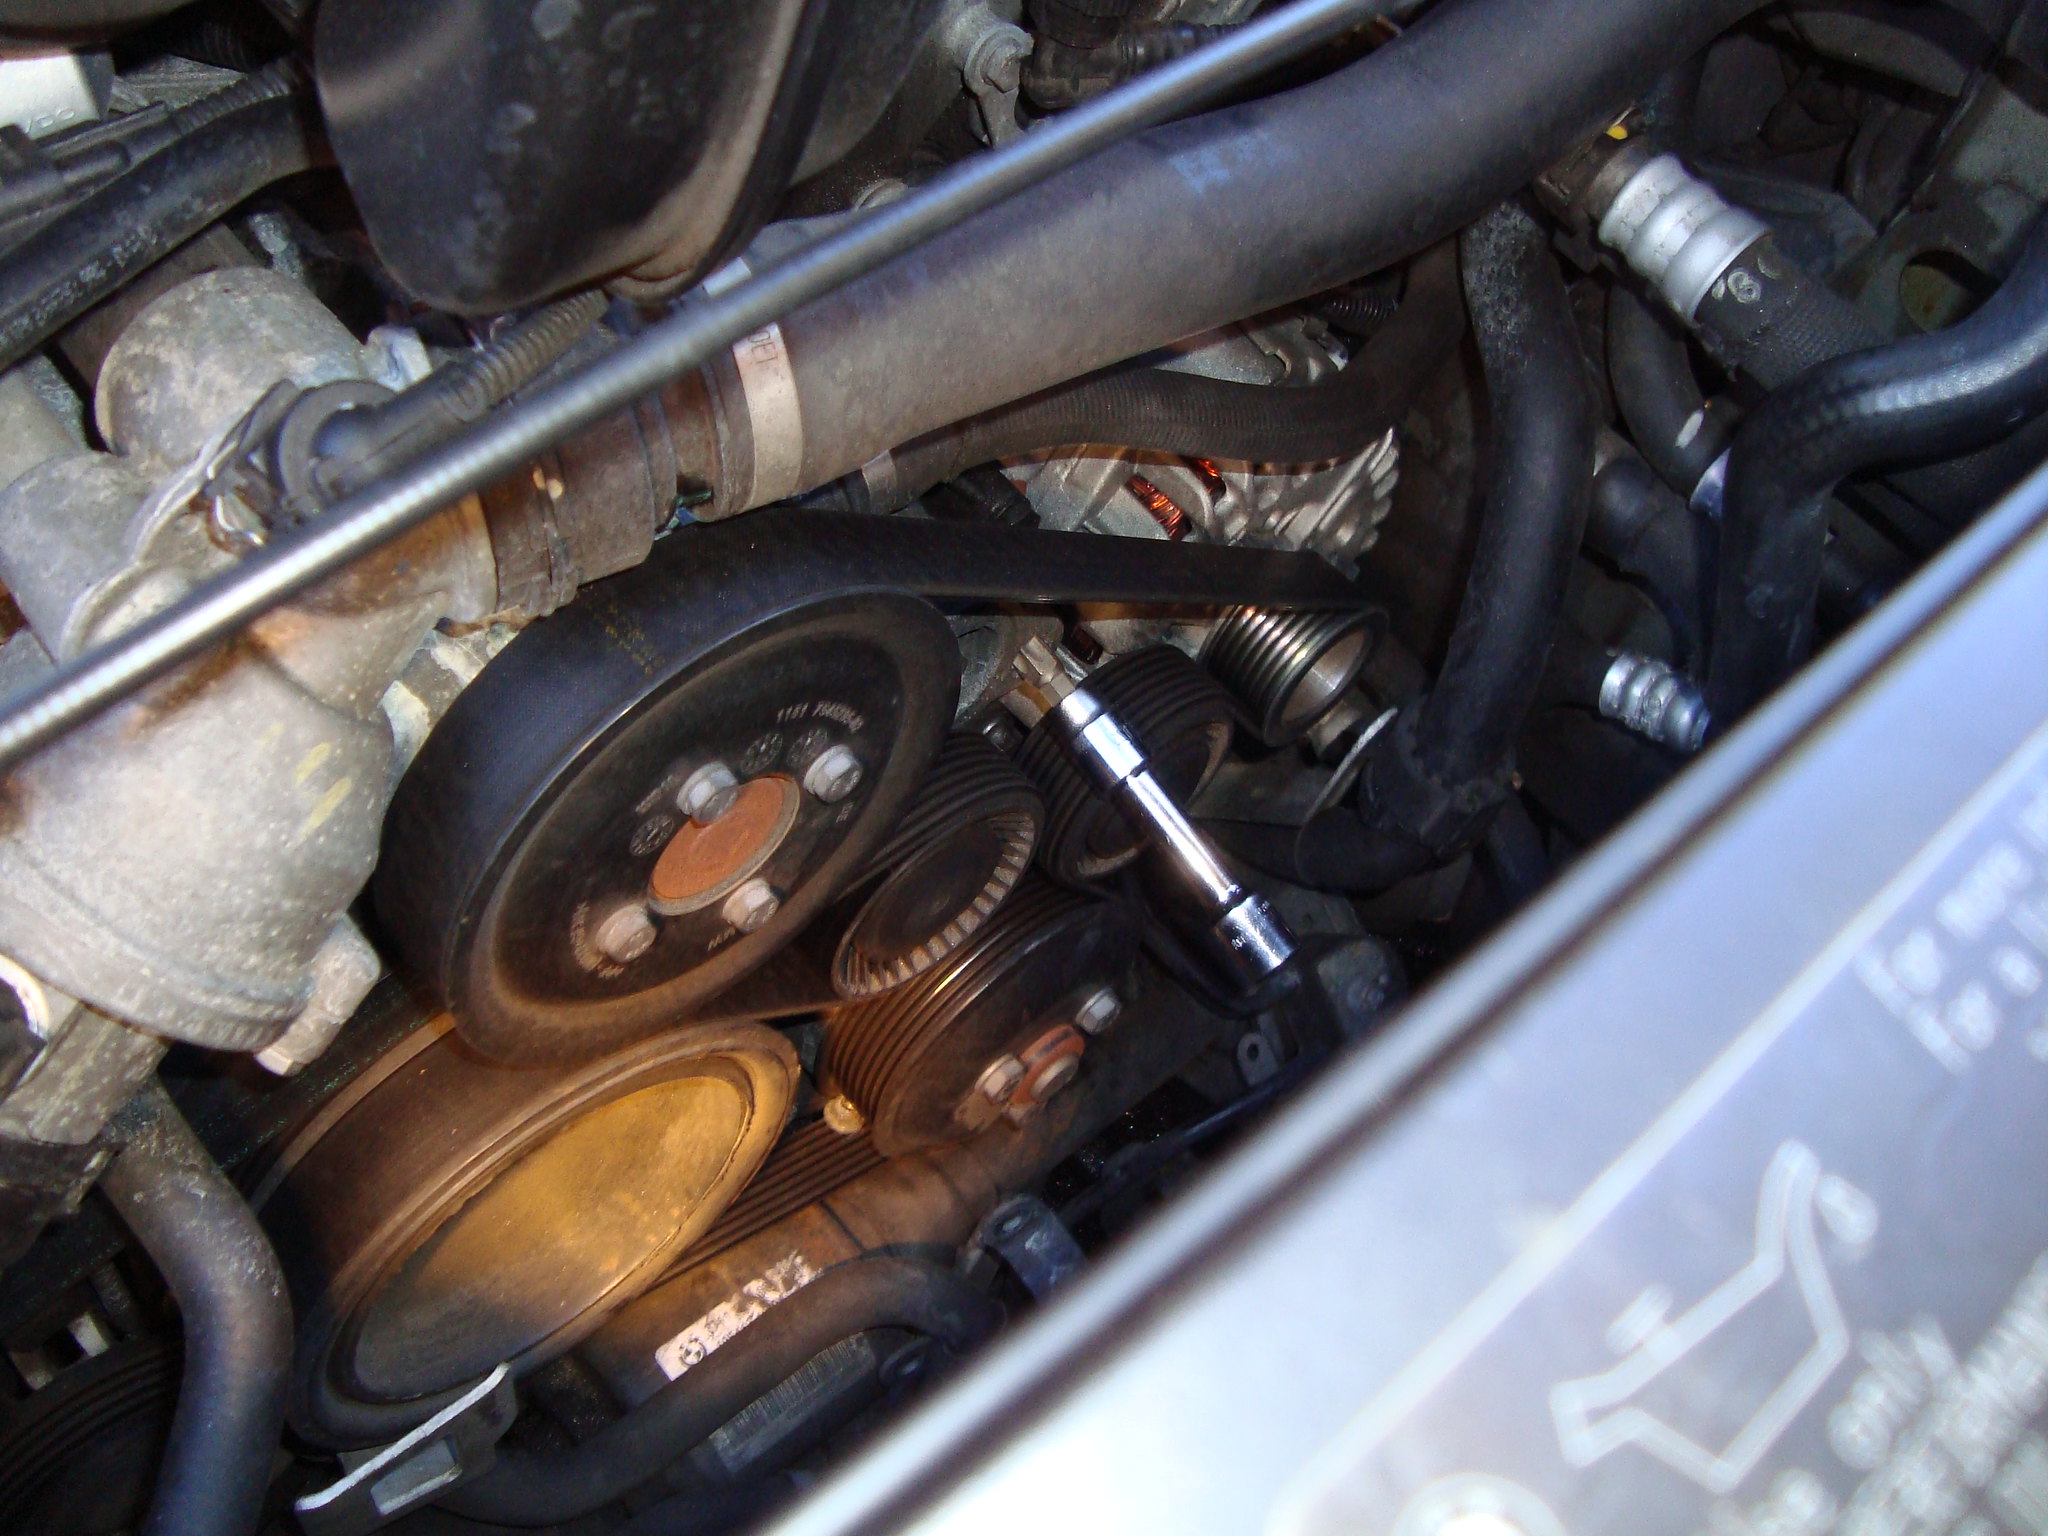 DSC04074 DSC04074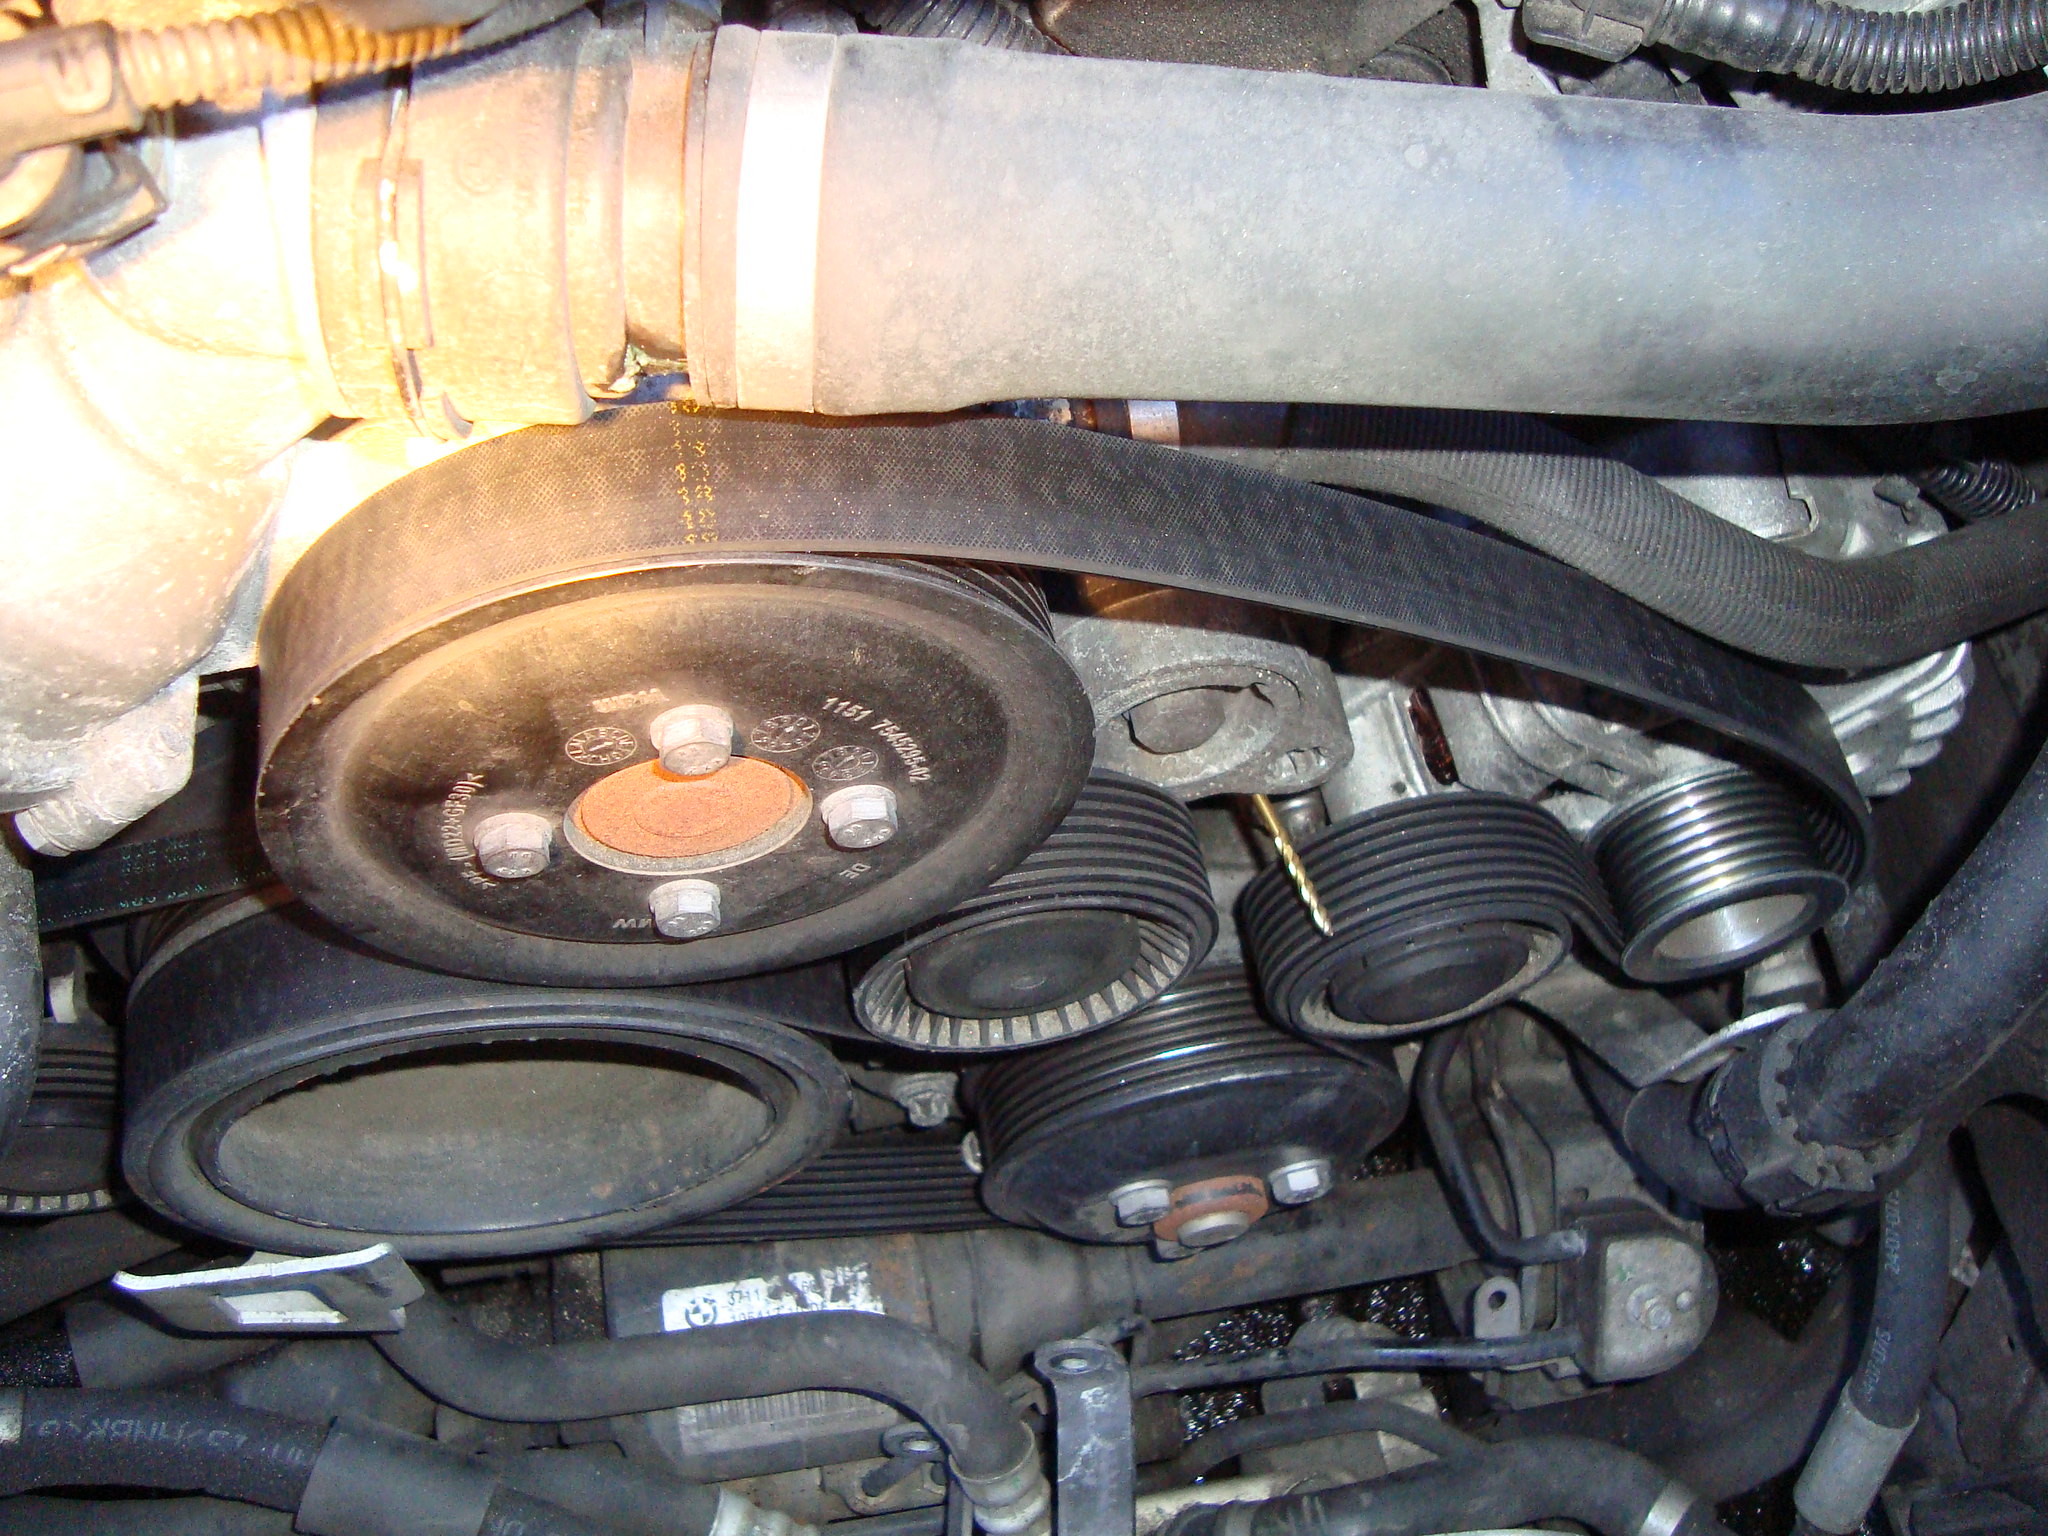 DSC04076 DSC04076- Notice in image above the drill bit is holding Serpentine Belt Tensioner in place after load is taken off of the belt. (Make sure to make a note of the way the Serpentine Belt is routed, you will need to reinstall it the same way. If you are reusing the belt, make sure you mark the direction of rotation on the belt.  DSC04077 DSC04077- continue by removing Breather Hose connecting left an right Valve Covers with Intake Manifold 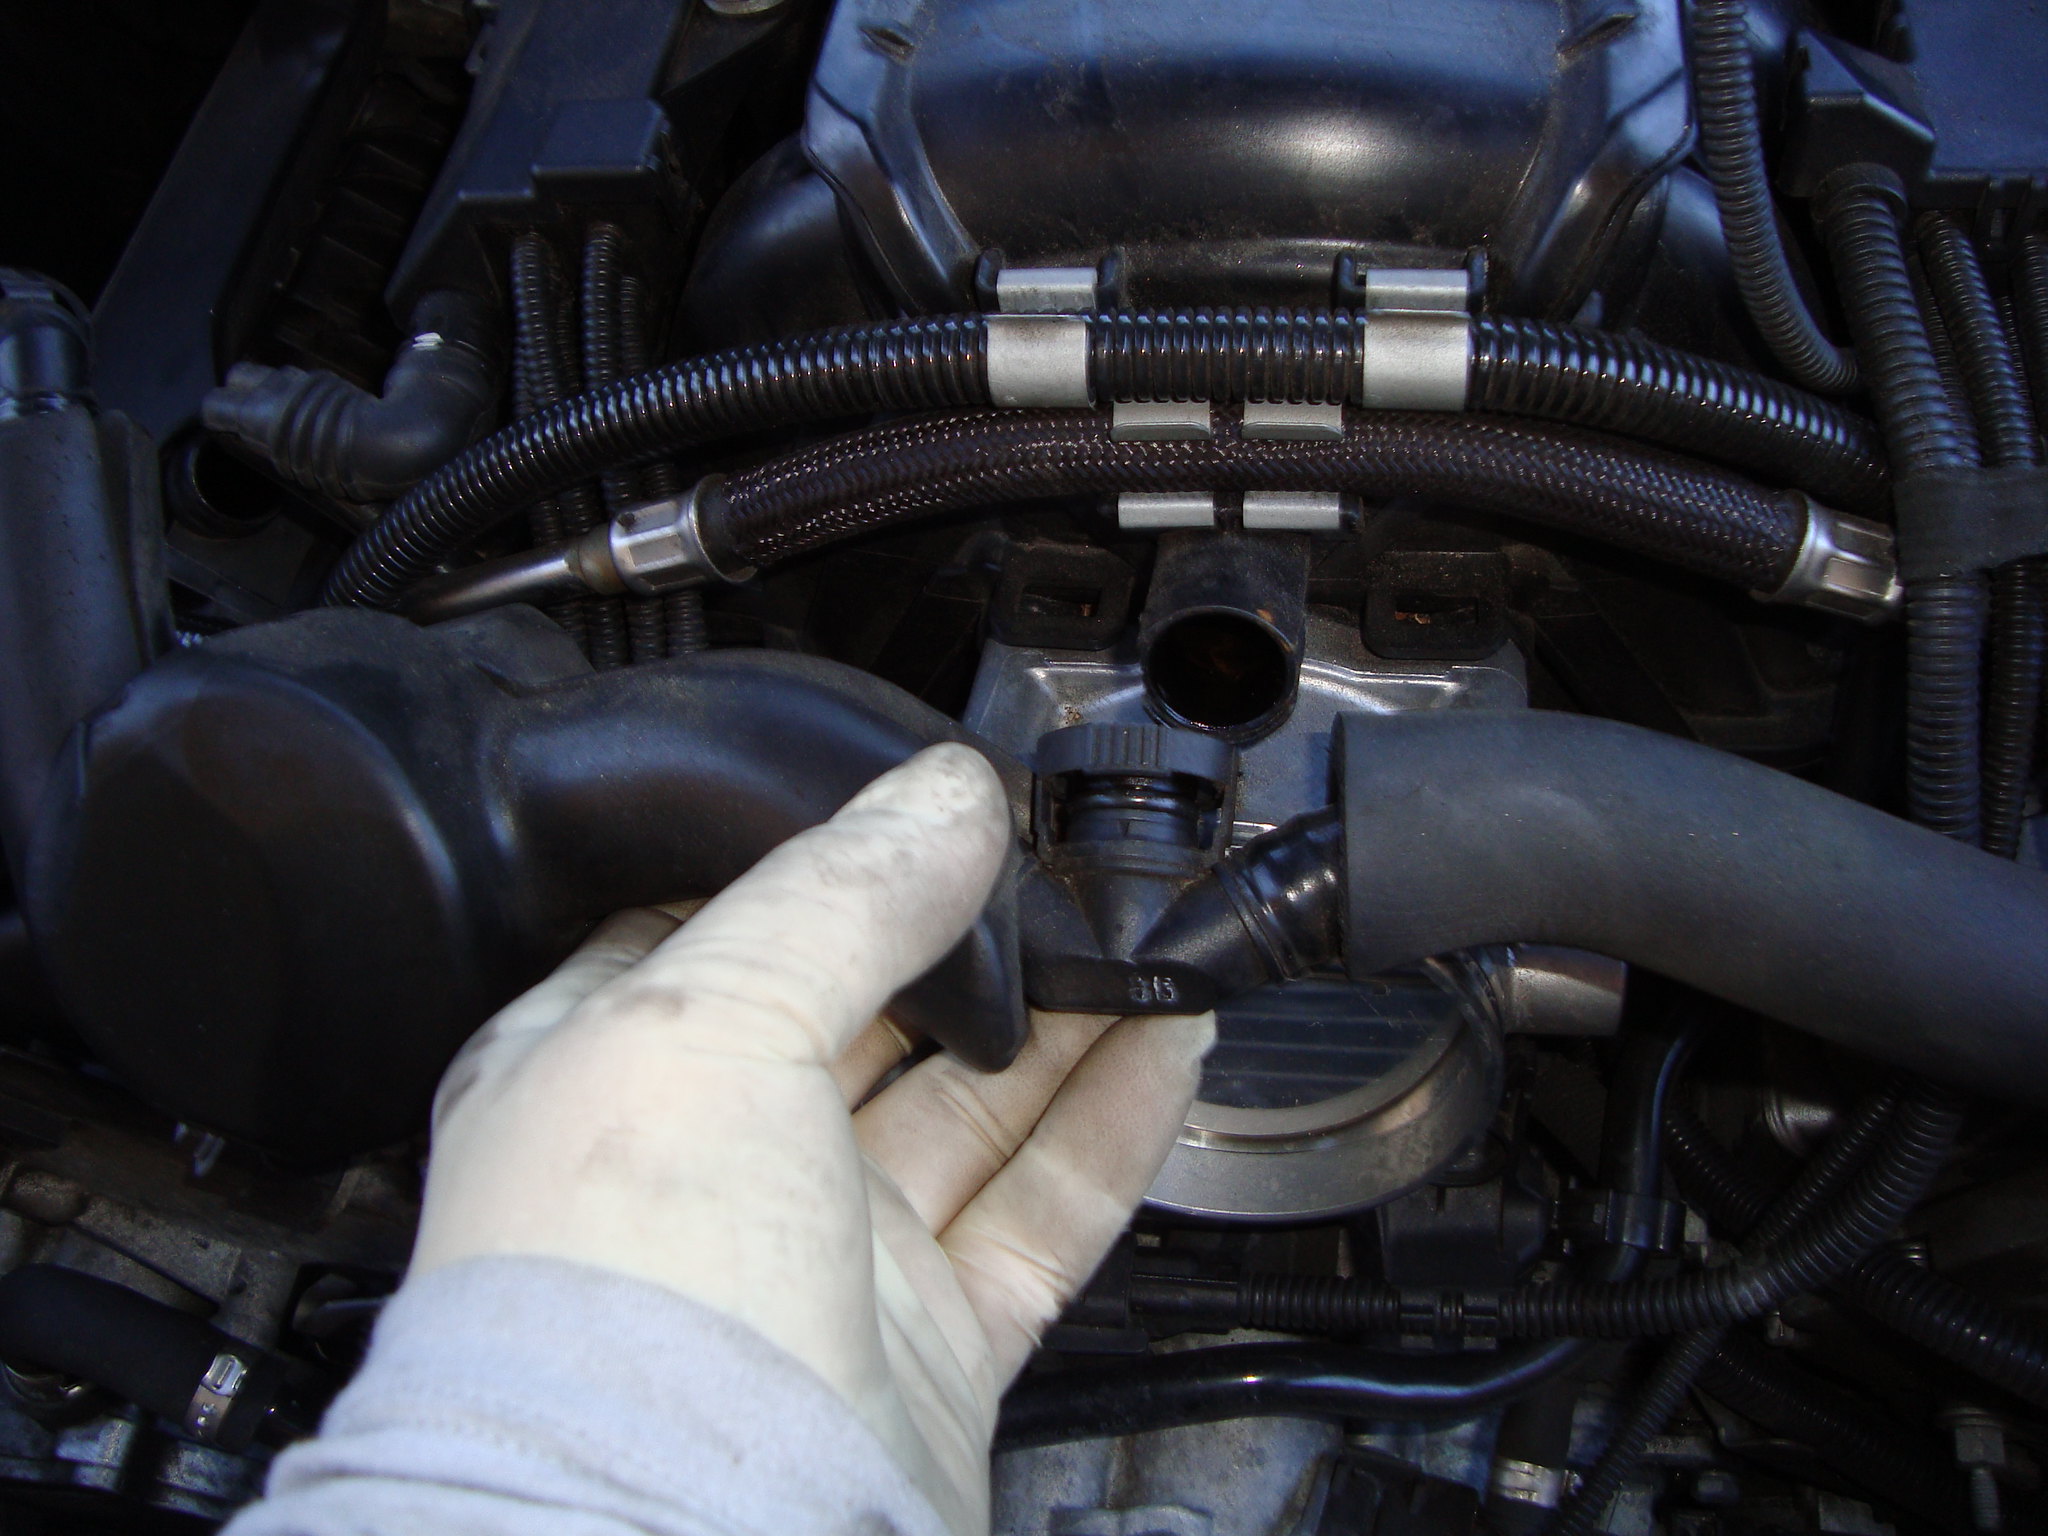 DSC04078 DSC04078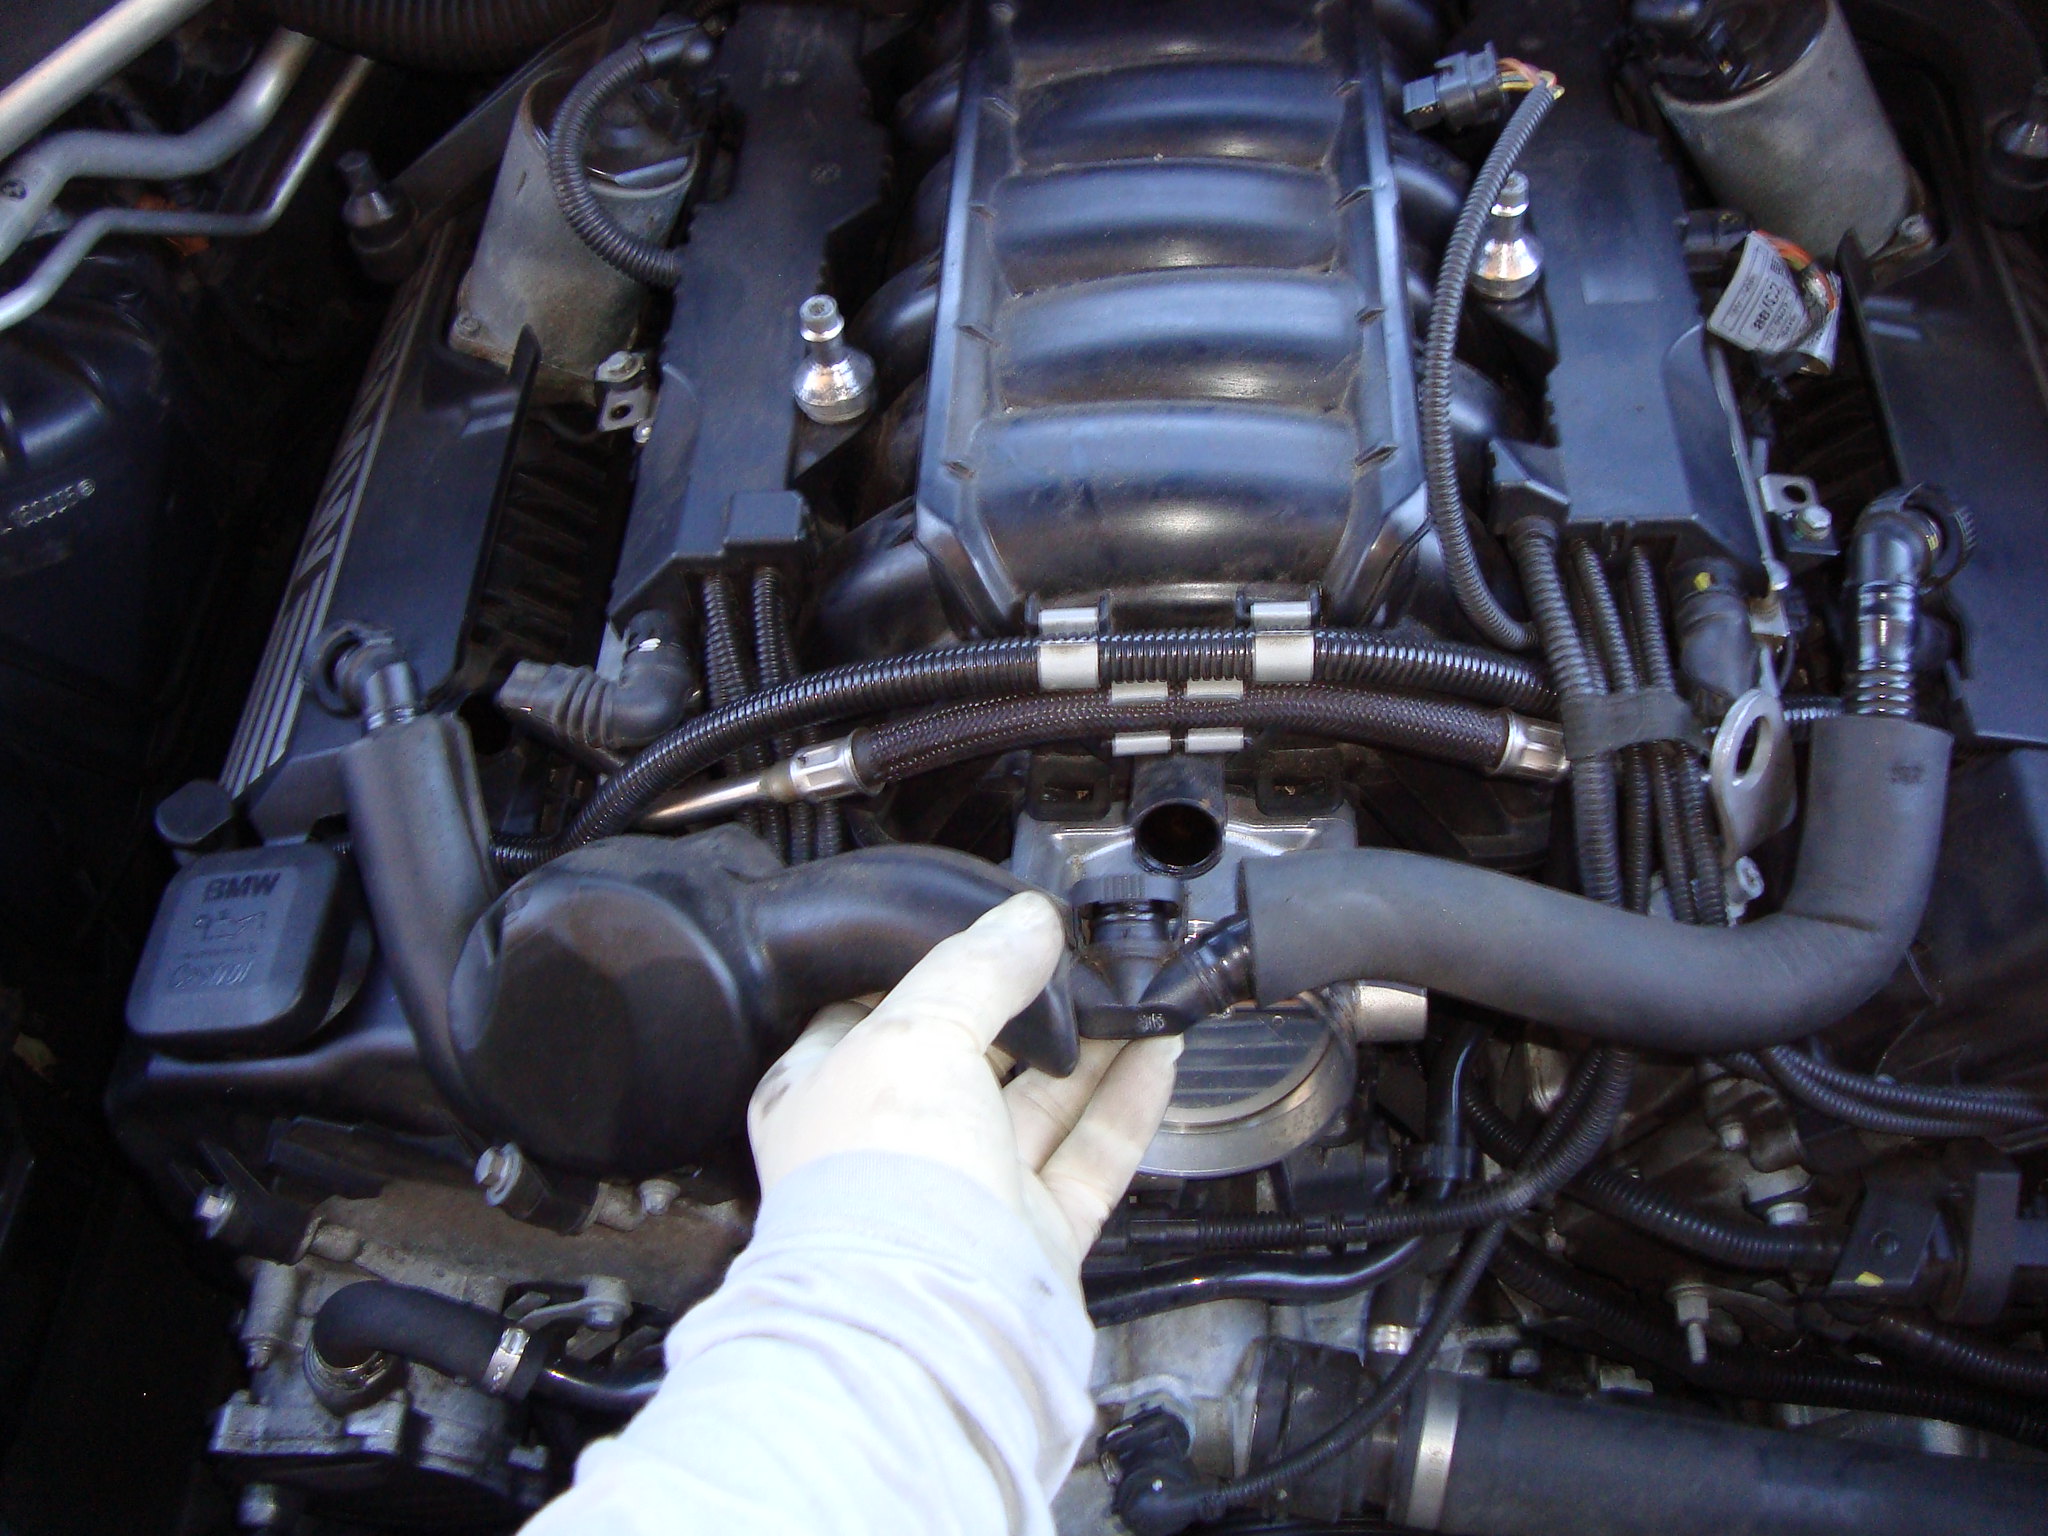 DSC04079 DSC04079- remove rain gutters, remember to use a socket but only to turn the bolts 90 degrees (these are actually locking pins and not plastic bolts)  DSC04081 DSC04081- remove Cabin Filter Housing, it is held in place by three locking pins: two on top, one on bottom  DSC04082 DSC04082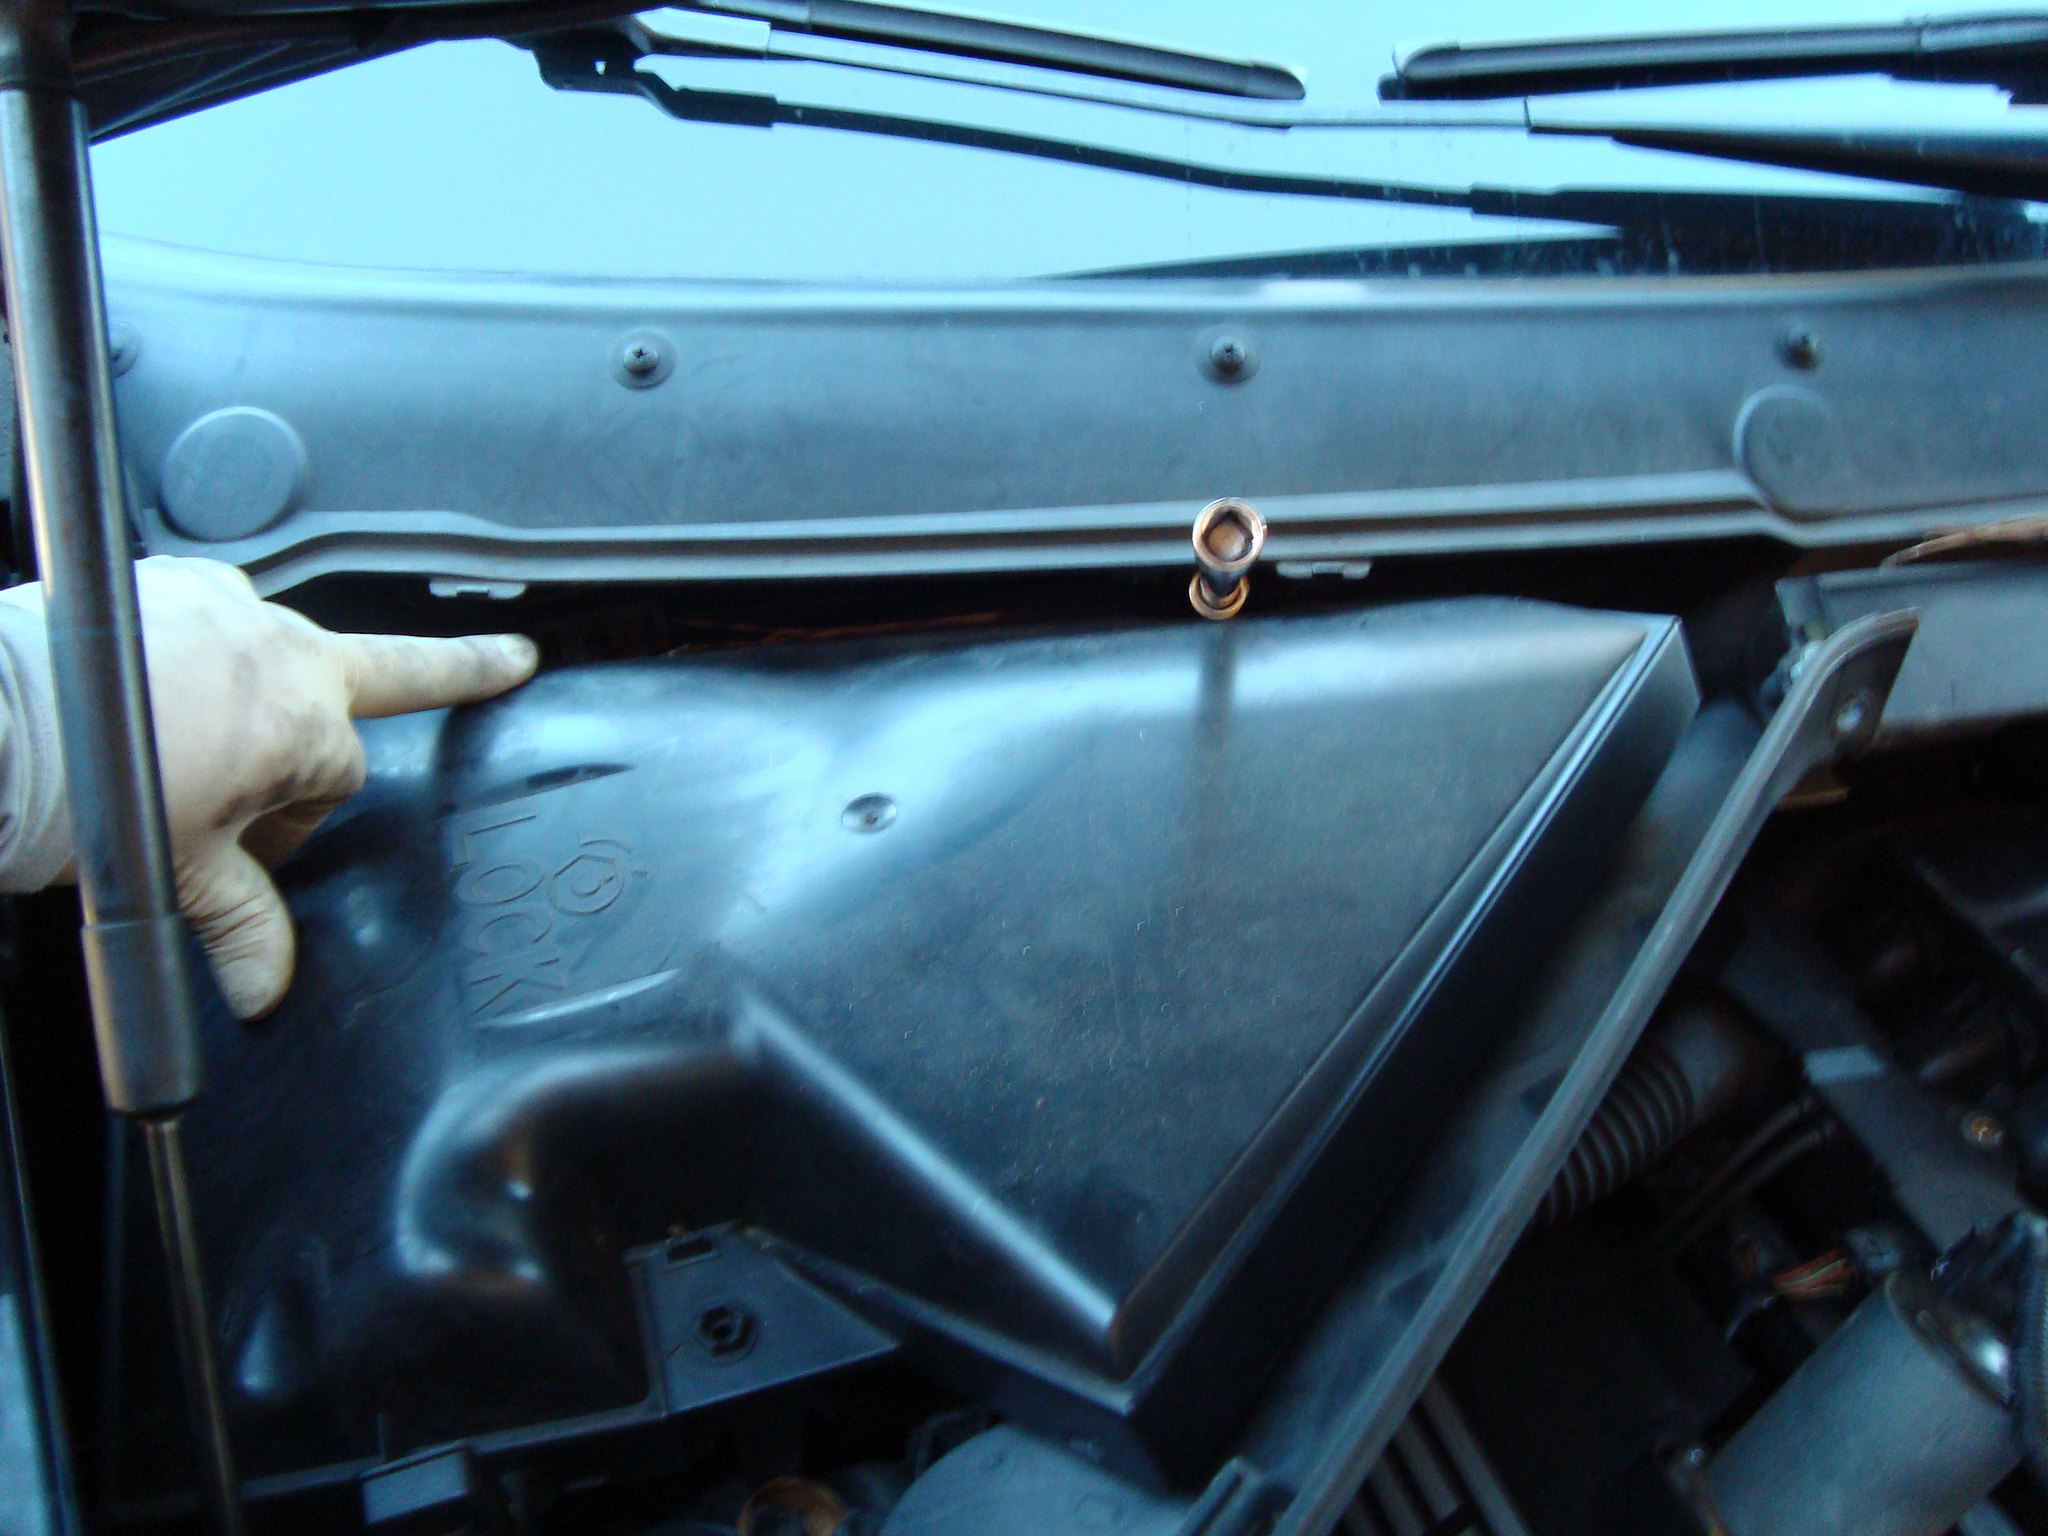 DSC04084 DSC04084- remove the "bulkhead left" and "partition middle and right". (There are two bolts and two screws on both sides of the car. There also are bolts interconnecting there and two plastic pins located on each end, plus tow that hold the middle peace) 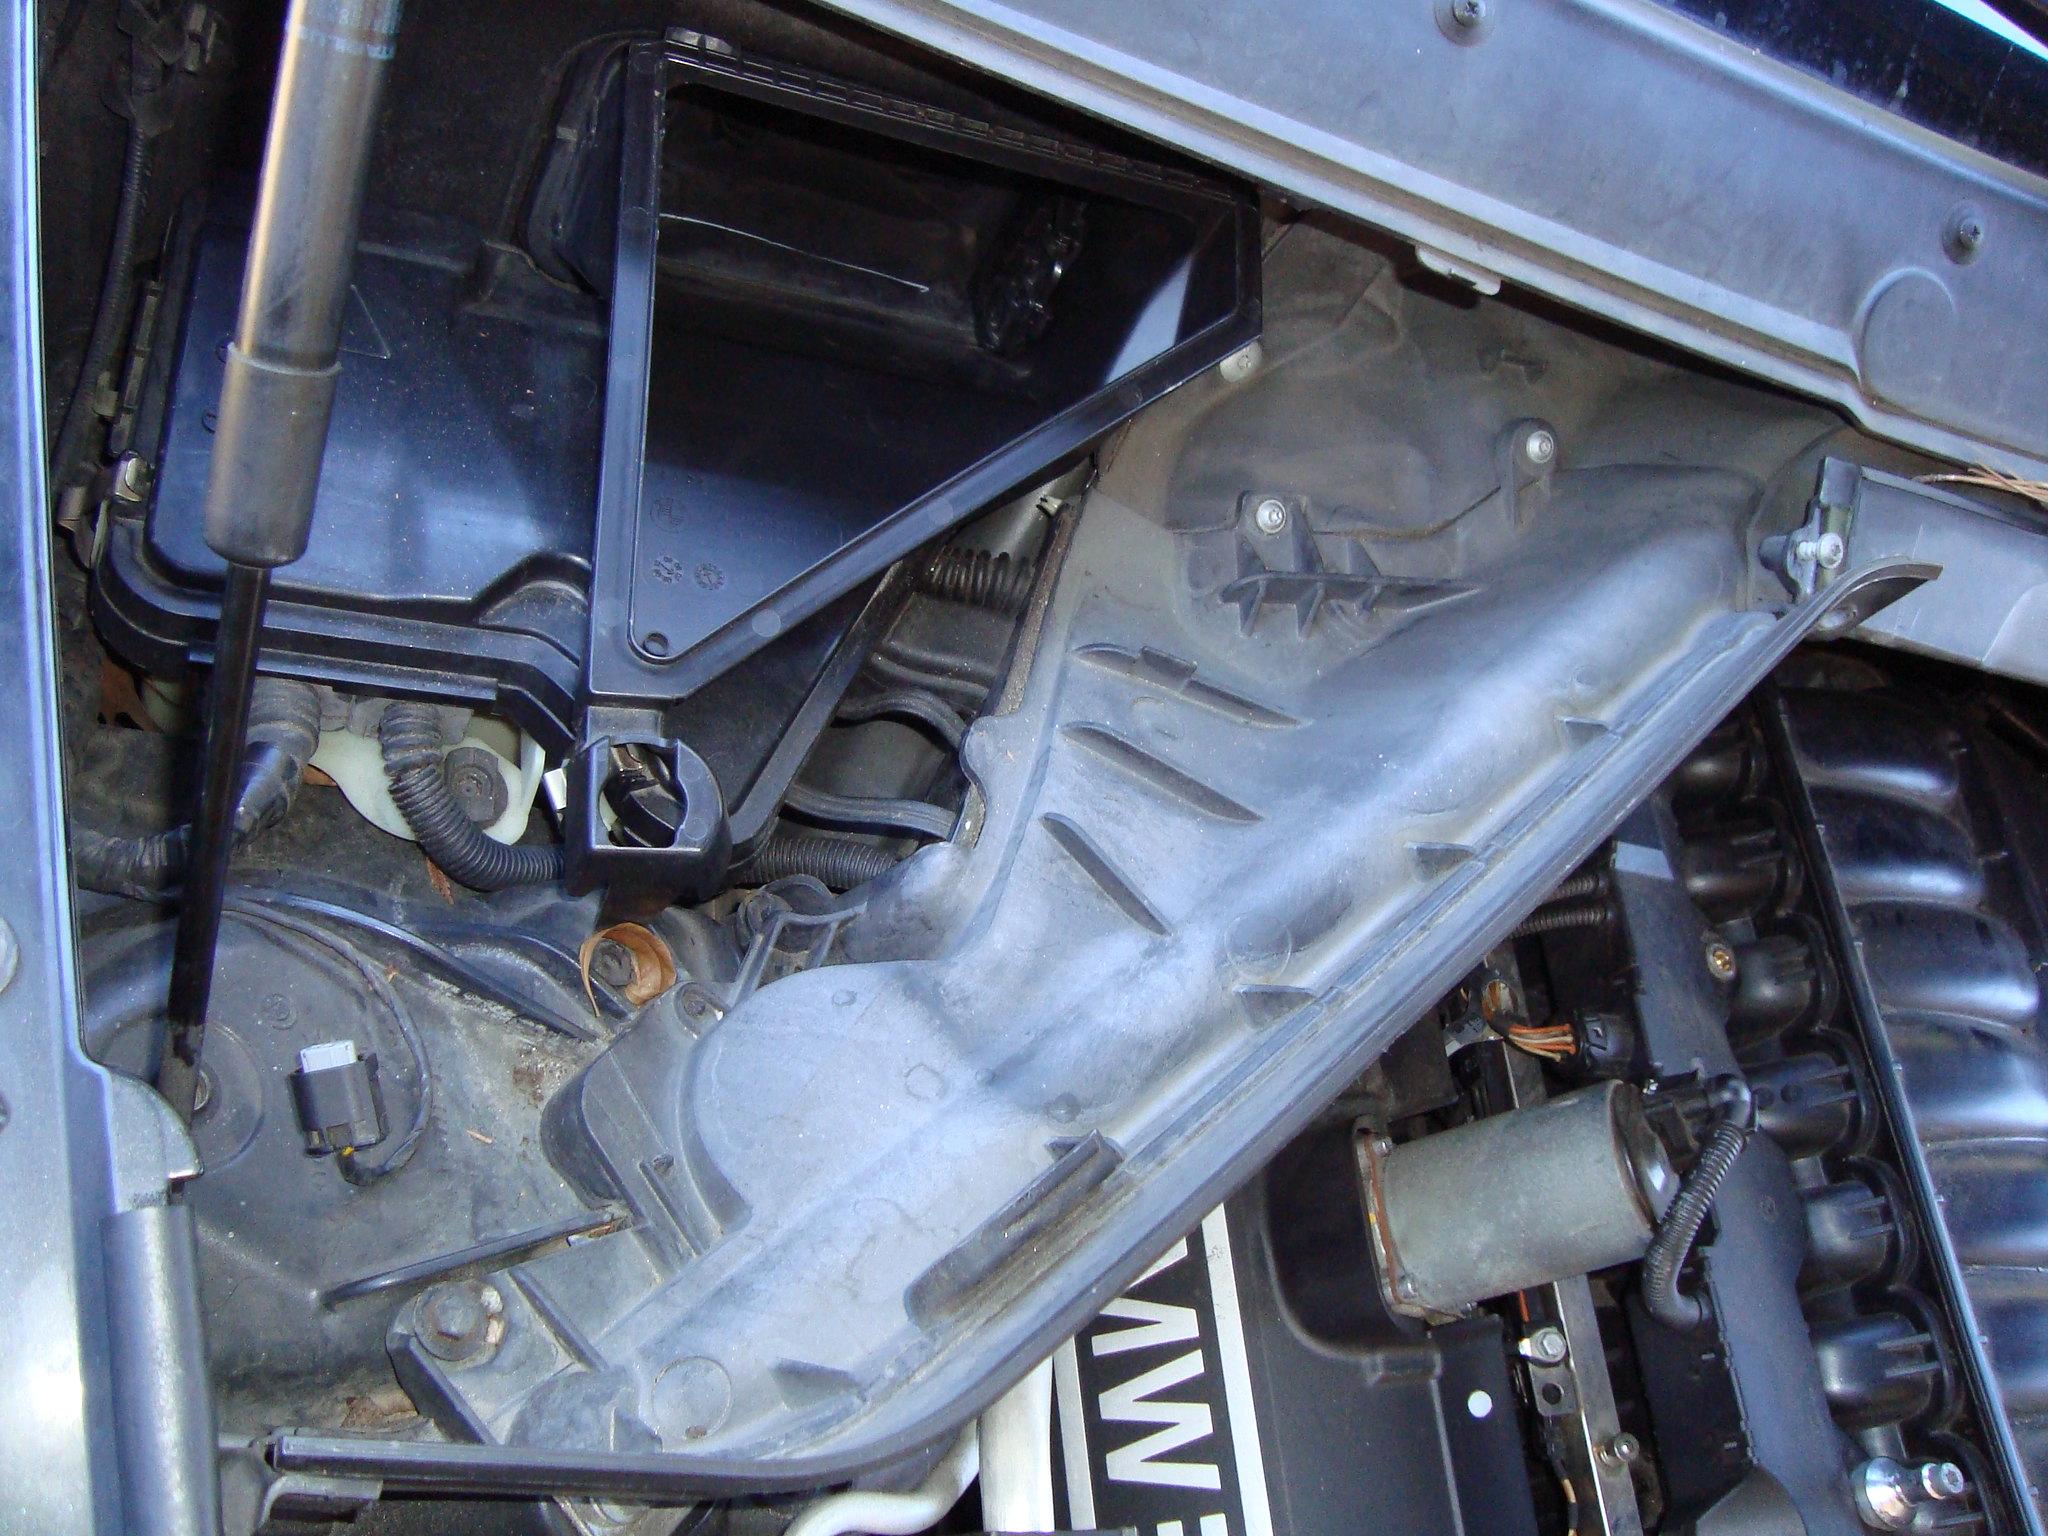 DSC04085 DSC04085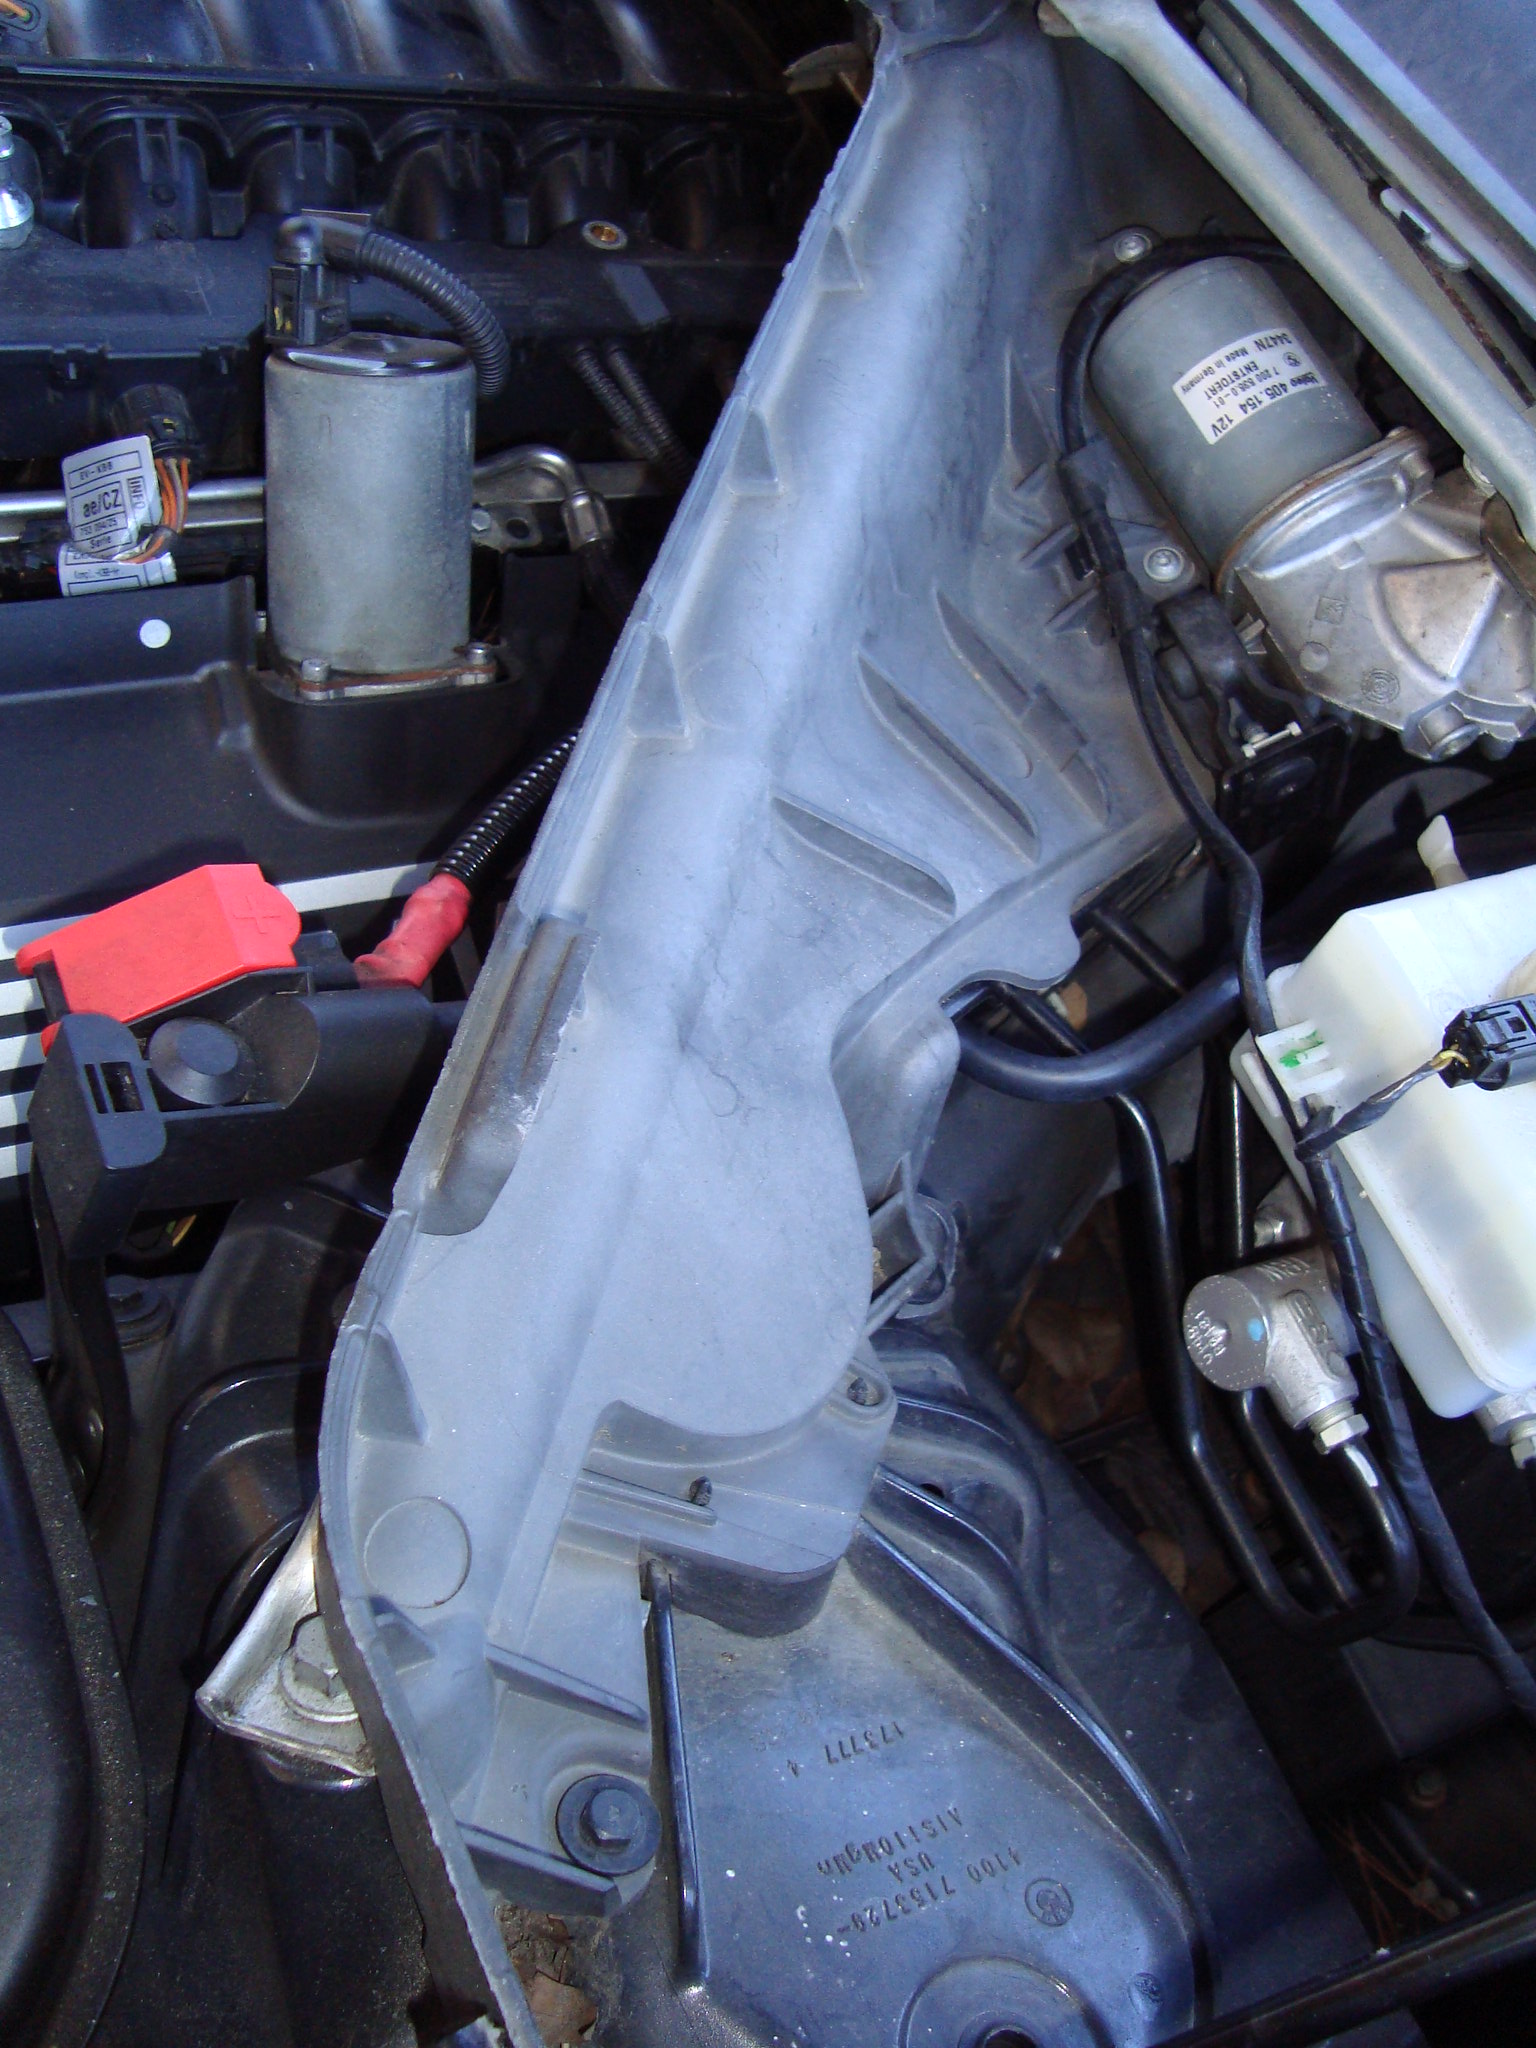 DSC04086 DSC04086- with all of that removed you should be looking at something like this  DSC04088 DSC04088- remove lower Air Box bracket (already gone in image above) - remove BMW plastic covers located on left and right side of the engine - disconnect electrical connection to the two Vanos Actuators located on left and right sides of the engine (in image bellow you can see driver side Vanos Actuator removed)  DSC04089 DSC04089- when removing Vanos Actuators: if you do not have a computer to release the tension the actuator has on the adjustable cams, remove three of four bolts, hold Actuator and remove the fourth bolt, expect the cam to fall off of the actuator as you try to move it and get it out of the valve cover. I did keep Actuators on their respective sides as not to swap the for a just in case measure. - remove two Air Box Lower Pins that are still holding the Cable Harness - disconnect the connector and unbolt the Throttle Body 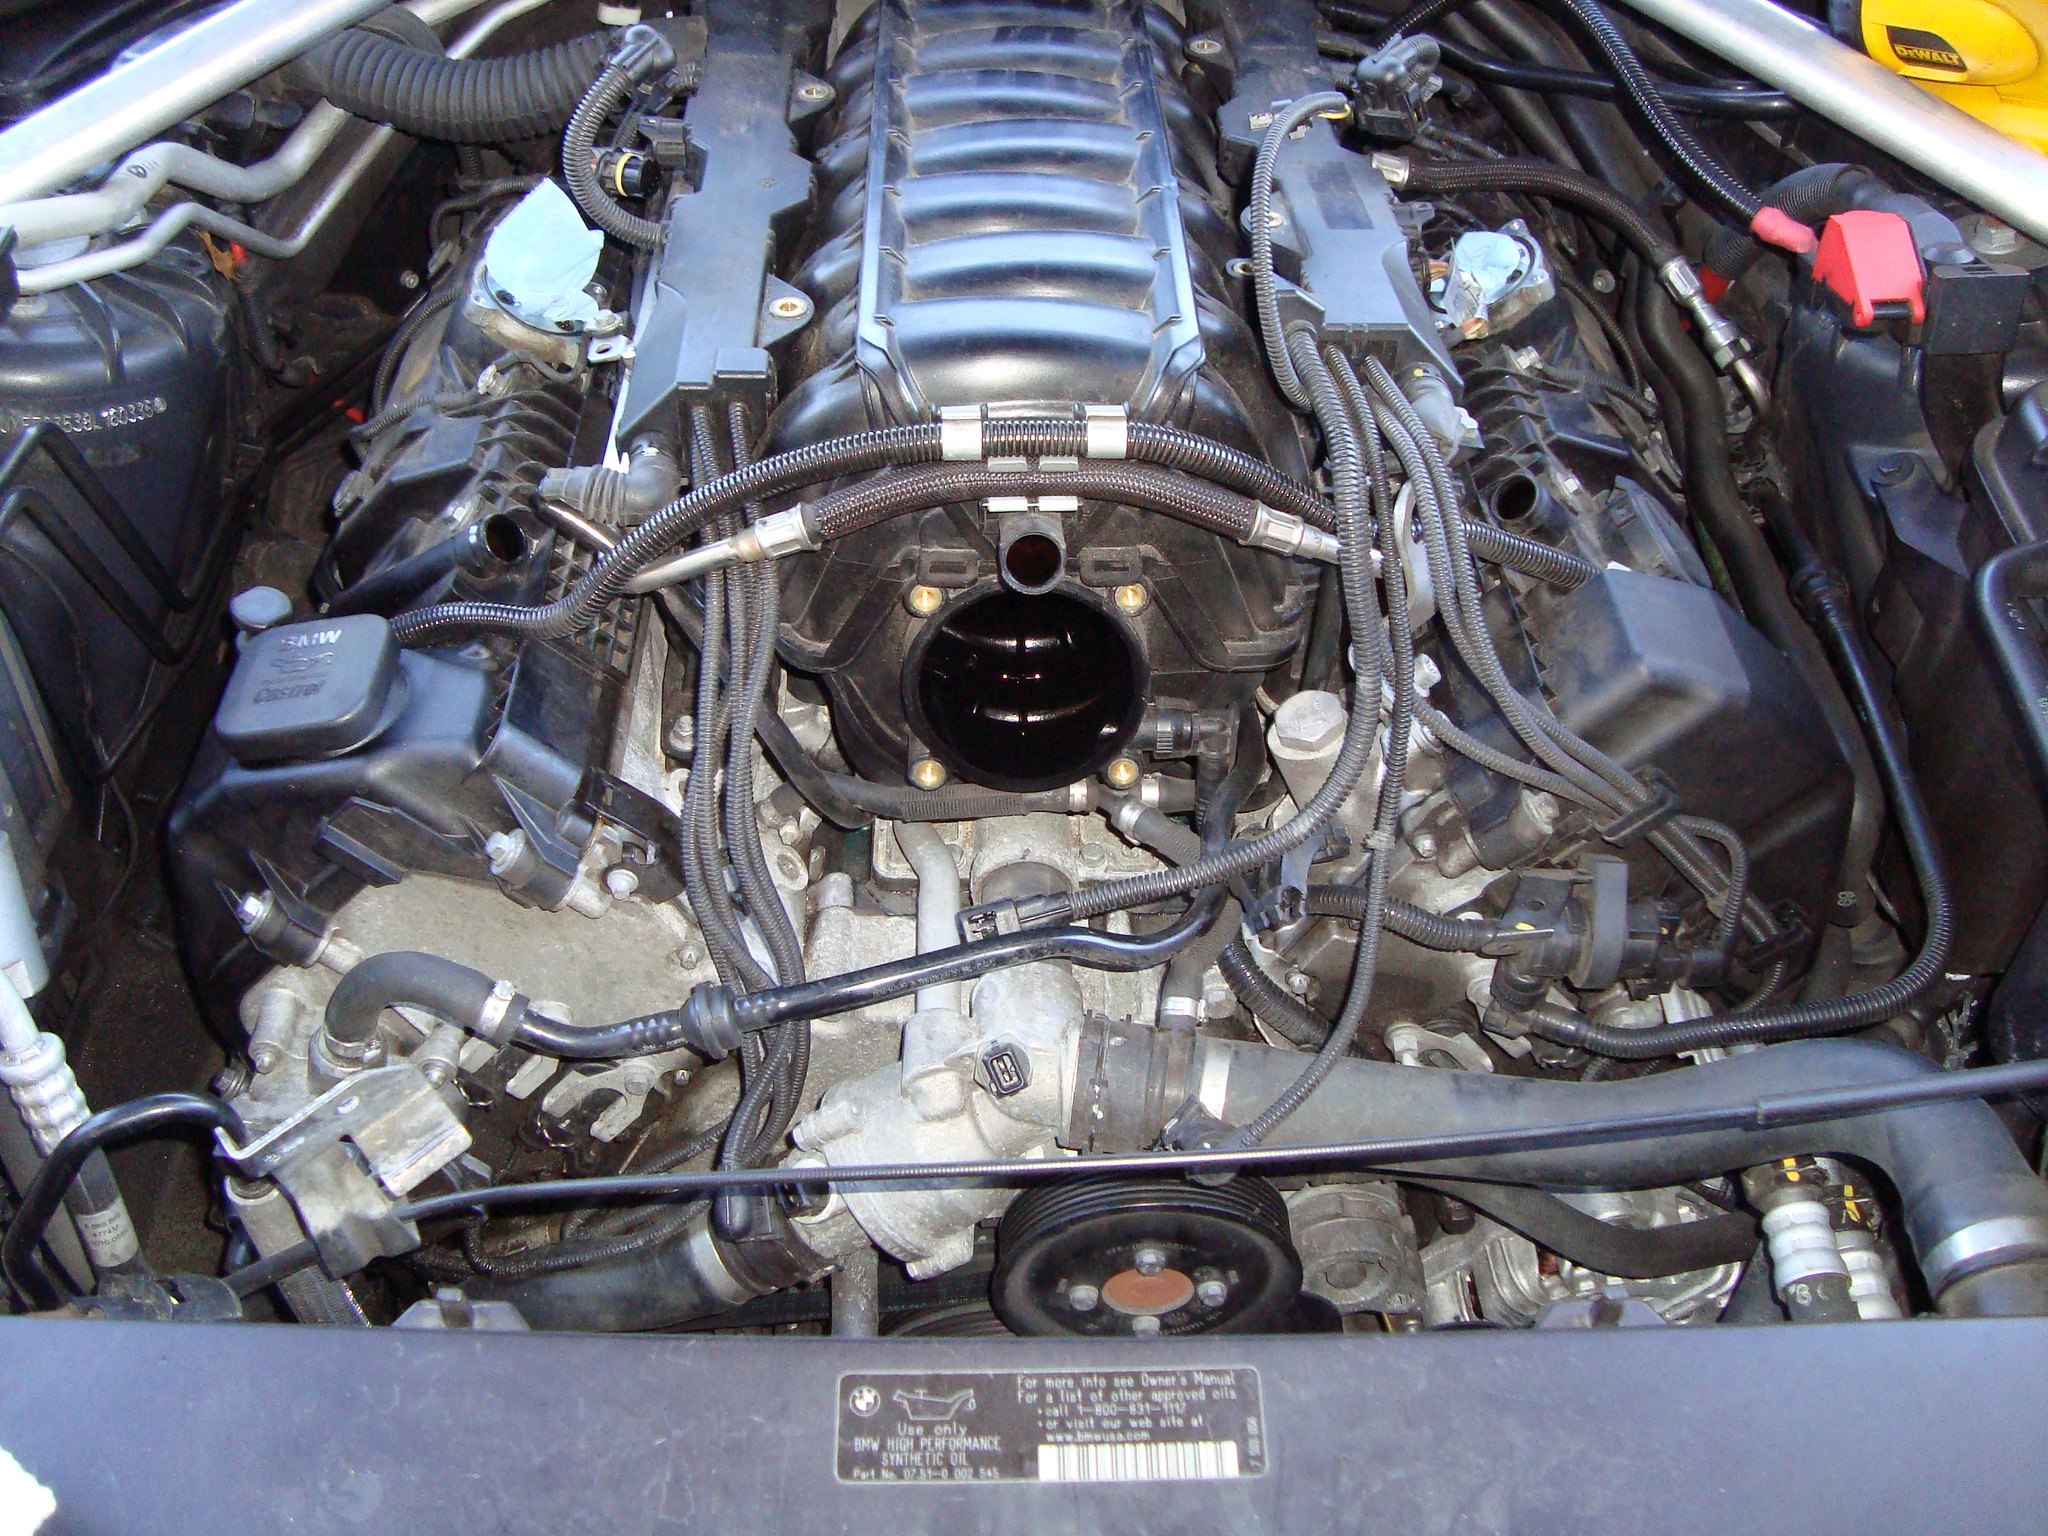 DSC04091 DSC04091- release fuel pressure. Valve is located on passenger side of the car under a cap. Remove the cap, cover with towel, and press the pin inwards. 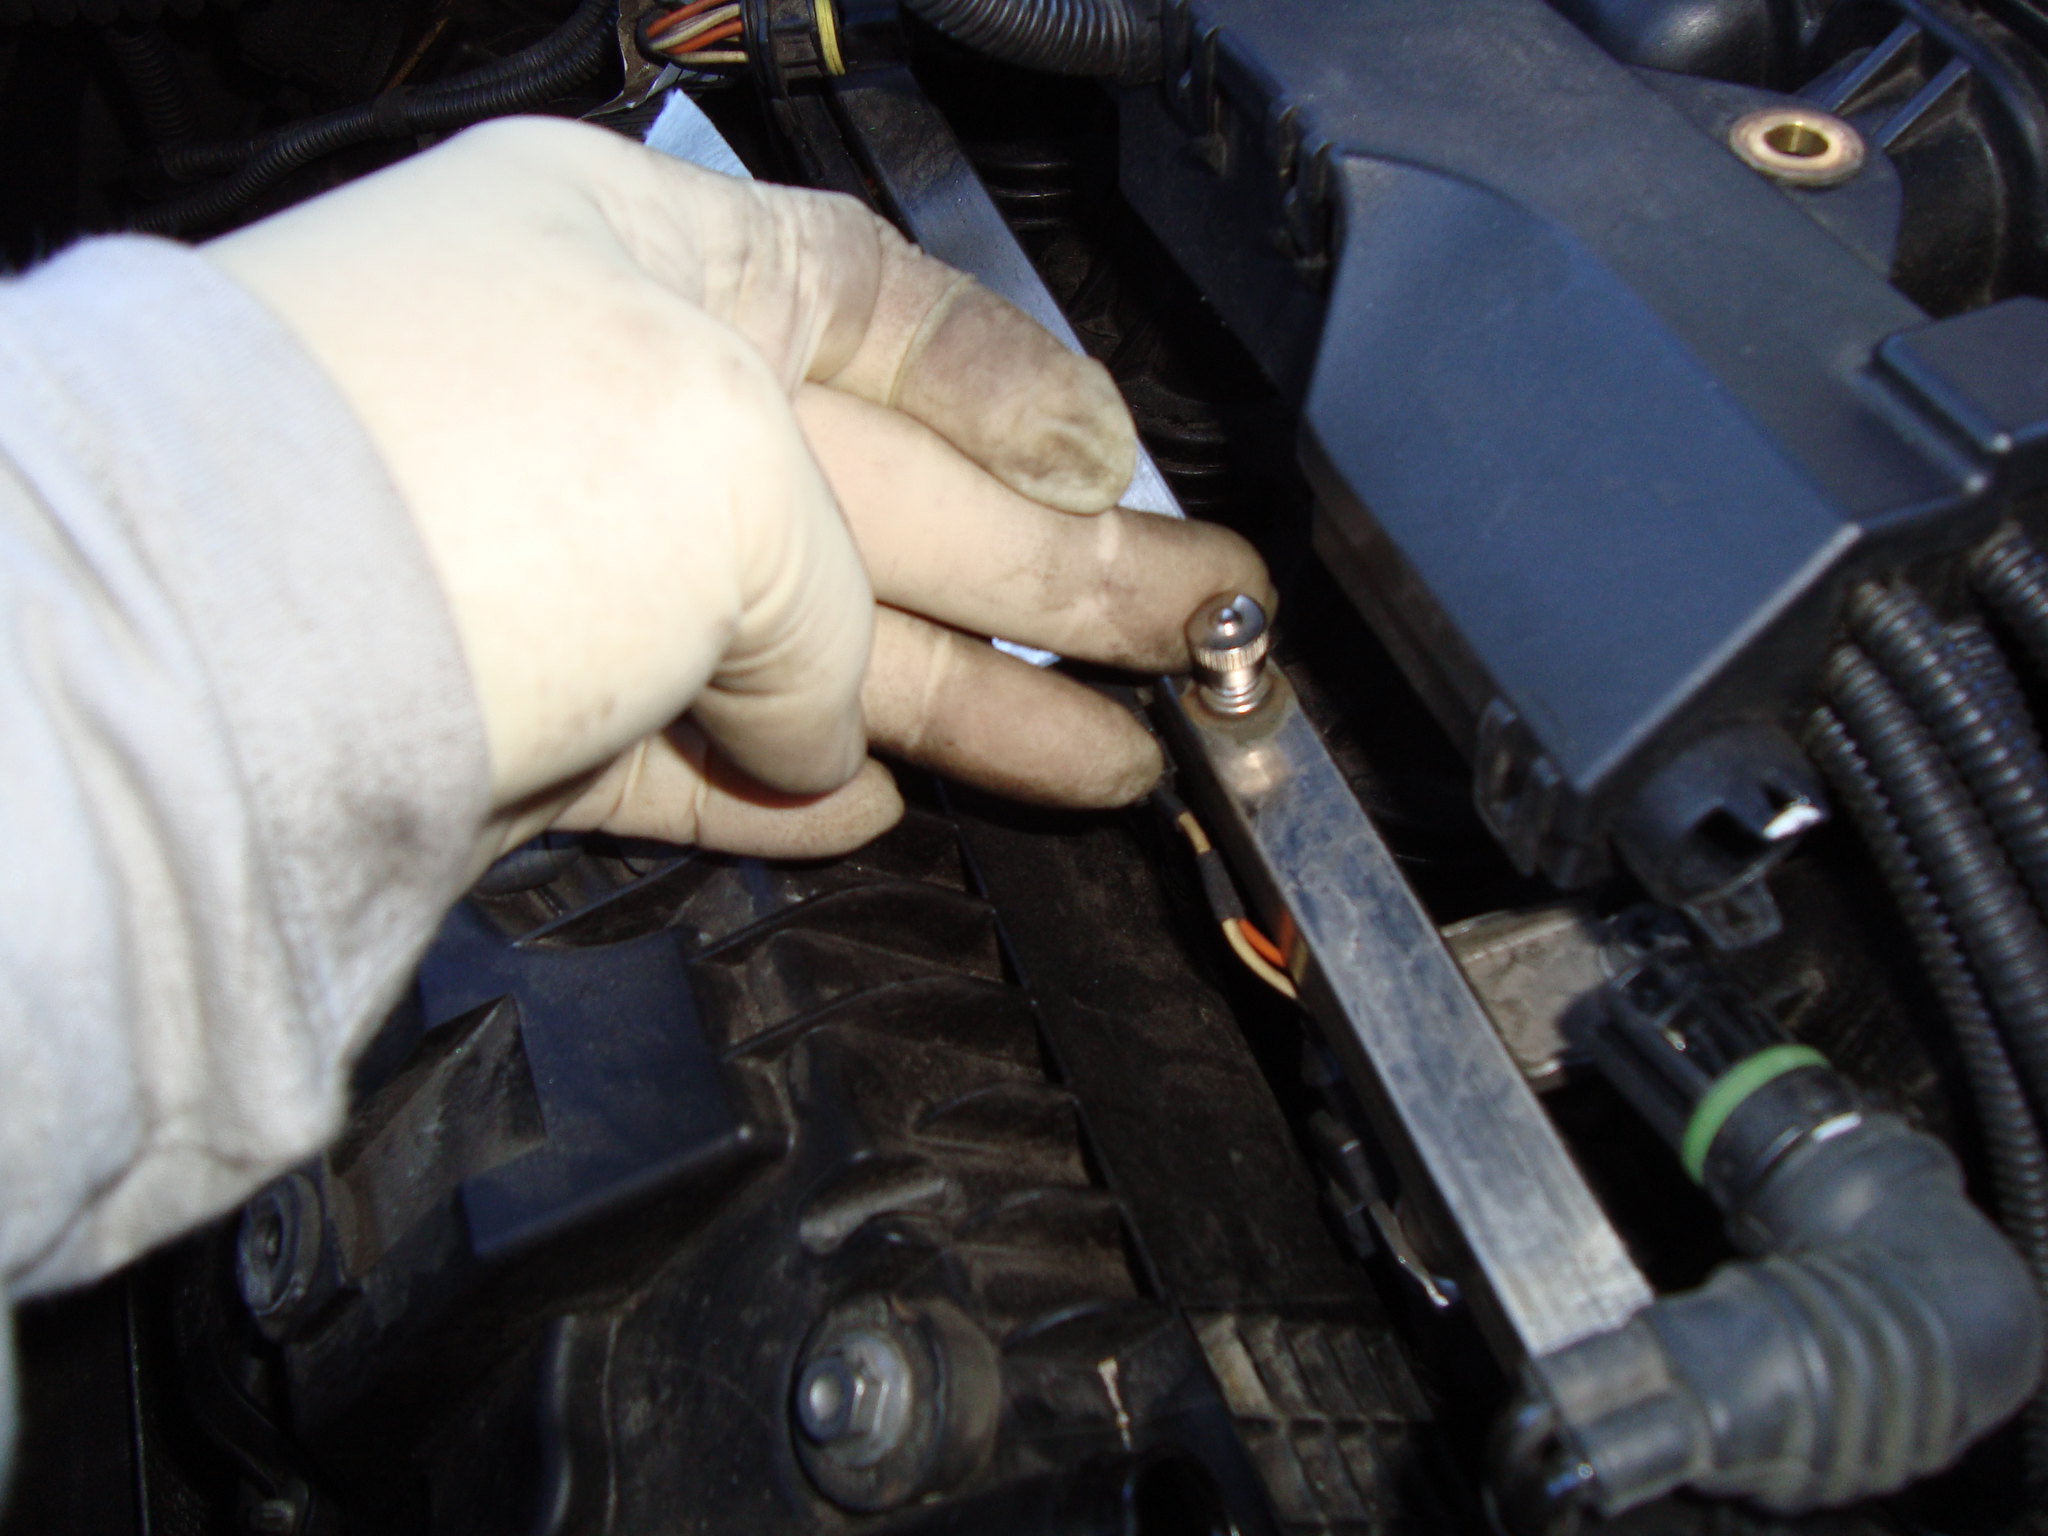 DSC04094 DSC04094- disconnect fuel line from the rail. Place towel under fuel line to keep clean. Pull the plastic “C” clamp from the fitting, compress (black fitting inwards) and pull apart. 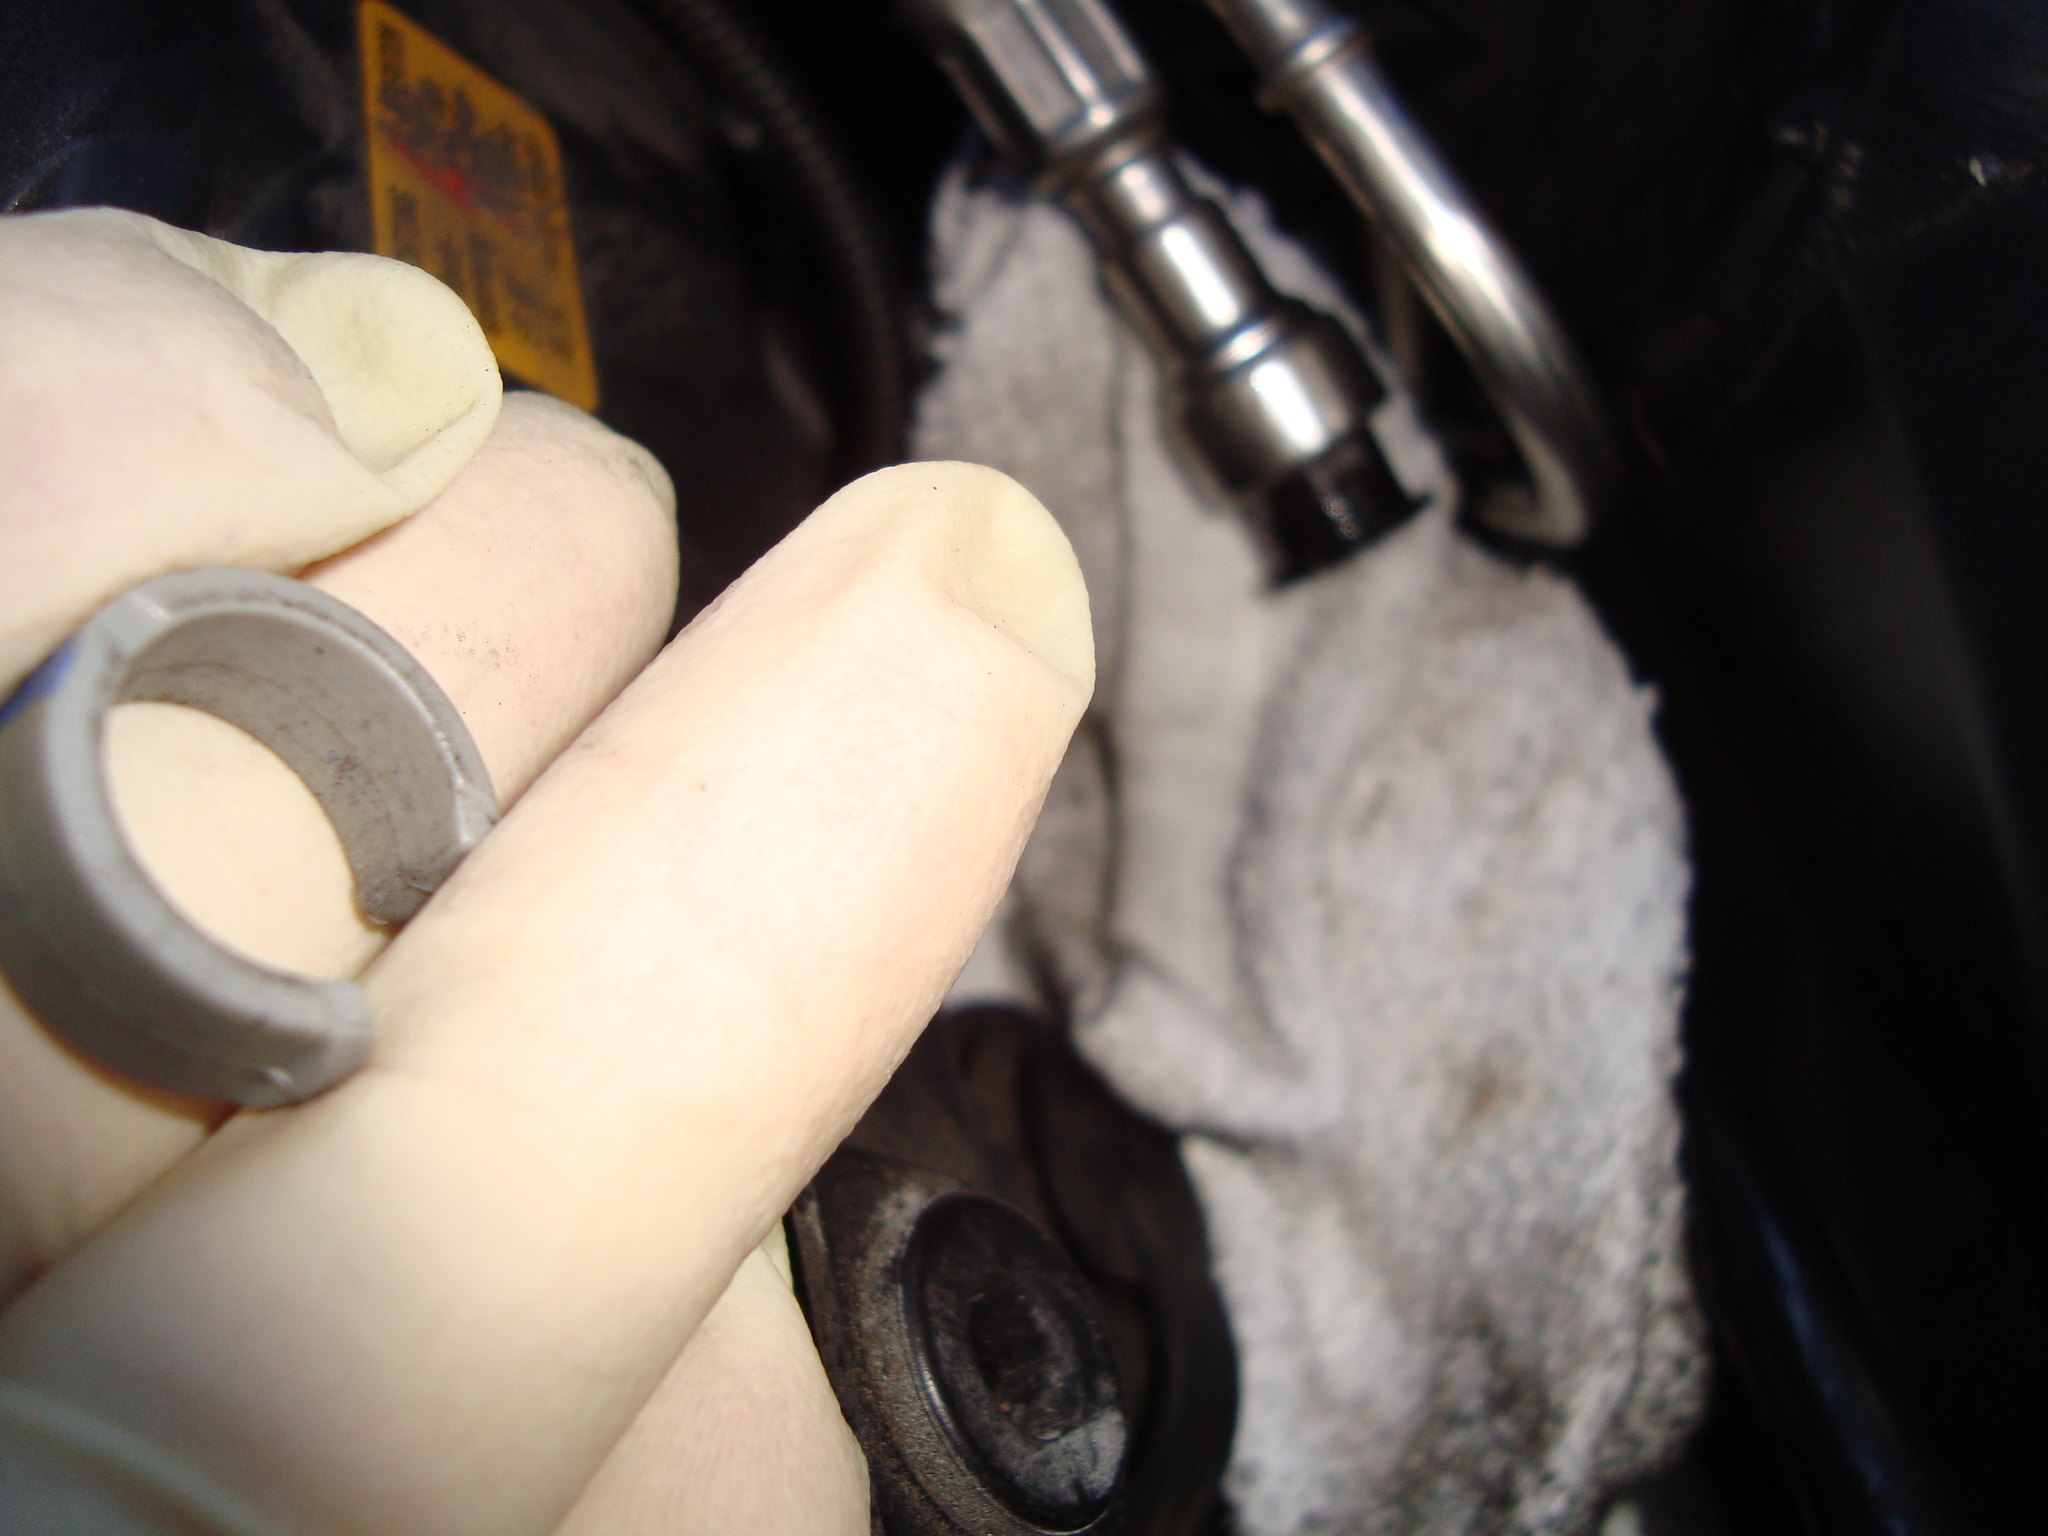 DSC04095 DSC04095- disconnect Knock Sensor Plug from the front of the electrical harness on both left and right side of Intake Housing 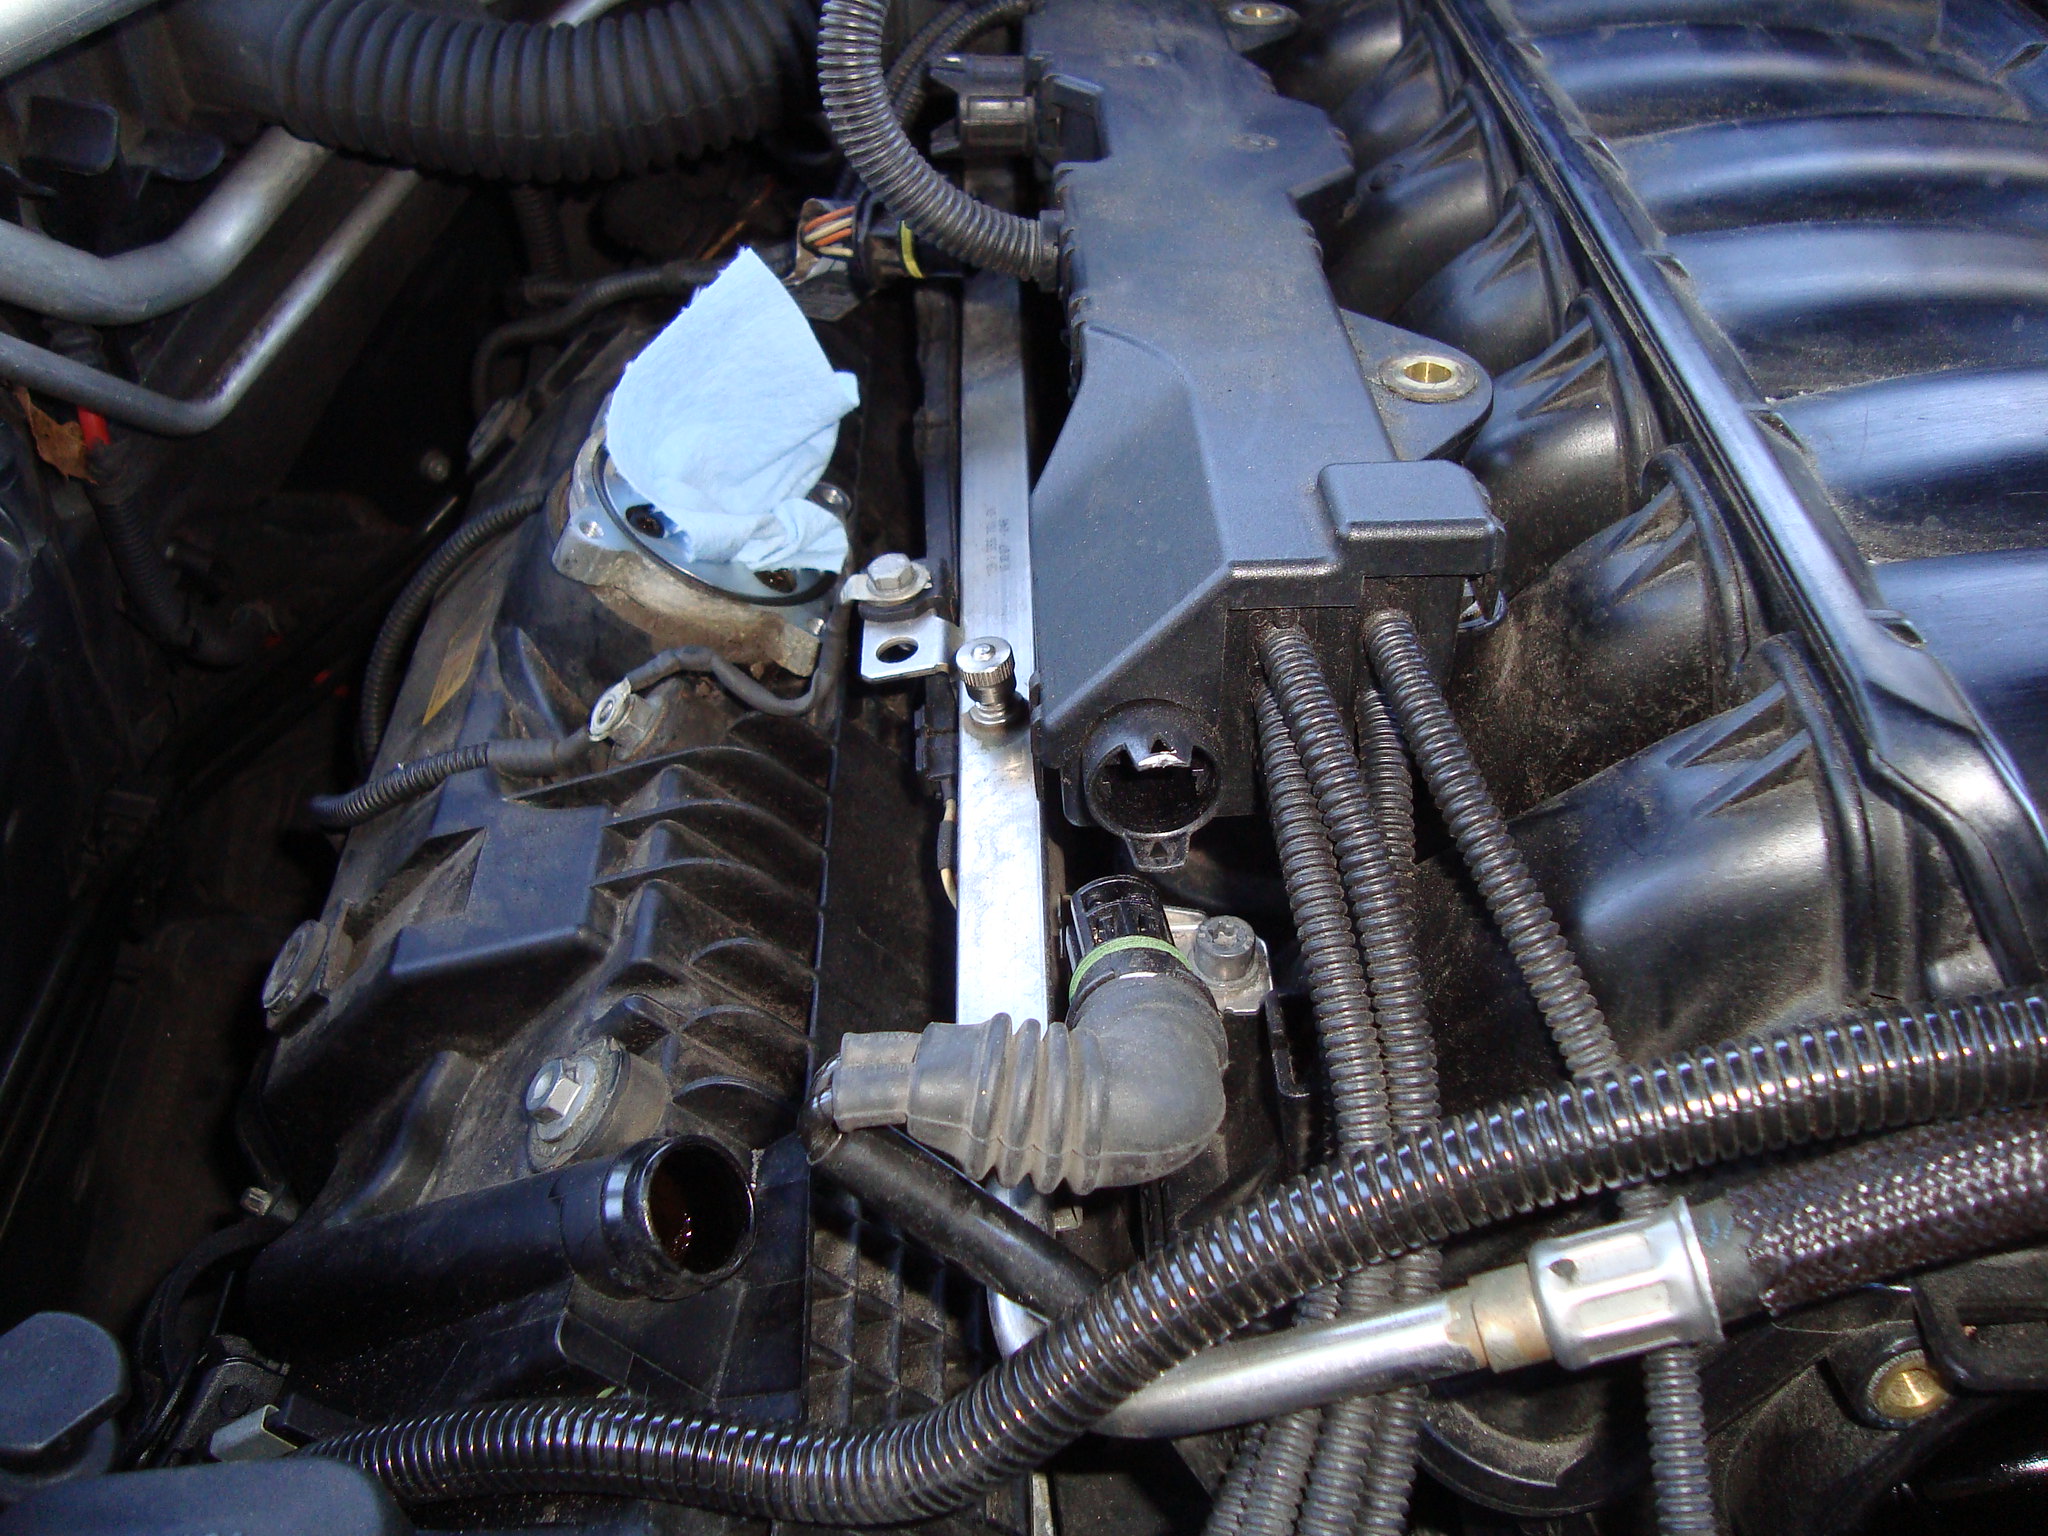 DSC04092 DSC04092 DSC04093 DSC04093- unbolt fuel rail grounding strips. Those are located between fuel rail and valve cover on each side of the engine and about the middle. - disconnect electrical cables that run down on left and right side. On passenger side, one of the connectors runs all the way down to Oil Sensor in Oil Pan. You will have to rout it out of there. On right side you can disconnect all visible connectors and leave the ones you cant access alone as there will not be need to disconnect those - start unbolting the Intake Housing. There are five bolts on each side. Passenger back will be the hardest. I loosened all of my and then used a magnet to pull them out 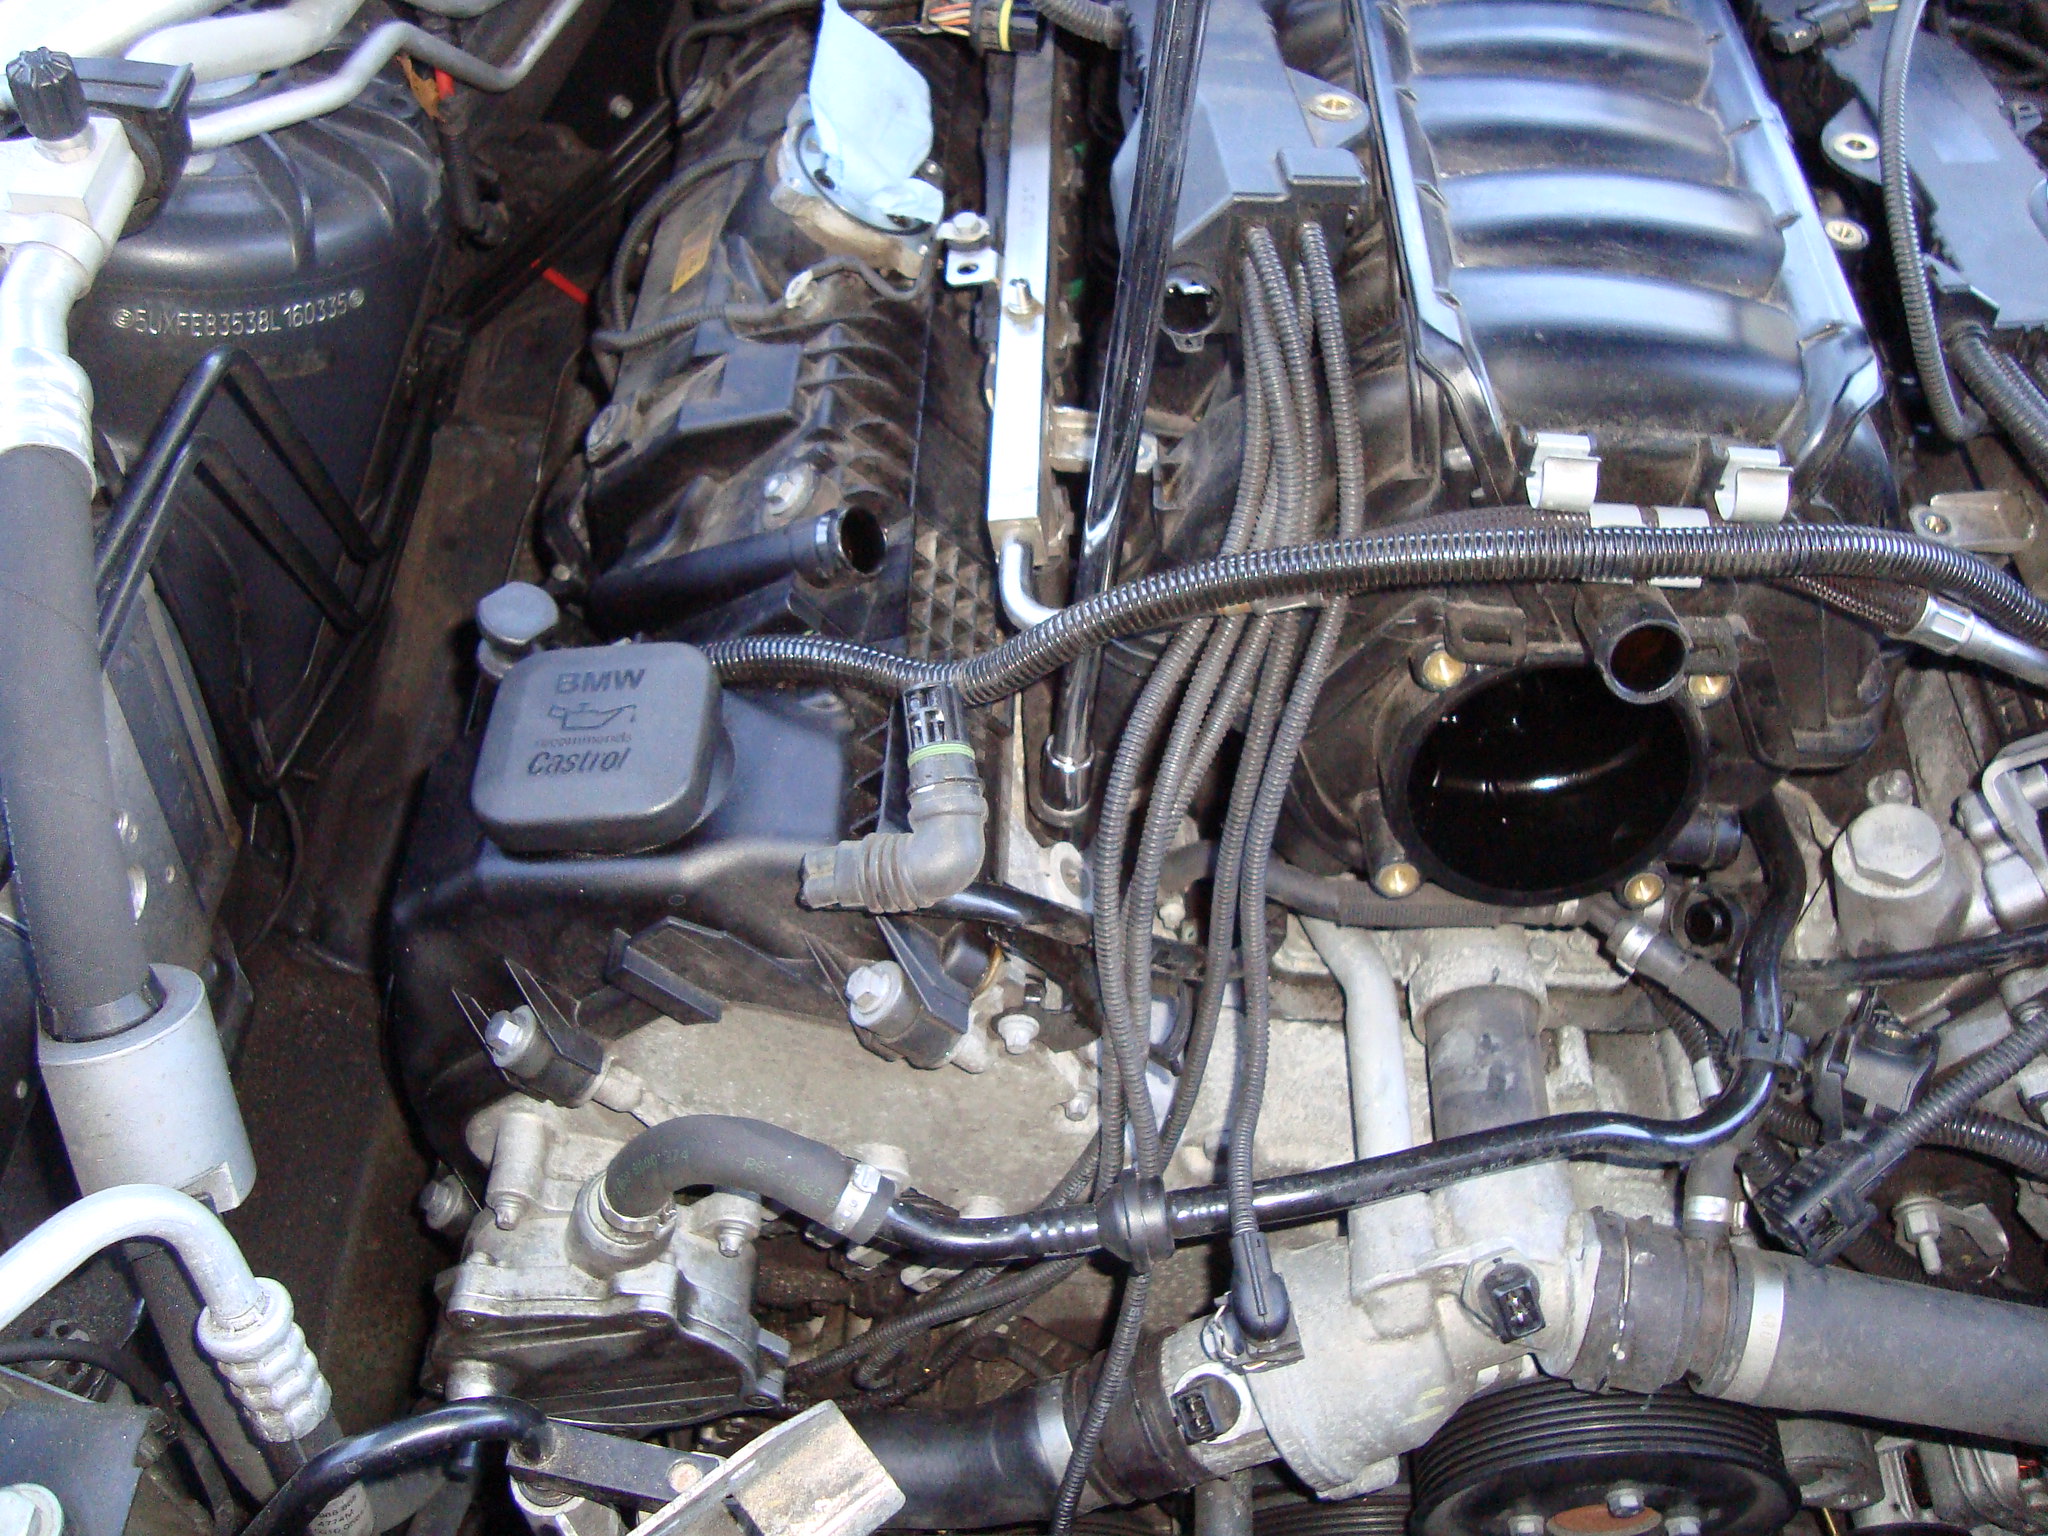 DSC04096 DSC04096- unclip power cable from the bracket on driver side back 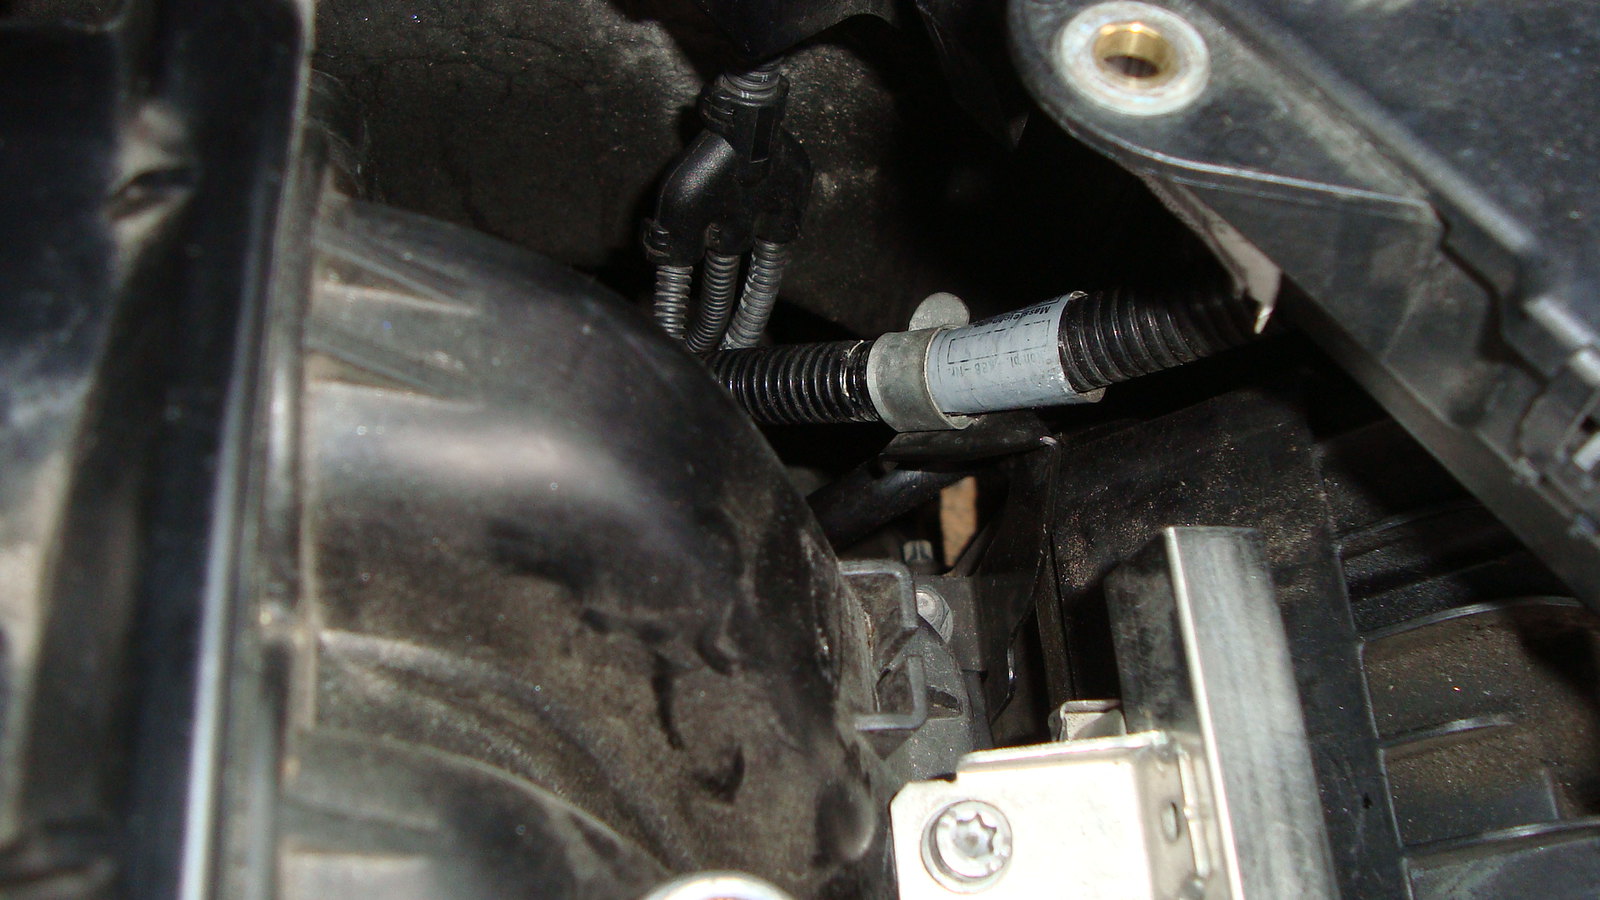 DSC04124 DSC04124- there is no need to unbolt/unscrew the fuel rails from the Intake Housing - disconnect three connectors behind the Intake Housing. You will have to clime onto the bay and lean so you can reach around the back of the Intake Manifold - remove the Intake Manifold 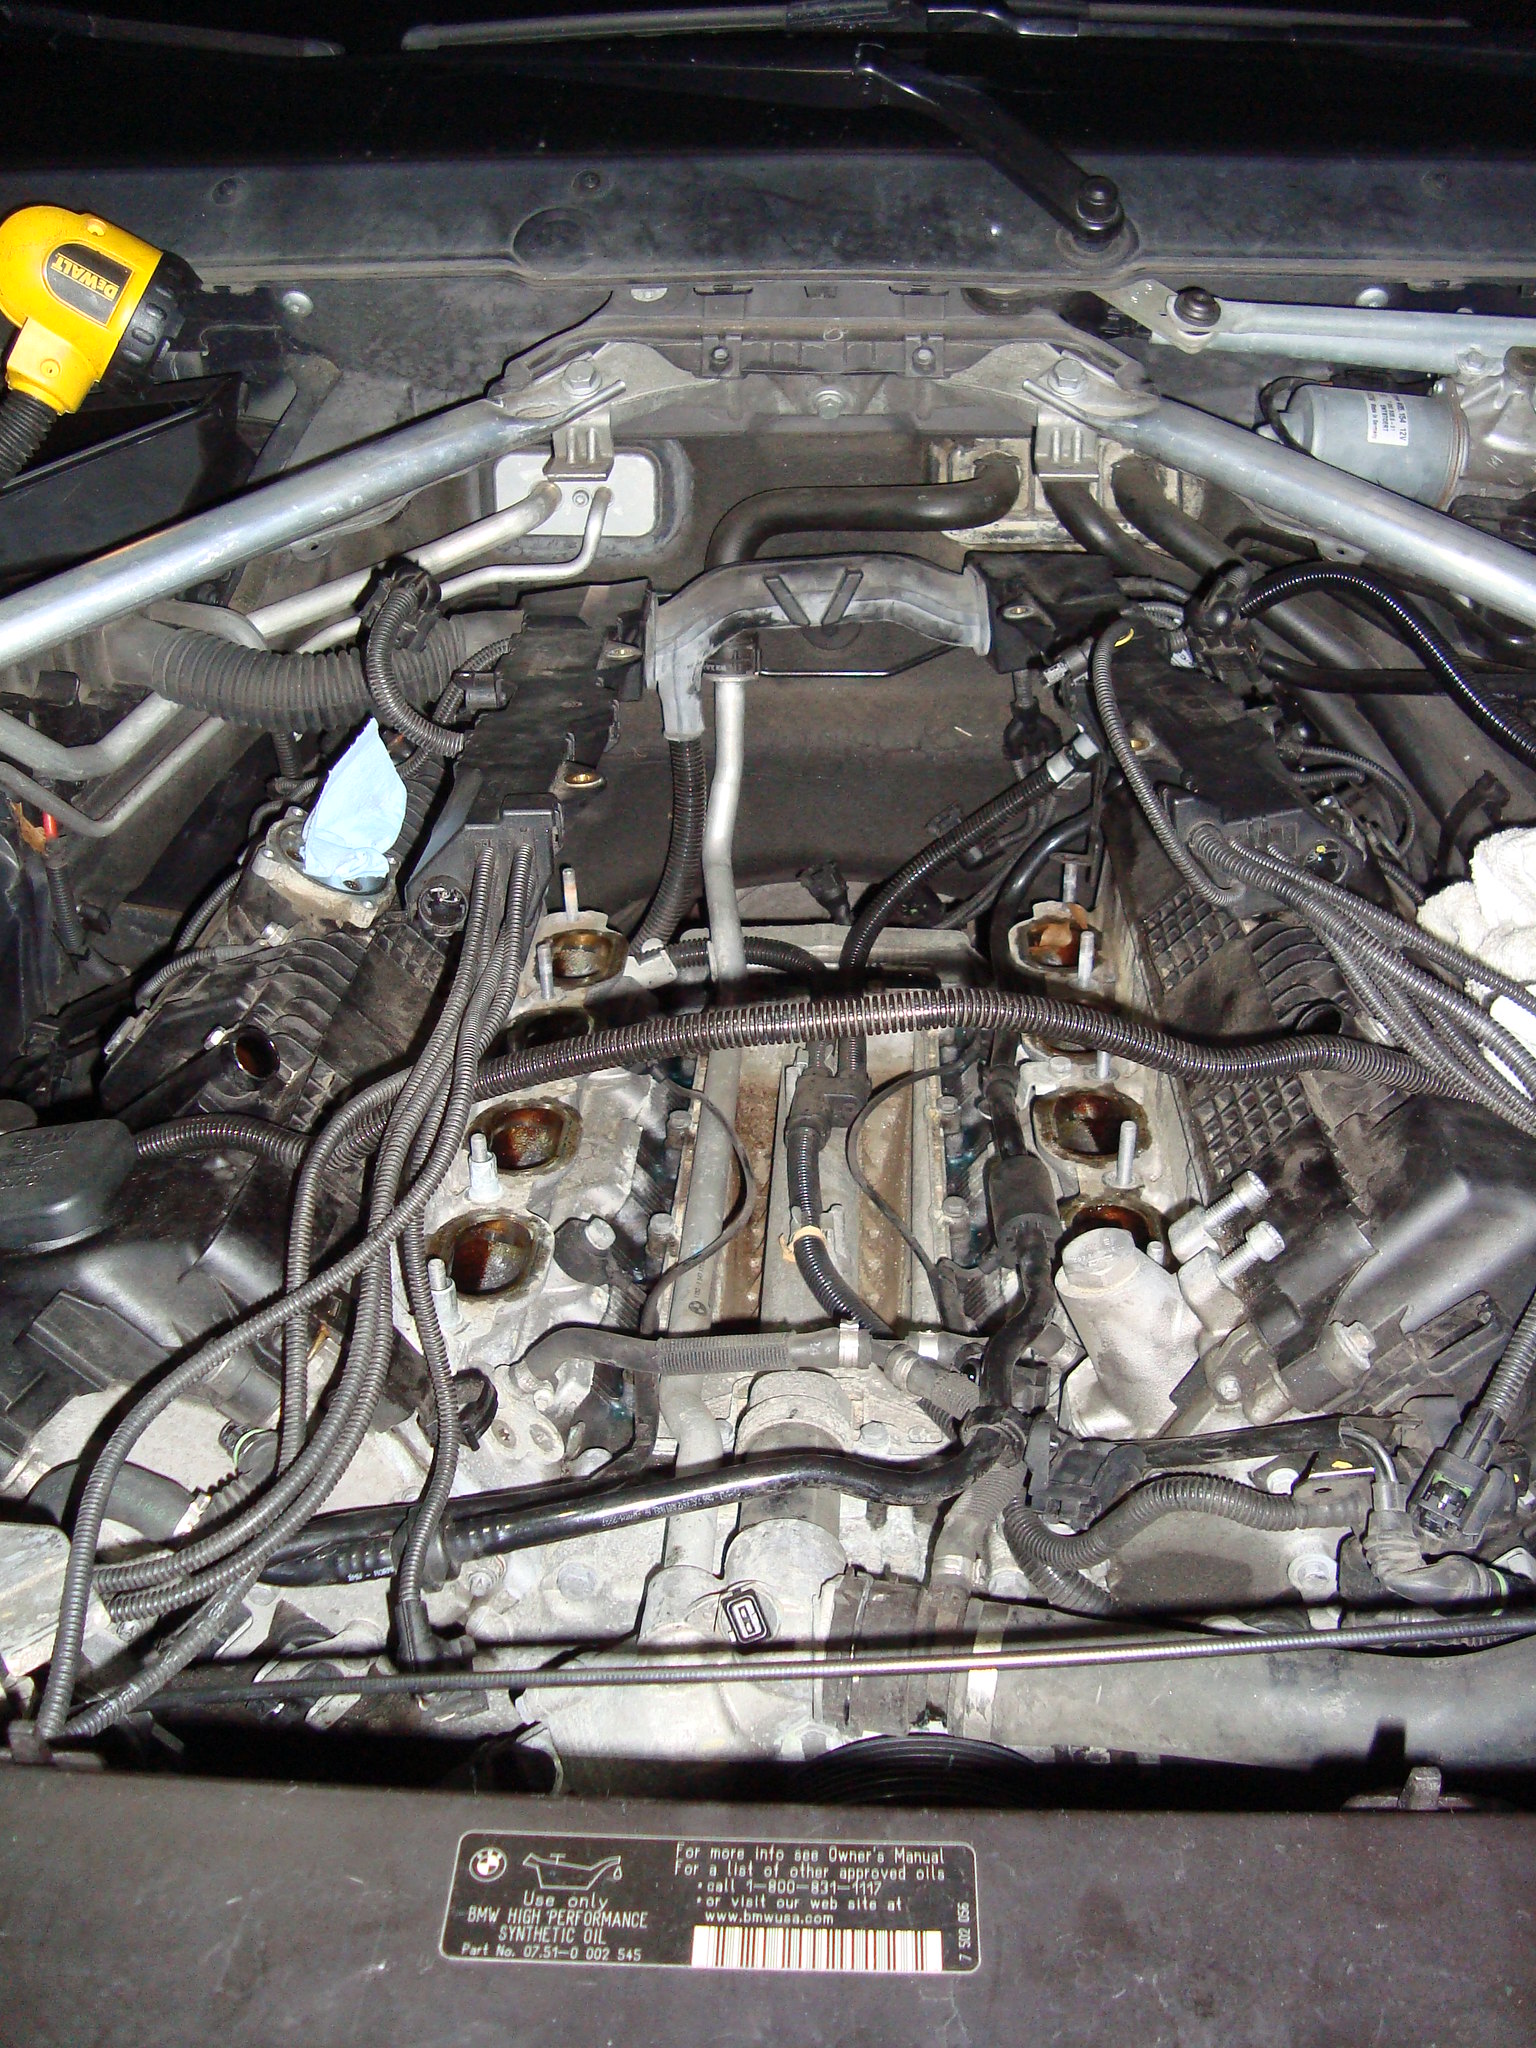 DSC04097 DSC04097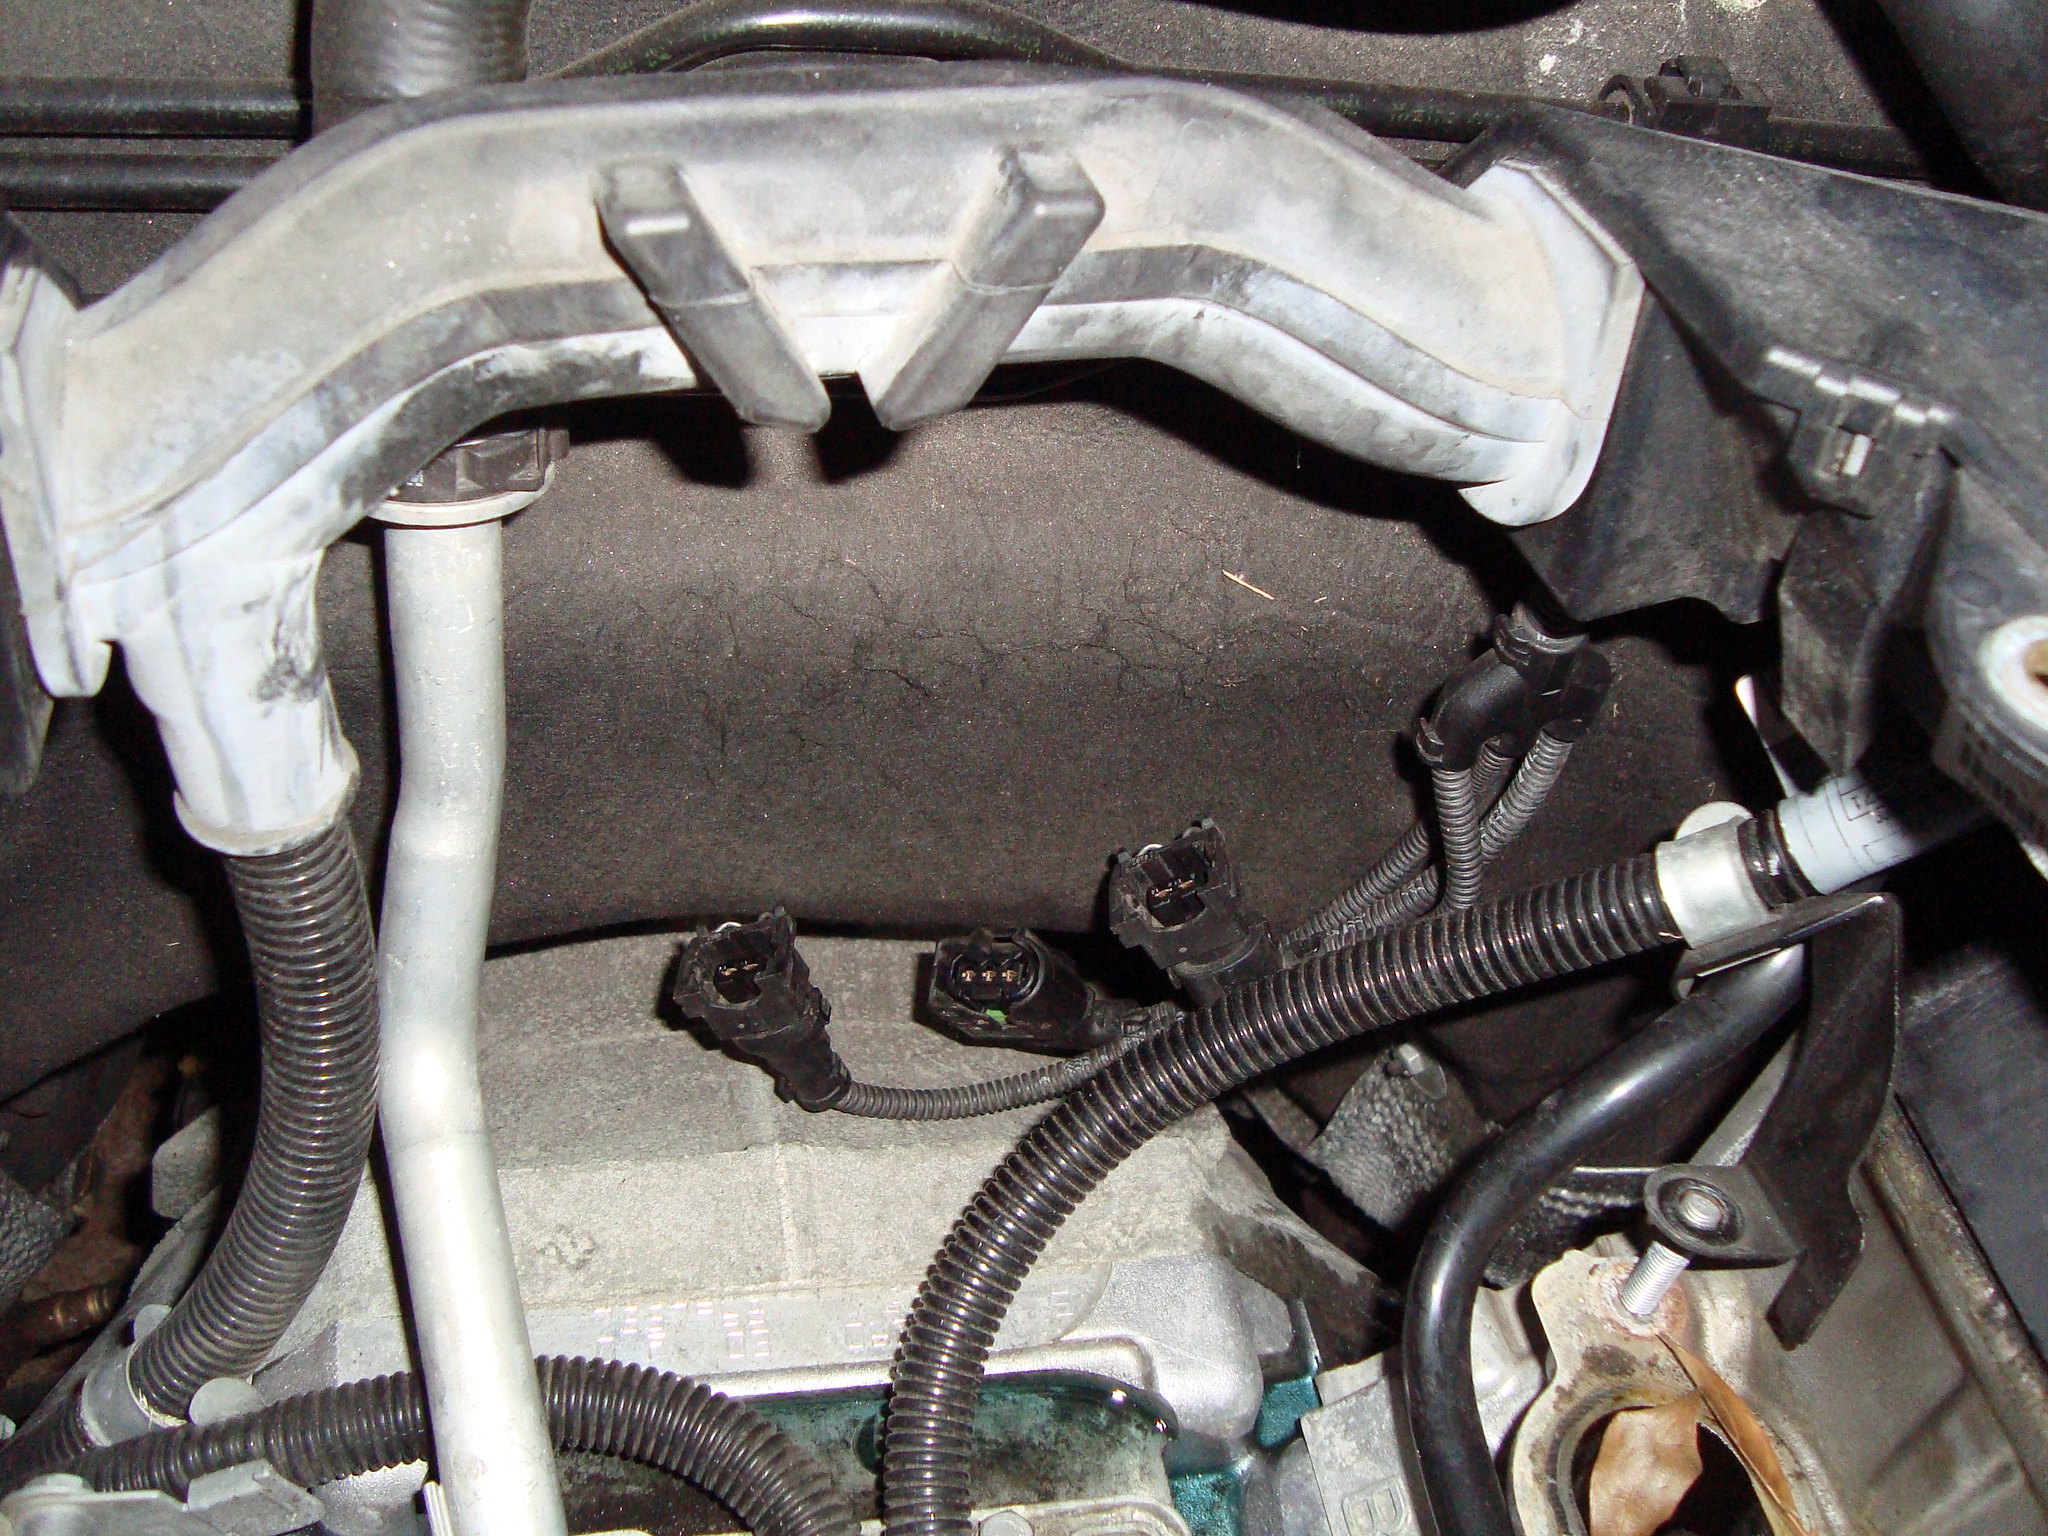 DSC04100 DSC04100- the above image is a close up of the three connectors plugged to back of Intake Manifold - remove the pulley from the water pump - remove tension from the Accessory Serpentine belt - remove the Accessory Serpentine belt - remove Crank Pulley (once you have all the torx bolts out, you may have to pry it off by wedging a long screwdriver behind it) - disconnect four water hoses from the water pump - remove water pump (there are five bolts holding it, the top bolt is the longer one) 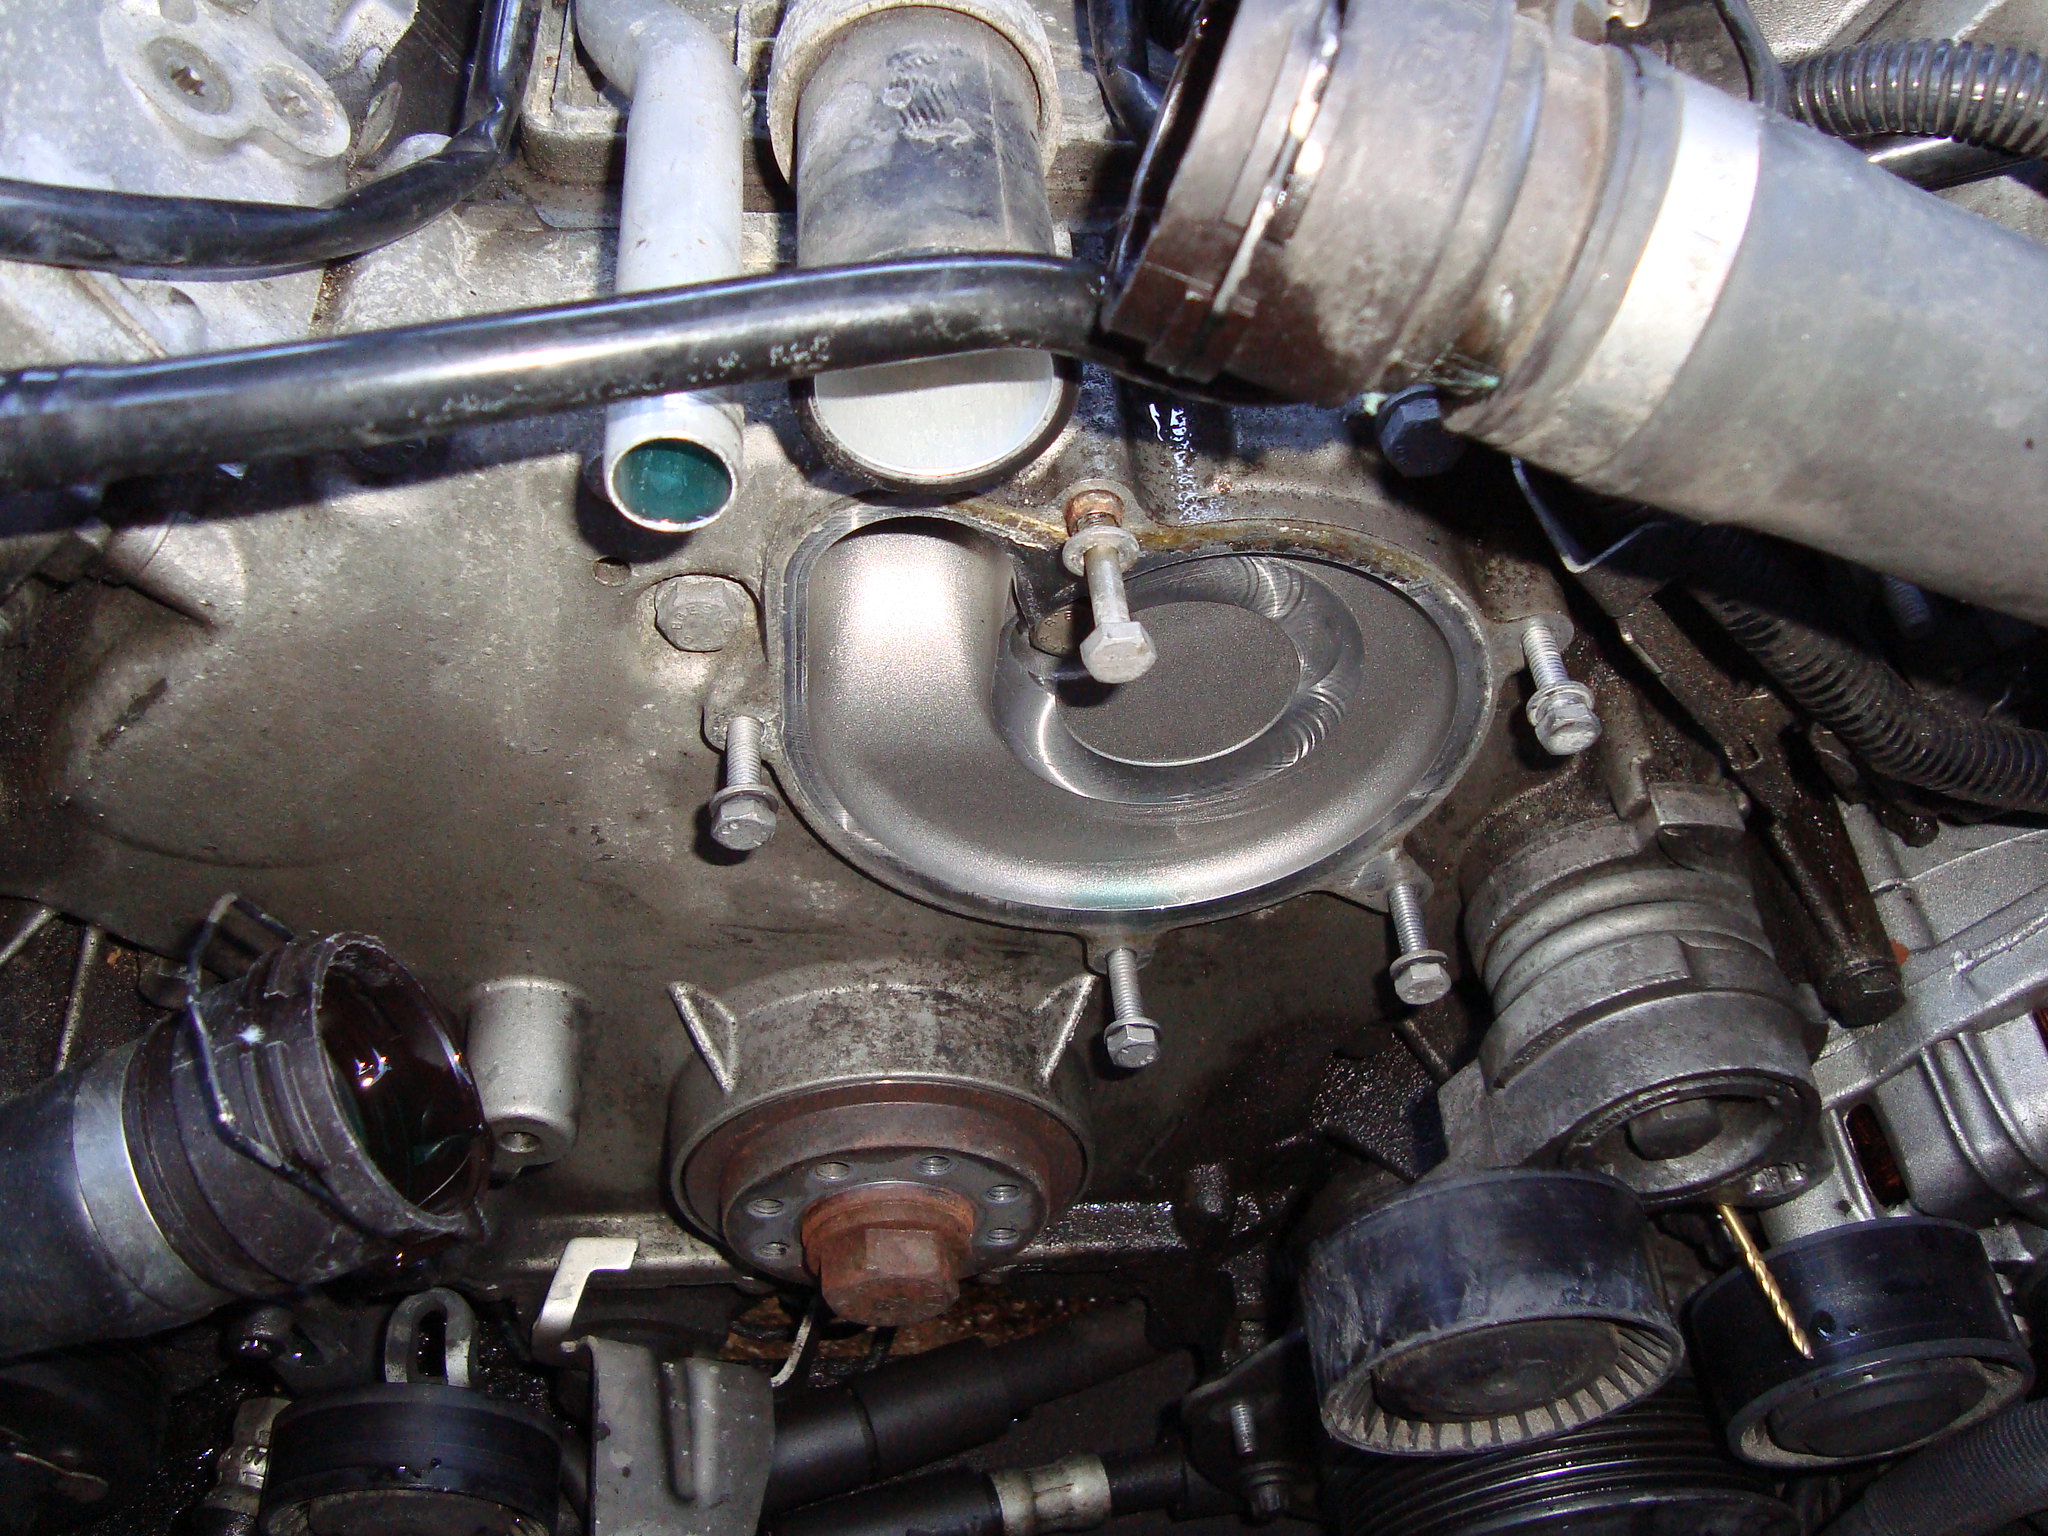 DSC04101 DSC04101- disconnect two small water hoses that are fed from a “Y” that comes from the main coolant hose (image bellow is of the passenger side with hose removed 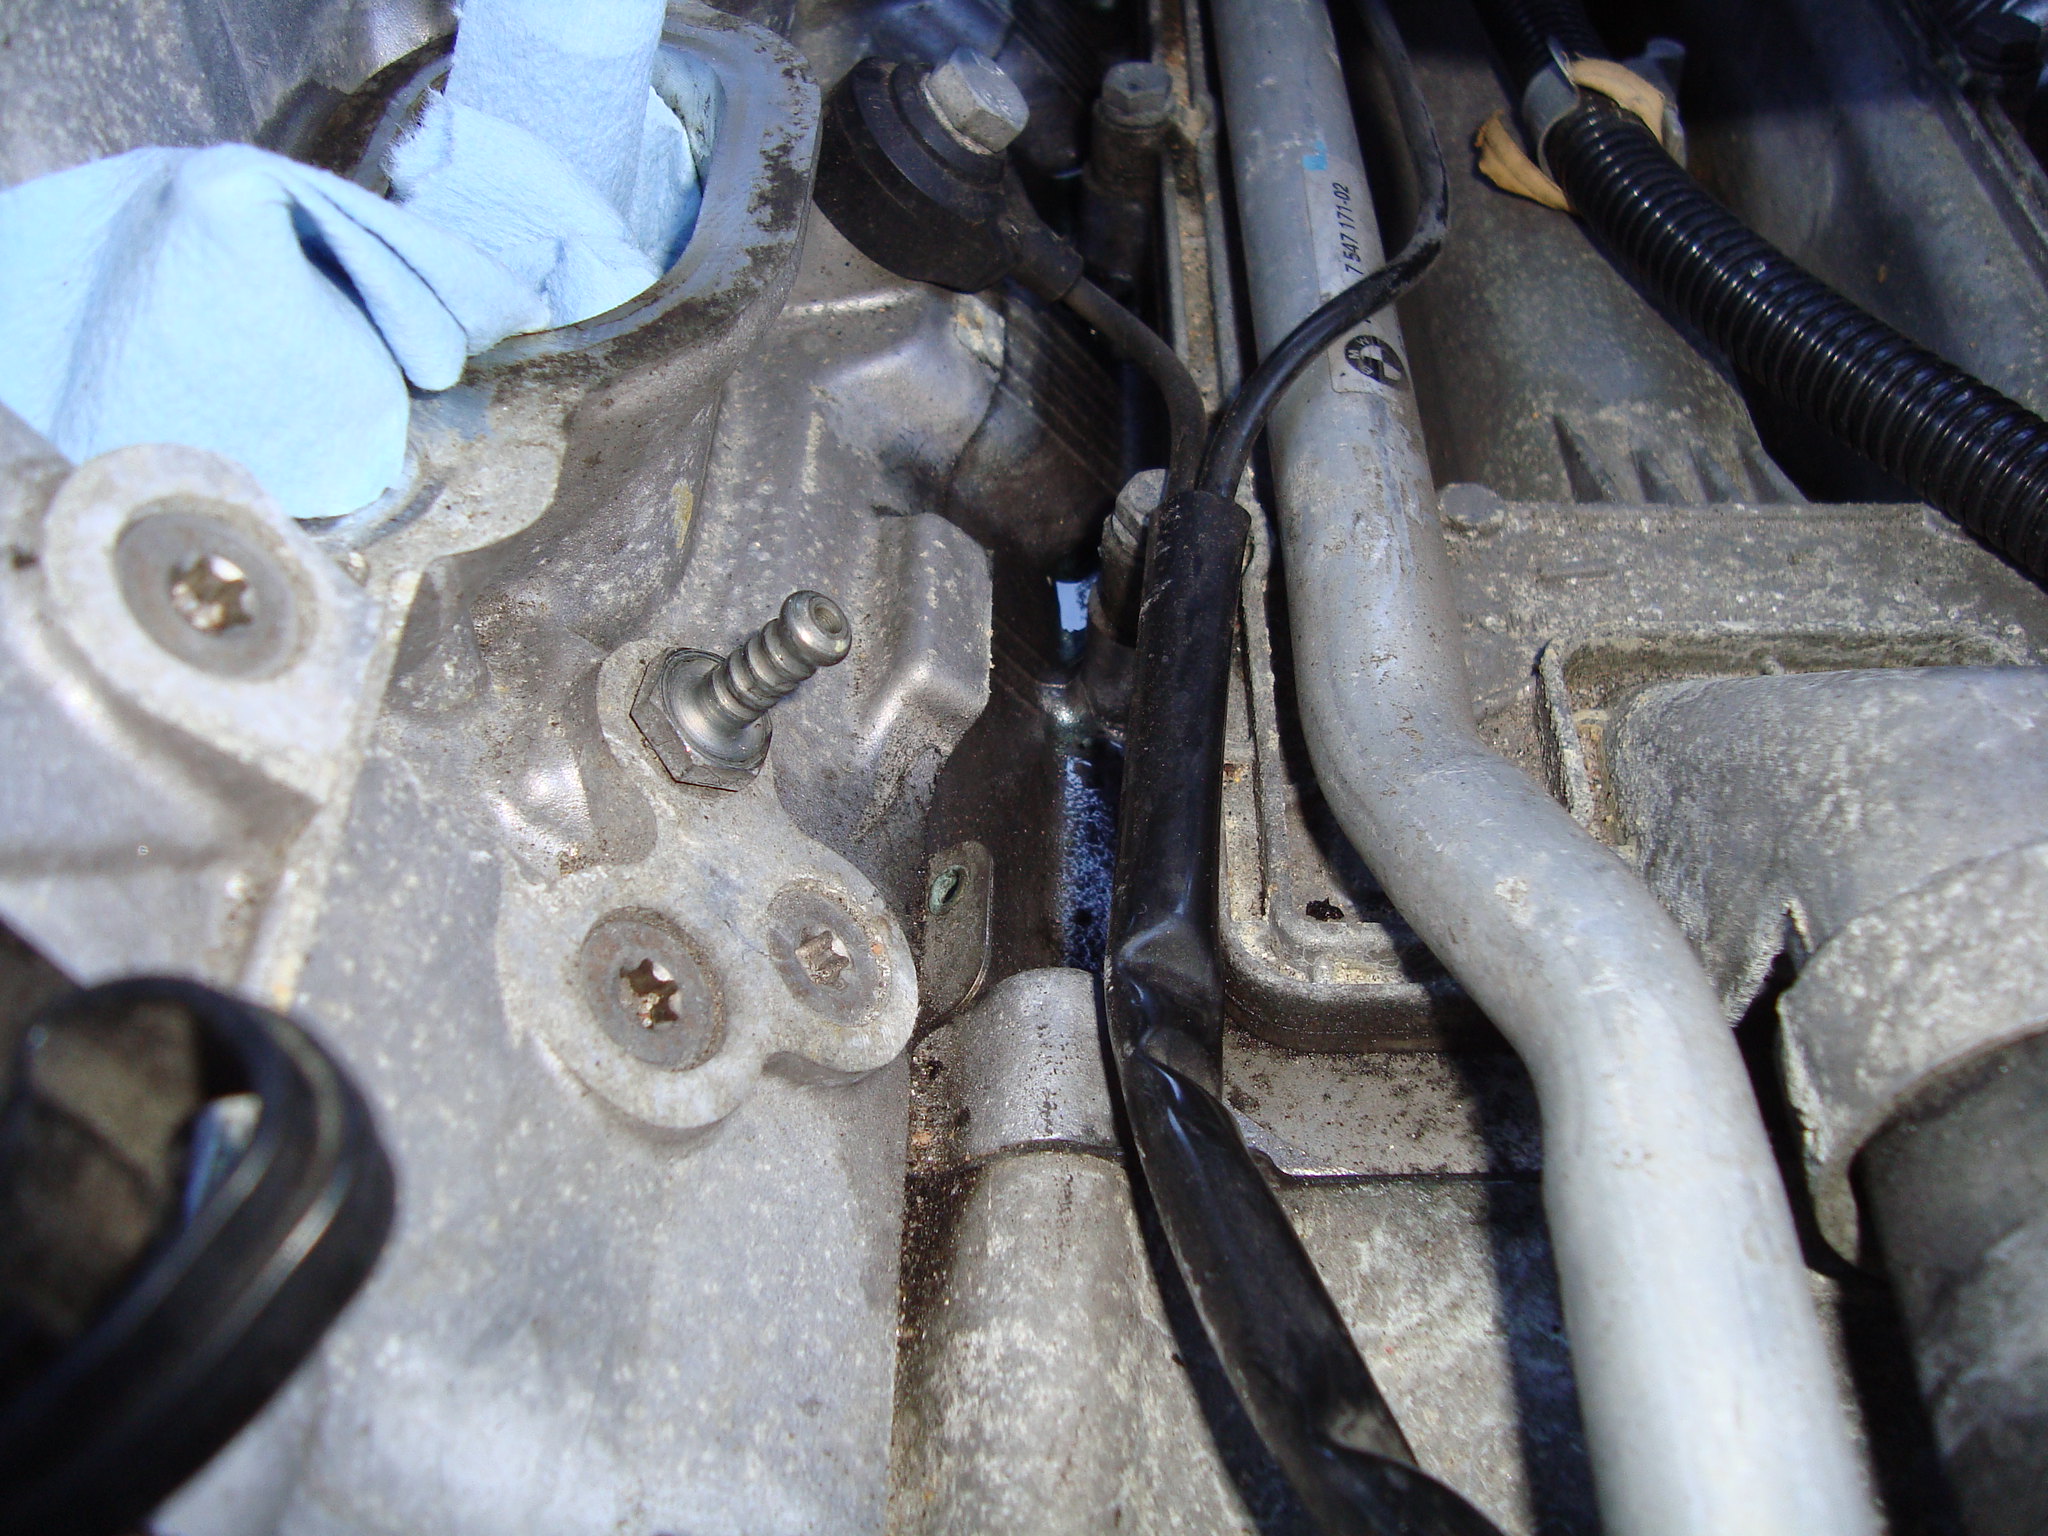 DSC04103 DSC04103- in image bellow you can notice coolant that has leaked out from the valley pan due to valley pan gasket leak 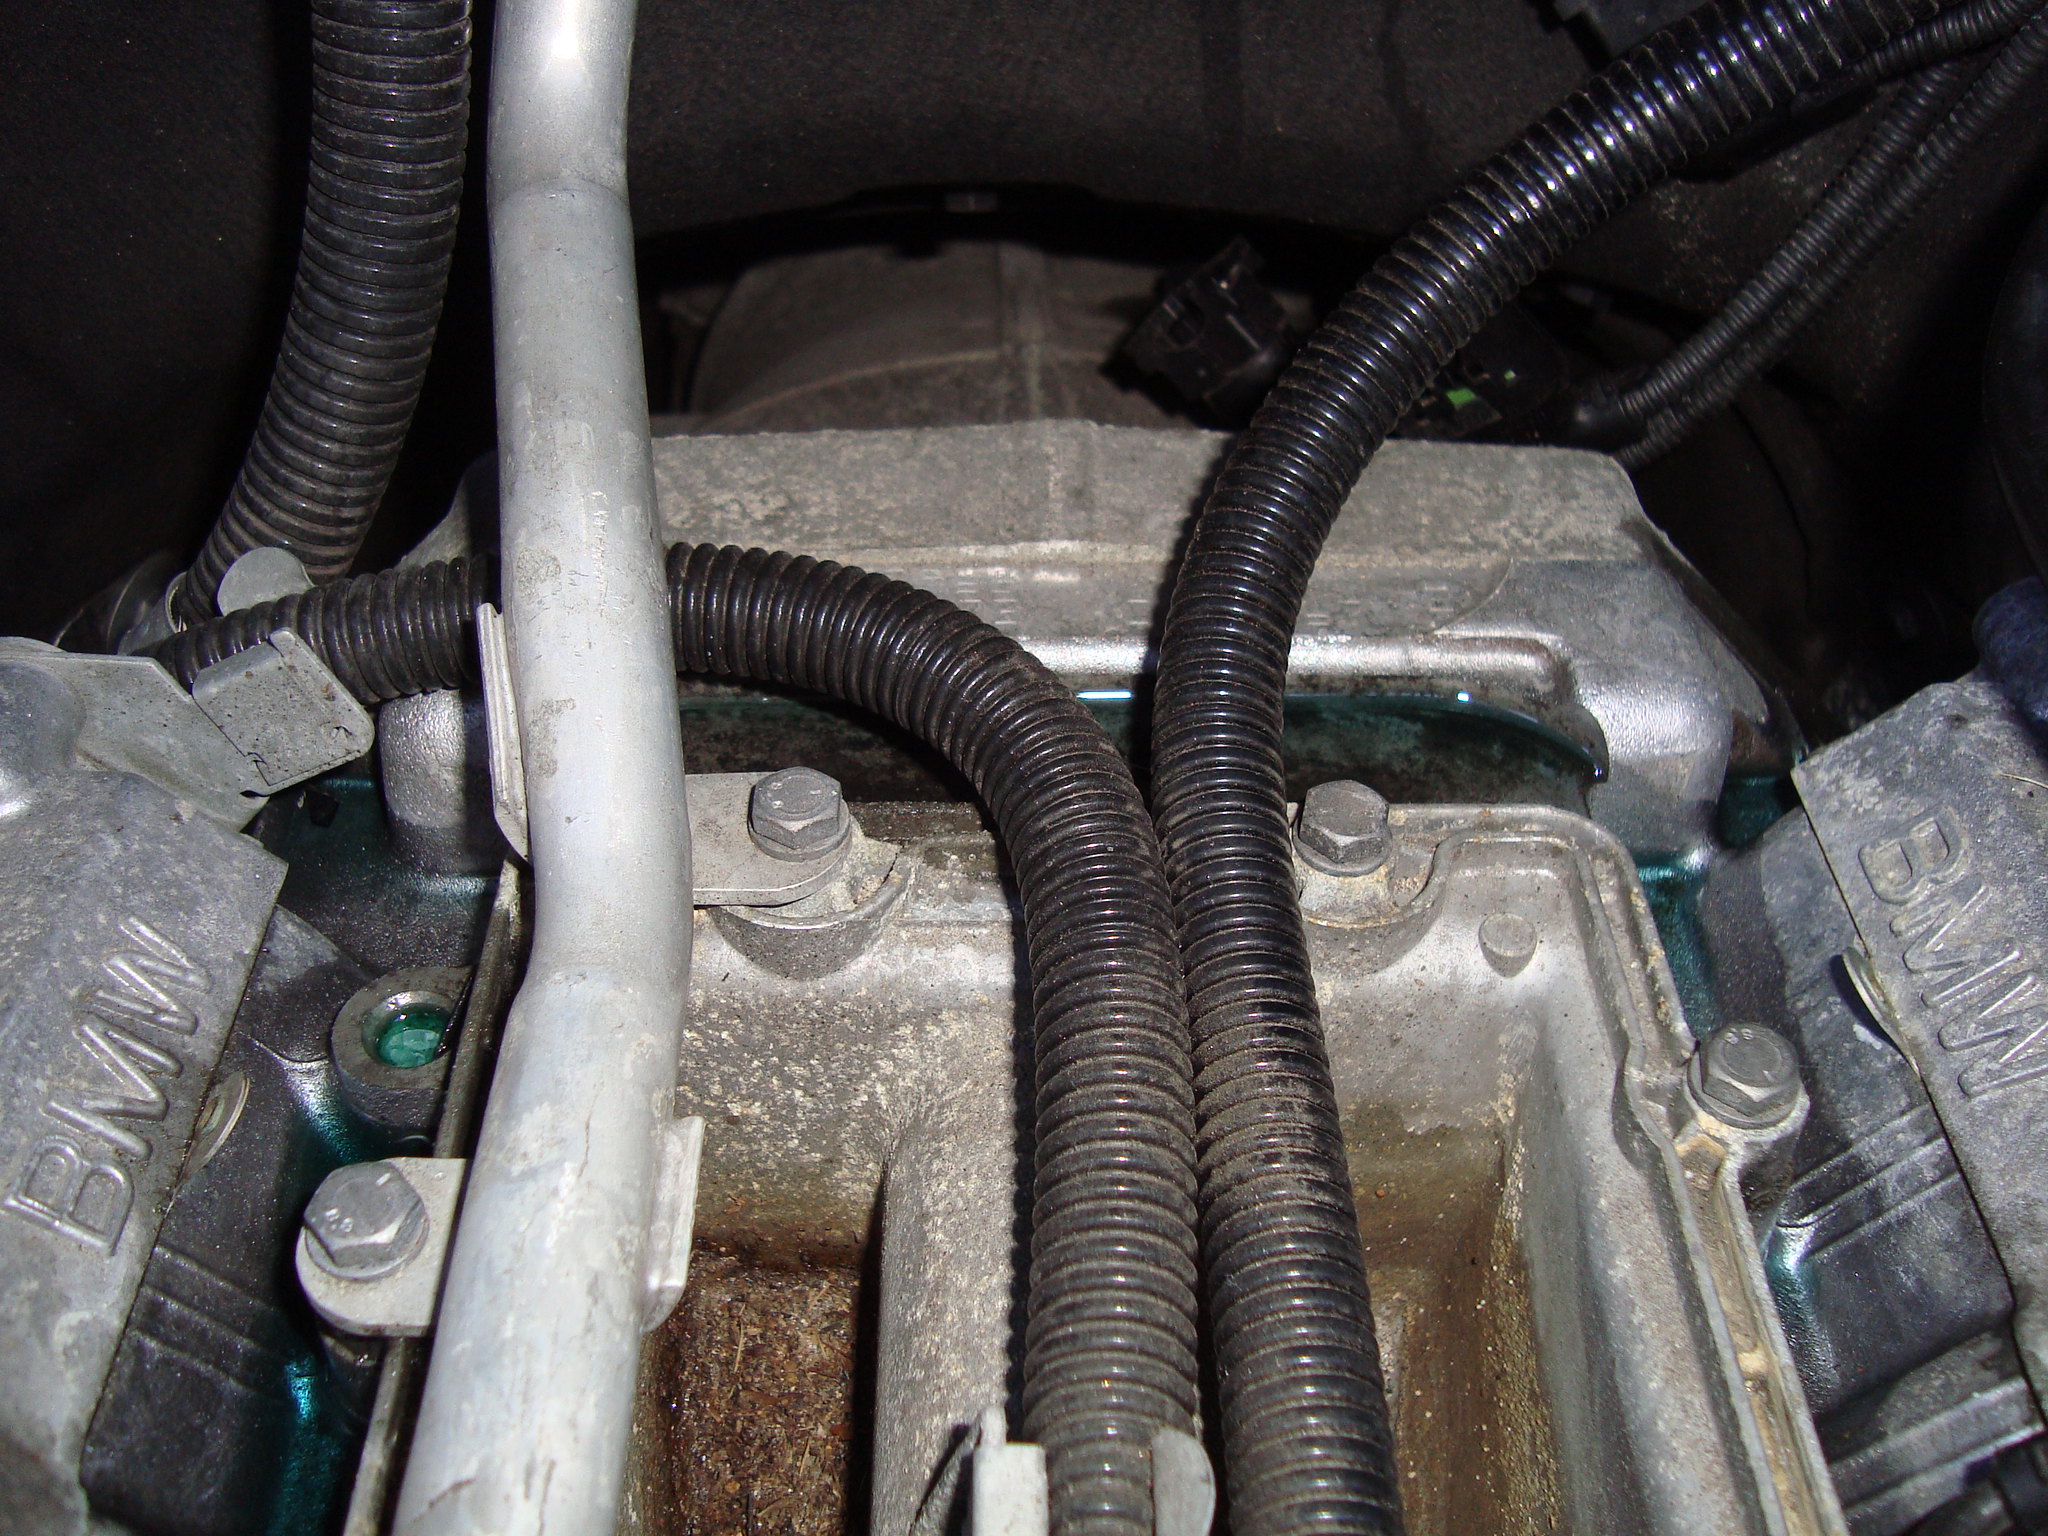 DSC04104 DSC04104- unbolt all the Valley Pan bolts and pull upwards to break the seal 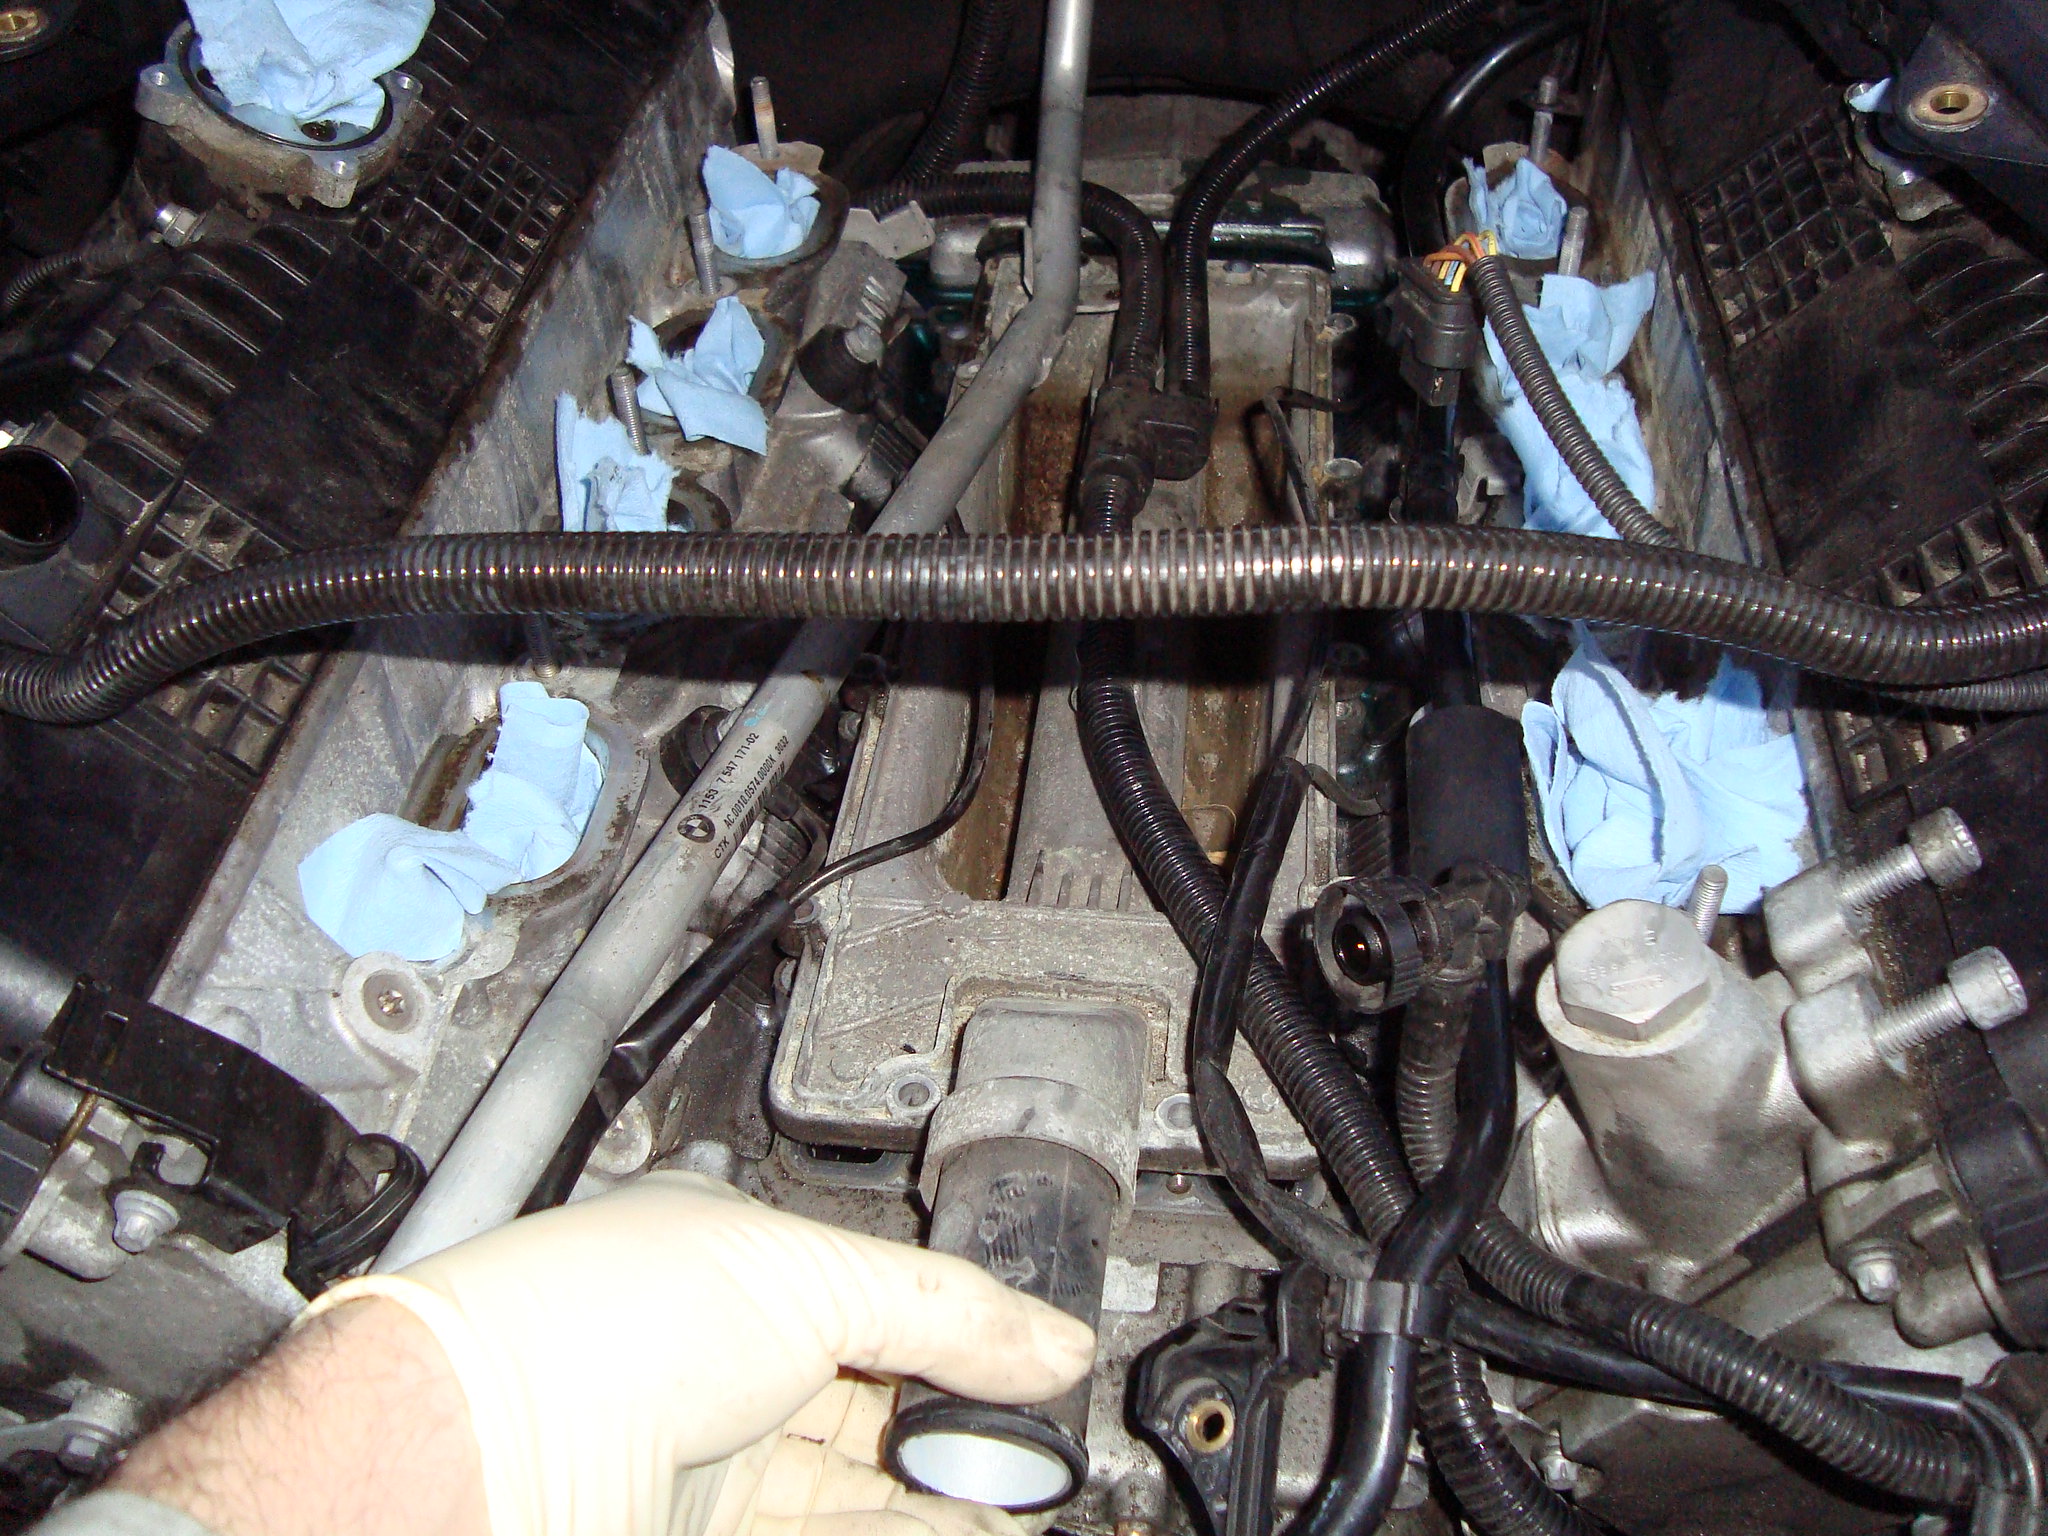 DSC04105 DSC04105- disconnect the electrical cable from the Valley Pan and pull Valley Pan forward and out - move the electrical cable clips from old Valey Pan onto a new unit, make sure to observe direction/placement  DSC04111 DSC04111- you will not have the Coolant Exchange Pipe in your reach, as well as a pool of coolant. (there is about a gallon of coolant here) - remove the coolant (remember to cover all openings to inside of the engine) - once you have evacuated all the coolant, place rugs inside the valley before you start cutting the pipe. This way you can keep the internals clear of any derby that will be generated in next steps - cut the pipe in half  DSC04113 DSC04113- remove the back side of the pipe 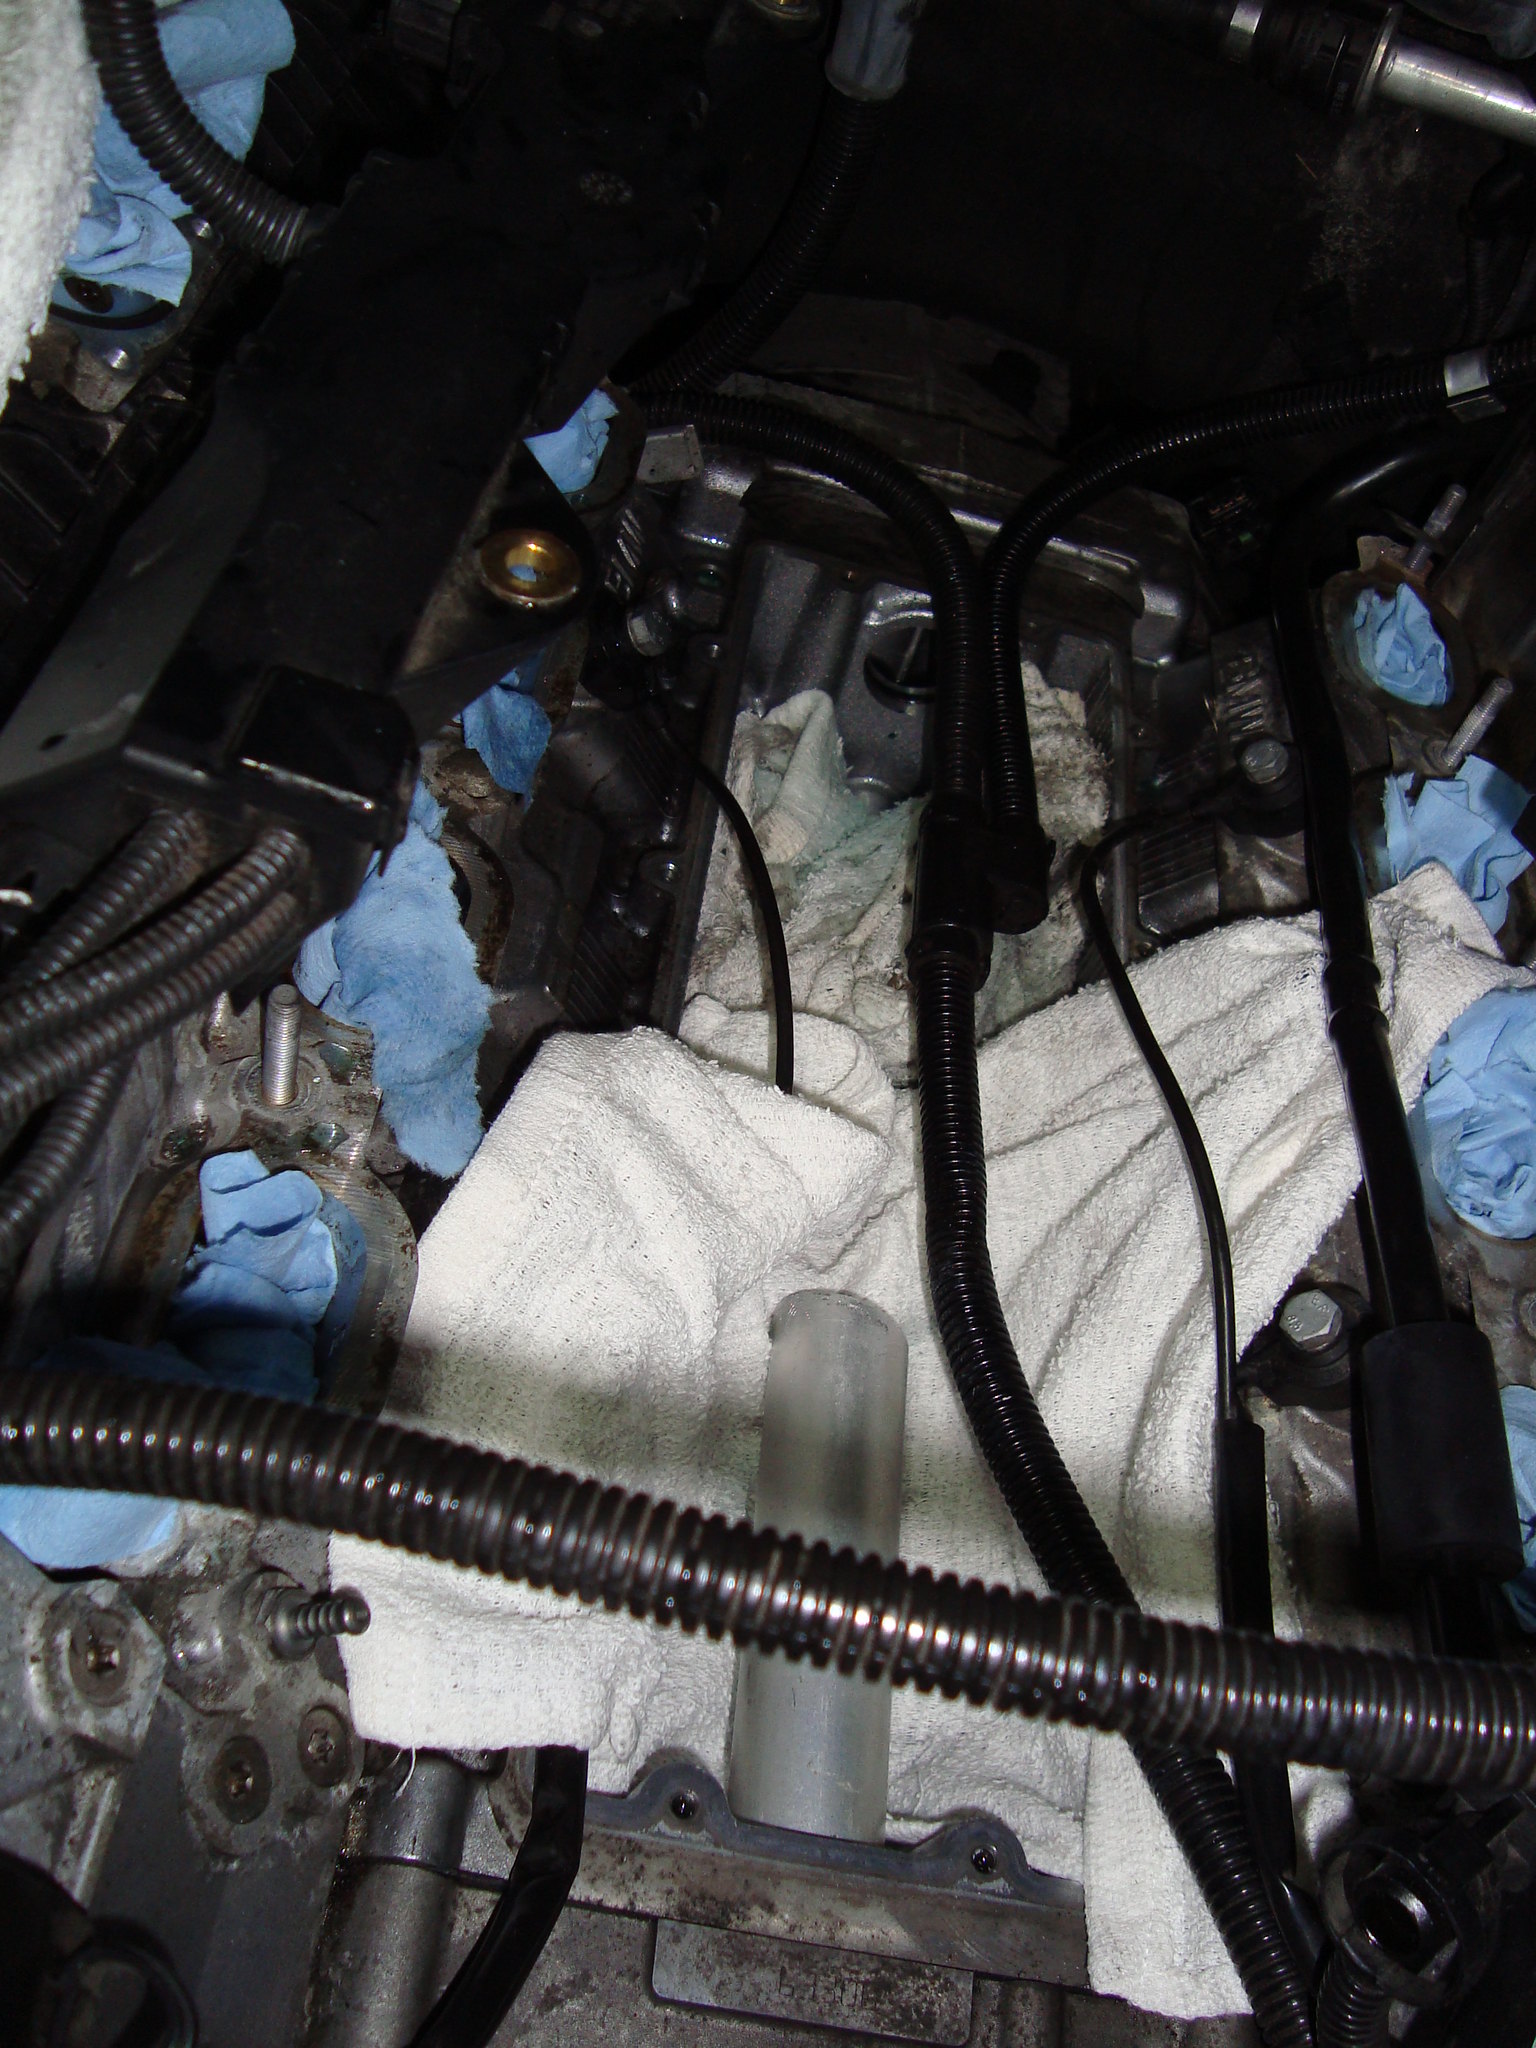 DSC04115 DSC04115- drill small home in the remaining pipe and leverage it out of the front of the block 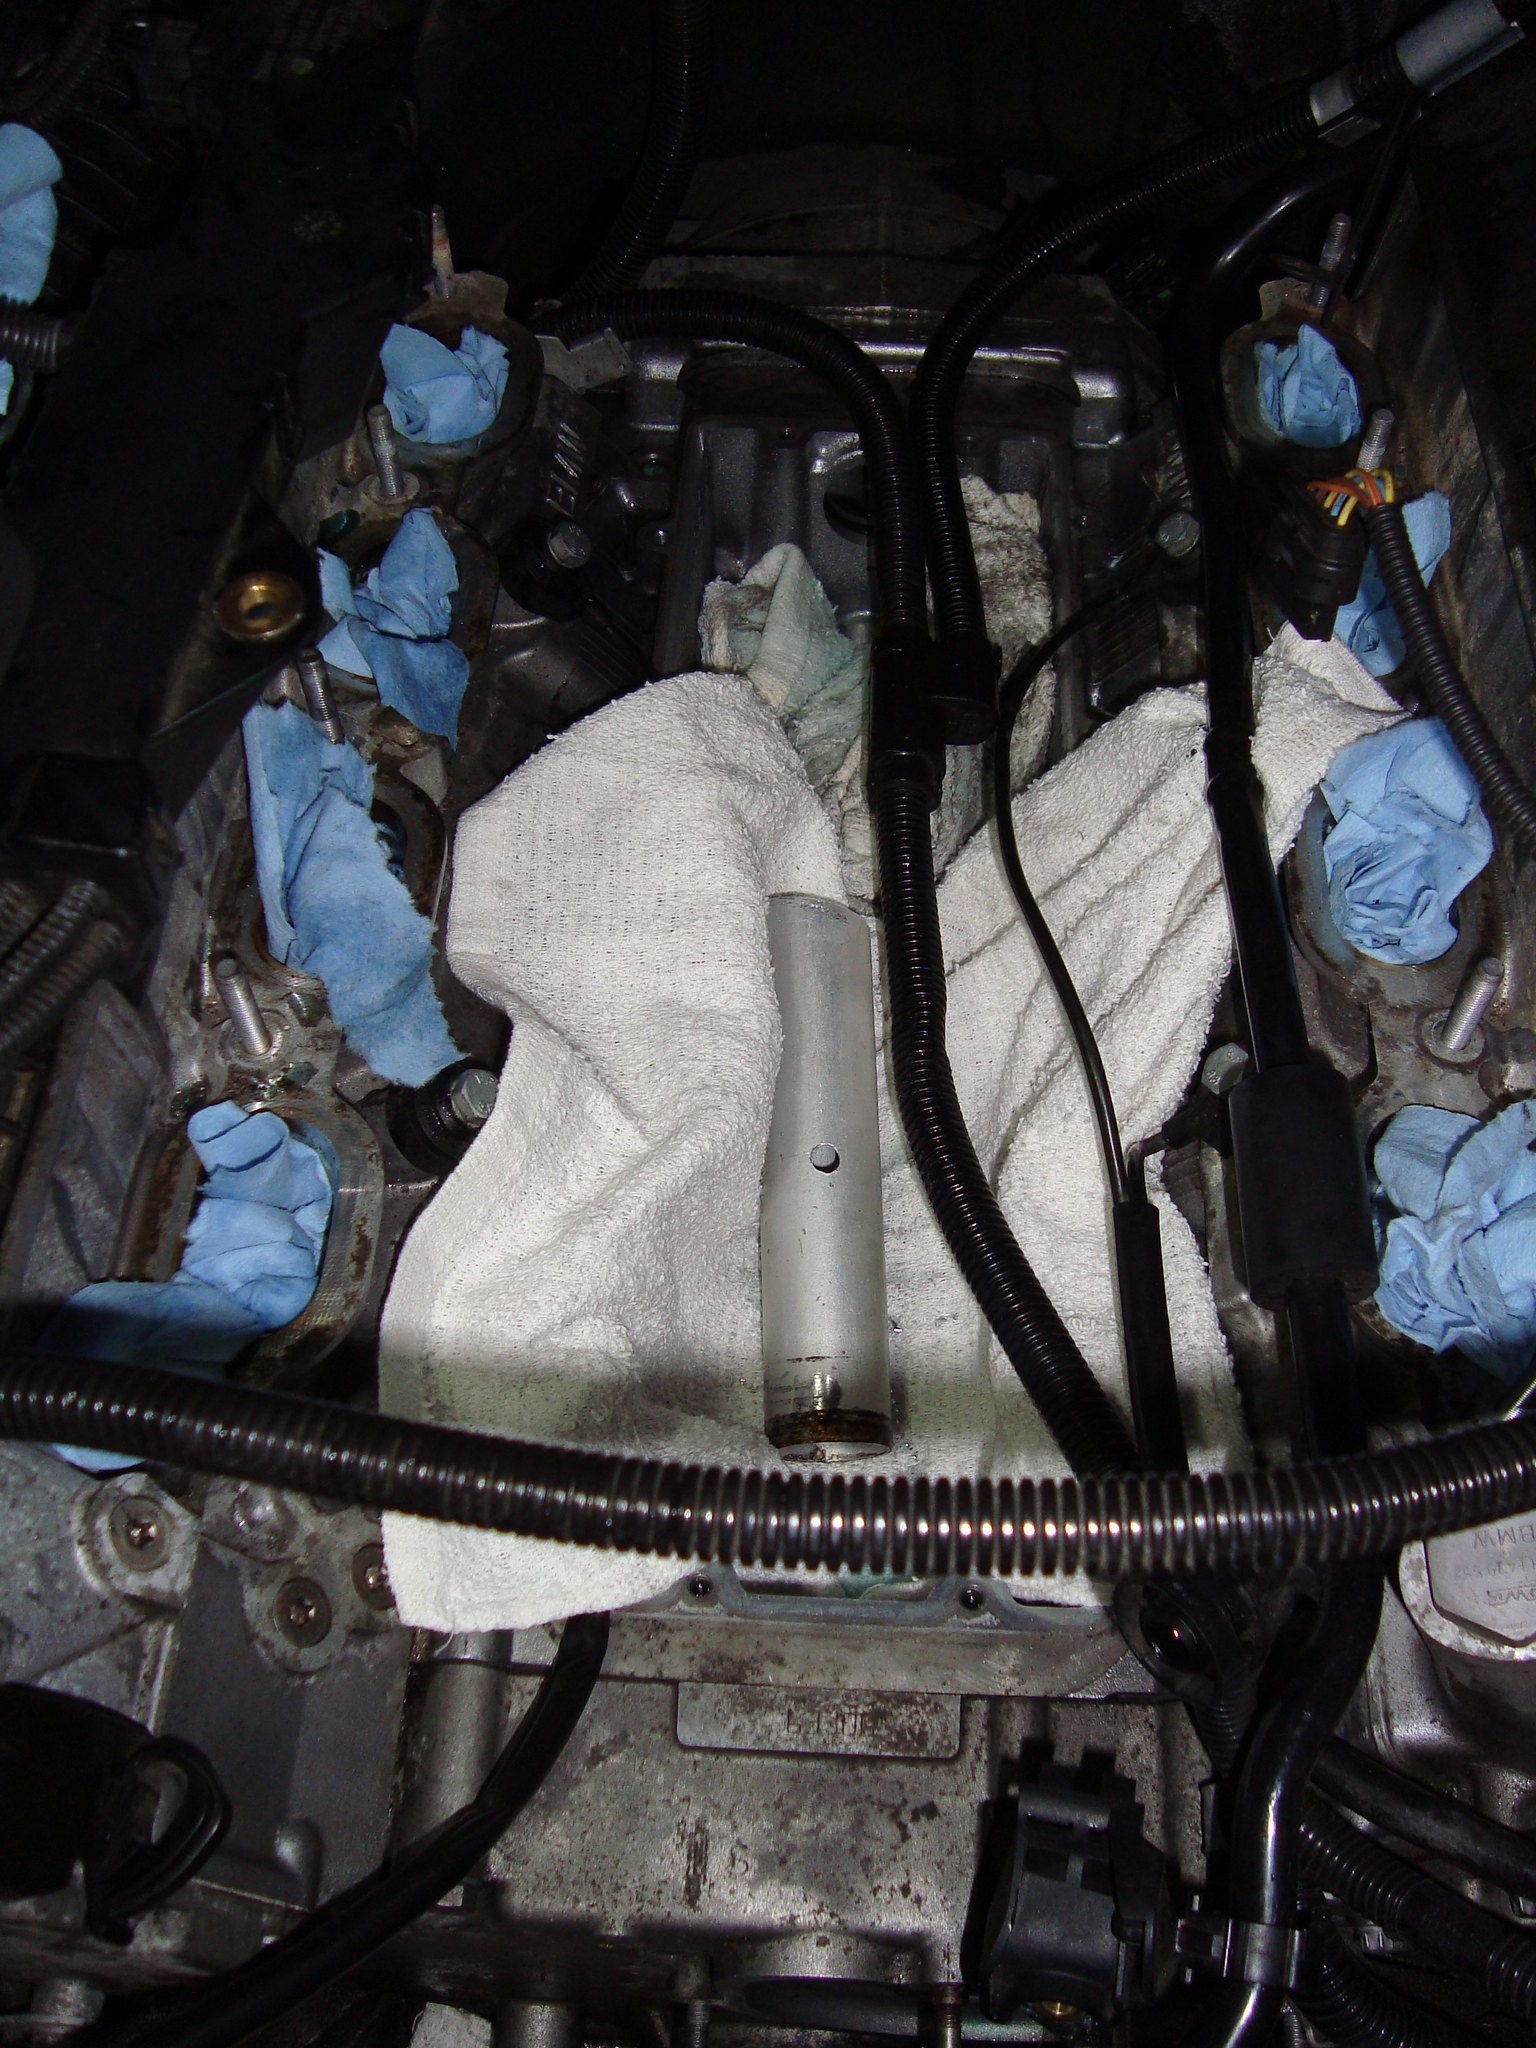 DSC04117 DSC04117- remove rear gasket that is inside the block (you will need a pick) - clean the gasket seat (use mirror to inspect your work) - remove the front gasket that is in the block (you will need a pick) - clean gasket seat (use mirror to inspect your work Here is an image of the front gasket 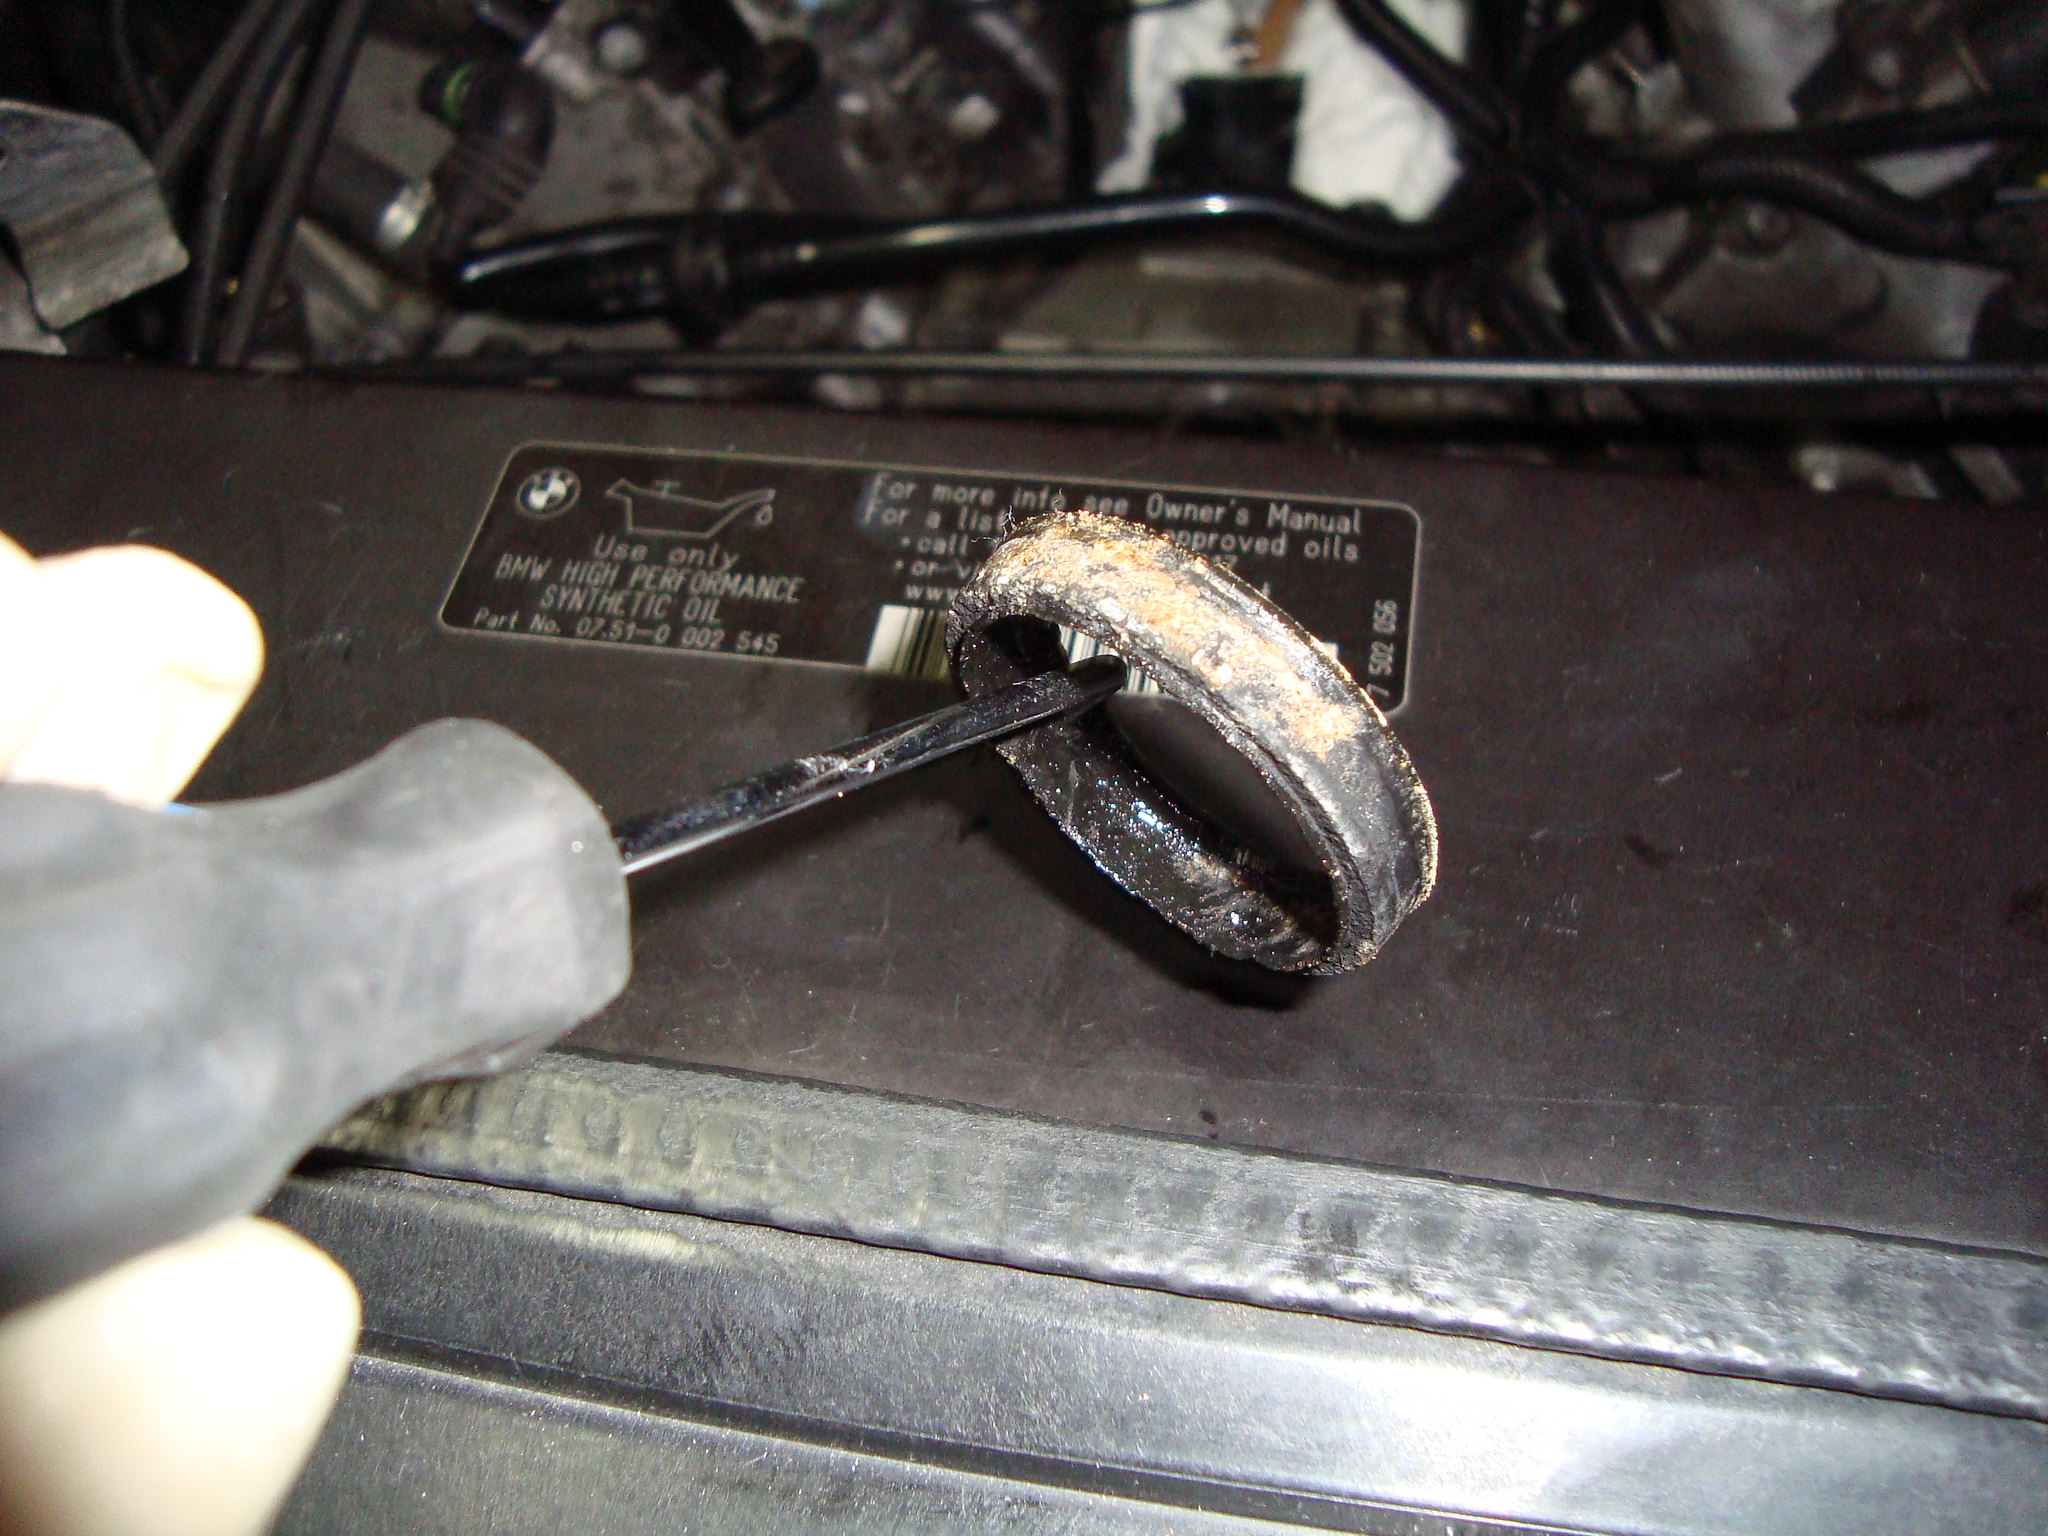 DSC04121 DSC04121- install rear gasket and front gasket per instructions supplied with the new expanding Exchange Pipe (I got really frustrated while installing the pipe, therefore no images. Lol - Remember that the kit you will purchase will come with two gaskets for the back of block: one on pipe and the other in the block. Front gasket will be on the pipe as well and it installs in the block  - Here is the link (also provided above) the how to remove and install the replacement pipe All German Auto | Expanding Cooling Pipe/Tube Now it is time for reinstallation of everything - install new Valley Pan (before you install the water pump) - tighten all bolts of the Valley Pan - if you are reusing the Thermostat: reinstall thermostat and Thermostat Housing to the Water Pump - install new Water Pump  DSC04123 DSC04123- reinstall all water pipes to the water pump and the valley STOP Here you will know if you like to live dangerously or not. At this time you are to pressurize the system and wait three hrs. (per instructions) Guess what I did. Lol - reinstall intake housing with new rubber gaskets: don’t forget to connect three back connectors and install the bracket on back of the housing / driver side - continue reinstalling all hardware until you get to Vanos Actuators - install new gaskets on Vanos Actuators - screw in the Vanos Actuator until the are seated nice and tight. Make sure the connectors are facing the same direction they did before and make sure that Vanos Actuators are in same orientation they were before - top off, or fill your coolant - once all parts in engine bay are reinstalled connect battery - remember that the connector for Oil Sensor is still unplugged, and bellow the car - put key in ignition and Do Not Start the car - turn the car On without starting the engine (leave On for one minute: this will realign Vanos Actuators) - turn car Off and remove the key from ignition (leave alone for 30 seconds) - start the car and let it run for few seconds (there will be warning lights on your dash; to get rid of the 4x4 error: turn wheels far left, followed by far right and then center again = that should clear it; you still should see Oil Sender Malfunction for few more seconds) - turn car Off - bleed the Coolant System of bubbles by turning the heat all the way up and fan speed all the way down: follow the link I’ve provided above BMW Coolant Bleed Procedure For Electronic Water Pump After Repairs On Cooling System - YouTube - drive the can on ramps if you like - reinstall the connector on the Oil Sensor - reinstall skid plate and belly pan - take the beast for a spin. Happy Motoring Last edited by gregg3gs; 02-02-2018 at 01:12 AM. Reason: adding correct terminoligy 
|
| Bookmarks |
|
|
|
|


 Threaded Mode

