
|
|
|
|
||||||||||
| Xoutpost server transfer and maintenance is occurring.... |
| Xoutpost is currently undergoing a planned server migration.... stay tuned for new developments.... sincerely, the management |
 |
|
|
LinkBack | Thread Tools | Display Modes |
|
#1
 02-20-2011, 06:37 PM
|
|||
|
|||
|
HOW TO: Build your own AUX in (E53) Pre-facelift, (- NAV + DSP)
This was done on a 2003 Business CD with DSP, no nav or changer was present. Total build cost $12. (I already had the $10 ipod charger from Marshalls) Start with a few goodies from your local electronics store. 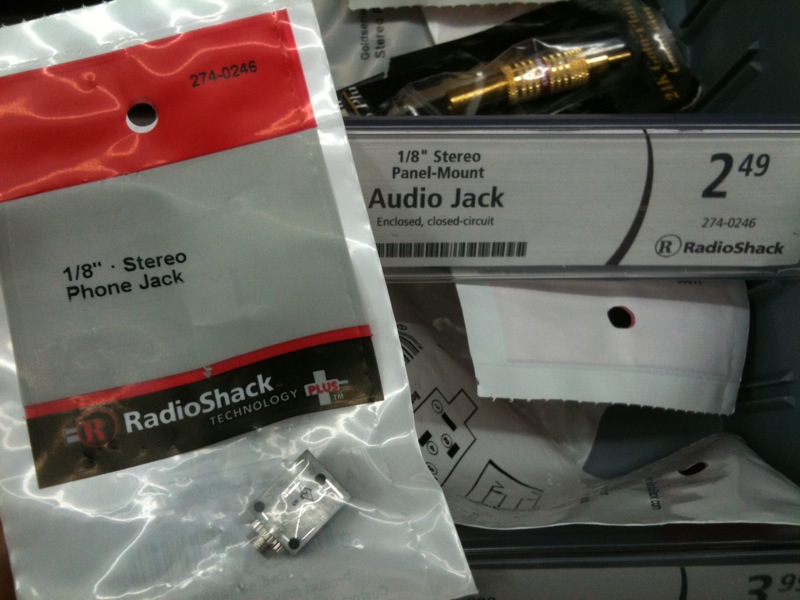 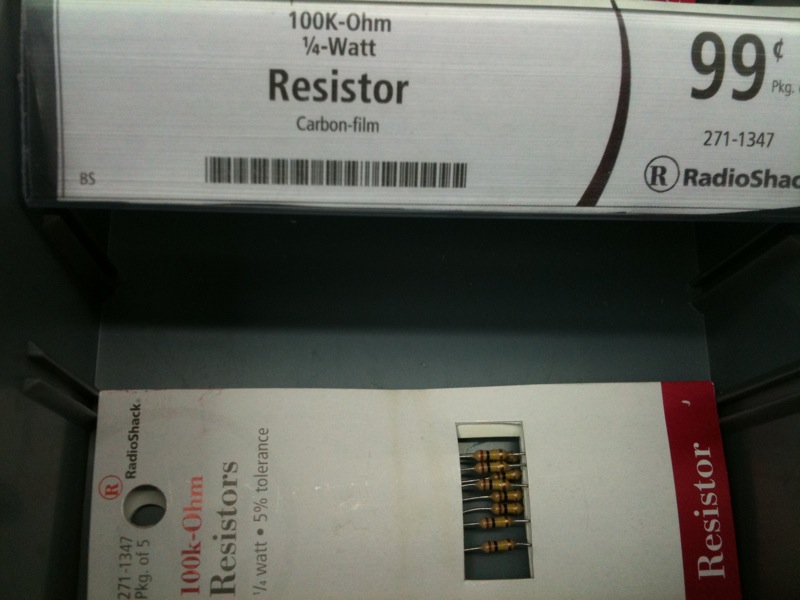 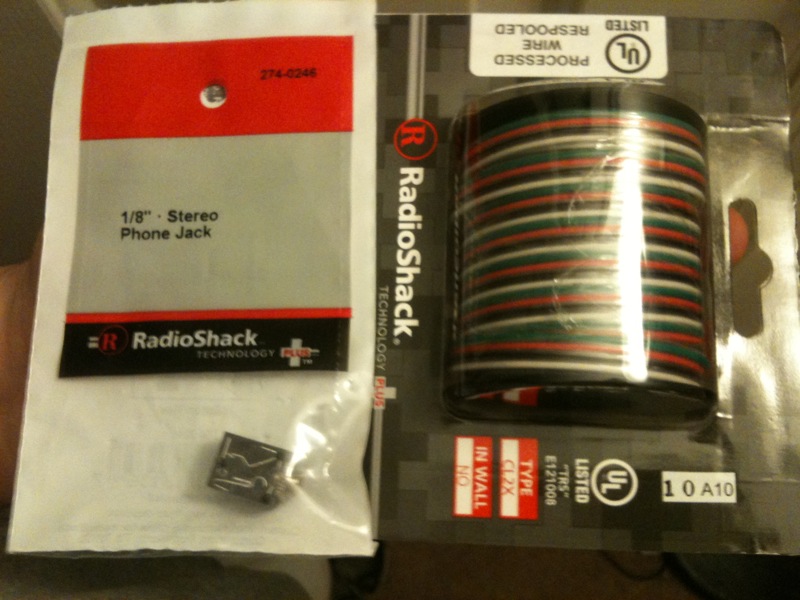 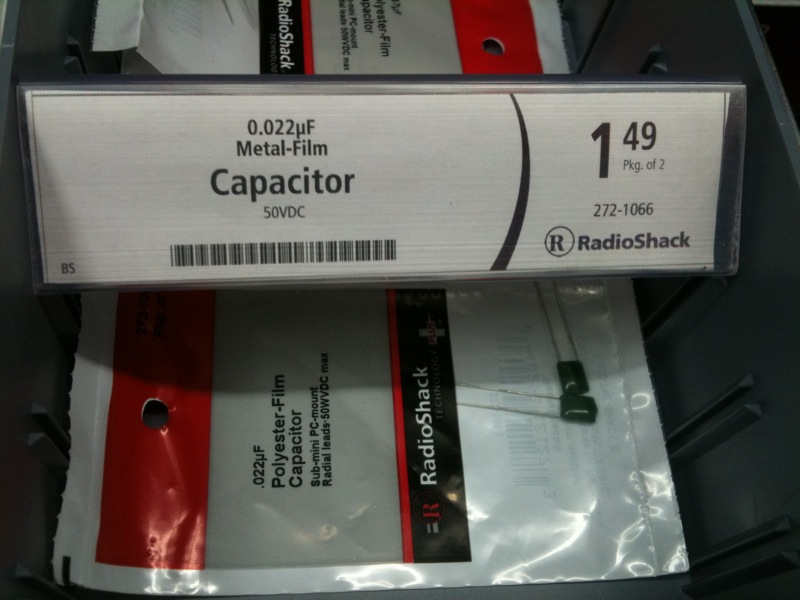 Would be nice if Radio Shack sold 300K resistors, but they do not so let's make one. This resistor lays across the R+L positive and tells the head unit to go into AUX mode. Just laying the 300k ohm resistor across pins 3 and 4 of the area where the ipod in signal goes will give you the aux selection on the radio (otherwise you don't get the option). 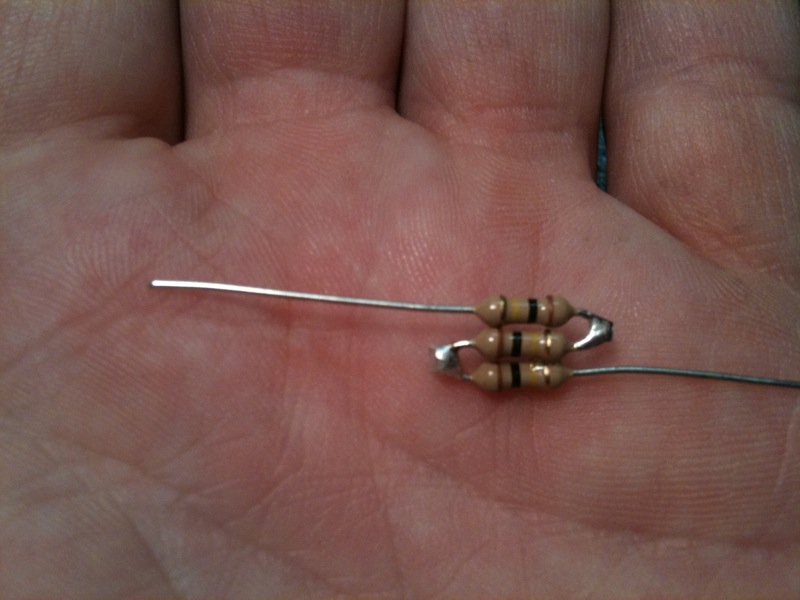 ...and let's make it nice and safe. 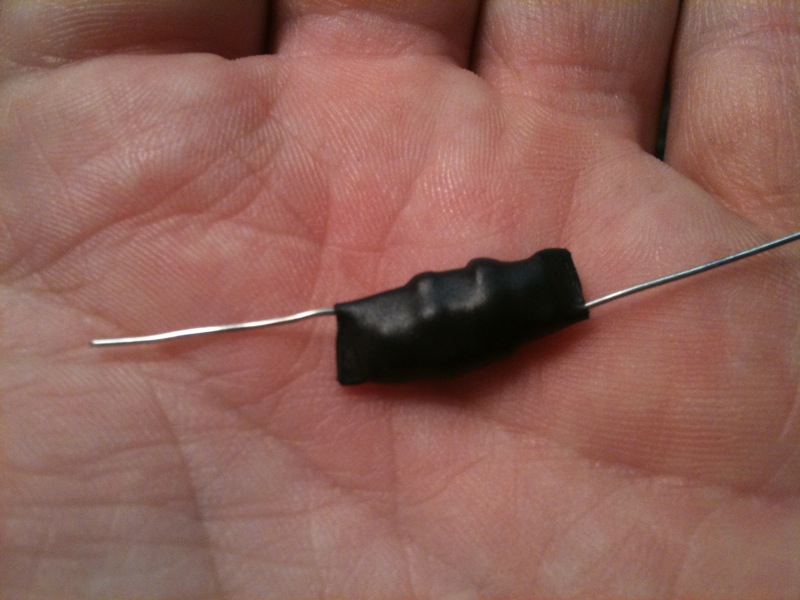 We're going to let the pics do the talking for a bit. 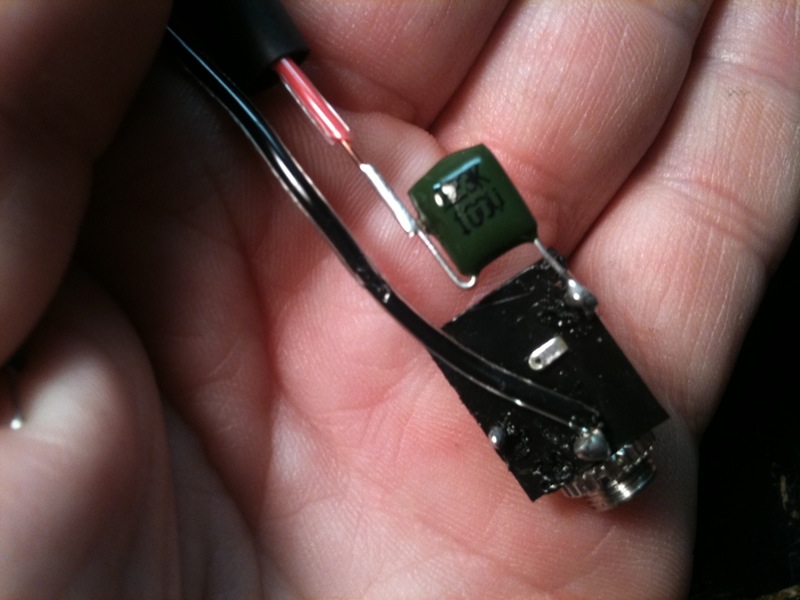 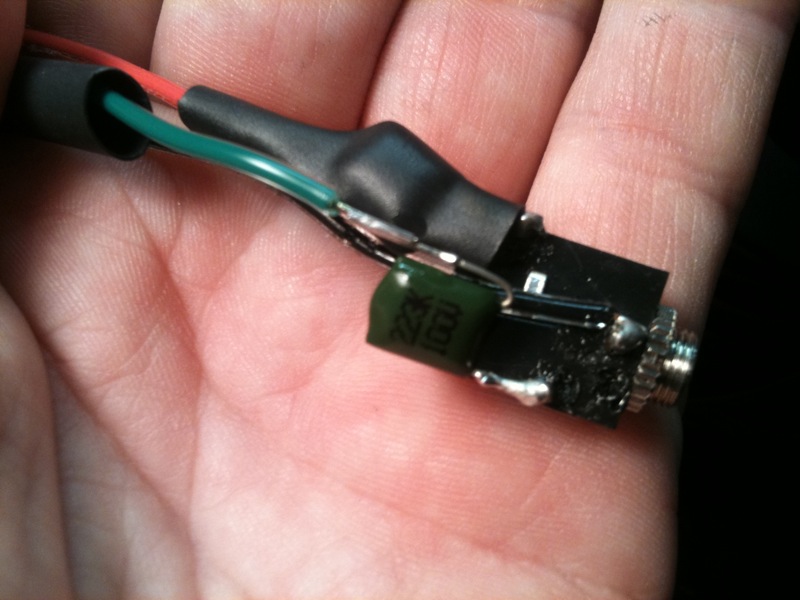 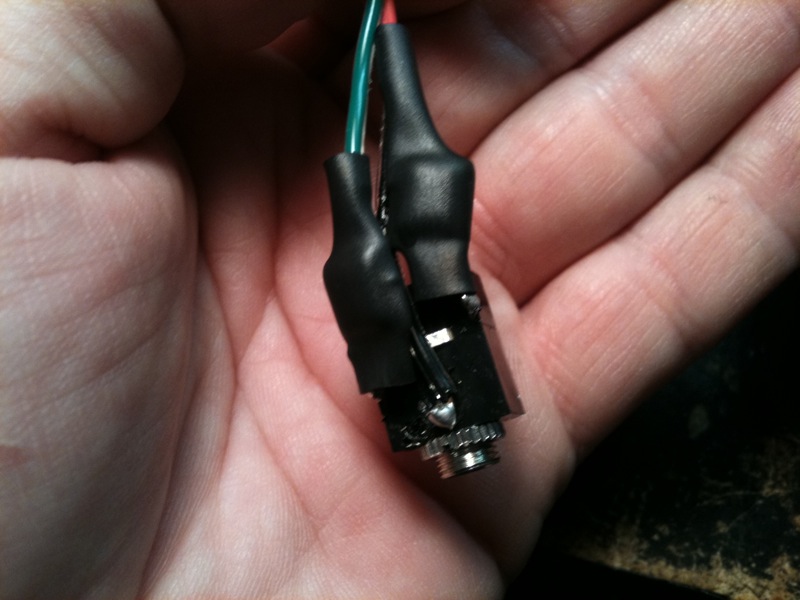 Here the resistor (300K we made) goes across the R+L positive. The capacitors are on the ipod side before the resistor, as the resistor and head unit must see each other first to go into AUX mode. 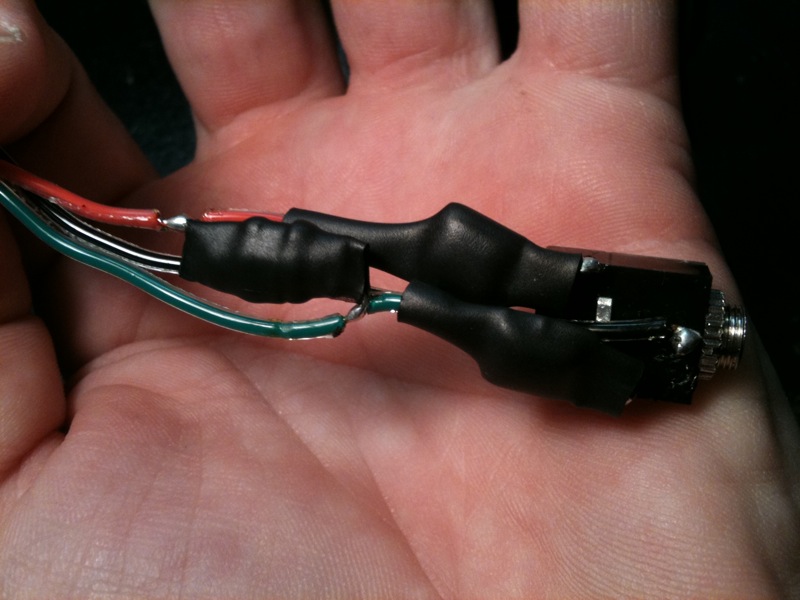 Just tape it all up and put it to the side for now since you've built the plug circuit. Since I am building into the overhead console I am going to do the writeup as such. Plug your iPod jumper cable into the new AUX plug and run it through to the other side. 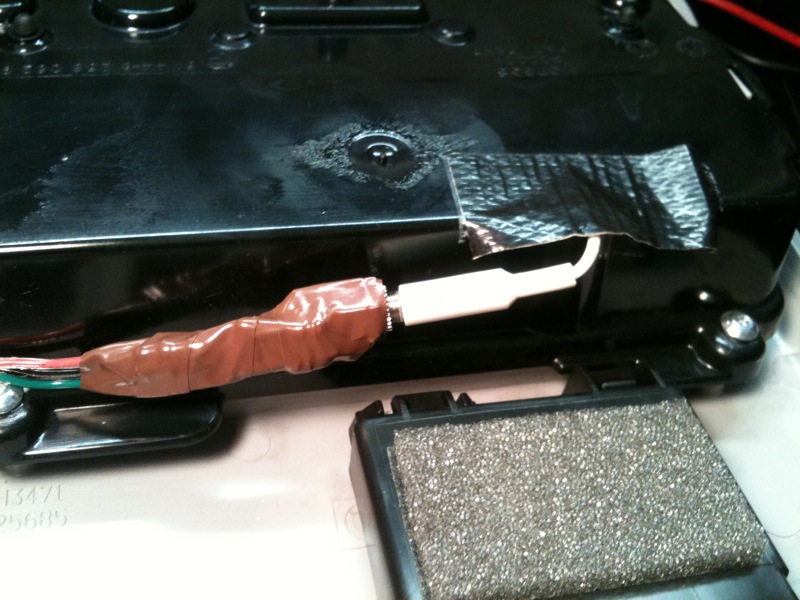 Now pick yourself an iPod charger cable up and dissect it for it's guts so your iPod will charge when you are driving. 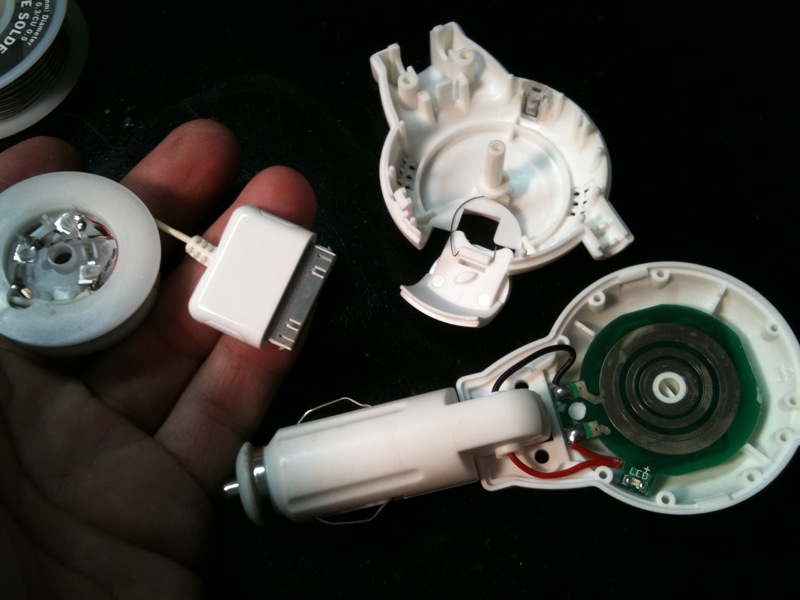 You'll use the green/red from the homelink plug for power since it turns on with the key and turns off when not in use. Ground to the sunroof motor mounting screws. 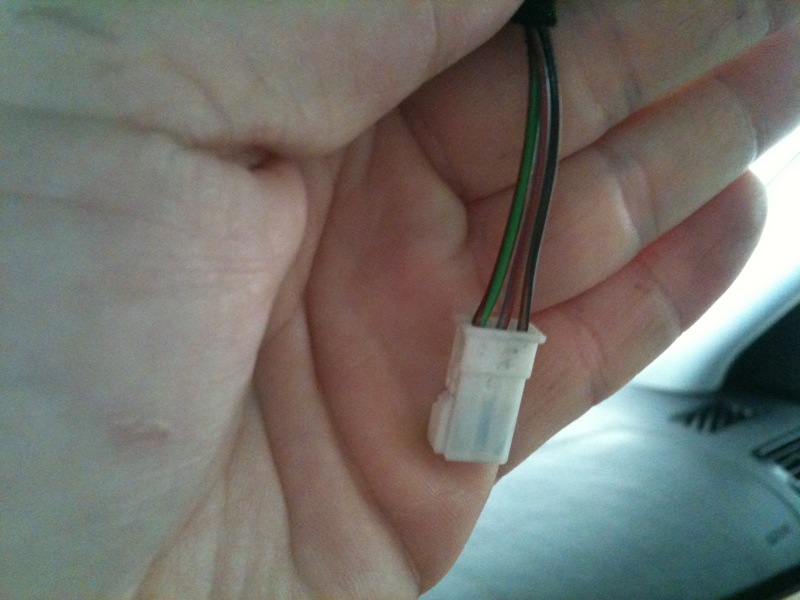 Run your AUX wire in through the roof and get it plugged in properly to the iPod and set up. Bolt it all back up after you have made the connections for power and AUX to the ipod. 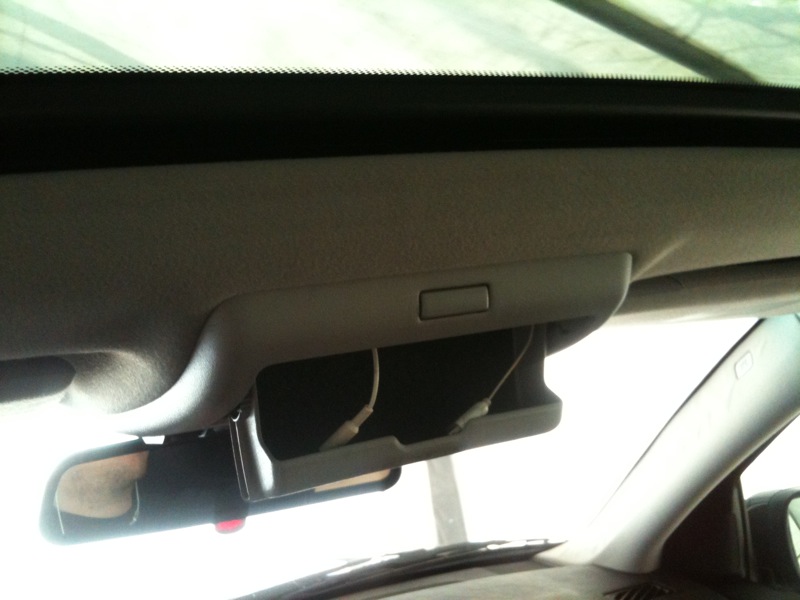 Set the iPod in to it's new space and connect it up. 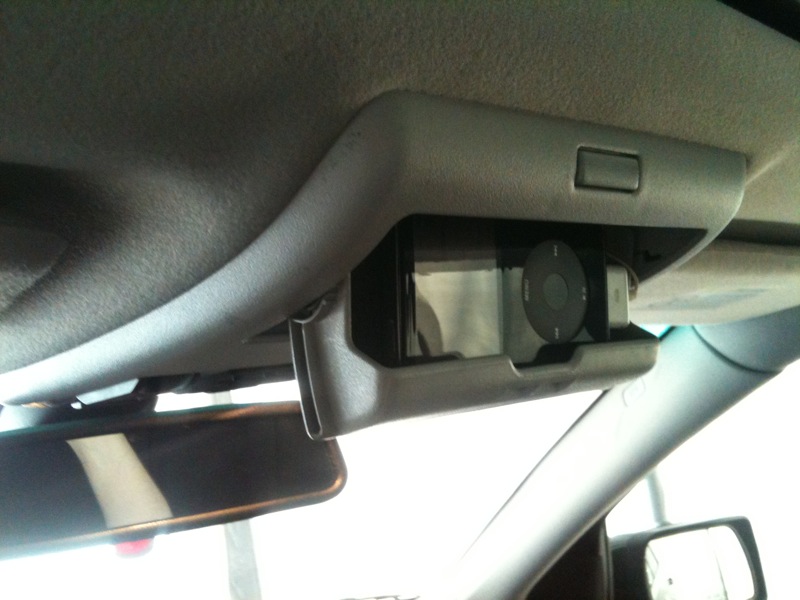 Turn the key on and see if your iPod is charging and has the little lightning bolt in the battery symbol. 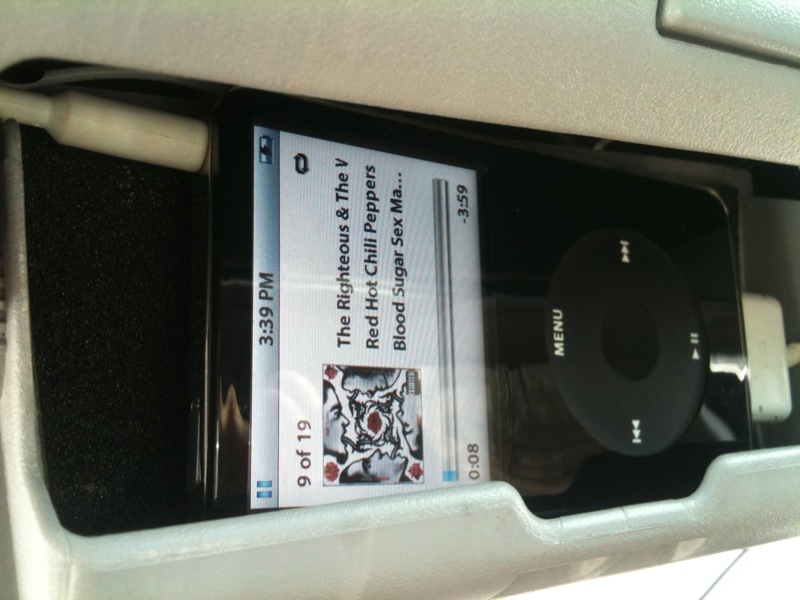 Pop the cover off your pillar and unscrew the screw to allow you to remove the pillar cover so you can run the wire down. 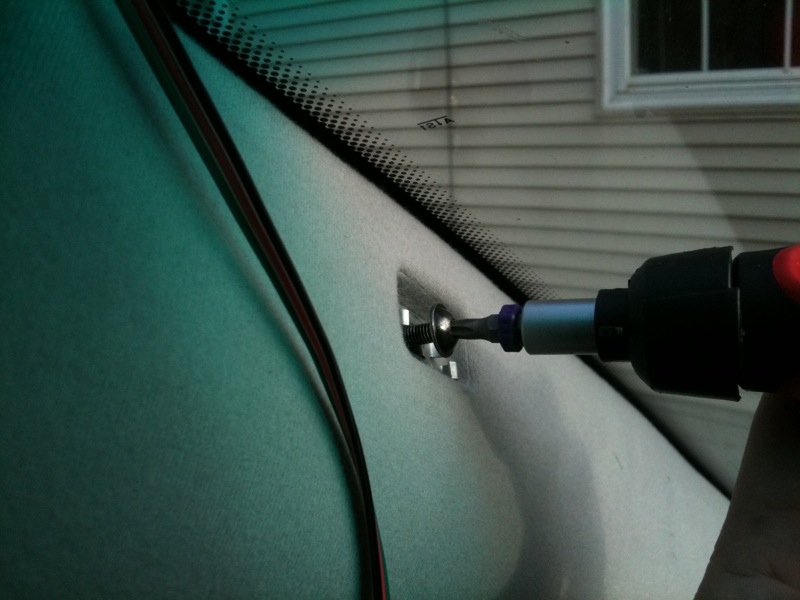 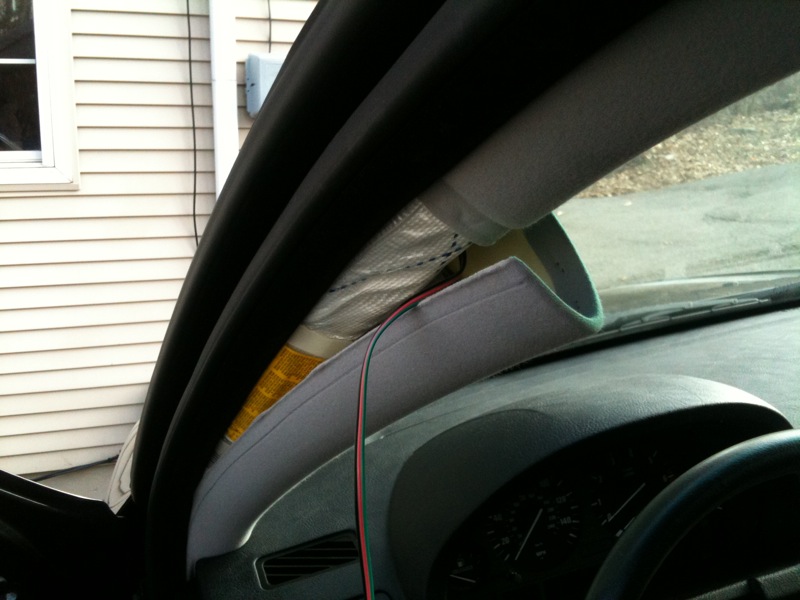 Stay away from the pillar airbag, run the wire along with the drain tube. 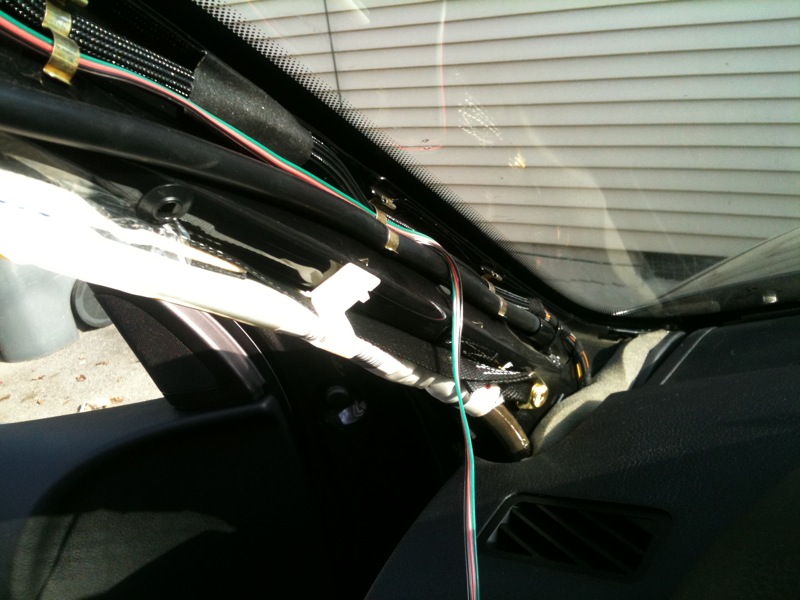 Then drop the lower pan from under the driver dash (couple screws and a few twist locks, no biggie) and run the wire over to the radio and feed it through. 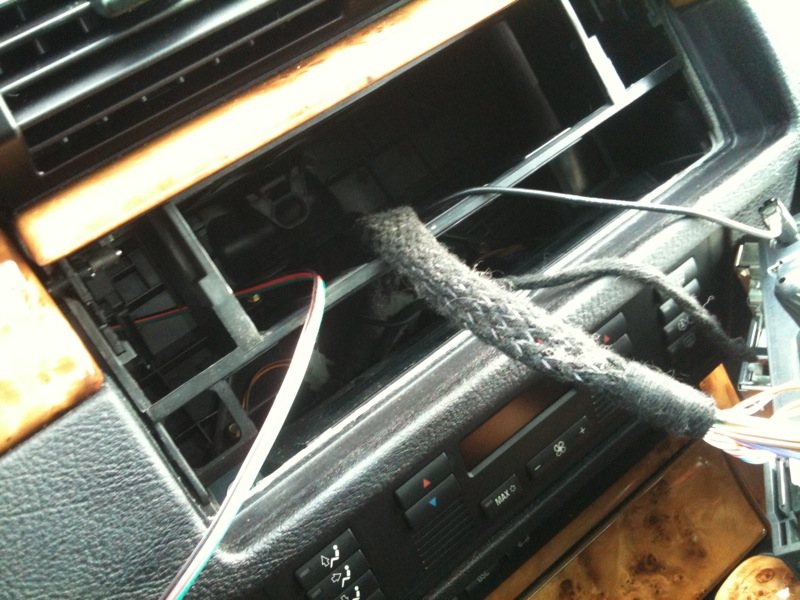 IF you look in the back of the plug where you are supposed to plug in (bottom right) it will be numbered. Pins 3 & 4 are R+L positive and pin 10 is common ground. 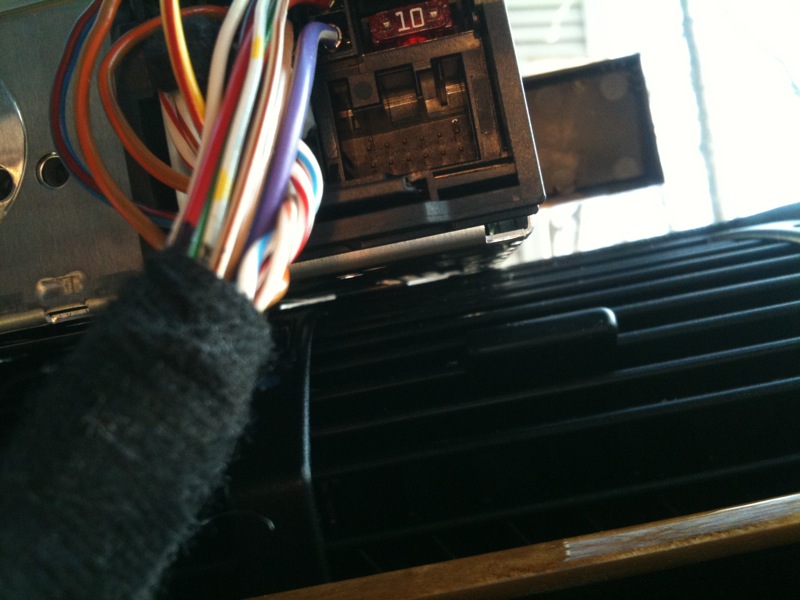 The pins are very common so picking up a few female pins to put on the end of your wire is easy enough, then just plug the wires in to the pins. If you did it right, you will now have the AUX option when going through the sources. Turn the ipod on and ENJOY!!!!!  : ) : )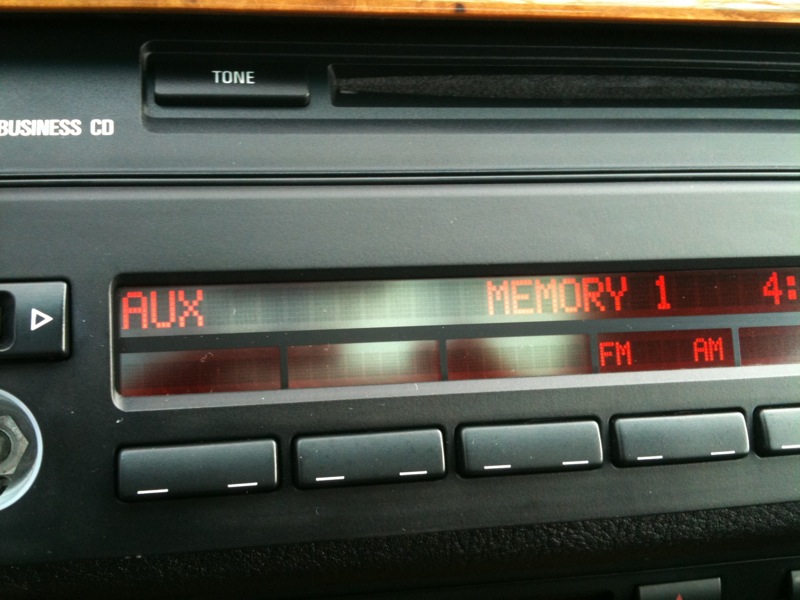 ..........and the video! http://www.youtube.com/watch?v=PeFfhUj4GcE ^ Proof of concept  ****TROUBLESHOOTING**** *Note if you experience a rumbling or humming sound when switching artists you need a ground loop isolator. Hard drive iPods are more susceptible than flash memory iPods. Get any average isolator and open it, change the rca's for straight wires. Tie the grounds together on each side to make it common ground. Put it inline between the 300K resistor and the iPod. Make sure the resistor stays in front of it all and the radio see's it first. Remove the .022 green caps completely from the AUX plug you made. You obviously can do this right from the beginning without doing the capacitors, but isolators are $20 or so and you might not need one.  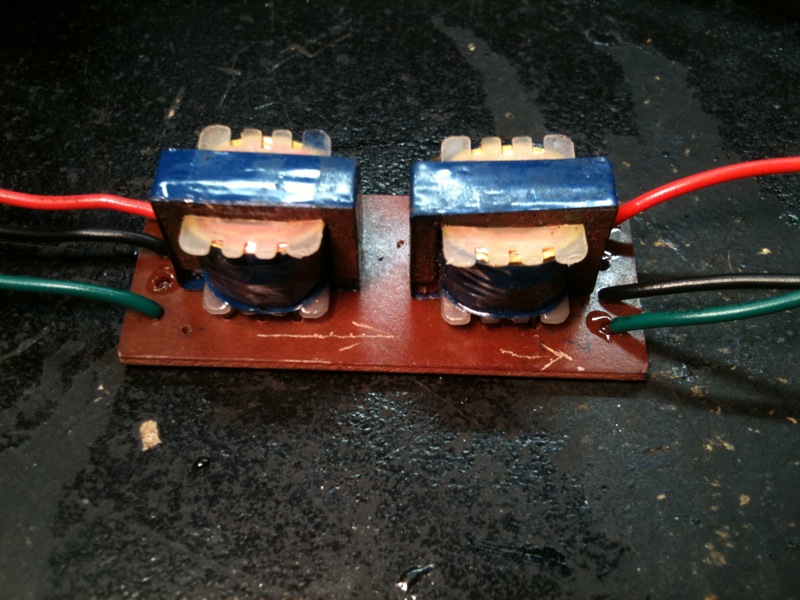
__________________
~2003 X5 4.4i~ Last edited by o. l. t.; 02-21-2011 at 02:59 PM. 
|
| Sponsored Links | |
|
|
|
|
#3
05-28-2011, 04:37 PM
|
|||
|
|||
|
So I have a facelift E53 with Nav. I installed an aux connection by simply wiring up a socket to the aux input behind the head unit. It works fine, when something is plugged in the head unit allows you to go in to aux mode - however I've noticed one problem....
If I plug my iPod/iPhone in and then plug in the charger (powered by the 12v socket) then the head unit no longer detects the aux signal. I can only imagine this is due to the earth on the charger and earth on the audio link having some kind of imbalance? Is that my problem? I noticed you have some resistors and capacitors added to your circuit. What exactly is the purpose of them and would adding similar to my aux connection resolve my issue?
|
|
#4
05-28-2011, 06:56 PM
|
||||
|
||||
|
Great work! I will be putting this to use during the summer.
However, I still have a question. What did you use for female pins if they are so common? Does Radio Shack sell female pins for use? I've also seen people cut up old IDE cables to use those pins; what do you say to that?
__________________
|
|
#5
05-30-2011, 08:34 PM
|
|||
|
|||
|
Quote:
__________________
~2003 X5 4.4i~
|
|
#6
05-30-2011, 08:36 PM
|
|||
|
|||
|
Quote:
__________________
~2003 X5 4.4i~
|
|
#7
05-22-2014, 01:36 AM
|
|||
|
|||
|
Outraged that my dealer wants $120 AUD for an auxilary cable... THREAD REVIVAL. I'll be building my own. I've purchased all the parts for $10, so hopefully this aux cable will also work for the 16:9 nav, non DSP.
I'll post updates on if, and how well it works.
|
|
#8
05-22-2014, 06:41 AM
|
||||
|
||||
|
check out this post - http://www.xoutpost.com/961741-post33.html
you will need a dealer part 61136931929 and three male pins... it is an easy mod - good luck
__________________
E53 X5 4.6iS 147K mi - Sold May 2013 Tireprints left in: USA, Nicaragua, Costa Rica, Panama, Russia  E53 X5 4.8iS built 2005-10-17 66200 mi - June 2012 96000 mi - June 2013 112000 mi - June 2014 OEM fire extinguisher OE first aid kit OE tow hitch OE TV module OE aspheric mirror K&N air filter black/white badges rear camera 4-channel video recorder Here is the list of things I have done to the X
|
|
#9
05-23-2014, 08:50 PM
|
|||
|
|||
|
Thanks! All done. Works perfectly! I didn't buy the proper connector. I just cut the wiring loom plug off and soldered my wires on. I'll post a picture later today!
|
|
#10
06-16-2014, 06:29 PM
|
|||
|
|||
 Plug cut and wires soldered!
|
|
| Bookmarks |
|
|
|
|


 Linear Mode


