Home Forums Articles How To's FAQ Register
Go Back   Xoutpost.com > BMW SAV Forums > X5 (E53) Forum
Fluid Motor Union
User Name
Password
Member List Premier Membership Today's Posts New Posts

Xoutpost server transfer and maintenance is occurring....
Xoutpost is currently undergoing a planned server migration.... stay tuned for new developments.... sincerely, the management


Reply
 
LinkBack Thread Tools Display Modes
  #41  
Old 03-22-2008, 10:36 AM
Member
 
Join Date: Mar 2006
Location: pittsburgh
Posts: 253
butundo is on a distinguished road
Yes, I cleaned up the surrounding area and spread it out a little. I should have taken a photo of the finished product.
Reply With Quote

Sponsored Links

  #42  
Old 03-22-2008, 04:14 PM
Satheesh.net's Avatar
Member
 
Join Date: Mar 2008
Location: Norway
Posts: 105
Satheesh.net is on a distinguished road
Quote:
Originally Posted by butundo
Yes, I cleaned up the surrounding area and spread it out a little. I should have taken a photo of the finished product.
Ok - I did it on my left-side. And it worked great! I got the DSP-bass on my right-side, so I didn't get it open. But the warning is gone!! So hopefully it was the left-side that caused the problem...

Thanks a lot for your help by the way!

PS! I will post pictures if I get the right-side apart...
Reply With Quote
  #43  
Old 03-22-2008, 09:40 PM
Member
 
Join Date: Mar 2006
Location: pittsburgh
Posts: 253
butundo is on a distinguished road
The right side is a lot more difficult to get at the bolts because of the bass box. I dropped a bolt and only used 2 to put the taillight back on. I did not have any problems with the right side, only the left side.
Reply With Quote
  #44  
Old 03-05-2009, 02:59 AM
X5 Meister's Avatar
Member
 
Join Date: Mar 2006
Location: Nordschleife
Posts: 5,486
X5 Meister is on a distinguished road
Here are the SIB's for people still needing them.
Attached Images
        
Reply With Quote
  #45  
Old 07-09-2009, 10:09 AM
CharlieHustleX5's Avatar
Member
 
Join Date: Feb 2008
Location: So Cal
Posts: 642
CharlieHustleX5 is on a distinguished road
Here's the write-up of the procedure....2 years after following this method, my lamps are still holding up like nothing ever happened.

http://www.bmwmotorsports.org/pdf/e5...y%20Repair.pdf

Be sure to keep a copy for future reference.
Reply With Quote
  #46  
Old 10-15-2009, 12:11 PM
Member
 
Join Date: Feb 2009
Location: nc
Posts: 45
dipstick is on a distinguished road
I did the solder fix. Sanded down the burnt area on the cheaply made galvanized holding bracket and floated copius amounts of solder around and over it. The key trick is to then paste all around the area with dielectric silicon grease. sold for a few bucks at any auto store. This will keep the moister out of the contact area and eliminate the arcing.
Reply With Quote
  #47  
Old 10-15-2009, 12:16 PM
Member
 
Join Date: Feb 2009
Location: nc
Posts: 45
dipstick is on a distinguished road
rear tail light issues

In addition to the solder and dielectric grease treatment, I noticed that a plastic "Rivet" was loose and the back plate was not a tight as it should be. I took a drill with a small bit and drilled a hole into the plastic mounting post. It then took a small screw and screwed it into place. It held very snuggle and tight. That was 4 months ago and no problem since.
Reply With Quote
  #48  
Old 05-30-2010, 09:49 PM
Member
 
Join Date: Feb 2009
Location: Seattle, WA
Posts: 1
nduncan64 is on a distinguished road
X5 DIY Rear Lamp Repair

First-time post, figured I'd share my write-up on repairing my X5's tail lights with this thread, since it was all of you that helped me figure out how to do it!

Thanks and be kind, I'm a noob....
n

------------------


X5 DIY Rear Lamp Repair

I have been dealing with the well-known problem with my 2001 X5’s rear tail lights for a couple years now by simply sanding the corroding spots on the circuit board and bulb holder contact points. Unfortunately, my luck with this simple fix ran out last week and the pitting finally got to the point that it was too big for the bulb holder to complete a circuit no matter how well I cleaned up the contact points.


Been reading through the forum posts and knew there were two problems I had to fix.
  1. Repair the circuit board where the corrosion/pitting had occurred.
  2. Repair the plastic circuit board supports where they’d melted from the heating of the circuit board.


Tools/Supplies:
  • 2001 BMW X5 With Bad Tail Lights
  • 8MM Socket Wrench
  • Side-cutters / Dikes (for removing damaged plastic circuit board supports)
  • Needle-nose pliers (for bending the damaged circuit board back into shape)
  • Soldering Iron & Solder
  • Sandpaper
  • Rubber Cement
  • Acetone (or your favorite adhesive remover)
  • Q-Tips
  • Epoxy
  • Super Glue
  • Masking/Painter’s Tape
  • Dielectric Grease
  • BMW Tail Light Holder (basket + terry-cloth towel)
Job #1: Repair the Circuit Board

Reference/Credit: CharlieHustleX5’s excellent write-up for soldering the circuit board posted to the Xoutpost’s "X5 Tail Light Alteration and fix. “ thread.
  1. Remove tail lights (Won’t cover the details here, the steps are covered well in the write-up above and in other forum posts.)
  2. Inspect the problem area. The problem really is only with the brake lamps (bottom, black holder) on both rear lamp assemblies. The turn signal (top, white holder) showed very little oxidation and the middle light (green holder) was perfectly clean.


  3. Place tail light in official BMW tail light holder. The basket+towel combination made working with the awkward shape of the tail light much, much easier. I also chose to completely remove the black “gasket” and have steps and pictures further down on re-attaching it.

  4. Apply a thin, wide layer of solder over the problem area. I also sanded the fresh solder to make a more even surface at the contact point. I’ve actually never soldered before and did the sanding by hand. Someone with soldering experience and a Dremel could do a much more professional looking job.

  5. I then reinstalled the lamp holders into the tail light and connected the tail light to the wiring harness in the X5 to ensure my soldering job was successful.
Job #2: Repair the Plastic Circuit Board Supports

Reference/Credit: Service Information bulletin – SI B63 08 07 (Image of SIB posted to same thread here).

  1. Inspect the problem area. Again, the problem really is only with the brake lamps and its evident that the heat being generated by the circuit board is enough to severely damage the plastic circuit board supports (gray, cross-hatched heads). Following the directions from the bulletin, I cut off the heads of the damaged supports with a pair of side-cutters and then bent the circuit board up a bit to get a better look. On both tail lights, it was the bottom two supports that were damaged, all other supports appeared fine.


  2. Using needle-nose pliers I then bent the circuit board back into its proper position, which was at a parallel height was the rest of the undamaged circuit board just next to it.
  3. Once I was satisfied that the circuit board was bent to its proper position, I used a small dab of super glue on the very end of the circuit board to glue it to the last gray cylindrical post. This made it much easier to go on to the next step of rebuilding the supports with epoxy.


  4. I then put a piece of masking tape on the inside edge of the circuit board and hole as a guard against getting any epoxy inside the lamp assembly or too close to the inner edge which might interfere with the lamp holder when reinstalled. (Sorry, looks like I didn’t get a picture of this step.)
  5. Build up a “wall” of epoxy underneath the circuit board to replace the melted plastic and add a couple dollops to the holes in the circuit board to act as the heads for the supports (equivalent to the gray cross-hatched heads that you see elsewhere on the board). And as the bulletin mentions, you want to be careful not to get too much epoxy such that the “notch” where the bulb holder inserts into is blocked and may not allow the holder to turn into its locked position.


  6. Allow epoxy to cure. The bulletin mentions applying masking tape to hold the circuit board in place. I got around this with my super-glue trick in step 3.
  7. Re-attach the gasket. As the bulletin instructs, I cleaned the lamp body where it contacts the gasket, as well as cleaned the gasket where it contacts the lamp body. I used q-tips and acetone for the cleaning, you’ll see before and after shots below.


    I then used some good old Elmer’s rubber cement on both pieces to reattach the gasket. For good measure, I taped down the gasket while the glue setup for about 30 mins.


  8. I then applied some dielectric grease to each of the spots on the circuit board where the lamp holders make contact. Hoping this will help slow the return of the problem.
  9. Reinstall the repaired tail lamps in your X5 and enjoy!
A note about epoxy…. I don’t claim to be an expert about this epoxy stuff, just thought I’d mention my experience with the 2 different types of epoxy I had at hand. Both worked, but one turned out to be more suitable for the task of building up a support base and replicating the support “heads”.
  • Manual-mix: The first type I used comes in a dual-chambered container and you squeeze the product onto a mixing surface (a scrap piece of cardboard) and then mix until the color changes. This product was a fairly thick consistency and had a longer setup time (15 minutes). The final pictures above are of the tail light I used this epoxy with. The benefit of this type turned out to be the thick consistency, it held its shape much better immediately, even before it started to setup.
  • Instant-mix (shown in the supplies picture): The second type I tried also comes in dual-chambered container, but has a nozzle you attach which allows the two ingredients to “instantly” mix in the nozzle and allows you to apply the mixed product directly to the surface you’re working on. I had thought this would be easier and provide a “cleaner” finished product. What I found was that the consistency of this epoxy was much thinner and continued to want to flow and spread out of the area I was trying to build up. It would not hold the shape of the round support “heads” as well as the first product. Not sure if there are “instant-mix” epoxy’s with a thicker consistency, but it would be preferred.
Reply With Quote
  #49  
Old 08-07-2010, 01:29 PM
chilliwilli's Avatar
Member
 
Join Date: May 2005
Location: International member
Posts: 2,202
chilliwilli is on a distinguished road
Fantastic write-up gents...both rear brake lights went out at the same time. I followed the instructions and repaired both within a couple hours...with enough time to surf the swells at the beach

Last couple times this happened, on previous X5's, dealer replaced the entire unit, only to have the issue return. Glad to have such resourceful contributors on this forum
Reply With Quote
  #50  
Old 08-25-2010, 07:14 PM
dpgx5's Avatar
Member
 
Join Date: Feb 2008
Location: Ohh Canada
Posts: 578
dpgx5 is on a distinguished road
Rear light problem

Hi, our other X ran across this problem.

The drivers side bottom flickers slowly, and the passenger side is just not on.

I re & re the bulb sockets on the passenger side and still same problem.

Also my front DRL on the passenger is not lighting up.

Anyone care to chime in... Im thinking I should switch it with my rear light and see if it still happens, just wondering if anyone had the same issue prior to me removing and so on.

Here are the pics.
Attached Images
  
__________________
2006 BMW X5 (4.4i) N62

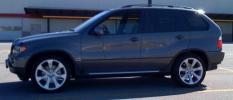
MY BMW X5... No matter how I disguise it... it's heritage keeps showing through!
Reply With Quote
Reply

Bookmarks


Posting Rules
You may not post new threads
You may not post replies
You may not post attachments
You may not edit your posts

BB code is On
Smilies are On
[IMG] code is On
HTML code is Off
Trackbacks are On
Pingbacks are On
Refbacks are On


All times are GMT -4. The time now is 08:07 AM.
vBulletin, Copyright 2024, Jelsoft Enterprises Ltd. SEO by vBSEO 3.6.0
© 2017 Xoutpost.com. All rights reserved. Xoutpost.com is a private enthusiast site not associated with BMW AG.
The BMW name, marks, M stripe logo, and Roundel logo as well as X3, X5 and X6 designations used in the pages of this Web Site are the property of BMW AG.
This web site is not sponsored or affiliated in any way with BMW AG or any of its subsidiaries.