
|
|
|
|
||||||||||
| Xoutpost server transfer and maintenance is occurring.... |
| Xoutpost is currently undergoing a planned server migration.... stay tuned for new developments.... sincerely, the management |
 |
|
|
LinkBack | Thread Tools | Display Modes |
|
#71
 10-28-2010, 11:13 PM
|
||||
|
||||
|
@chas3 - Is that the exact camera you have purchased (same seller and camera model)? I am asking because I would like to mount one too, but I am kinda confused on the required resolution/TV lines. Yes choose TYPE "A" (there are 2 types - A and B). Type a fits the light receptacle of the license plate and requires only a slight modification to secure the assembly. TYPE B is too think. Camera resolution is great. I'm satisfied. If your worried about NTSC or PAL, just let the seller know what you need. They have both systems. You might have ordered TYPE B instead of TYPE A. As I said previously even TYPE A would require a little modification to fit securely. Funny my new camera arrived yesterday and when I used the X today, the camera is ALIVE AGAIN but still with heavy SNOW & CLOUDY VISION! Can't see anything but shadows again 

|
| Sponsored Links | |
|
|
|
|
#72
10-28-2010, 11:44 PM
|
||||
|
||||
|
Is it cloudy on your external monitor as well, or just the X. If it's just the X, sounds like a new cable is in order.
__________________
650hp 10 X5///M - Stage 2, Vibrant 1794's , gutted cats, custom intake, AC Forged 22's 325hp 98 BMW 740iL - ///M5 6spd, www.bavengine.com w/ Performance Option, electric fan, CF intake tube w/ heatshield, Mag 14816 w/ notched bumper, Bilstein/H&R Stage II/Powerflex 600+hp 02 Harley F150 - MHP900 Stage 3 engine, KB2.3, 8# lower, 60# inj, Walbro FP's 135hp 01 TL1000R - M4 full exhaust, K&N, Yosh box, -1/+2 gears, 2CT's
|
|
#73
10-29-2010, 05:11 AM
|
|||
|
|||
|
Finally got some photos, to further explain what is going on.
I ordered type A camera, the thin one.  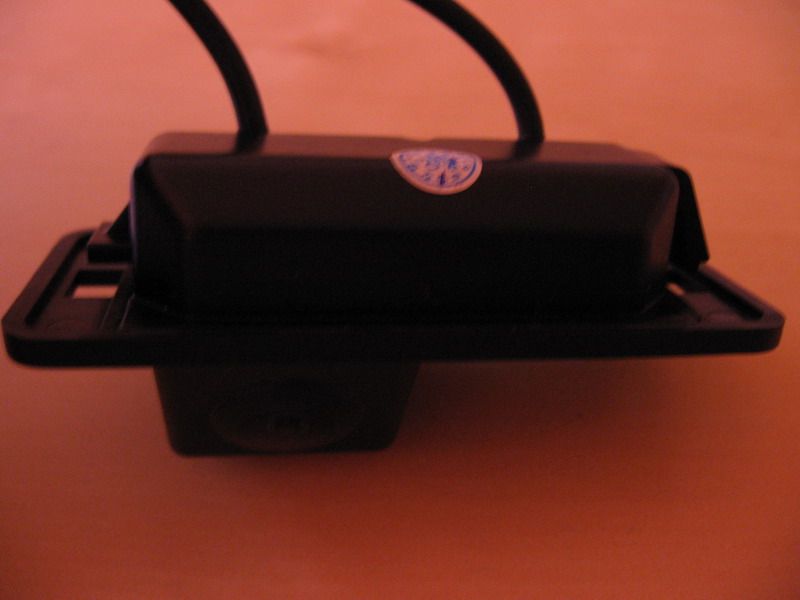  However, there is no plug and play way to install this on the E53. The E53 license plate is different from say E60 license plate, where the bulb is held in a separate case and you can detach the whole case and replace the case with the camera. 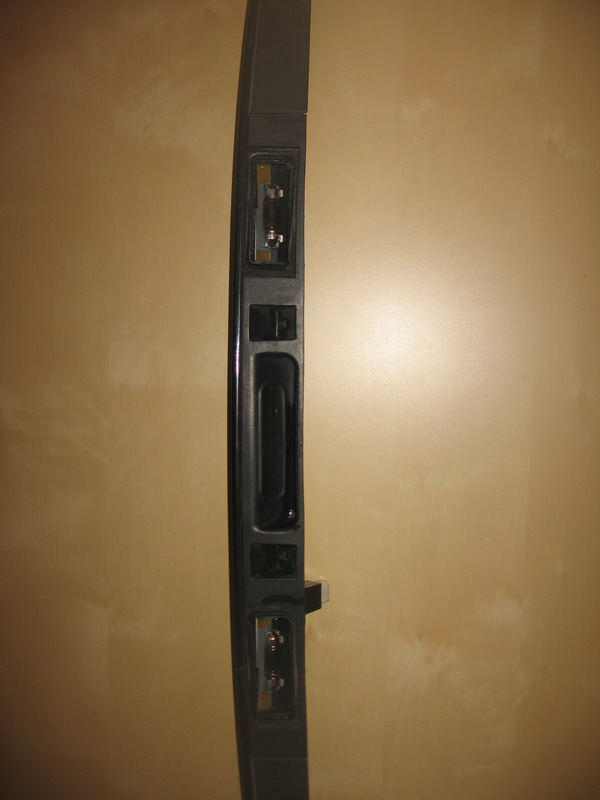 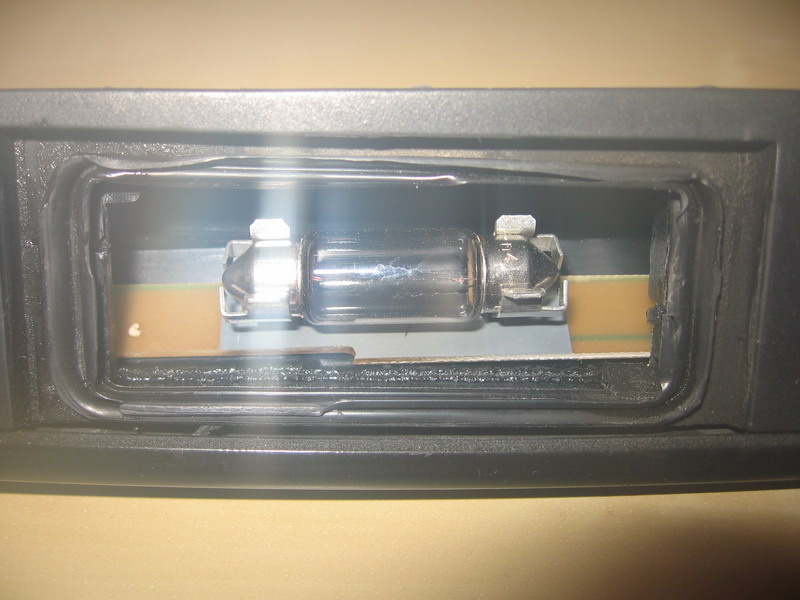 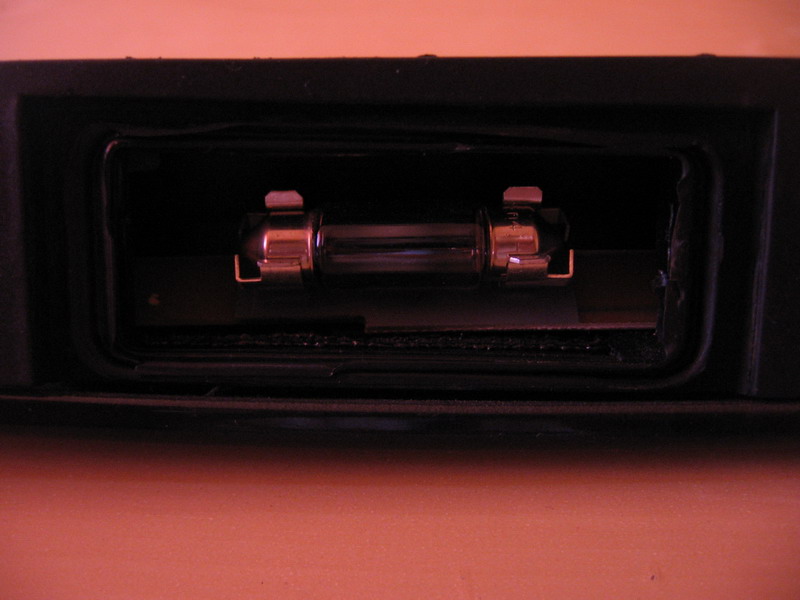  On E53, the bulb sits on a small thin board and the bulb is case is a common body with the whole plastic trim. The only way I see this through is wrecking the board. The problem is that I can't get a clear view of the whole board and I would avoid wrecking it since it also holds my soft-close button. As about the blur, by your description, is surely sounds like condensation. I've been fighting this when I got the camera from the car and took the photos above. I had to constantly wipe the lenses and quickly get a shot before it went blurry again.
|
|
#74
10-29-2010, 12:28 PM
|
|||
|
|||
|
I installed this same camera with success
I installed this same camera with success. It by no means was plug and play. I had to remove the passenger side license plate light with a dremel. I also had to do major dremel work to modify the space to accept the camera. I ended up putting silicone all inside the BMW licence plate light / liftgate handle. The camera is supposed to be water proof so I did not worry about water getting into it. I had to drill a hole through the back of the liftgate and the liftgate handle to get the rca connector into the interior of the car. Then I had to silicone that hole up. I also had to purchase a $225 video module that attaches to the navigation unit to get this camera to work. I only have one problem now, the error message check licplate light comes on the dashboard. To fix that, I have to get a resistor and connect it into the missing light bulb power line and then ground the resistor to the body of the car to simulate a license plate bulb.
The job was not easy and the camera was definately not plug and play like they advertise. My camera is clear as day and it has good visibility at night. I have had it installed for about a month now with no problems. I also used a bosch relay to get reliable power without flickering. I live in Germany where there is PLENTY of moisture. Jason
|
|
#75
10-29-2010, 01:37 PM
|
|||
|
|||
|
I feel you. I was hoping to get it installed today already, but I only got halfway through the work (fitting the camera and passing the wires through) due to the amount of work I had to do just to fit the camera inside.
If the camera was not that cheap, I would have packed it up and kicked it back to China.
|
|
#77
10-30-2010, 03:33 PM
|
|||
|
|||
|
Relay Used for Camera
I used a Hella 15 amp bosch relay which costs about 8 bucks and comes with a 15 amp fuse built on to the relay. The relay is 12 volts. The pin 85 was connected to the power lead coming from the reverse light positive and 86 is grounded to the body of the X5. 87 was connected to a power lead that I spliced from the adjustable rear seat power that is on all the time (a constant 12v power supply). Pin 30 is connected to the positive wire of the backup camera and the negative of the camera is grounded to the body of the X5. Pin 87A was not on my relay; if it was, it would not be used. The relay switches on very reliably every time I put the vehicle into reverse gear.
Another thing I did was splice off another wire from the reverse light power lead to switch the video module. The video modue has a special wire that will switch between the video signal of the navigation computer to the signal coming from the reverse camera when it gets power from the reverse light. This works like a champ also. All this may sound complicated, and if you have any further questions, please let me know.
|
|
#78
10-30-2010, 04:03 PM
|
|||
|
|||
|
My 30amp relay must have been too big then. I tried using some 12V/30AMP relay (some poor brand) and the screen kept flickering. The relay kept on opening and closing (that buzzing sound), and the camera was going on and off. I will try a 15 amp one.
The weird thing is that I measured the reverse light power and it came up as 10V instead of 12V. As far as I understood, the LCM actually sends pulses (only visible to an oscilloscope, hence the filament of the reverse bulb looks like it's continuously on) to the reverse light instead of constant power. I will probably drop the reverse light wiring and aim for the PDC pinouts as soon as I figure their order inside the bracket. I used exactly the following scenario: Camera +12V = Reverse light +12V Camera ground = Reverse ground One Relay as follows: 85 = Reverse light +12V 86 = Reverse ground 87 = Reverse ground 30 = Pin 17 of white connector on TV module (I had the 87a available but it is useless in this application) The screen kept flickering, which may be one of the following reasons: -I've got 10V from reverse light on Pin 85 of the relay, probably not enough to switch it -or -I've got 10V from reverse light on Camera +12V, probably no enough to keep it alive
|
|
#79
10-31-2010, 02:45 AM
|
|||
|
|||
|
Chas3, I agree. If you are getting power from the reverse light to power up your camera, that power is not adequate for the job. Power should be drawn from a constant source (I used the power to the adjustable rear seat which was a thicker gage wire). The power from the reverse light is good enough to switch a relay, and it should be strong enough to switch your 30 amp relay. What does matter is that the ground to pin 86 is a good one. I ran a separate ground instead of using the reverse ground.
|
|
#80
10-31-2010, 03:00 PM
|
|||
|
|||
|
And I finally finished the install.
My 2 cents about the camera deal The camera is not even close to plug-n-play like advertised. If I knew how much work it involves to get it installed, I would definitely not have purchased it and I would have gone for one of the many other camera out there. You have to literally chop and break through the license plate bulb holder and mess the whole trim that hold the gummy tailgate switch, just to fit the camera inside. My 2 cents about the install: The reverse light is not suitable for powering the camera. It is not your average 12V power you can find on many other power wires in the X. The reverse light works based on pulses. The pulses are visible only to an oscilloscope. The reverse light bulb filament doesn't cool down as fast as the pulses ago, and keeps staying bright, hence you will never see the bulb flicker. It looks like plain 12V when you look at the bulb, but when you measure it, it only averages 10V on your measuring tool. So, if you power the camera from that wire, it will constantly go on and off, according to the pulses, resulting in a flickering image on your nav screen. The only solution is to power the camera from a real and stable +12V wire. I used the one on the BM54 since it was right in my face when I leaned over the trunk, but there are a bunch of others you can tap into. Just use a measuring tool to see which one suits you. The proper install requires 2 relays (12V/30AMP/whatever brand). Both relays are triggered by the reverse light. Both relays have PIN 85 to reverse light power and PIN 86 to reverse light ground. Relay #1 powers the camera (PIN 87 to camera +12V and PIN 30 to your +12V source) Relay #2 grounds the BMW OEM video module PIN 17, making the nav switch automatically to the reverse camera video input. (PIN 87 to reverse light ground and PIN 30 wired to PIN 17 of BMW OEM video module) When you switch into reverse, both relays circuits close, powering your camera and switching the video source of your nav in the same time. Additional car reversing signal can be found on the X1312 connector (the blue one). If you don't want to mess with it, tap into the reverse light X329 connector, like mentioned above. X329 connector: White/Green = reverse light + Brown = reverse light ground X1312 connector: White/Green = reverse signal + Any ground will work with it. Automatic camera display switch is made through PIN 17 of the X18804 connector (blue) of the BMW OEM video module. Connecting that pin to ground, automatically switches the display to reverse camera. Camera video output is connected to PIN 13 (video +) and PIN 14 (video ground) of the X18806 connector (white) of the BMW OEM video module. Among the things you will have to perform during the wiring, are -taking off the tailgate outside switch trim (the one that includes the tail lights) -taking off the interior trim behind the switch (the one you can grab to pull the tailgate down) -stripping the left side C pillar to pass the wires -taking off the lower tailgate covers to tap into the reverse light (or you could tap into them from inside the trunk) You will notice a short image filck every time you switch to reverse and the camera is turned on. That is normal, both your camera and your nav screen are just fine. The tiny camera doesn't have a sync circuit, neither the nav has, to cut that short flick out. The camera works fine both during daylight and night. The reverse lights brightness is enough to distinguish any object on your screen at night. You can even notice an eventual hole in the ground with just the reverse lights on. In addition, you can also turn on your hazard lights for some extra light. As long as you are in reverse, the video is stuck with the camera output. You can not switch it to other nav screen. Though the control buttons, like station tuning, still work. Not a deal breaker, but just for the record. Always solder anything, be it tapping into a wire, or the relay pins. A soldering gun with car socket is like 3 bucks only. Tape everything after, even the RCAs together. Spend the extra hour you would waste to follow the OEM wiring route. You will definitely be happy with stealth wiring. The LED inside the reverse camera camera are not error free. You will have to either do the resistor trick, or use NCS Expert/Navcoder/etc to disable bulb testing for the license plate. The values for NCS Expert are: Code:
KALTUEBERWACHUNG_KZL nicht_aktiv WARMUEBERWACHUNG_KZL_LI nicht_aktiv 
|
|
| Bookmarks |
|
|
|
|


 Linear Mode


