
|
|
|
|
||||||||||
| Xoutpost server transfer and maintenance is occurring.... |
| Xoutpost is currently undergoing a planned server migration.... stay tuned for new developments.... sincerely, the management |
 |
|
|
LinkBack | Thread Tools | Display Modes |
|
#1
 09-30-2012, 04:21 PM
|
|||
|
|||
|
DIY: Bypass Amp for $0
This solution works for me because I had zero plans of investing money into the stock radio system. When I'm ready to switch over to an aftermarket system, all of my funds will go towards that. After doing this, I finally can listen to my radio and it sounds great. MY ISSUE: Whenever the radio was on or off the radio made a loud buzz sound that could not be turned off or down. The only solution was to unplug the amp with the result being no sound, no music....nothing. Condition of amp: The bay the amp was in was completely dry and had no signs of ever taking in water. The connections on the amp itself didn't show any signs of corrosion or water damage. FUSES: Checked and cleaned all radio related fuses before starting the venture. I also pulled the cassette player to check the fuse behind the main cassette plug. This DIY will show you how I: - removed the amp - troubleshooted the origin of the buzz - and how I worked around the amp for $0 TOOL NEEDED: - ratchet - extension - 9mm socket - 10mm socket - T9 star - Philips screw driver MY SYSTEM: factory AM/FM cassette with 6 cd changer and phone in the arm rest. 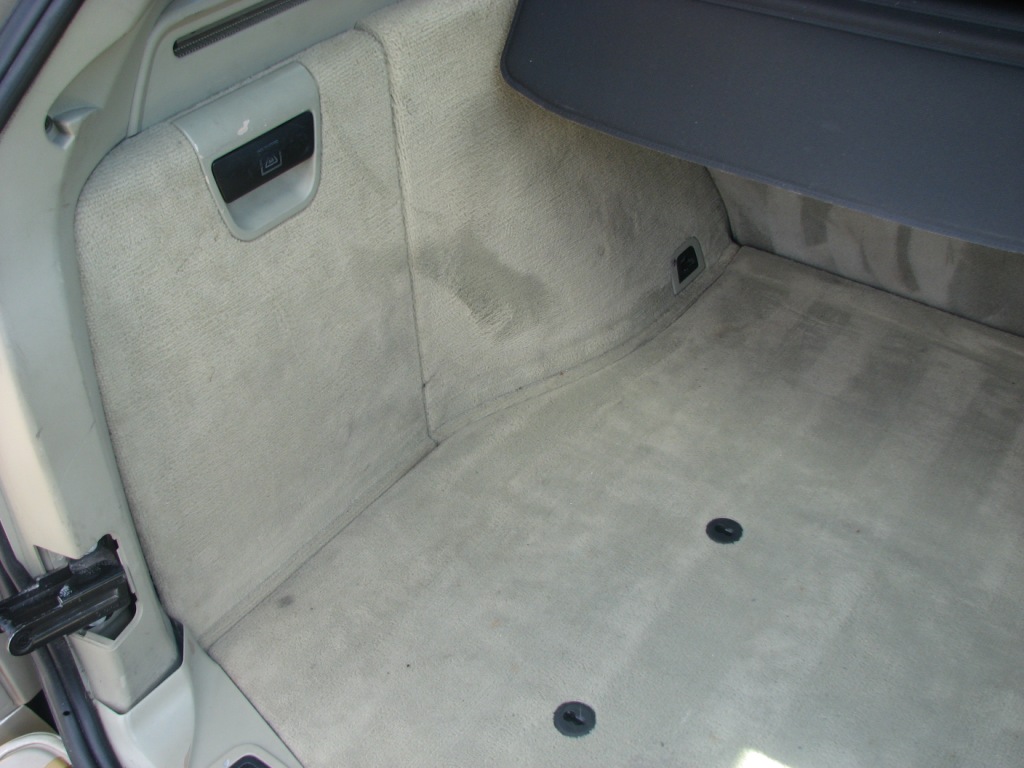 You will find the amp in the rear of the X5 on the left hand side.  remove the floor of the trunk. 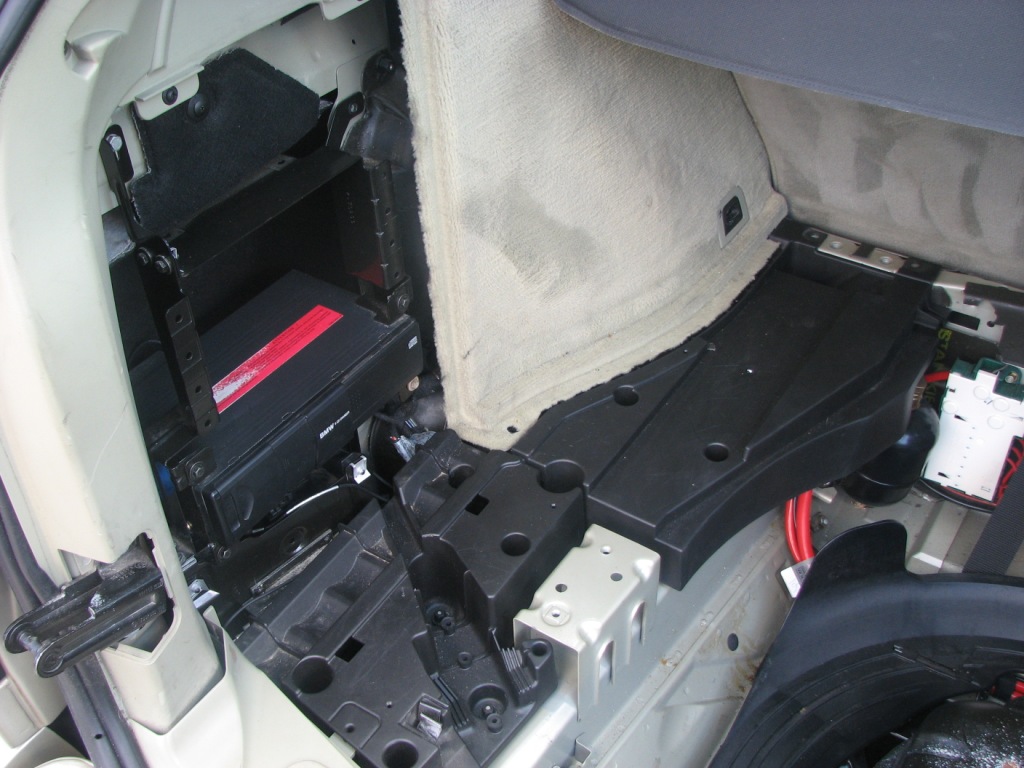 remove the access panel to reveal the 6cd changer.  remove this black plastic panel on the floor of the trunk in front of the CD changer. There will be 2 black plastic 10mm nuts to remove.  remove the cd changer. There will be 4 9mm bolts to remove.  I believe this unit is for the phone in the armrest. Remove the two screw-on plugs on each end and remove the 2 Phillip head screws.  Remove this greenish/gold looking bracket by remove only one bolt. 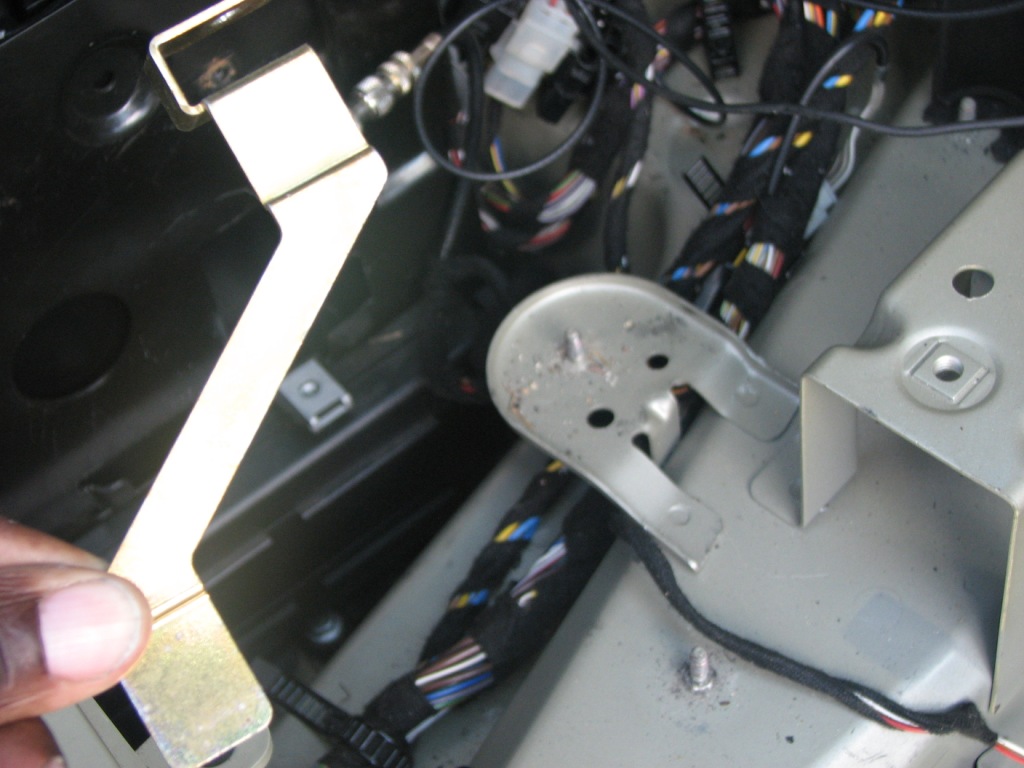 This is how the bracket looks removed.  Unplug the 3 plugs from the amp and one black wire (assumption is it's a ground). Now you can remove the entire bracket with the attached amp. 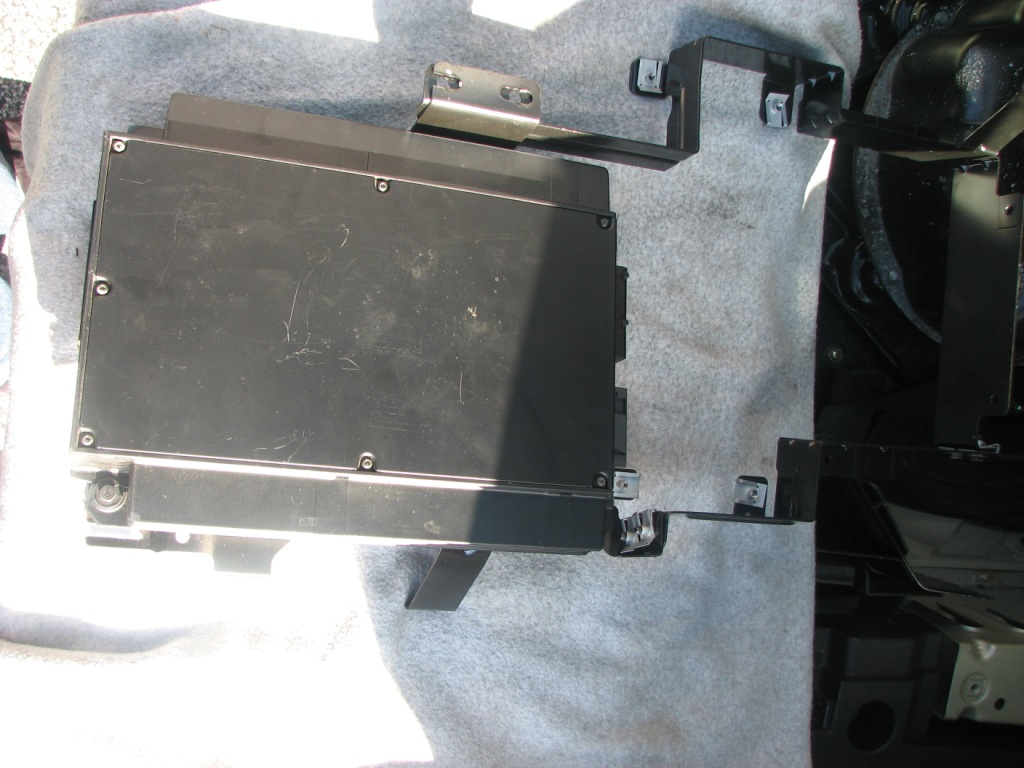 Now remove the bracket from the amp by removing each of the 4 bolts (one in each corner) 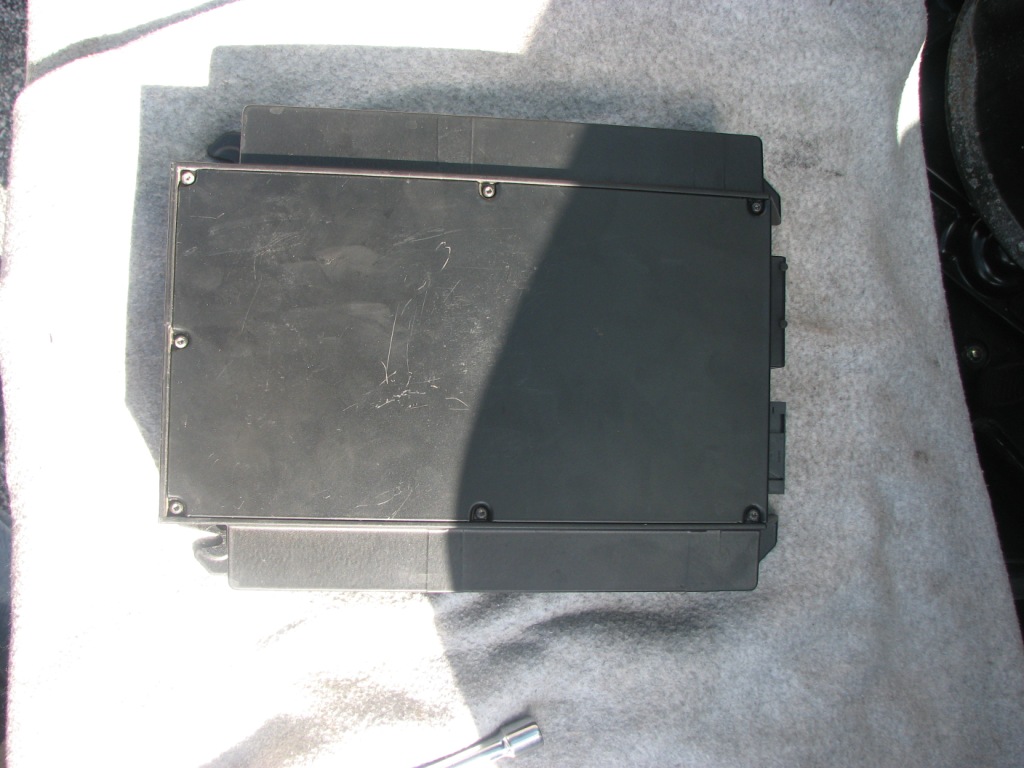 This is a bottom view of the amp with the bracket removed. 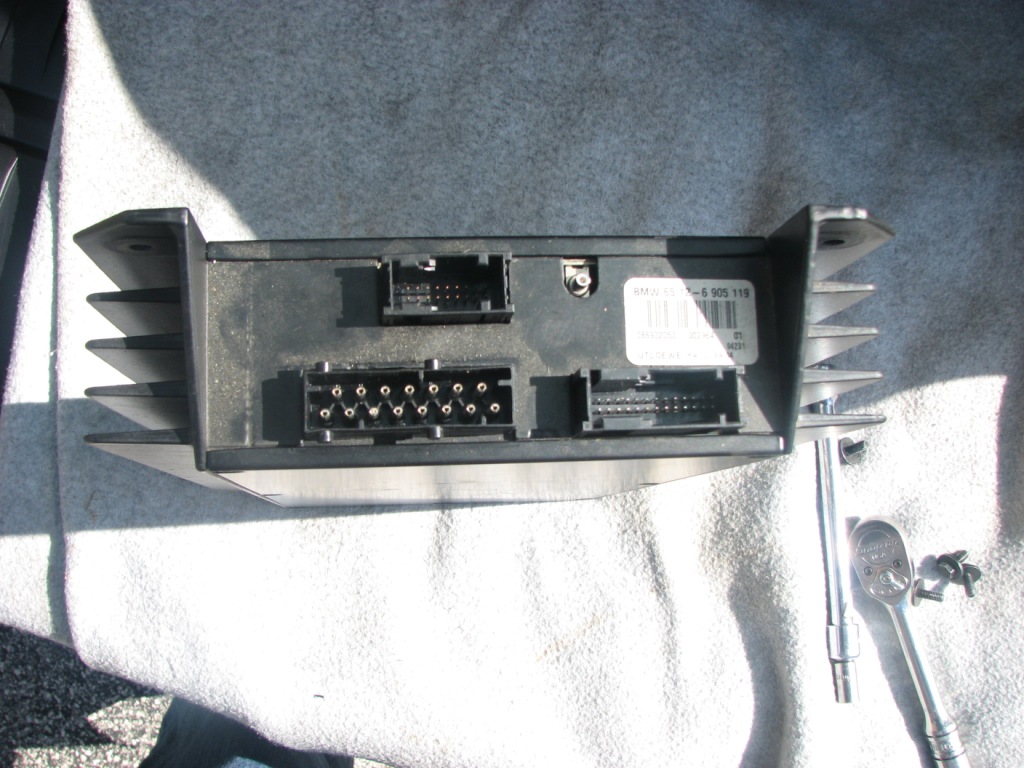 This is the end of the amp where you unplugged the 3 plugs earlier. *** To be continued on next page ****
__________________
2000 X5 4.4i w/ 150K miles. Last edited by mrathell; 09-30-2012 at 04:46 PM. 
|
| Sponsored Links | |
|
|
|
|
#2
09-30-2012, 04:38 PM
|
|||
|
|||
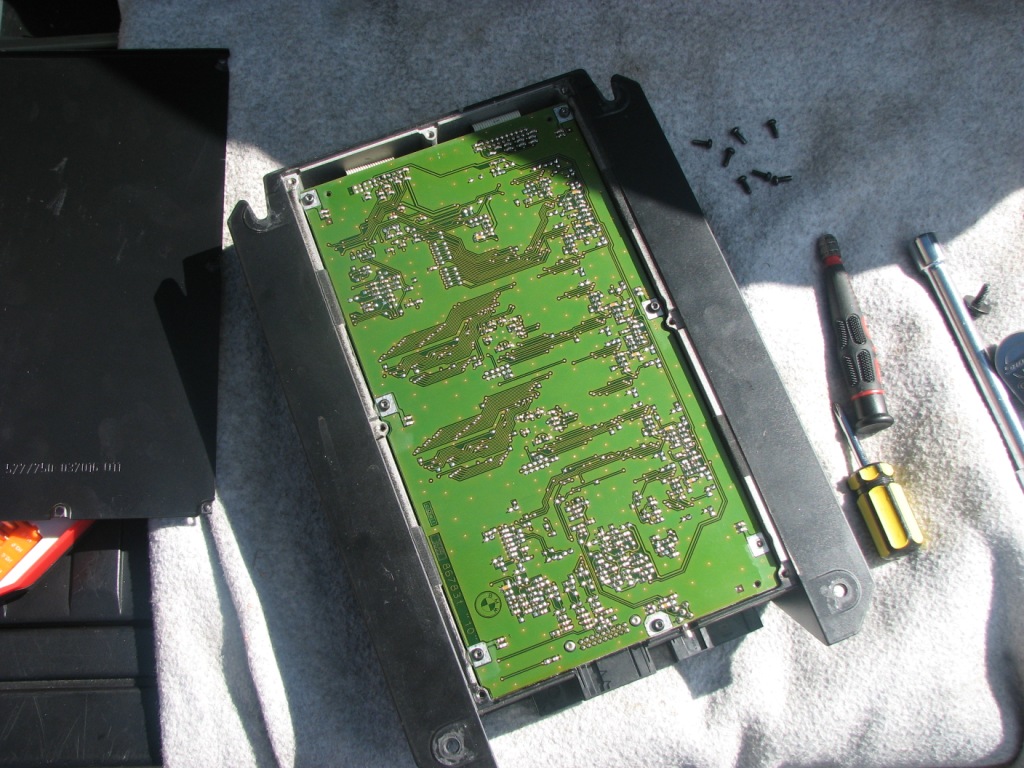 Now remove the 9 T9 screws from the bottom of the amp. 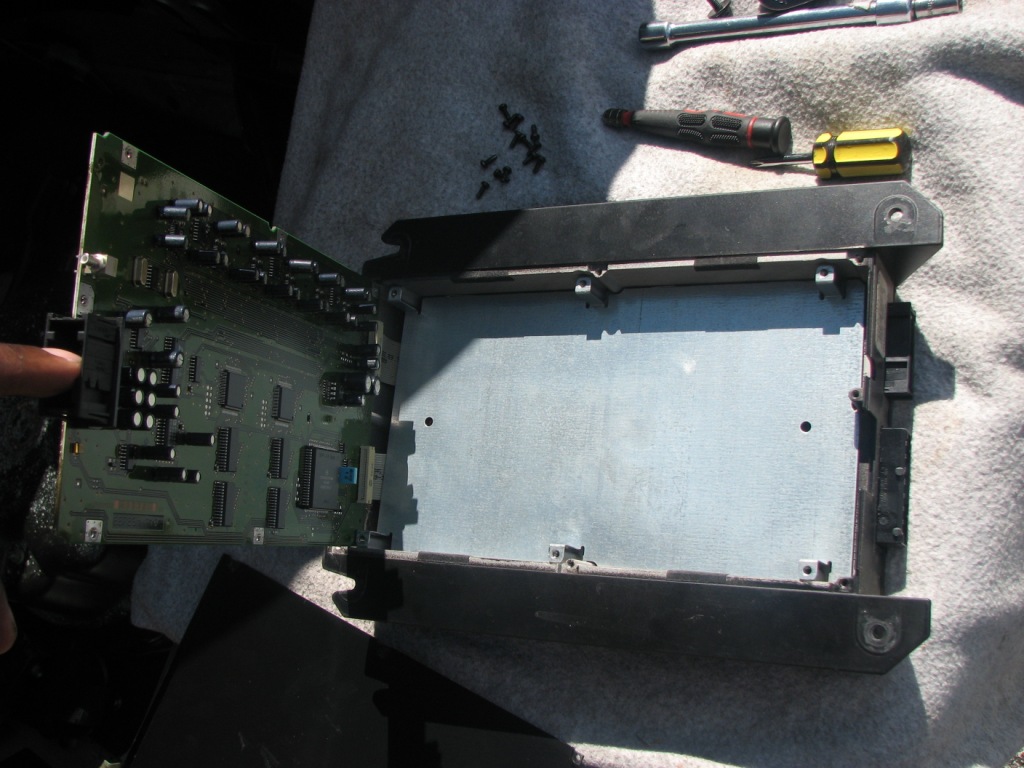 remove the 6 T9 screws from the green circuit board. Now lift the green circuit board to expose the metal late beneath it.  Do not try and completely remove the circuit board because it is attached to the 2 white ribbon cables as shown in the pic. 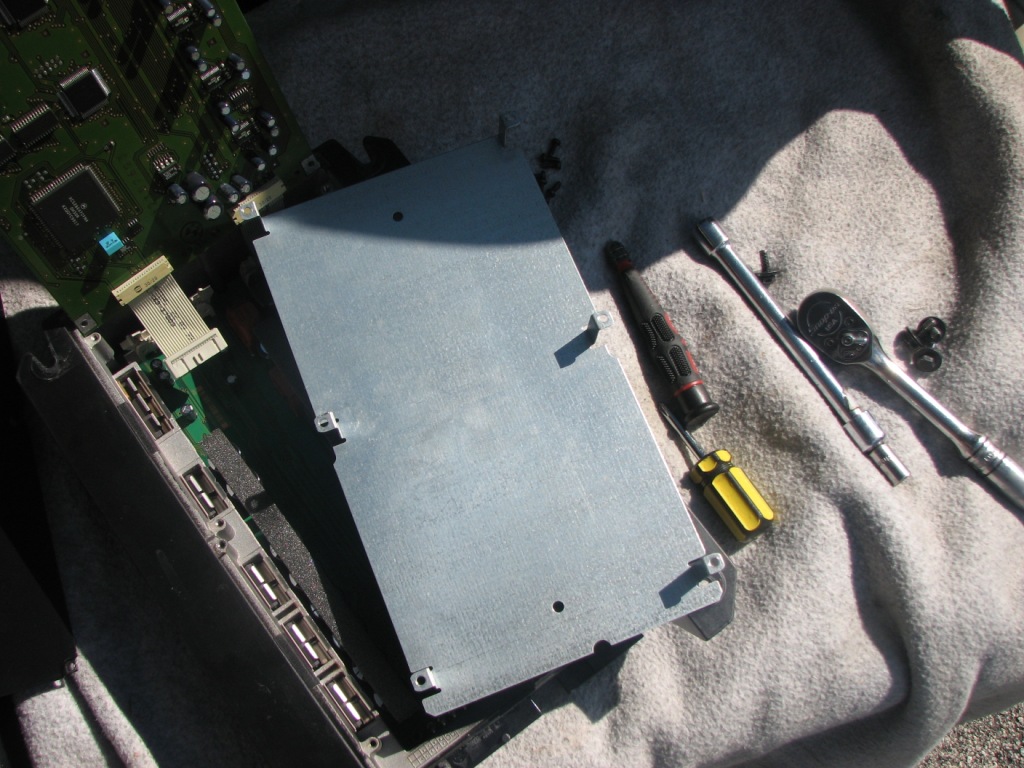 Now lift out the metal plate....this is easy. 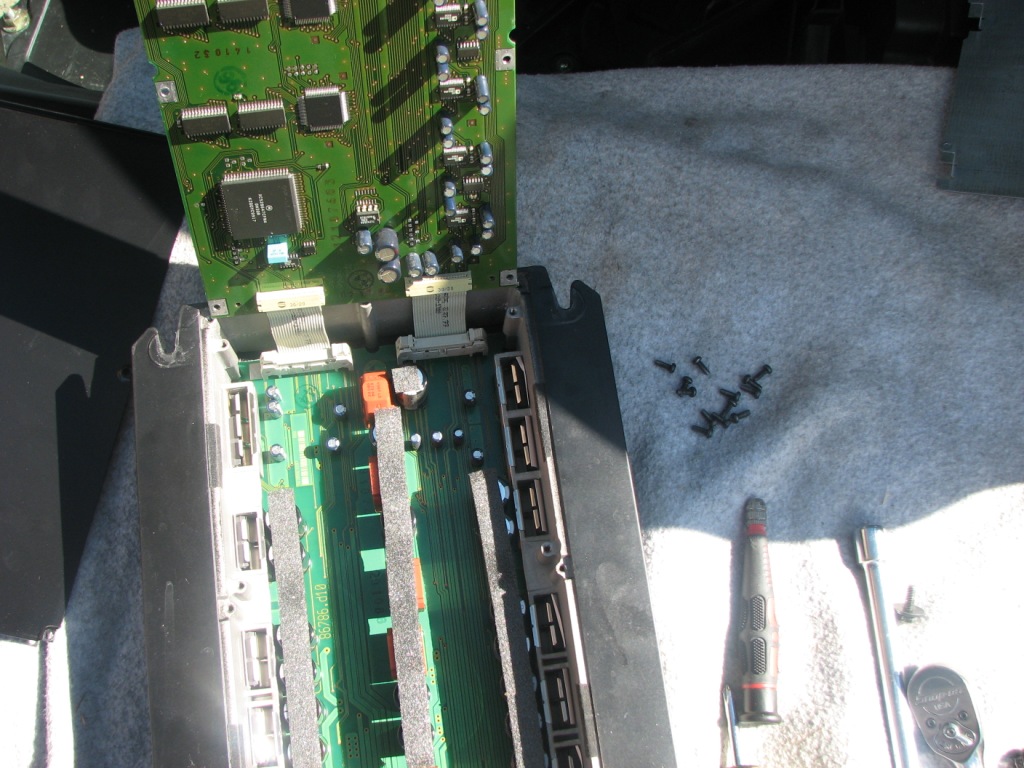 I'm assuming the green circuit board I have raised is the circuity for the crossovers (only guessing.) When I would unplug the ribbon cable on the left the buzz would stop but also the music. Unplugging the ribbon cable on the right had zero effect either way.  This plug is for the speaker wires coming from the radio. 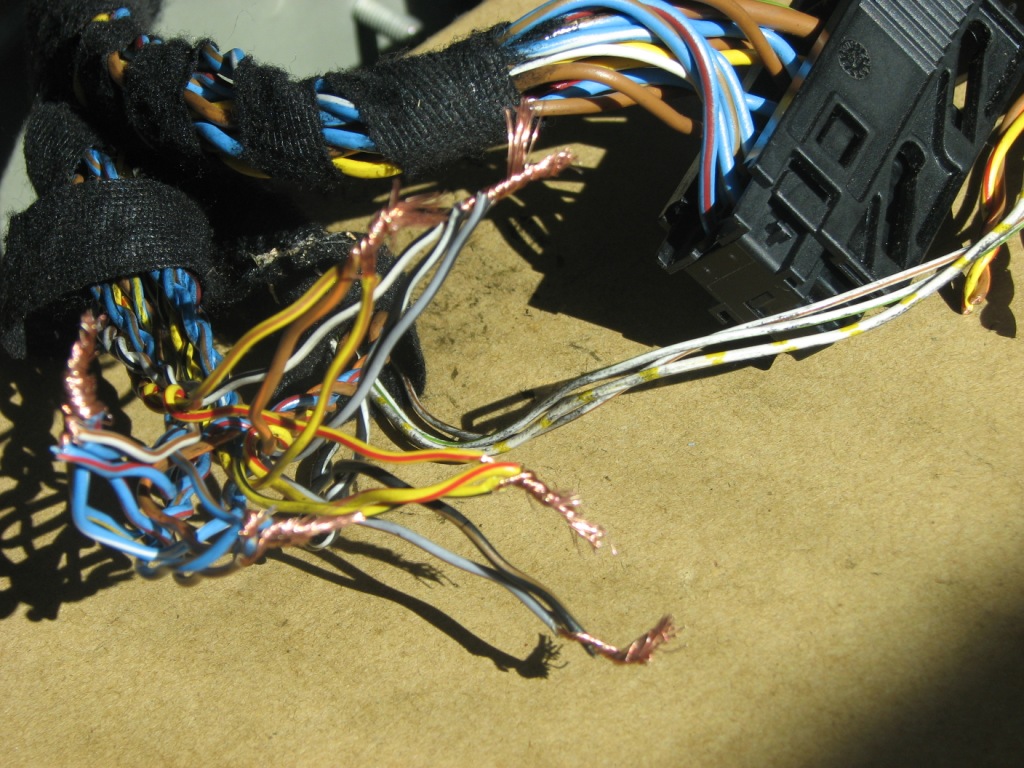 I cut the speaker wires from the small plug and the medium sized plug. At this point I simply attached like wires with the radio on to listen for the best sound. Any of the wires with the brown thin strip (regardless of the main color), I connect to each other. ***Don't pay attention to my shoddy wiring, this was done only as a temporary job as I tested which wires work best with each other. ** there were 3 wires on the small plug that I didn't cut because there didn't fit the normally pattern of speaker wires, the had colored dots on them instead of solid thin lines. ** I didn't cut any of the wires on the main big plug, nor did I use any of the connections from it. ** You may choose to experiment on your own with the wire connection combinations to maximize sound to suit your taste. In the end, I didn't plug anything back into the amp......zero...nodda
__________________
2000 X5 4.4i w/ 150K miles. Last edited by mrathell; 09-30-2012 at 04:49 PM.
|
|
#3
10-02-2012, 05:05 PM
|
|||
|
|||
|
wow,
is there a chance the noise had anything to do with the cell phone "brain" being screwed into the amplifier? the top board you pulled is the preamp section of the DSP unit, the lower is the amplifier section. it looks like the cell brain was screwed into the amp section. did you notice any damage on the bottom of the board? as to paralleling all those wires together, probably not a good solution for the long term. try getting a used dsp amp also ground is brown, not black. some of the speaker positive leads are black trace, with the negative being brown.
|
|
#4
10-02-2012, 11:06 PM
|
||||
|
||||
|
Hey capea4, I appreciate all of your suggestions and information.
 Quote:
Quote:
Quote:
__________________
2000 X5 4.4i w/ 150K miles.
|
|
| Bookmarks |
|
|
|
|


 Linear Mode


