|
Xoutpost server transfer and maintenance is occurring.... |
Xoutpost is currently undergoing a planned server migration.... stay tuned for new developments.... sincerely, the management |
|
LinkBack | Thread Tools | Display Modes |
#1
|
|||
|
|||
BC Racing Coilover - Product Overview Thread
As I go through the installation process I'll be sure to post pics and do an in depth review after I've had some time to let things settle. Of course if you've seen my YouTube channel, "BimmerMarketplace" you guys are probably familiar with some of the DIY videos I have posted. I'll try to upload some videos during my installation process that may help those DIYers should they decide to tackle this on their own. 
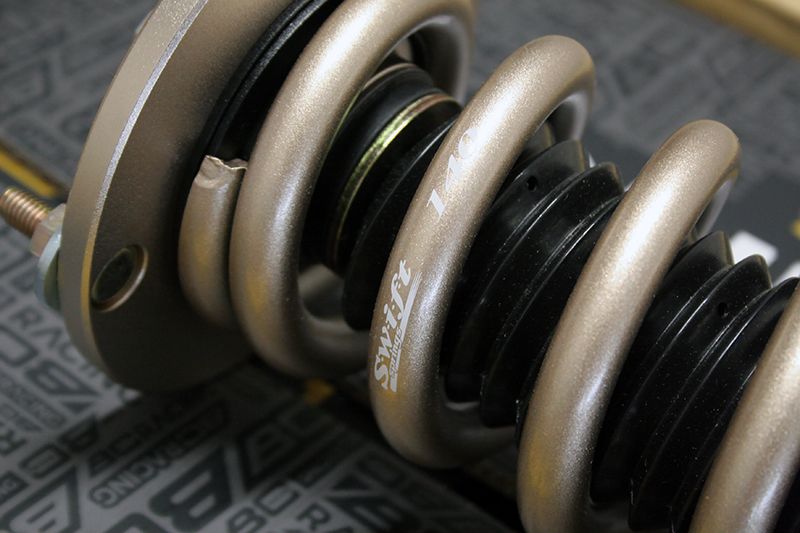
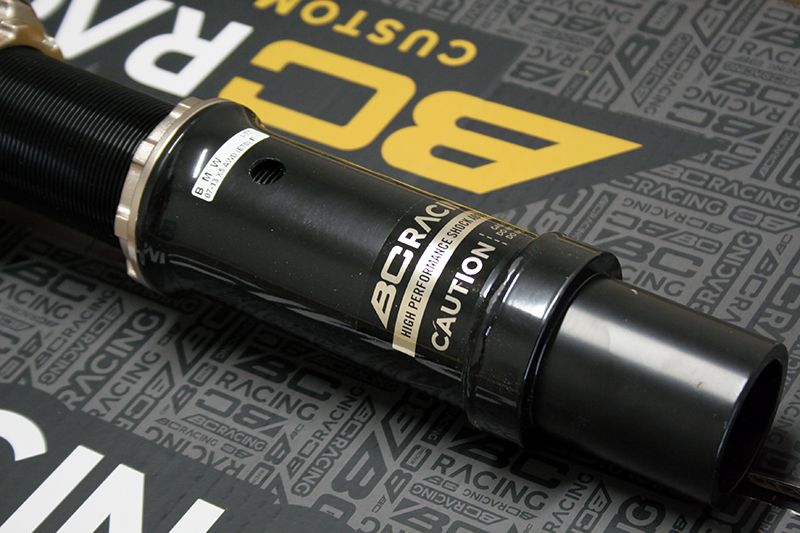
Anyways, let get to the good stuff. Here are some specs of the coilover setup:
Of course there's a lot more but these are the features I really have come to appreciate. I will say this, I previously had BC Racing coilovers on my E60 M5 and call me crazy but I actually enjoyed them more so than the KW setup I had. That being said I'm really hoping I have the same experience with these as I did on my M5 as they were easy to tune and for a coilover setup, were very comfortable. 
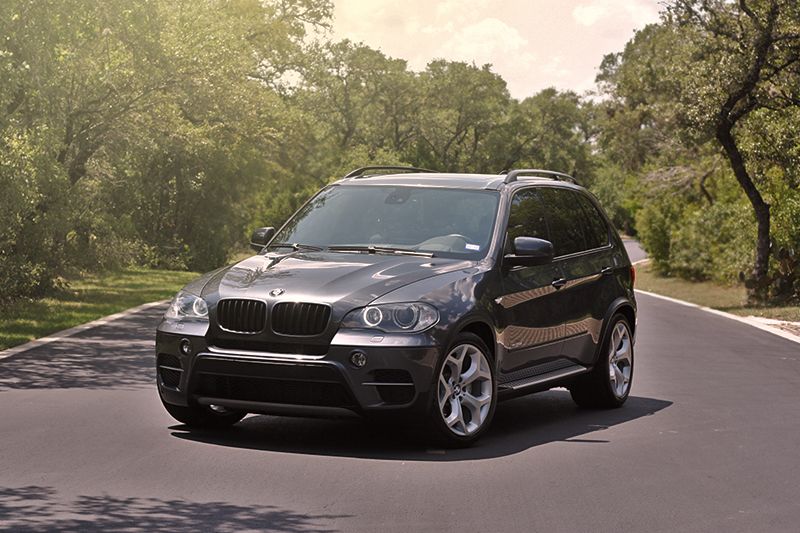
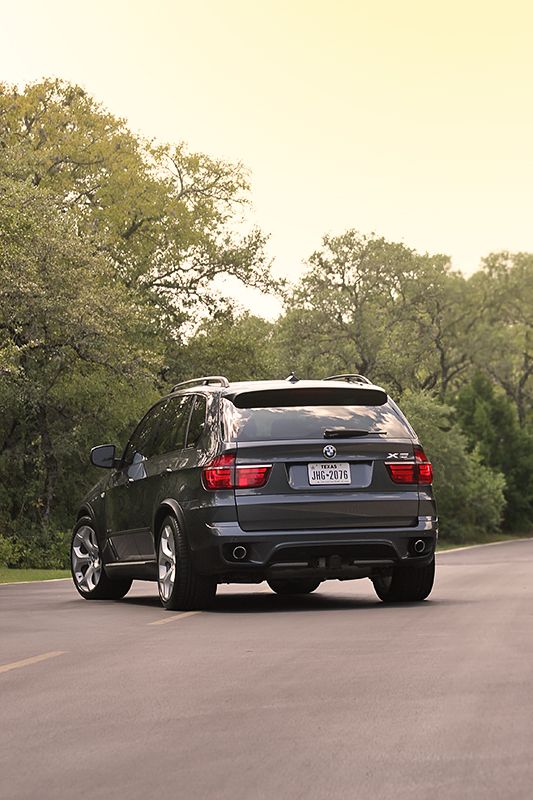
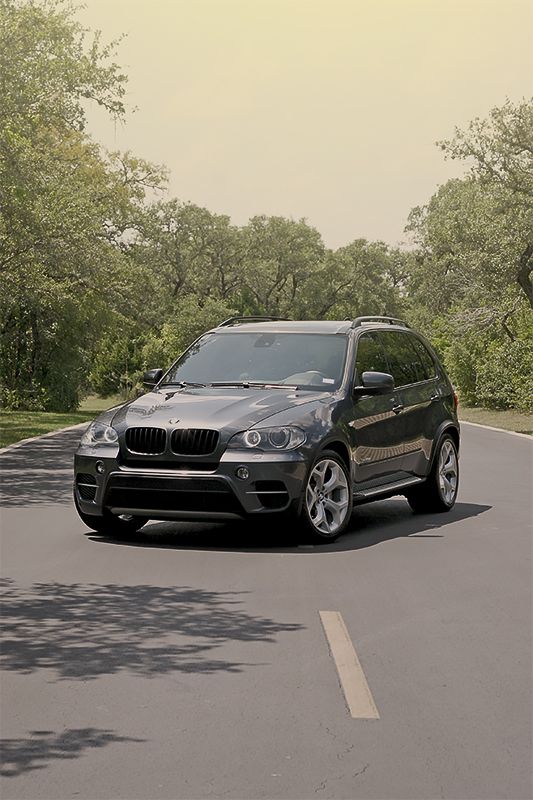
Installed pics on vehicle: Rear Coilover Installation & Preload Setting: https://youtu.be/WXdLhx3WOMI 
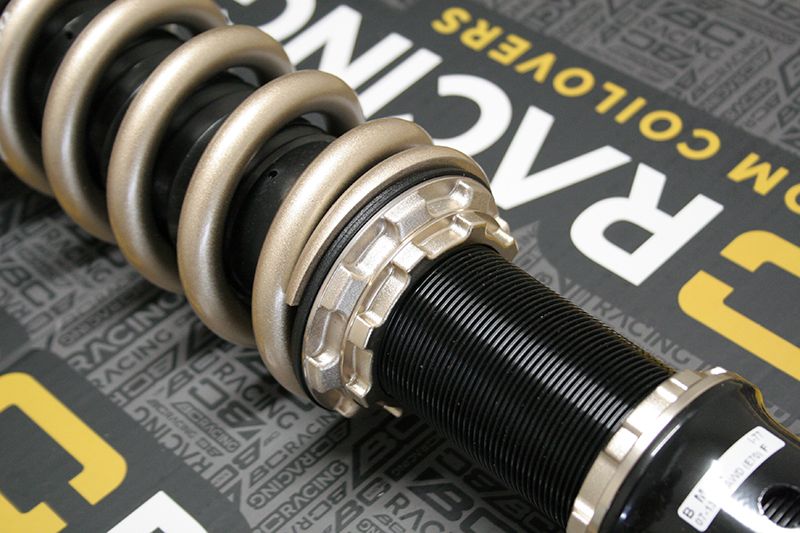
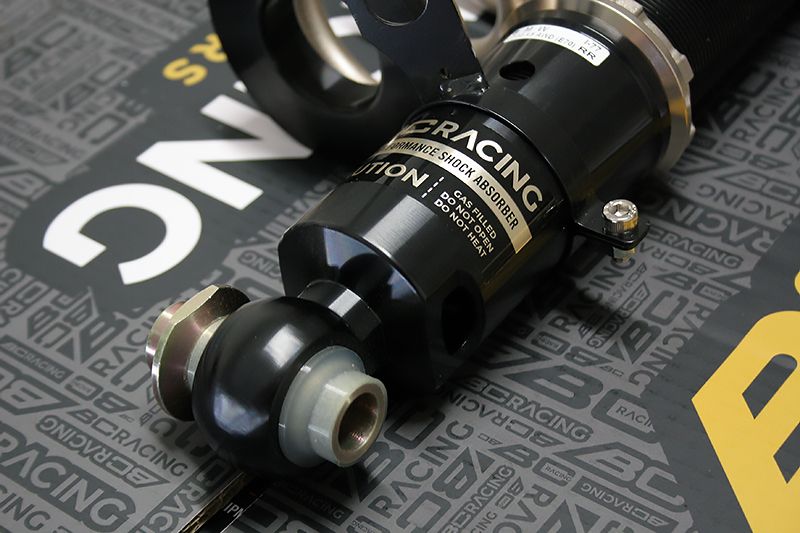
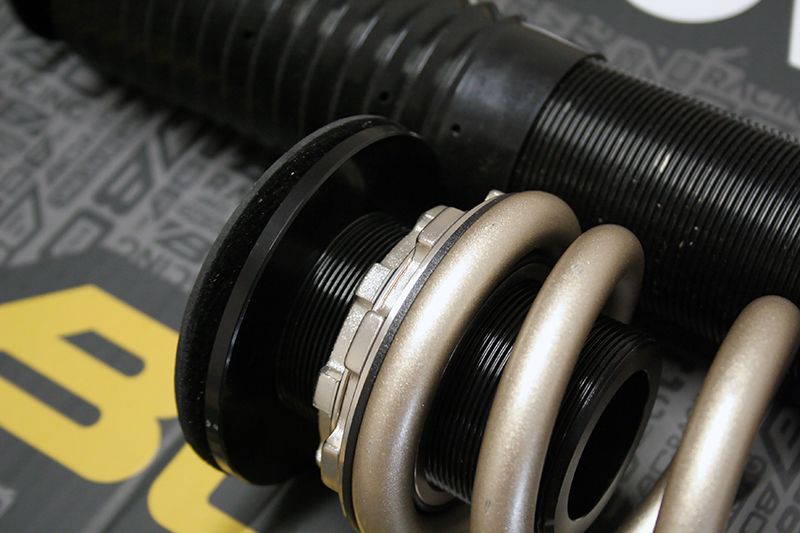
So lets start off with some quick pics of the product.... Last edited by Socale39; 09-04-2017 at 06:15 PM. |
Sponsored Links | |
|
#2
|
|||
|
|||
Rear Suspension Installation
Started tackling the rear today. Needless to say, doing the install in a single car garage in the TX summer isn't my idea of having a whole lot of fun but at least I purged some toxins from the body. Definitely looking forward to getting the new house built with plenty of garage space. Overall installation was straight forward. Doing the work all myself makes it a bit challenging so here are some tips for the rear suspension removal/installation process: 1) Jack up vehicle and place jack stand under rear sway bar mount and lower car. Make sure car is secure and keep floor jack in position at all times 2) Remove wheel/tire 3) Remove brake line securing clip from rear shock 4) Compress suspension slightly with floor jack and remove rear lower shock bolt using a 21mm Socket and the rear sway bar nut with 18mm wrench and T40 Torx to keep threads from spinning 5) When removing the coil spring I find that using the jack tube or arm to extend the suspension works quite well. While sitting on the arm I remove the spring from its perch prying the bottom up from the control arm. WD-40 works well to help this process. See pic below: 6) Once spring is out you will need to remove the rubber spring insulator from the control arm. To do this you will remove the tip of the insulator using a standard screwdriver then work on prying the top up. The concept is very much like the standard plastic rivets. I used a combination of screwdrivers and an open end wrench to pry it out. You can also try pushing it out through the bottom side but you have limited room. 7) Next you will want to go in the trunk area and lift the floor panel up to reveal three plastic rivets on each side holding the carpeting in place. These are located on the side of the rails. 8) At this point you will need to remove the three 16mm nuts holding the top hat in place using a ratchet/short socket combination. Remove shock assembly from vehicle. 9) Now that you have the shock assembly out, we will need to swap out the top hat and dust shield. You will need an 18mm wrench and an allen wrench to remove the top nut and swap the parts. 10) At this point its time to install your new components using the reverse procedure as listed above. I have included a few photos showing everything installed for reference (specific to BC Racing Coilovers) |
#3
|
|||
|
|||
Subscribed. Do you mind sharing total cost for the kit?
Sent from my XT1650 using Tapatalk |
#4
|
|||
|
|||
Total cost is around $1100 w/o Swift Springs and $1400 w/ Swift Springs.
|
#5
|
|||
|
|||
Not to rain on the parade, but someone at BR needs to understand what "way" means in terms of suspension engineering...
When you say "2 way" adjustable, this means the compression AND rebound are independently adjustable. A "4 way" usually means there is a high and low speed compression and a high and low speed rebound- each of the 4 being adjustable. "30 way"? Hmmm Likely ONE way with 30 settings. (FWIW, each 'way' needs its own hydraulic circuit. One of my cars has a a two way system, remote canisters on 4 corners. What is the spring rate on stock versus these? Any numbers?? |
#6
|
|||
|
|||
Not raining on any parade here. If you want to dissect the marketing that's all good but it's fair to assume we all know what it means. 30-different dampening settings.....how's that?
As for the spring rates, I'm working on getting the numbers to share and will report back. One thing I quickly learned about the rear OEM shocks is that the bump stop is huge and I feel like there is very limited travel left if using a drop spring. I'd recommend shortening the bump stop if anyone here is just using dropped springs on factory shocks. |
#7
|
|||
|
|||
Really excellent DIY post, BTW. I never want to touch the camera with filthy hands...
|
#8
|
|||
|
|||
So for those wondering about spring rates:
Swift Springs Front - 14kg Rear - 12kg BC Racing Springs Front - 200mm / 14kg Rear - 190mm / 12kg |
#9
|
|||
|
|||
So I tackled the fronts today's and I think I have the perfect stance. Now I'm just fine tuning the suspension to figure out the best dampening setting. Of course I know that springs can settle so I figure I'd provide the preliminary measurements:
Front Left: 29.75" Front Right: 29.75" Rear Left: 30.00" Rear Right: 30.00" The thing I like about the stance right now is that I still have a slight rake with the front being slightly lower. Here's a quick pic of the installed coilover |
#10
|
|||
|
|||
Any updates on a DIY for the front, discussion of ride quality, or pictures of the vehicles new stance? I'm considering something similar and am waiting to hear your results. Thank you
Sent from my XT1650 using Tapatalk |
Bookmarks |
|
|
|