
|
|
|
|
||||||||||
| Xoutpost server transfer and maintenance is occurring.... |
| Xoutpost is currently undergoing a planned server migration.... stay tuned for new developments.... sincerely, the management |
|
|
LinkBack | Thread Tools | Display Modes |
|
#9
 11-13-2012, 08:38 PM
|
||||
|
||||
|
Great write up by darkmesa8. Thanks! Thought I would add to this post with my experience.
Removing, opening the actuator/control unit and reassembly took around 4 hours. Probably took me a little longer as I was working on my back and trying to figure some things out on the fly. I think my vehicle represented more of a challenge as it has the active dampening and air bags in the rear. there is very little room to work with and actually sliding the unit out after all cables and electrical were removed was very difficult. The electrical connector is a levered connector. just take a screwdriver and move the lever back and the connector pops right off. Be very careful when removing the white clip on the passenger side Bowden cable is it is quite fragile and I managed to break the clip from one side. There are two tabs on the white clip that need to be lifted slightly to be able to slide the white clip back which releases the cable. Getting the clip off and on is a serious pain with the limited space. The control unit takes some muscle to pry apart after removing the torx 25 screws. Just start at one side and keep working around. When reassembling the driver side bowden cable you may notice the square screw just keeps turning anticlockwise and doesn't catch. I found that if you take a plier that has the grip which locks you can pull the cable out of the emergency release cable a bit and lock it with the cable out. This basically drags the actuator part out so that you can screw the right side back in easily. The screwing action has to be done by hand and takes forever! Unfortunately for me I did not see any lose wires and the connector showed no evidence of any burnt pins so after all that I am no further ahead  No other tips but feel free to PM me if I can assist. Some pics
__________________
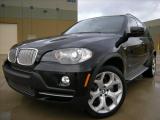
2008 X5 4.8i BSM/Blk - premium, sports with 20" 214s, navigation, rear climate, adaptive ride, dark bamboo, running boards, 3rd row seats, USB audio, high speed maximum, etc etc Mods: Smoked reflectors | Hoen xenon match fogs and angel eyes | LED plate bulbs | 18" winter wheels Other vehicles: 2002 M3 Vert TiAG/Blk - with every option and many mods | 2009 Chevy Silverado LTZ - fully loaded Last edited by Noodle555; 11-13-2012 at 09:08 PM. 
|
| Bookmarks |
|
|
|
|


 Threaded Mode

