
|
|
|
|
||||||||||
| Xoutpost server transfer and maintenance is occurring.... |
| Xoutpost is currently undergoing a planned server migration.... stay tuned for new developments.... sincerely, the management |
 |
|
|
LinkBack | Thread Tools | Display Modes |
|
#41
 08-23-2016, 11:42 AM
|
|||
|
|||

|
| Sponsored Links | |
|
|
|
|
#43
08-24-2016, 08:59 PM
|
|||
|
|||
|
Yep. definitely worth to take out the Radiator. Took a bit more than 5 minutes (one of the lower hoses was really tight), but there was way more room. I have now managed to disconnect all hoses from the WP/Thermostat and removed 2 main bolts of the WP.
Have no idea how to get to the third and last bolt of the WP; can't even see it  .....but done for the night, so will see if I can wrap all Tomorrow. Got the new WP and Thermostat but still waiting for the new blue drain plug for the radiator. .....but done for the night, so will see if I can wrap all Tomorrow. Got the new WP and Thermostat but still waiting for the new blue drain plug for the radiator.
|
|
#44
08-24-2016, 10:36 PM
|
|||
|
|||
|
Slow and steady, don't rush if you don't have to. I assume the "3rd" bolt is the one I got to through the wheel well with a 1/4" drive and extensions.
 good luck, reassembly is much faster. BTW make sure all your hose o-rings are wiped clean and verify the hoses are fully seated when reconnected. I had to go back in to re-seat one hose. good luck, reassembly is much faster. BTW make sure all your hose o-rings are wiped clean and verify the hoses are fully seated when reconnected. I had to go back in to re-seat one hose.
|
|
#45
08-26-2016, 07:19 PM
|
|||
|
|||
|
Finally
 !!! !!!The short story, managed to remove to WP and Thermostat, so technically, I'm 50% done .... The long story; it was [ >  > > > >  > > ] painful, taking the third bolt was indeed challenging but it was nothing compared to remove the hose that connects the WP to the Engine (I guess it should have been removed before taking the bolts but how you would have taken it out if you can't see the hose clamps?) ; I honestly do not know yet how I will be able to put all this together.... saying that the space is tight is a huge understatement !!!! ] painful, taking the third bolt was indeed challenging but it was nothing compared to remove the hose that connects the WP to the Engine (I guess it should have been removed before taking the bolts but how you would have taken it out if you can't see the hose clamps?) ; I honestly do not know yet how I will be able to put all this together.... saying that the space is tight is a huge understatement !!!!Questions: Do I assemble the Thermostat + Hose + WP before? or should the WP be bolted first and then connect hoses + thermostat???? The aforementioned hose was twisted and stretched so I have decided to buy a new one just in case is damaged
|
|
#47
09-19-2016, 08:53 PM
|
|||
|
|||
|
last week got all parts and managed to get everything back on.
it took time to decide if i wanted (and if it was required) to change the Pipe/Hose that goes from the Waterpump to the engine Block (p/n 11537555281), part #3 here RealOEM.com - Online BMW Parts Catalog Some posts I found said that to remove such pipe I would need to remove the exhaust header (!!!!) ...so decided to wait until I could confirm that the pipe could be removed as it is; finally found a very detailed entry that indicated that it could be removed without taking the exhaust header. Just to be sure, I decided to check if I could at least "see" and access the two bolts that attachs the pipe to the engine block. I decided to remove a plastic cover that goes in the bottom passenger side (right) section, just below the water pump. After removing this piece --see picture below-- I was not only able to see the two bolts but also, it gave full access to the"back" of the water pump, this made the whole re-assembly process easier and faster (I should have removed this piece and recommend to remove it to anyone doing the WP). See piece #9 here RealOEM.com - Online BMW Parts Catalog 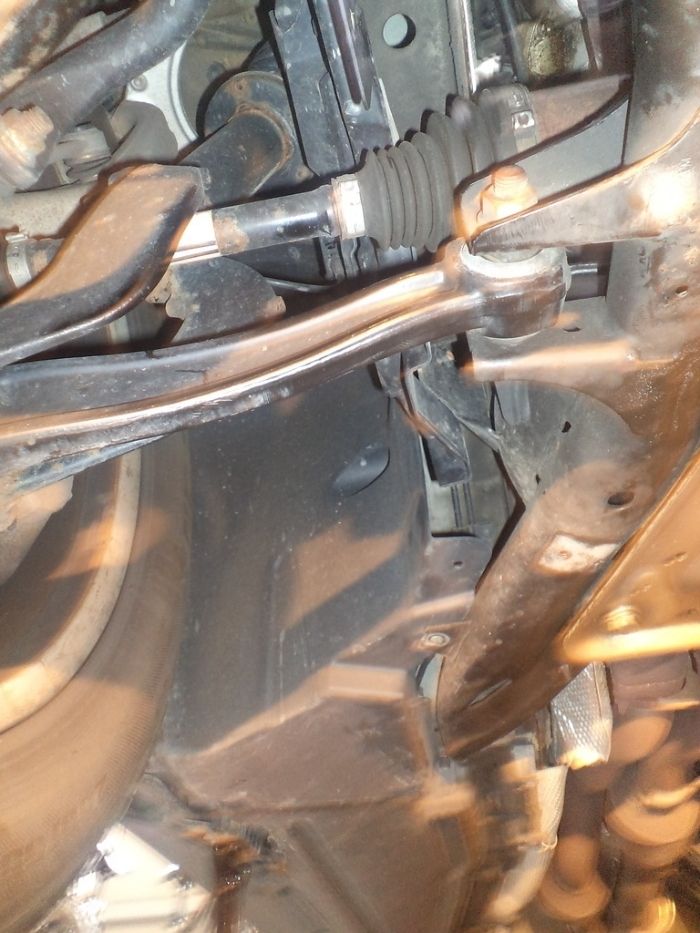 To remove the bolts, I used a flexible extension; the bolts are quite a bit difficult to access but managed to remove both. The pipe disconnected with just enough space from the exhaust header. 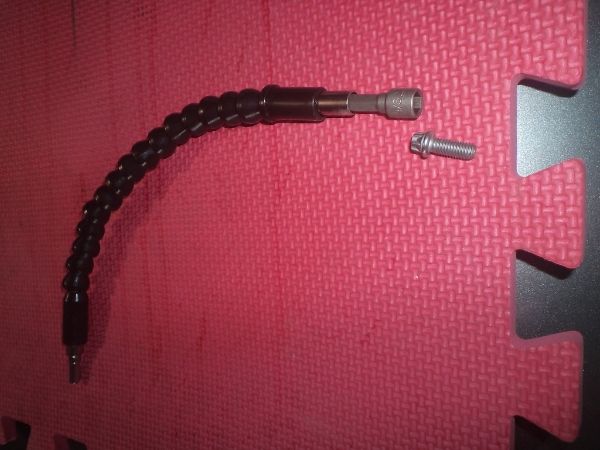 After I removed the Pipe, I compared the hose ends and definitely I'm glad I decided to replace; the hose was completely deformed and had lost any compression / form; this picture shows the new Pipe/Hose on the left and the old one at the right (see the difference in diameter) 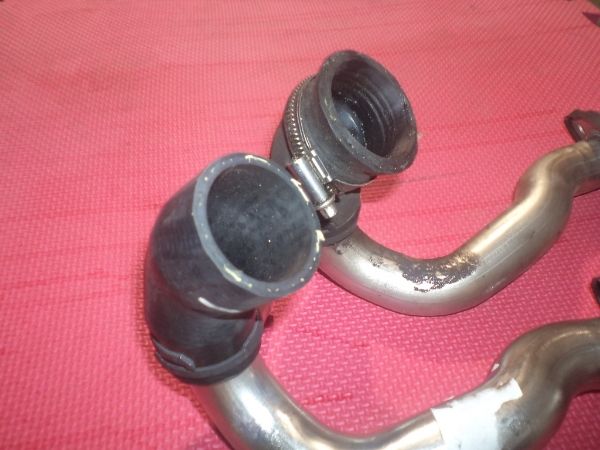 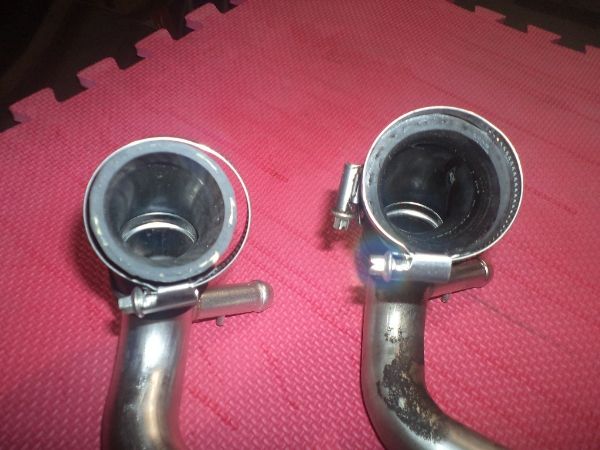 After setting up this pipe, I just went ahead and assembled everything back. removing the radiator made a lot of difference as there was a lot of space to work. See below.... 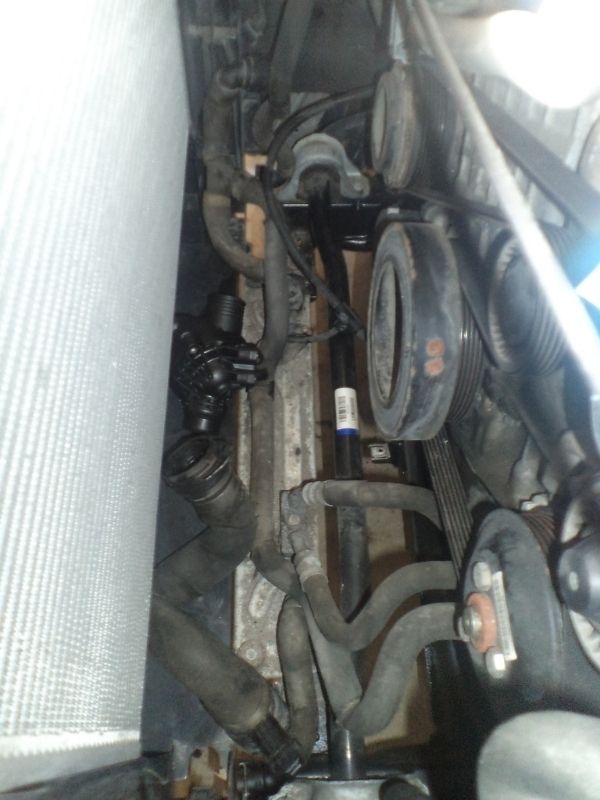 Cheers Last edited by CLS70; 09-19-2016 at 09:18 PM.
|
|
#48
11-09-2016, 10:44 PM
|
|||
|
|||
|
Do all the people that are removing the radiator have an n/a motor (Pre-LCI)? I am considering attempting to replace the water pump and thermostat on a 2013 X5 35i and the most thorough DIY i have found is a video (link below) by BavAuto on the 1 series. Would love to be able to work on ramps instead of jack stands if possible though.
DIY electric water pump VIDEO for N-series (N51/N52.N54/N55) engines...
|
|
#49
11-10-2016, 11:02 PM
|
|||
|
|||
|
Can't comment for other members or for your specific X5 model but I did remove the radiator and it gave me a lot of room and facilitated the WP replacement.
I was able to do it with the car on ramps and without having to remove wheels despite posts that indicated that was a requirement. I have some links that I used as well....not X5 though Pictures: Electric water pump + thermostat replace this post was the best, specially as I ended up replacing a few hoses as well....(I hope is ok to post these here...) DIY - E60/N52 Cooling system overhaul - Bimmerfest - BMW Forums
|
|
#50
11-11-2016, 12:59 AM
|
|||
|
|||
|
Wow, working with the wheel on seems doable, but with a lot of additional challenges. I always try to get as much of the kr@ out of the way as I can. Besides using jack stand will the suspension drop a few extra inches for more room. The greater the frustration level, the longer and/or the more expensive the project becomes. If using jack stands makes you nervous, also leave the floor jack (if that is what you are using) in place and locked while you work, and slide the tire under the vehicle just in case. Good luck, and have fun.
|
|
| Bookmarks |
|
|
|
|


 Linear Mode


