
|
|
|
|
||||||||||
| Xoutpost server transfer and maintenance is occurring.... |
| Xoutpost is currently undergoing a planned server migration.... stay tuned for new developments.... sincerely, the management |
 |
|
|
LinkBack | Thread Tools | Display Modes |
|
#192
 04-23-2020, 11:06 PM
|
||||
|
||||
|
Quote:
__________________
2006 X5 4.8is LeMans Blue Metallic (His)  2013 Infiniti JX35 Black (Hers) (Sold) 2007 X3 3.0si Monaco Blue Metallic (Hers) 

|
|
#193
04-23-2020, 11:09 PM
|
||||
|
||||
|
Yes do it all in one shot. I just finished doing my rear Control arms, ball joints and integral links. I did order the swing arm bushings but did not replace them but if you have the time and a press, I would recommend knocking those out too...
__________________
02 Imola on Black Dinan S2 4.6iS 00 RoyalRot on Sand/Black 740i Short Sport
|
|
#194
04-24-2020, 12:05 AM
|
||||
|
||||
|
Quote:
__________________
2006 X5 4.8is LeMans Blue Metallic (His) 2013 Infiniti JX35 Black (Hers) (Sold) 2007 X3 3.0si Monaco Blue Metallic (Hers)
|
|
#195
04-24-2020, 12:26 AM
|
||||
|
||||
|
MID pixel repair - updated, all pixels now working!
Well, it's done. Not 100% like I hoped but somewhere north of 99% - only one missing vertical line, that almost never shows up.
Here's what I had to start with...   The LCD connection end was easy - the PCB end was harder and after I connected it all up and tested it, it WAS perfect!! Then came re-assembling the case. What a pig. During the re-assembly, the PCB metal clamp popped off. Bugger... An hour of goofing with it, adding more tape, bending it etc, got me to where I am now. Here's the end result, after much stuffing about...    I'm happy with it. It's a little gutting knowing that at one point it was perfect and if I had another 2 hours to waste on it, I'd do it over. Might only take an hour in fact, as the PCB and LCD display are now clean... Just wanna drive the thing now....!! ***UPDATE*** After I drove to work on the first day back after lockdown, the missing column of pixels re-appeared...  VERY HAPPY!! 
__________________
Wayne 2005 BMW X5 3.0d (b 02/05) 2001 BMW F650GS Dakar (b 06/01) 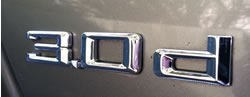
Last edited by wpoll; 04-27-2020 at 04:49 PM.
|
|
#196
04-26-2020, 10:28 AM
|
|||
|
|||
|
So I recently installed a new stereo, nice big Xtrons unit (look and works amazingly well, honestly looks as if it was meant to be stock), so now I started removing things from the trunk from the stock stereo that I will never need.
I have removed the navigation unit and CD changer, but can someone help me identify what these two things are? I believe one of them is for Bluetooth phone, but cant identify the other one. Also, what else can I remove from the stock stereo?  
__________________
03.06 BMW X5 4.8is LeMans Blue
|
|
#197
04-26-2020, 11:27 AM
|
||||
|
||||
|
Silver one is the Bluetooth module. Other is the oe amplifier. Bluetooth can come out, amp has to stay.
__________________
2005 X5 4.4i Build 04/05 Maintenance/Build Log Nav, Pano, Sport (Purchased 06/14 w/ 109,000 miles) (Sold 8/15 w/121,000 miles) 2006 X5 4.8is Build 11/05 Maintenance/Build Log Nav, DSP, Pano, Running Boards, OEM Tow Hitch, Cold Weather Pckg (Purchased 08/15 w/ 90,500 miles) 2010 X5 35d Build 02/10 Nav, HiFi, 6 DVD, Sports Pckg, Cold Weather Pckg, HUD, CAS, Running Boards, Leather Dash, PDC, Pano (Purchased 03/17 w/ 136,120 miles)
|
|
#198
04-26-2020, 01:25 PM
|
|||
|
|||
|
Quote:
Thats what I thought, thanks. All removed now.
__________________
03.06 BMW X5 4.8is LeMans Blue
|
|
#200
04-27-2020, 09:41 AM
|
||||
|
||||
|
So, this weekend, my buddy and I practiced social distancing while replacing every bushing and arm on the rear end of my X5 4.8is, except for the subframe bushings and shocks. I also had purchased the Lemforder swing arm bushings, so we got a chance to do those for the first time ever. I've done rear suspension on at least 5 e39s, so I was quite familiar with the process, but this was the first time changing the swing arm bushings and those were quite a pain. We even went and bought a new 20 ton press as my 12 ton wasn't really doing the job.
Tips we learned: -You can press out the bushings with the larger center (less rubber) fairly easily with a 36mm impact socket (Morello or something like that bought from Amazon for removing a rear output flange on a M5 transmission) -To remove the other bushing, we found that drilling out the rubber first, then pressing the center out, then using an air chisel made quick work of removing them. Every time we tried a socket to press them out, the socket went in crooked and mangled the bushing, which then made it near impossible to remove. -Pressing in the new bushing with the larger center goes pretty easy with a flat plate on the bottom and a flat plate on top applying even pressure. The outer shell will kind of find its way into the hole and start squeezing in, but you can also use some large channel locks to push in any edge that doesn't go in easily. I highly suggest putting a decent amount of grease on the edge of the bushing and the hole in the swing arm. -For the bushing with the large split, this was a decent bit more difficult, but mainly because of the clamps we tried to use. You can get by with a normal 2" hose clamp, but make sure it is a quality one and preferably a t-bolt style clamp if you can order one ahead of time (none in stock around here on a weekend). Clamp at the middle of the bushing until the rubber on either side of the wedge cutout is touching. You won't be able to get it to compress enough to close the metal together, so don't try (ask me how I know, LOL). Once you have it compressed, just press it in using the same method as the other bushing, using the channel locks to squeeze in edges that try to poke out. Once it's started in the hole, you can remove the clamp. -With both bushings, when you get them started in most of the way, add a cup type receiver to the bottom that fits the ring of the swing arm hole. This will make sure that the center, which protrudes out of both ends, has the space to allow you to push the bushing in fully. I used the large receiver cup from my rear ball joint tool, which fit perfectly. So, new swing arm bushings, ball joints, integral links, upper control arms, sway bar bushings and endlinks. I had already done the front end suspension rebuild, but hadn't done the front sway bar bushings yet, so knocked those out as well. The X5 was then dropped off at my buddy's shop for valve stem seal repair, gaskets, spark plugs, front tie rod ends (ran out of time), and alignment. A very productive quarantine weekend.
__________________
 -Paul 2003 "M5" - Full M5 conversion, GC Coilovers, Eibach ARBs, UUC Evo3/DSSR, Borla Exhaust w/Muffler Delete, BMW NBT, Bi-Xenons, APEX PS-7s, e60 Hubs 2004 X5 4.8is - Stock for now 2005 Range Rover (M62TU Powered) - M62TUB46 swap
|
|
| Bookmarks |
|
|
|
|


 Linear Mode


