
|
|
|
|
||||||||||
| Xoutpost server transfer and maintenance is occurring.... |
| Xoutpost is currently undergoing a planned server migration.... stay tuned for new developments.... sincerely, the management |
 |
|
|
LinkBack | Thread Tools | Display Modes |
|
|
|
#1
 10-15-2008, 08:25 PM
|
|||
|
|||
|
Quote:

|
|
#3
10-20-2007, 01:26 AM
|
||||
|
||||
|
That looks fantastic.
BTW, How did you feed that "Auto Scan" screen?? I'd like to know which wire in head console is right for hard wiring... "Does anybody know which wire in the head console is right for detector mounting, yet??"
__________________
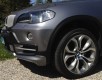
 2008 X5 4.8i Black Sapphire/Black perforated int./Dark Bamboo wood trim, [w/ all factory options except rear DVD system] + aerodynamic kit/stainless pedals/illuminated door strip/3M Color-Stable tint/LED license plate light/Thule's 91726 snowboard carrier. 2006 X5 4.4i, Titanium Silver/Black int./Anthricite Maple(traded)
|
|
#5
10-20-2007, 09:13 AM
|
||||
|
||||
|
Thanks. This is the newest RDD Spectre proof remote detector on the market. I will be also installing a Laser Interceptor for ultimate laser protection.
__________________
2013 BMW X6M-current 2013 Audi S4-current 2007 BMW X5 4.8i (E70)-sold
|
|
#6
10-20-2007, 07:34 PM
|
|||
|
|||
|
K40
It's certainly not the least expensive option out there, but I have a built-in K40 in my 911 Turbo and will be doing the same thing in the new X5. The K40's now are bluetooth, so you get a small handheld remote that sits in the glovebox. Two very small blue LED lights are installed anywhere you'd like in the interior. I usually pick a spot in the center console about 3-5" apart - looks factory done and works flawlessly (my experience).
Again, it's not the cheapest option, but when you spend this much on a car, you want your installations to look fully integrated. Josh
__________________
CURRENT: 2008 BMW X5 4.8 ~ 2007 Porsche 911 Turbo ~ 2008 Range Rover PAST: 2008 Lexus GX470, 2008 Audi S6, 2007 BMW M5, 2007 Chevrolet Tahoe LTZ, 2007 Porsche 911 4S Cabriolet, 2007 Audi Q7 4.2, 2006 Range Rover Sport Supercharged, 2006 Lexus RX330, 2005 BMW X5 4.4, 2000 Audi S4, 1999 and 2000 Jeep Grand Cherokee Overland, 1999 Porsche Boxter S and others from the older days.
|
|
#7
10-23-2007, 03:42 PM
|
||||
|
||||
|
Quote:

__________________
2013 BMW X6M-current 2013 Audi S4-current 2007 BMW X5 4.8i (E70)-sold Last edited by Denalio; 10-23-2007 at 04:06 PM.
|
|
#9
10-16-2008, 01:55 AM
|
|||
|
|||
|
The use of this DIY is for reference only; I disclaim all LIABILITY FOR DIRECT, INDIRECT, INCIDENTAL, OR CONSEQUENTIAL DAMAGES OR INJURIES THAT RESULT FROM ANY USE OF THE EXAMPLES, INSTRUCTIONS OR OTHER INFORMATION IN THIS DIY.
 DIY Hardwire Radar Install in Center Headliner SPECS: X5 2008 E70 3.0 si Panoramic Roof Passport 8500 INTRODUCTION: CLOSE THE PANORAMIC ROOF COMPLETELY BEFORE YOU START AND DO NOT OPEN IT DURING THIS INSTALL if you do, youll have to electronically reset the roof no big deal, I can tell you how I did it. This is the second switched hardwired radar detector install Ive done (meaning: NO voltage is provided to the radar unit when the ignition is switched OFF, it only receives voltage when the ignition is switched ON) the other was on an earlier X5 2005 E53. I had no problems with the switched hardwired E53 install (after 3 years of use) and thus far (after about three months) no problems with the E70 install as well. It takes a little effort and if you dont use the X, can probably be done in less than a few hours (if its your first time). By way of comparison, on 7/12/2008, QMan posted his DIY for a hardwire radar detector: I just installed my radar detector and after quite a bit of investigation I did find a wire in the center console. It turns on when you open the door, not when you turn the key, BUT CLOSE ENOUGH. If you look at the Start/Stop button's illumination, it makes that behavior. Been using it for a week know and I am happy with it. There is a ton of circuitry in that center console. I marked up the image in this thread to identify the wire. But, I would still verify this wire's behavior beforehand. In contradistinction, the DIY I describe ONLY works when the ignition is switched ON . When being used, I clip the radar detector to the visor, but this set up could be easily used with the alternative suction cup attachment. Unlike the E53 install, I had to make a very minor modification in the left front edge of the center headliner console, that allows the cable (that connects to the radar unit) to retract into the headliner (you very easily manually feed it back into the headliner space) making it essentially invisible when the radar detector is not attached (and safely put away in the glove box). The only other cutting of plastic was because I used the Direct Wire Smart Cord (see: http://www.escortradar.com/shop.htm ). Because of this, I had to carefully (!) cut out with a Dremel tool an oval hole in the center headliner console to accommodate the Direct Wire Muting Unit (see image). I then sparingly applied a small bead of epoxy around the Muting Unit on the inside of the headliner to secure the Muting Unit. Im pleased at how the finished product looks. By no means are you obligated to use this Direct Wire Muting Unit, and instead can simply use the Hardwire Cord to hardwire the cable to a ground and 12Volt switched source. Your time to do the install will be considerably less if you dont use the Direct Wire Muting Unit.     PROCEDURE: 1. Remove the center headliner light console (console): Understand that the console is hinged at its rear end farthest from the windshield (see images). Conversely you unclip the console from the edge closest to the windshield. It is held in place on the headliner by two clips, that can be pried off by inserting a spatula or other plastic blade under the edge of the console. **NOTE**: there is plastic trim piece that overlies this area and if you can remove it, youll be able to see the clips I mention (see also the images to see where the clips are located).   Once the console has been unclipped, detach it from its electrical connectors theyre standard connectors that come out with little difficulty. Since each is a different size, theres little chance youll reconnect them incorrectly if you dont remember what their proper connection ordering is. You need to get the console out of the way so you can then: (1) take the console out of the vehicle so you can trim a small amount of plastic from the edge (so the cable can move freely in and out), (2) access the 12volt wire to connect, (3) access the grounding screw to establish a ground. 1. Trim Headliner on left side (drivers side). The purpose of doing this is to allow the cable to be pulled out to connect to radar unit and then be EASILY pushed back into the space above the console when the radar unit is no longer in use. I used a rat-tail file to slowly and carefully remove a hemi-circle shaped piece of plastic. Note that you need to file BOTH the black AND grey plastic portion of the console. (see images). 2. Identify the 12 volt switched wire. The best I can describe this is the wire youre going to use is NOT found on any of the connectors to console as described above. Instead it is a Green/White wire found bundle wrapped with others and lying in front above the headliner, towards the windshield. (see images for the location of the wire). Youll have to conservatively unwrap the wire from the bundle to make it more accessible. The next part described is confirmatory and may not be necessary.  Once youve identified this wire, I suggest you use a voltmeter to test it with the IGNITION ON and THE CAR MOTOR RUNNING (i.e. the car is parked with the parking brake on and car is running) to confirm the wire is 12 volts switched. NOTE that it can be difficult to get a good connection from the voltmeter to the 12 volt wire I used an alligator clip firmly attached to the wire when I confirmed it was the one I wanted to use. REMEMBER: You need to establish a good ground otherwise it will appear that it doesnt have the necessary voltage (trust me). After this, turn off the engine and switch off ignition. . 3. Identify the ground. I used the torx screw as in the image as the grounding source. Loosen screw, slide ground lead under, tighten screw down tight (!).  4. Reconnect the electrical connectors on the headliner, replace the headliner light console, making sure that the cable isnt being pinched and can FREELY move in and out.
|
|
#10
09-20-2013, 12:23 AM
|
|||
|
|||
|
Sorry if this is a repeat question, but how did you remove the trim in front of the reading lights that covers the clips holding the entire housing?
I tried pulling mine from the front but I feel like i'm going to snap it in two. Did you simply pull yours off? and how much force did you have to use to do it? Thanks Quote:
|
|
| Bookmarks |
| Thread Tools | |
| Display Modes | |
|
|
|
|


 Hybrid Mode


