
|
|
|
|
||||||||||
| Xoutpost server transfer and maintenance is occurring.... |
| Xoutpost is currently undergoing a planned server migration.... stay tuned for new developments.... sincerely, the management |
 |
|
|
LinkBack | Thread Tools | Display Modes |
|
#111
 06-10-2016, 10:10 AM
|
||||
|
||||

__________________
2006 X5 3.0 6-spd w/Evo UUC ssk sport/premium pkgs born Valentine's Day, 2006. 
|
| Sponsored Links | |
|
|
|
|
#112
06-18-2016, 09:04 PM
|
|||
|
|||
|
Quote:
Cheers!!!
__________________
2001 E53 X5 4.4i (03-07-2001 build date) White exterior / hellbeige interior (6MT swap vehicle - Manny) 2002 E53 X5 4.6is (12-20-2001 build date) Imola Red exterior / M-texture interior (Red) 2003 E53 X5 4.4i (06-26-2003 build date) Silver exterior / Black interior (Silvester II) 2008 Mini Cooper S ragtop (04-17-2008 build date) Dark Silver exterior / Gray interior ( Topless) BMWCCA member (#4745)
|
|
#113
06-18-2016, 09:05 PM
|
|||
|
|||
|
Good day all!!
Well, another chapter in this quest... I test fitted the alternator while it was on the engine stand. The oil cooler assembly gets in the way, but it goes on rather easily when it is in the vehicle...Additionally, I installed and tightened it in place three times before I was done with it...It is easier to install the power wire and connector prior to putting it in place...So, every time you remove this, you need to tap the bottom bolt with a hammer to push the locking lug out...  This is how it should look to install it...   And all tightened up (notice the bolt in the gap)...   Got the new crankcase vent kits... The new cover doesnt look the same because there is no hose that goes on the end fitting, so BMW got rid of it...  So, this might be interesting... I pulled the cover to the coil harness housing so I knew exactly where it would sit when installed...I did all that to figure out where the ground wire caps for the valve cover went...   I figured out that the tall ones go along the top and short ones go on the bottom...  The two ground caps go in the center at the top...  All back together so wires dont get buggered up...  I bent this pulling the motor... I pulled the motor without valve covers...I had to find an alternate spot to lift the motor due to the covers being included with the installation...   The plug tubes were a pain to get on... The outside bolts go on rather easily...But the eight cam cap nuts were crazy to get installed...I cant imagine doing them with the motor installed...I tightened slightly, tapped, tightened, tapped...and did that for all 16...Rubber dead blow hammer!!Do not hit your plastic valve cover with a ball peen hammer!!Things might not work out that well for ya!!!   With the valve cover installed, even the rubber grommet wont come out... It gets locked on the top of the cam cap nut...  I tried to get this centered during the valve cover install process...  I knew this was the correct way only because of the marks the old one made on the cover... I also dont see it working out that well flipped over...  This gets a new O-ring too... Its in the kit...  New, also in the kit...  Added for the installation... I pulled the motor with this still connected...I think it was easier...  If you dont have a 14mm allen for this, find one of these... I got this some many years back when I swapped my 2.82 rear diff for the 3.15 in my E39...I tap this in place and if it gets stuck, I thread the all thread rod in and pull it out...  Push it up tight and loosen...   All dressed up and ready for install!! Isnt that just a sight?!   I have this chain with angled rectangular plates on the ends that happen to fit perfectly at the knock sensor locations and supported the motor evenly with much delight!   Lifted the engine stand too... I felt good about it holding the whole time!!  And look how level it is here!! I was amazed how well balanced it turned out this way!!    Going in was slow!! I didnt want to rush through this part and mess up something vital!!My better half assisted me with this process!!Thanks babe!!  Okay, having done it this way, I will say I think it might be easier to install this side first... BUT, leave the passenger side off...There is enough room on the pass side to have a small football game...But getting the nuts on the driver side with the motor installed was frustrating and time consuming!!!  You must put the pass side manifold on before you install the compressor and you will need to move the dipstick tube to the side slightly for one nut... I did NOT break the A/C system... (spoiler - Im writing this after I started the motor...It started fine)...The A/C works great!!  I thought it would be a good idea to remove the brake booster vac pump... Too close, but it probably would have cleared...  It was a pain to get it around this!! The compressor goes under the motor mount bracket, but the tube here goes over it...Yep!A huge PITA!!  Lots of room... For now...  This is touching, but barely!!  All the obvious stuff on top, but dont forget the trans cooler lines and the oil pan... They run by the oil pan, but things can get moved around and such...Not to mention the motor isnt going to go straight down...  Its close, but there is enough room on this side...  This is touching the fuel line... Close over here!!!  This is finally over and in place...  And its in there!! YAY!!  Thats it for now... Stay tuned for the next chapter... Cheers for now!!!
__________________
2001 E53 X5 4.4i (03-07-2001 build date) White exterior / hellbeige interior (6MT swap vehicle - Manny) 2002 E53 X5 4.6is (12-20-2001 build date) Imola Red exterior / M-texture interior (Red) 2003 E53 X5 4.4i (06-26-2003 build date) Silver exterior / Black interior (Silvester II) 2008 Mini Cooper S ragtop (04-17-2008 build date) Dark Silver exterior / Gray interior ( Topless) BMWCCA member (#4745) Last edited by williamx5; 06-20-2016 at 05:29 PM.
|
|
#114
06-20-2016, 09:29 AM
|
||||
|
||||
|
Man I wanna be you when I grow up! That's just awsomeness delux!
Are you leaving the oil valve parts out (the ones you helped me find the location of)? BMW X5 4.8iS 2005
__________________
BMW X5 E53, 4.8iS - 2005 Professional Stereo/Nav with DSP (modified BM54 module) - Converted to Eonon GA5166X with Reverse cam 4-Corner Air Suspension - Converted to BC Coilovers
|
|
#115
06-20-2016, 05:32 PM
|
|||
|
|||
|
Quote:
I actually didn't have all the parts to put them back... So, there wasn't really anything to put back... I hope they aren't necessary!! Mainly cause I don't have them... Thanks for tuning in!! Cheers!!!
__________________
2001 E53 X5 4.4i (03-07-2001 build date) White exterior / hellbeige interior (6MT swap vehicle - Manny) 2002 E53 X5 4.6is (12-20-2001 build date) Imola Red exterior / M-texture interior (Red) 2003 E53 X5 4.4i (06-26-2003 build date) Silver exterior / Black interior (Silvester II) 2008 Mini Cooper S ragtop (04-17-2008 build date) Dark Silver exterior / Gray interior ( Topless) BMWCCA member (#4745)
|
|
#116
06-30-2016, 09:27 AM
|
|||
|
|||
|
Good day all!!
Well, I figured it was time to finish this up for those that are interested... This last part is just going over all the little things I found while getting it all back together... Like the DS cam sensors... One had to be different but fits in both locations... The starter solenoid looks like the crank sensor connector... Wires are about the same length too... Starting where the pictures start..... These two tensioners are almost mirror images of each other... If you are confused as to which location they go, just look at the wear on the pulley... The narrow belt goes with the A/C and the other below the PS pump...  Don't put the Alt in until the PS pump is in and this bracket that uses the PS pump bolts... The oil cooler lines mount to the other end of this bracket buried under the Alt...   Then these go on... Wide belt is by the Alt... Narrow belt is for A/C...   Okay, I may have mentioned this already, but don't actually install the Alt until the wires are connected up... I tried to get them connected after it was installed... I just don't think it is possible... But this works... Rather well with no cooling hoses and such in the way... Haven't tired it with everything else installed...  New belts in place...  DS cam sensors... Oh, I don't know... after-thought maybe... realoem doesn't have the different one in their picture... I have not heard or read about an extension wire to use the other type of sensor...  Here is how they go in... (I got the SES for DS exhaust cam over-advanced upon initial start-up... Figured I had these backwards... They weren't, but the SES fault for the cam went away... Maybe air pocket in the vanos or something)... Intake cam is the wire version... That connects up to the wire box... that connector is the one on the far left of the pic... with the bend in the boot...  I'm not positive if the oil dipstick tube uses this bracket, but it seems more logical than the wiring loom under it...   Coil grounding wires... Coils are not in yet... I want to prime the oil pump with no compression... No plugs are in yet either...   Don't forget to hook this up behind the intake... If it just falls down behind the intake, it can get easily overlooked...  This is how the drive shaft comes apart... This came out like this after I pulled the motor... I had a super hard time moving the drive shaft back into the transfer case... I really should have taken a picture prior to cleaning and greasing the splines... I wasn't done when I took the picture...    Cooling hoses... These were pretty much a puzzle... Not to difficult to figure out... They identify where they go by just fitting them at the possible locations...    Green marks help!!!    Okay, minor setback was this HUGE O-ring in the radiator side of the bottom hose... Figured previous tech lost the original and used what they had... I'm not sure how it worked up to this point, but it makes sense as to why I could not get the hose off!! I almost cut the hose and dealt with it after the radiator was out... I got the correct O-ring!!   Here is where I primed the oil pump... Just a couple pics of the chain moving and getting clean oil on it... Stationary... My better half is helping me with the starter...   Okay all!! This is the part I am reluctant to reveal, but.... So, I got it primed and now I'm ready to start it... Plugs are in... Coils are in... everything is connected... Coolant is in... No leaks... All the drive line components are back in... All I have to do is replace the fuel pump fuse and turn the key... So, I did that... I replaced the fuse and turned the key a few times to prime the fuel system that had been disconnected... Turned the key and nothing... WHAT?! Oh crap!! So, I didn't have fuel... Checked the fuse, and low and behold it was popped... Not sure why there were blown fuses in the ashtray... Found one other that was popped... Put a good one in and still nothing... Double crap... Pulled the back seat to check voltage at the pump, knowing the fuse is now good... This is what I found under the back seat... The positive part here is there was enough money in this to pay for the power to run the shop vac... LOL!!!  After... My better half and I spent the good part of two hours cleaning this... Got the garden hose out and everything!!   Okay, I finally traced my steps and found that I somehow put the fuel pump fuse in an "unused" location... Once in the correct position, she fired right up... No clank, tick, ping, or ding!! Topped off the cooling and let it idle for a while... checked the SES codes and the cam timing and trans fail safe came up... cam timing went away and I'm dealing with the trans now... Oh, I changed the front diff oil since I had spilled some after pulling it... I ran the initial oil for a couple hours run time... Then changed it and the filter with Mobil 1... That's it so far... Dealing with the trans issue now... I wonder if I should include that segment in here as well... I put it in a different thread... Thanks for tuning in!!! Cheers all!!!
__________________
2001 E53 X5 4.4i (03-07-2001 build date) White exterior / hellbeige interior (6MT swap vehicle - Manny) 2002 E53 X5 4.6is (12-20-2001 build date) Imola Red exterior / M-texture interior (Red) 2003 E53 X5 4.4i (06-26-2003 build date) Silver exterior / Black interior (Silvester II) 2008 Mini Cooper S ragtop (04-17-2008 build date) Dark Silver exterior / Gray interior ( Topless) BMWCCA member (#4745)
|
|
#117
06-30-2016, 09:51 AM
|
|||
|
|||
|
Quote:

|
|
#118
06-30-2016, 08:53 PM
|
||||
|
||||
|
Congratulations
 Someone in Georgia give this guru a six-pack! Someone in Georgia give this guru a six-pack!Please continue with the same thread so that the entire project stays as one... and the title of this thread befits spinoffs anyway. So don't change the adventure movie theater  I always look forward to your updates. I always look forward to your updates.
__________________
'05 E53 X5 4.4i, '97 E39 528, '07 E92 335i, '16 F86 X6M. Last edited by X5only; 06-30-2016 at 09:01 PM.
|
|
#119
07-01-2016, 10:01 PM
|
|||
|
|||
|
Good day all!!
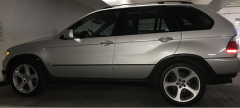
As per a request to include all aspects of the project in here, I'm including the transmission thread to this one... I was getting the Trans failsafe message and I couldn't go far from the house without it taking hold. Limping back home in third gear is not all that much fun... So, I decided to tear into the issue a little... The shifter doo-hicky thing that tells the Trans computer what gear it's in, is not like all the others before it... I searched for the part and now know why it isn't avail... It is literally apart of the valve body inside the trans... This one is hall effect with a magnet slider (so it seems)... So, here is the story... Here she is!! In all her high stance due to me filling the suspension manually by jumpering the air control coils and manually operating the air pump... BUT, it's not sitting on the bump stops!!! And, to my surprise, all the air bags are holding!!  Here is the color of the trans fluid at 164160 exact miles... I know that because I just changed the first oil fill after initial start...    There is ALWAYS one that doesn't cooperate!!!  Dirty pan...  Original filter... I know that cause it has a date on it...  Don't let this seal stay in the trans... It does sometimes... Mine almost did...  And the fun stuff!! With the fluid looking this bad, I wanted to clean out the valve body... I'm one of those that feel the risk is worth it have clean oil in there... But, I clean out the crap that will otherwise ruin the trans if left alone...  Gotta pull that little leaver down to release the electrical connector extension housing...  There are ten Torx 40's (seven long and three short) to drop the valve body... The other torx bolts are 27's...   These are the main long seven... The other three are in the black plastic electrical housing...   Think this is the reason I would loose my gear when it heated up... This was all over my selector slider piece...  All clean...  Oh, that thingy you pull down to release the connector extension won't go back up unless the extension piece is in place first...  You take these out and the electrical part comes off the valve body... you can't take it apart... I kinda tried, but it wasn't worth the risk of breaking it...   Pull these out (27's also) to get the solenoids out...   The middle yellow one doesn't have any removable valves behind it... Yep, I pulled all them out too...  Initial separation was very dirty!! Poor lighting... My apologies!!  So, here are the check valves for this one... and the two spring plungers... There are other plugs along the side that I didn't circle... I have a pic of them too...  Here are the valves for the shorter half (top half as it sits in the trans)... Three on one side... Two on the other...   Skip that third spot... Nothing there...  exploded view...  This is the other side... The last one gave me problems... (There is ALWAYS one!!!)   ONLY ODD ONE!!!   All back together...   Not in yet... Ran out of time... Gotta work tomorrow... I need to get the fluid, gasket, and filter... Was looking up the specs on the correct fluid, but I can't get a good straight answer from the posts I was reading... AFT2? Dex VI? Semi syn? Full syn?? Well that is it for now... I really hope this fixes my fail safe program!! If not, I will be stuck buying a valve body... Or dig into the electrical plastics... Cheers!!
__________________
2001 E53 X5 4.4i (03-07-2001 build date) White exterior / hellbeige interior (6MT swap vehicle - Manny) 2002 E53 X5 4.6is (12-20-2001 build date) Imola Red exterior / M-texture interior (Red) 2003 E53 X5 4.4i (06-26-2003 build date) Silver exterior / Black interior (Silvester II) 2008 Mini Cooper S ragtop (04-17-2008 build date) Dark Silver exterior / Gray interior ( Topless) BMWCCA member (#4745)
|
|
#120
07-01-2016, 10:14 PM
|
|||
|
|||
|
UPDATE::::
Okay, here it is...
Well, before I got the fluid and parts, I decided to pull this huge plug in the pan... And I took some measurements... I'm thinking to myself, "WHY?"... Well, the top of the rim for the plug is about 9mm above the top of the gasket surface...   And the top of the threads for the fill hole are about 13.7mm from the gasket surface...  So, I figure it is for the initial fill cold... Then the fill plug is pulled when it's at temp to drain off the excess... Of course, I didn't try this when I put everything back together... UGH!! Here's the 12 liters of fluid!! Liquid gold!!  Here is the seal I got...  All new stuff... I figured I was getting just the filter with the part number I pulled... I got the big plug, the little plug, and the filter... Good to know if you need a drain plug!!  Here are the part numbers...  Don't forget to line this up or you could end up starting the truck in drive...   In place...   This is all the way in... It is difficult due to it's location, but it will be good when the locking tab goes up...    This is the fill system I made... Just a 3/8 air fitting with a length of 3/8 fuel line... I put the fuel line OVER the exhaust as the bend was a bit too much...  This is initial fill... Running, but not up to temp...   This is getting up to temp... Not too happy with the fluid color... But!!  Ahhhhhh... I used the four new 40 Torx bolts to start the pan... They are easy to over tighten, so be careful!! That's it... For now... Now on to why my trans if getting the fail safe... Cheers for now!!
__________________
2001 E53 X5 4.4i (03-07-2001 build date) White exterior / hellbeige interior (6MT swap vehicle - Manny) 2002 E53 X5 4.6is (12-20-2001 build date) Imola Red exterior / M-texture interior (Red) 2003 E53 X5 4.4i (06-26-2003 build date) Silver exterior / Black interior (Silvester II) 2008 Mini Cooper S ragtop (04-17-2008 build date) Dark Silver exterior / Gray interior ( Topless) BMWCCA member (#4745) Last edited by williamx5; 07-03-2016 at 08:42 PM. Reason: Adding the good stuff!!
|
|
| Bookmarks |
|
|
|
|


 Linear Mode


