
|
|
|
|
||||||||||
| Xoutpost server transfer and maintenance is occurring.... |
| Xoutpost is currently undergoing a planned server migration.... stay tuned for new developments.... sincerely, the management |
|
|
LinkBack | Thread Tools | Display Modes |
|
#1
 12-02-2016, 12:37 AM
|
|||
|
|||
|
Danny's X5 4.6 Thread
Hey y'all,
I just signed the paperwork and wired over the money for a 2003 X5 4.6, so it looks like I have an X5 now! It's Sapphire Black Metallic with black leather sport seats. It's pretty much fully loaded, I can't think of a single feature it doesn't have, aside from the running boards. Heated seats front & back, power seats front & back, sliding cargo tray, PDC, nav, rear window shades, tow hitch, etc. I paid a bit under $4k for it, not including the shipping costs. I'm working on getting it shipped to my house right now— it's in Seattle and I'm here in Phoenix. How'd I get it for so cheap? Pretty simple, actually. It has 213,000 miles and it needs timing chain guides. Clean history otherwise: it's originally a Cali car, spent some time in Arizona, and then went to Seattle. No accidents and the Carfax actually shows quite a bit of dealer service. It also has a freshly rebuilt transmission so once I take care of the guides it should be quite solid. The engine still runs but it's pretty rough due to the bad guides. That's why I'm having it shipped. Am I insane for buying an X5 4.6 with 213,000 miles and engine issues? Nah. I've done the timing chain guide + Vanos rebuild job in 6 different M62tu's (4 E39s, 1 E38, 1 Range Rover) as well as a rod bearing replacement on an S62, so this should be quite a breeze for me. I also spent the last few months daily driving a $3000 2004 Range Rover with 160k miles and zero service history (after I rebuilt the M62tu and replaced the fuel pump) and I survived just fine. Most of the parts are shared anyways, so it should all be quite familiar. I had a 2003 540i/6 M-Sport with 200,000 miles not too long ago, so high mileage really doesn't bother me— I find it quite endearing, in fact. Anyways, enough blathering, here are some pictures. These are from the dealership and I'll post some better pictures once I receive it. 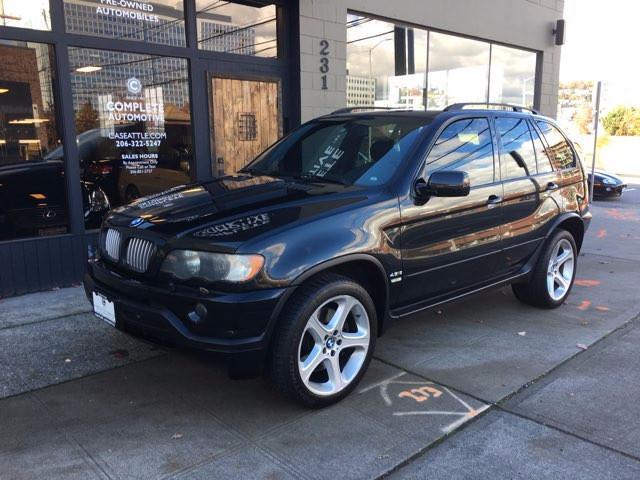  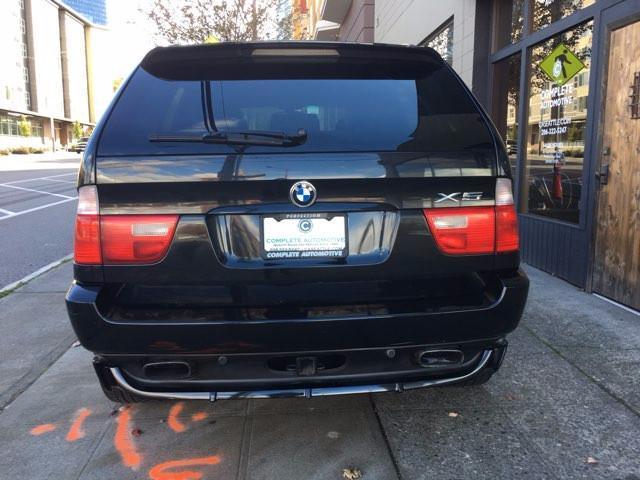 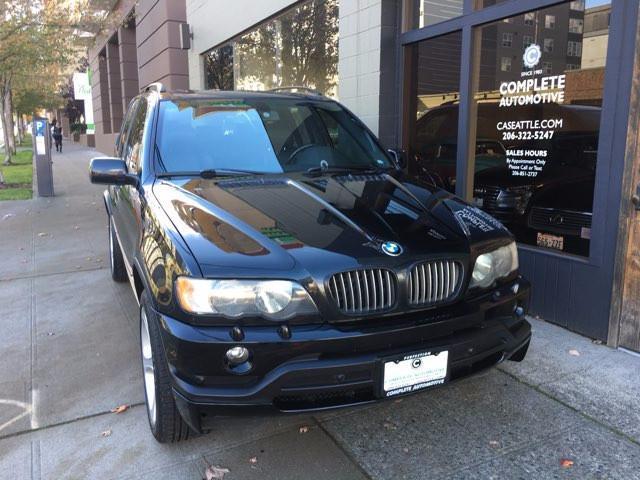    My goal with this X5 is to use it as a daily driver and an occasional tow rig. It already has a proper tow hitch so at most I'd have to just wire up the trailer harness and trailer brakes. I own a two-axle open car trailer with a friend so this will be perfect for that. My other car is a 2000 540i Touring with 183k miles that I'm always working on— I plan to turn it into an M5 Touring so that's why I need something to daily drive once I take the plunge and start the swap. Thanks for having me here, I hope to contribute plenty to this wonderful community. Some of you guys might recognize me from Bimmer Forums, I'm super active on there too.
__________________
2003 X5 4.6 | 2000 540i Touring Formerly owned: 2004 Range Rover | 2000 M5 | 2000 540i/6 1995 750il | 2003 Mercedes S500 | 2003 540i/6 
|
| Bookmarks |
|
|
|
|


 Threaded Mode

