
|
|
|
|
||||||||||
| Xoutpost server transfer and maintenance is occurring.... |
| Xoutpost is currently undergoing a planned server migration.... stay tuned for new developments.... sincerely, the management |
 |
|
|
LinkBack | Thread Tools | Display Modes |
|
#11
 02-25-2017, 02:00 AM
|
|||
|
|||
|
https://www.youtube.com/watch?v=mpa9RJ7iEfQ
__________________
_____________________ 2004 Gray/Gray 3.0 X5 Last edited by MPDano; 02-25-2017 at 02:23 AM. 
|
| Sponsored Links | |
|
|
|
|
#12
02-25-2017, 06:05 AM
|
||||
|
||||
|
Yep - straight forward task if you have your own press. Just did mine recently (used Meyle HD bushings).
Hardest part is getting the control arm out of the car. You need a ball joint seperator for the wheel end of the arm and I had remove what seemed like half the damn car to get at the bolts on the bushing end. Lots of Tupperware inthe way.... ")
__________________
Wayne 2005 BMW X5 3.0d (b 02/05) 2001 BMW F650GS Dakar (b 06/01) 
|
|
#13
02-25-2017, 09:32 AM
|
||||
|
||||
|
Quote:
My mechanic had to shave a little of the face off at an angle to get that bushing to press in. It was just mushrooming in stock form with a 20 ton press until we decided to shave one side to make somewhat of a funnel shape to get the insertion going. Being careful not to touch the back lip/raised edge of that insertion side to allow that lip to perform its function of holding the bushing on that side against the metal arm edge. If you can figure out how to press them in shout shaving it, please let us all know. My guess is that a newer (and likely more expensive) design may be a two piece affair like I've seen on some other PU bushing designs in images. Mike
__________________
 Mike Dallas, TX & Appleton, WI 2003 E53 4.4i Pearl Beige 2003 E46 330Xi Monaco Blue 2007 E90 335Xi Black Sapphire Metallic 2011 F25 X3 28i Black Sapphire Metallic
|
|
#14
02-25-2017, 09:36 AM
|
||||
|
||||
|
Quote:
The passenger side required a BJ separator AND massive propane torch heat on the arm at the joint to free it up.  Mike
__________________
Mike Dallas, TX & Appleton, WI 2003 E53 4.4i Pearl Beige 2003 E46 330Xi Monaco Blue 2007 E90 335Xi Black Sapphire Metallic 2011 F25 X3 28i Black Sapphire Metallic
|
|
#15
02-25-2017, 09:50 AM
|
||||
|
||||
|
The trick for installing 1 piece poly bushings?
Use a 1/2 x 13 threaded rod/nuts/large washers to "pull" the bushing into the bore (with silicone spray). Pushing them in is like trying to get toothpaste back into the tube!
__________________
'03 X5 4.4 Sport, last of the M62s (8-03 build date) I believe in deadication to craftmanship in a world of mediocrity!
|
|
#16
02-25-2017, 10:00 AM
|
||||
|
||||
|
Quote:
That's a great trick! Mike
__________________
Mike Dallas, TX & Appleton, WI 2003 E53 4.4i Pearl Beige 2003 E46 330Xi Monaco Blue 2007 E90 335Xi Black Sapphire Metallic 2011 F25 X3 28i Black Sapphire Metallic
|
|
#17
02-25-2017, 10:06 AM
|
|||
|
|||
|
Ughhhh. I was hoping that front control arm was an easier job than the rears. Control Arms really wasn't that bad, except I removed a bolt that I should have and had to remove the spring to relieve tension on the drivers rear to get it back in.
__________________
_____________________ 2004 Gray/Gray 3.0 X5
|
|
#18
02-25-2017, 12:16 PM
|
||||
|
||||
|
Here are more of my experiences that I posted in another thread:
Heat in the form of a propane torch on the tension strut at the ball joint combined with my Harbor Freight  popped the arm free from the ball joint. Then removing the ball joint was a real joy as well. Heat around the spindle area surrounding the joint with generous PB Blaster followed by impact extensions and whackings from my BFH persuaded it to release. Thankfully the E12 torx bolts removed easily without damage. (pre-PB Blasting probably helped). Another mega PITA was the ABS wheel sensor. This was totally corroded into the bare steel of the spindle, even though the sensor housing is plastic. I removed the wiring harness from the frame and when the spindle was finally removed was able to back tap it out with a drift punch without damaging the plastic. Cleaned all the joint openings with a wire brush and applied liberal doses of anti-corrosion product for reassembly.    Put a new seal in the differential and waiting for drive shaft and front suspension parts to arrive today. Will battle the driver side tomorrow and maybe a piece of Saturday. Will also change the front diff fluid since the drain plug, I believe, is only accessible with the skid plate out of the way. The skid plate will rotate nicely out of the way to enable the inner CV joint whack to remove from differential by leaving it dangling from one bolt. Then when you want to work on the other side, dangle it from the opposing front corner bolt. Also, completely removing the steering knuckle/spindle from the strut and attaching arms is really a short cut way to get at the bolted in ball joint and probably corroded in ABS sensor. It worked for me. I also use liberal doses of anti-corrosion spray and wire brushing of all the mating surfaces to ease any future disassembly, although I use the "touch it once" standard so that I'm not back in there in my lifetime with the vehicle. Mike
__________________
Mike Dallas, TX & Appleton, WI 2003 E53 4.4i Pearl Beige 2003 E46 330Xi Monaco Blue 2007 E90 335Xi Black Sapphire Metallic 2011 F25 X3 28i Black Sapphire Metallic Last edited by semcoinc; 02-25-2017 at 12:22 PM.
|
|
#19
02-25-2017, 01:13 PM
|
|||
|
|||
|
OMG! Ha ha. Just got back from the alignment place. I was way off on my settings after the rear arms replaced. Anyways, told them to give me an installed quote for those front arms. I wanna see if it's worth it to let them do it or DIY. From the pics, not looking forward on this DIY

__________________
_____________________ 2004 Gray/Gray 3.0 X5
|
|
#20
02-26-2017, 11:07 AM
|
|||
|
|||
|
Every vehicle is different. Most just pop off with no "extreme" measures required. Plan on one weekend, get your tools, clean dry working area, organize your work area, turn on the tunes, snap on the extra work lights and get to work.
__________________
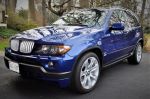 2005 X5 4.8IS The Blue ones are always FASTER.... Current Garage: 2005 X5 4.8is 2002 M5 TiSilver 2003 525iT 1998 528i Former Garage Stable Highlights 2004 325XiT Sport 1973 De Tomaso Pantera, L Model 1970 Dodge Challenger T/A 4 sp Alpine White 1970 Dodge Challenger T/A 4 sp GoManGo Green 1971 Dart Sport, Dart Light package 1969 Road Runner 383 1968 Ply Barracuda 340S FB Sea-foam Green
|
|
| Bookmarks |
|
|
|
|


 Linear Mode


