
|
|
|
|
||||||||||
| Xoutpost server transfer and maintenance is occurring.... |
| Xoutpost is currently undergoing a planned server migration.... stay tuned for new developments.... sincerely, the management |
 |
|
|
LinkBack | Thread Tools | Display Modes |
|
|
|
#1
 07-16-2025, 11:50 AM
|
|||
|
|||
|
nice work!!
__________________
I swear, my cars are like a girlfriend. Sometimes its a rough ride, sometimes its smooth motorin'. Sometimes she doesnt like how i treat her and sometimes i dont like how she behaves. BUT at the end of the day, she loves it when I am inside her. _______________________ '91 850i '05 X5 4.4i '09 Clubman S 
|
|
#2
11-11-2025, 10:28 AM
|
||||
|
||||
|
M62 Rebuild Progress
I've been somewhat stuck trying to find cheaper springs for the 4.4 from my X5 that I'm rebuilding. I'm putting 4.6 cams in in it which have 1.5mm more lift than the 4.4 cams, so the 4.4 springs may cause valve float at higher RPM but the 4.6 springs, while still available from BMW, aren't cheap when multiplied by 32. Therefore I went down a rabbit hole evaluating S62 springs for the motor. The S62 cams have slightly less lift than the M62TUB46 pieces, but I was hopeful they would work since a member on Bimmerforums gave me a set of these springs used. Unfortunately the machine shop i took the heads to determined that they were too close to coil bind for comfort at full compression with the 4.6 cams. In for a penny....as they say. One set of new M62TUB46 springs have been dropped off at the machine shop so he can go ahead with the valve/head job and rebuild, and I can start assembling the bottom end.
I picked up the pistons from the shop and the 1.5 mm extra they took out of each valve relief look great and should ensure the motor doesn't turn into shrapnel, at least from piston/valve interference. 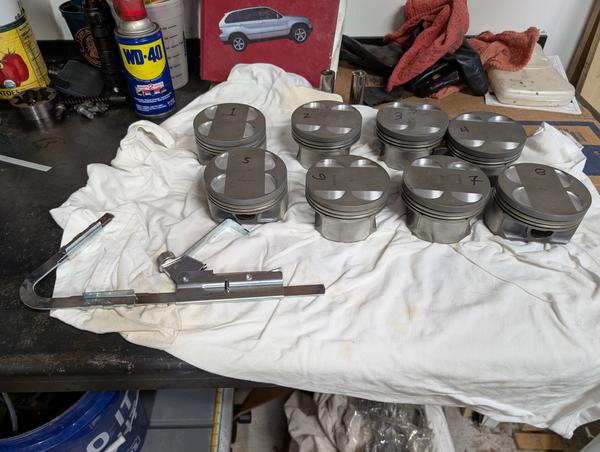 So I spent a few hours a day over the past 3 or 4 continuing to clean the carbon out of the piston ring groves. I had done an initial clean with Chem Dip before taking them to the machine shop, and I elected to stay with Chem Dip now, because I had it on hand and it cleans up very easily with water. No doubt it’s nasty stuff like diesel, carb cleaner, etc., but I didn’t need to use more nasty stuff to clean the pistons each time I dunked them. All told it took 3 baths in the nasty stuff for all of them, with a couple taking a 4th swim. 4 hrs is the single-dip limit for aluminum parts, according to the can and I would limit the pistons to an hour or two each time. Three at a time fit in the basket and I’d make note of the order number as they went in. The chem dip would strip the sharpie number on top and often the paint pen number I put on the inside too. what was left after the second dip: 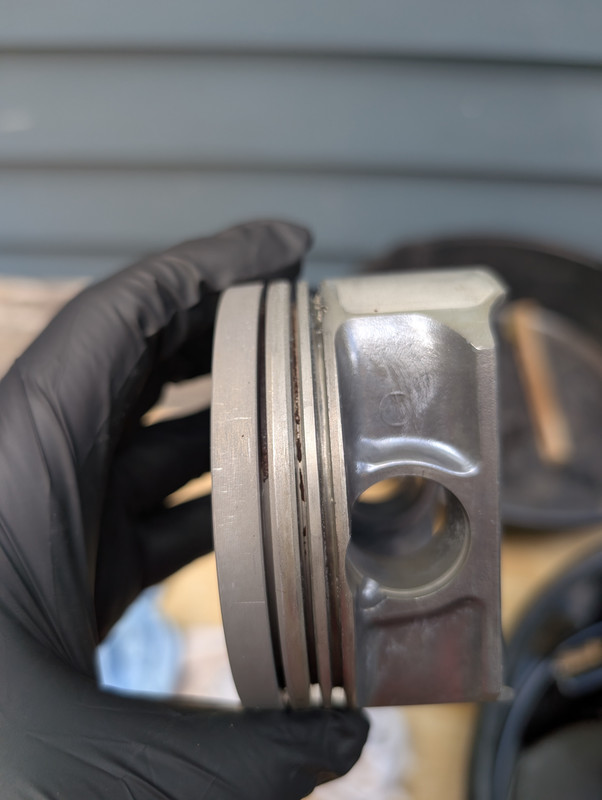 and after the last (usually 4th) dip: 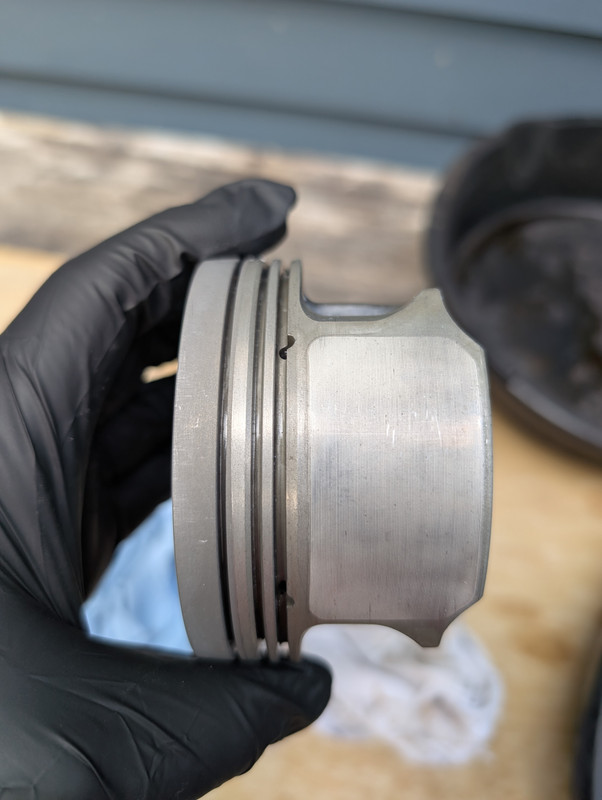 everyone in the pool: 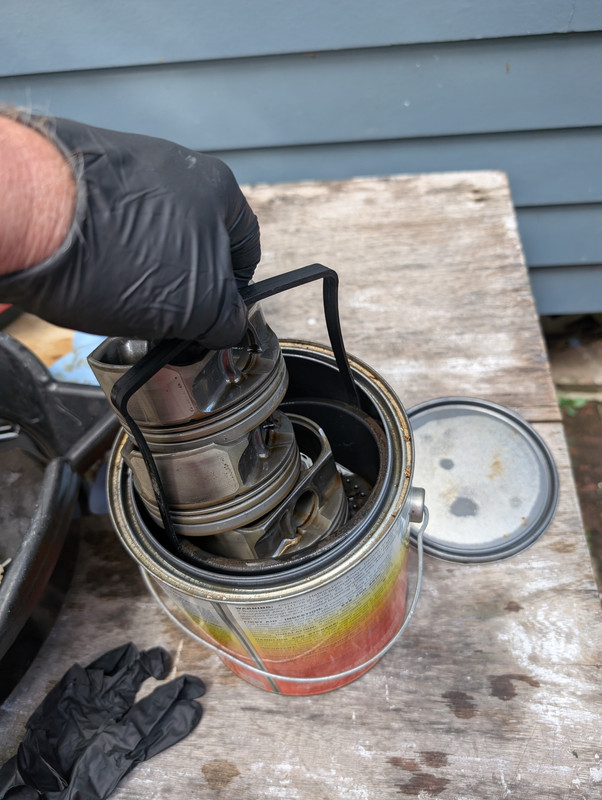 The cutting edge of the tool I bought for the job (because I wasn’t smart enough to hang on to an old ring) 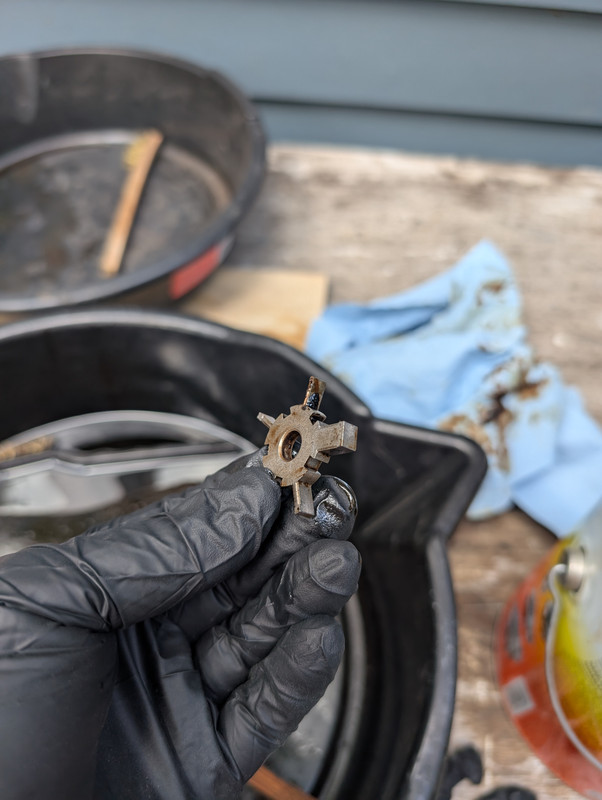 The tool was worthless when assembled, but the edge insert worked well after each dunk. Basically I’d put it in the groove with a bit of pressure and spin the piston against the beveled (cutting) edge on the tool insert. They are free of carbon finally, but in truth they look like old pistons. Some wear on the skirt coatings and occasional very light surface scratches. They are getting used regardless as new pistons seem like a silly expense for a motor that isn’t going to be anything earth shattering. I have got to think they will seal better now than they did at 150k, with all that carbon under the rings and on the tops. As mentioned, keeping them in order was a pain as the numbers dissolved in the chem dip, so I made sure to write down each time the order they were stacked in the can, and reapply a sharpie number on top as soon as the rinse water dried. There is a greater than zero chance that I mixed up pistons 8 and 6 though so we will see just how serious BMW is about keeping all the rods, pins and pistons together in their OE positions. 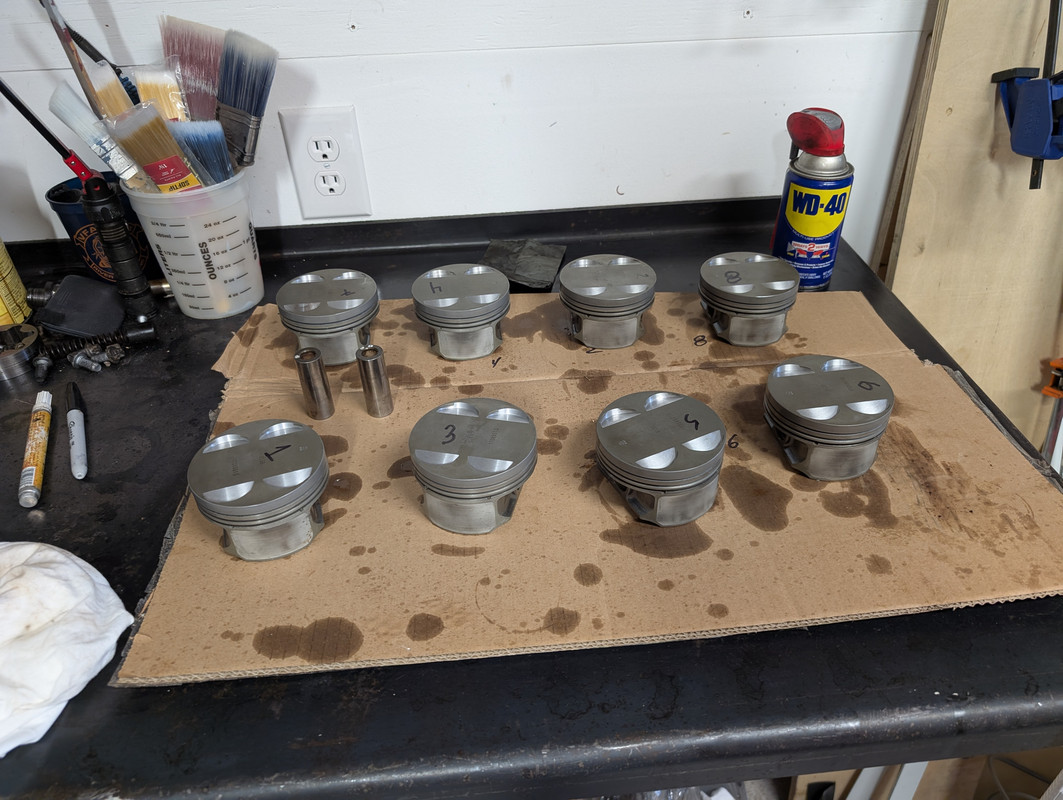 a spray with WD40 to help drive out any excess water and they are ready for the new rings and to be reunited with the rods - maybe tomorrow after I remind myself of the particulars of the job in TIS.
__________________
Current Original owner 2002 E53 X5 4.4i to 4.6i swap 2026 G80 M3 6 spd 2025 G06 X5 50e Former 1972 Audi Fox 1986 Saab 900S 1996 BMW Z3 1998 BMW E36 M3 Sedan 2004 BMW E46 M3 2006 Audi A3 Quatro 1993 Mopar 318 Jeep Grand Cherokee 2015 V6 Jeep Grand Cherokee
|
|
#3
11-11-2025, 10:41 AM
|
||||
|
||||
|
Pistons - part deux
With the pistons cleaned and all the parts on hand, I didn’t have any more excuses to put off beginning the assembly of the motor in earnest. So I cleaned my small shop for most of the day instead. In fairness, it was a pig sty and needed it.
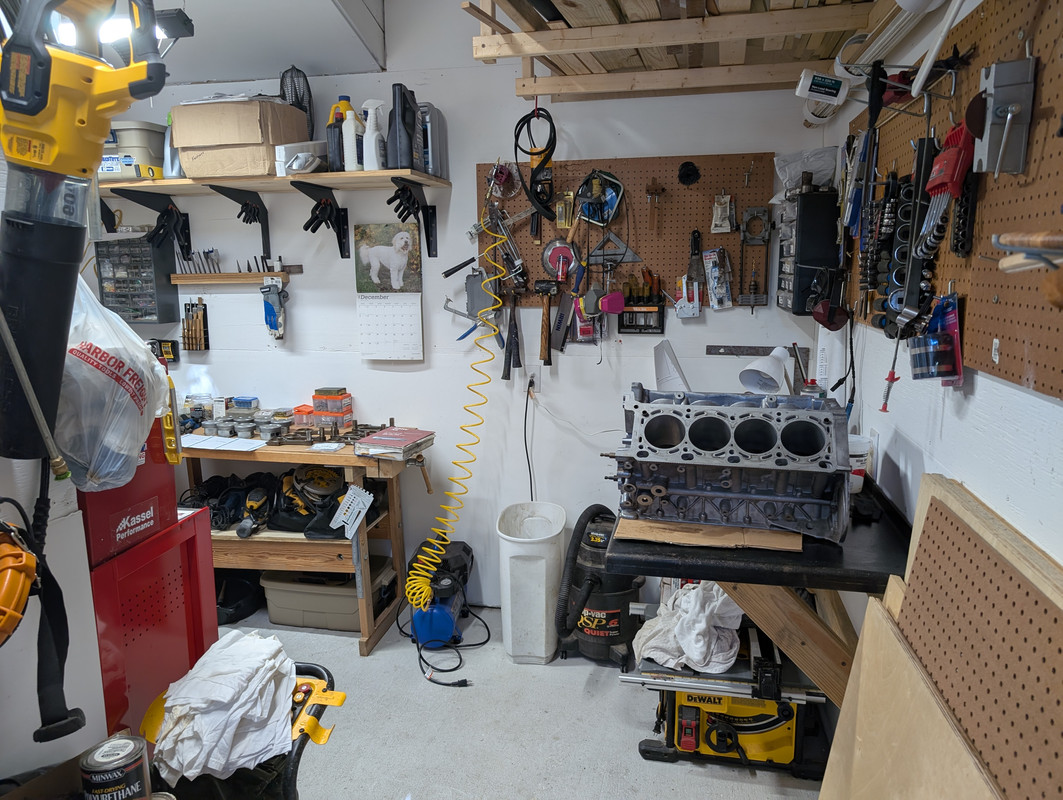 After spending some time with TIS, I organized all the parts I need to reassemble the pistons with new rings and pin retaining clips. 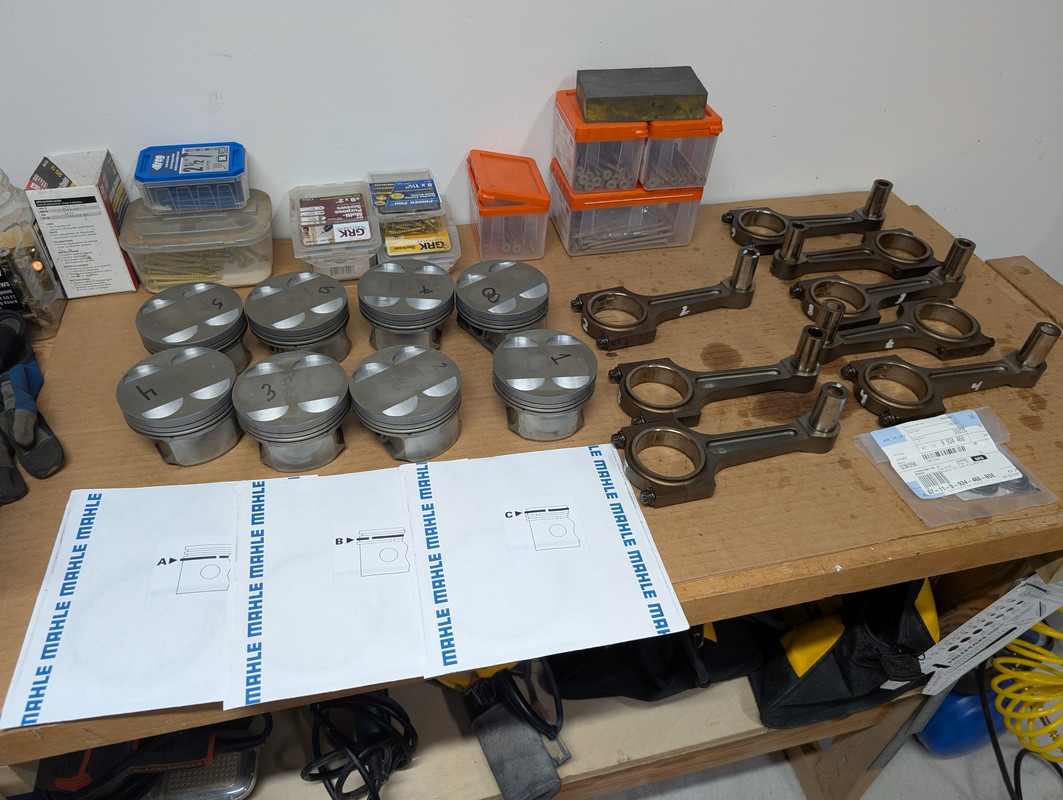 The rings come from Mahle three to a box and each package happily tells you which ring it contains. The bottom oil scrapper ring is a three piece without a top or bottom, the middle ring has a profile and has “top” etched on it, and the topmost ring seems symmetrical, doesn’t have “top” etched on it but does have the Mahle symbol on one side, so that’s the side I put facing up. TIS calls for specific end and axial gaps on all 3, so I bought a cheap feeler gauge and ring tool on Amazon. 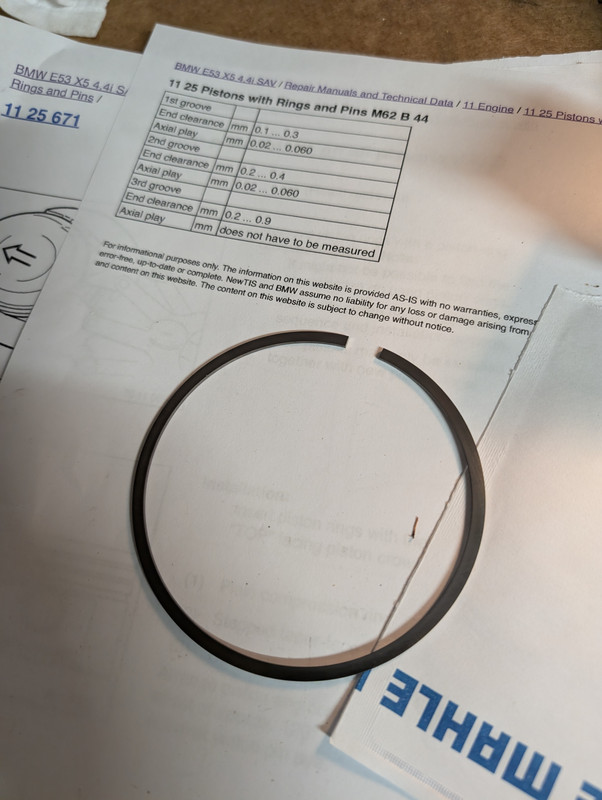 First I labled the ring packages with the cylinder number they were destined for. Then after oiling the bore and ring lightly with motor oil, I placed worked it into the top of the bore and used the tool to press it down a precise amount. The idea is to not have it askew in the bore or the gap will be off. 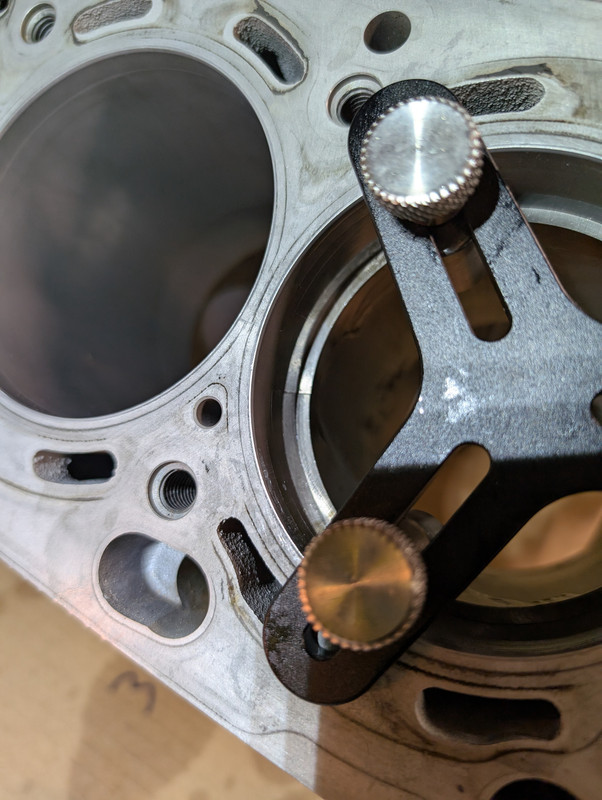 Then I would measure the gap with the feeler starting with the small end of the range given (ie .2mm) and then the largest. If the largest didn’t fit I knew we were within tolerance. I only found one on the tight side (within.05mm of the lower limit) so I used the other cheap Amazon tool I bought to sand a .05 mm off of it. It only took a few passes to get it to .2 mm. 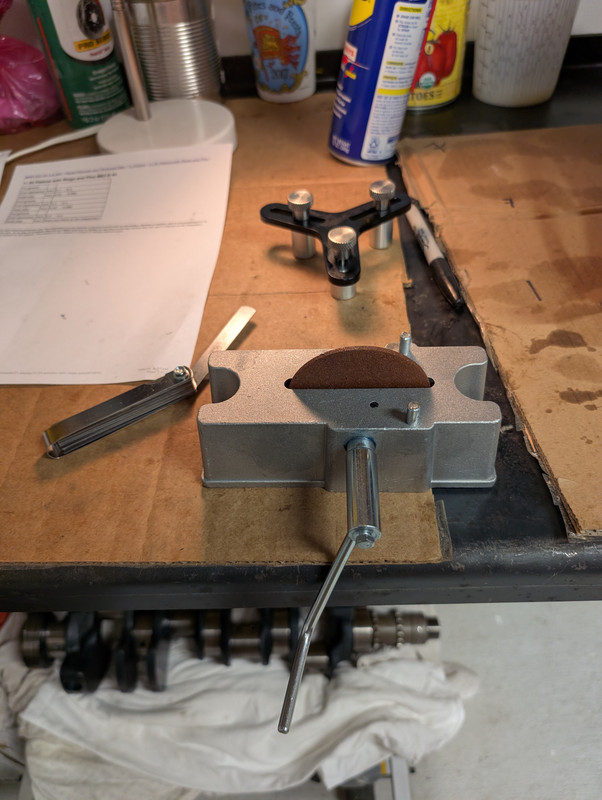 I checked the gap in all the rings, but probably didn't have to. One was a bit tight, but within spec, and all the others were well within spec. Thanks Mahle!. After measuring them all assembly was pretty straightforward. Oil the ring grooves with engine oil: 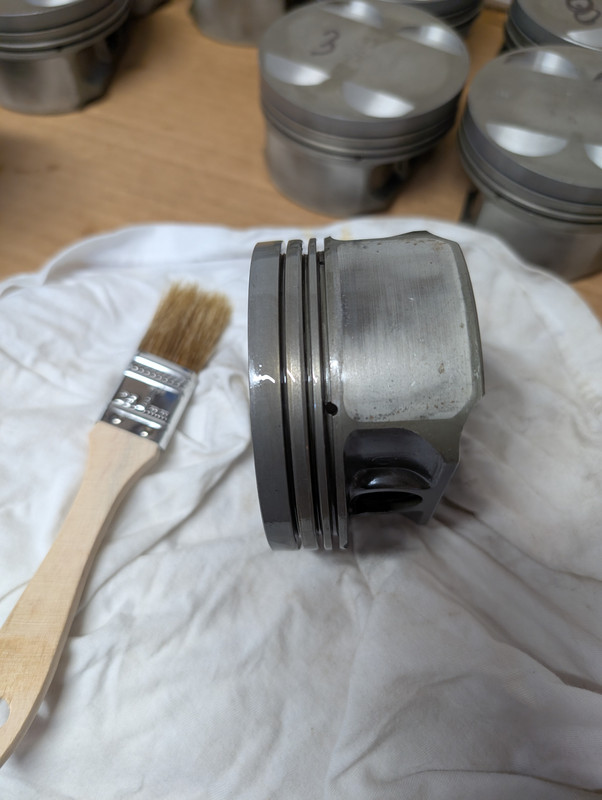 install the rings, starting with the oil scraper (bottom) ring assembly, then the top two working bottom to top. A ring spreader was handy for the upper rings. I separated the oil scraper ring gaps by 10 orm15 degrees and will “clo 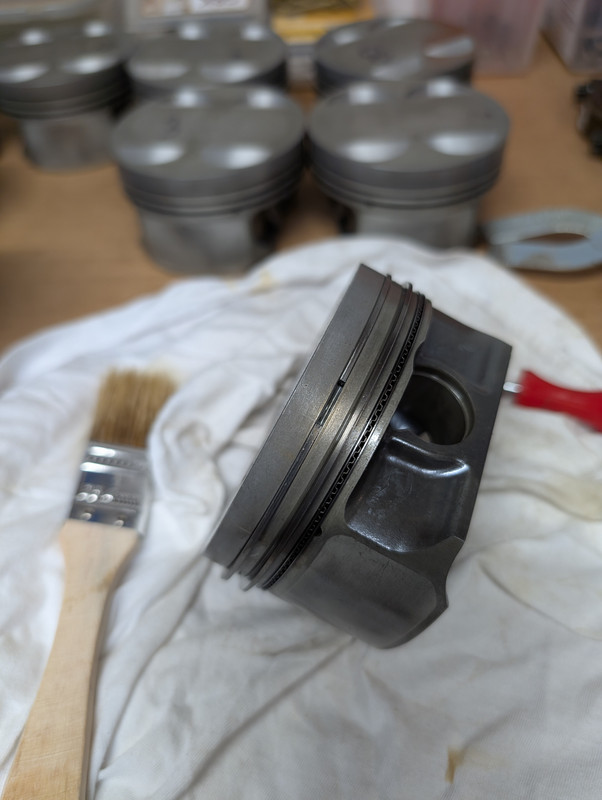 ck” all the ring gaps 120 degrees when I install the pistons. ck” all the ring gaps 120 degrees when I install the pistons.TIS wasn’t too helpful at first with rod orientation, but after looking over some pics of the rod bottoms during disassembly, it did make sense. The rod bottoms have some numbers etched in them biased to the "front" (right side) of the rod. This allows you to match the forward side of the rod to the "forward" arrow on the top of the piston for assembly. Unlike the N62 rods, the M62 rods seem perfectly symmetrical at the bottom, but direction must matter somehow. Below you can see the “y84” on the right side of the rod bottom, which matches to the piston-top arrow facing right during assembly. I also put a sharpie arrow on each rod facing forward during disassembly, but had forgotten this. 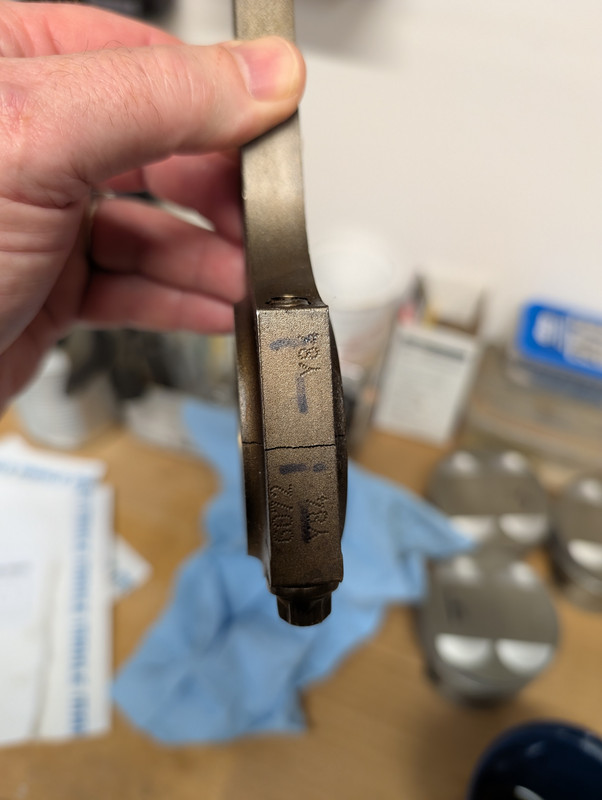 Pins, rod and piston bushings all got a light coat of oil and the pins slid in nicely. TIS emphasizes that no force should be used or needed to to get the wrist pins in. New snap rings went in to finish the assembly. 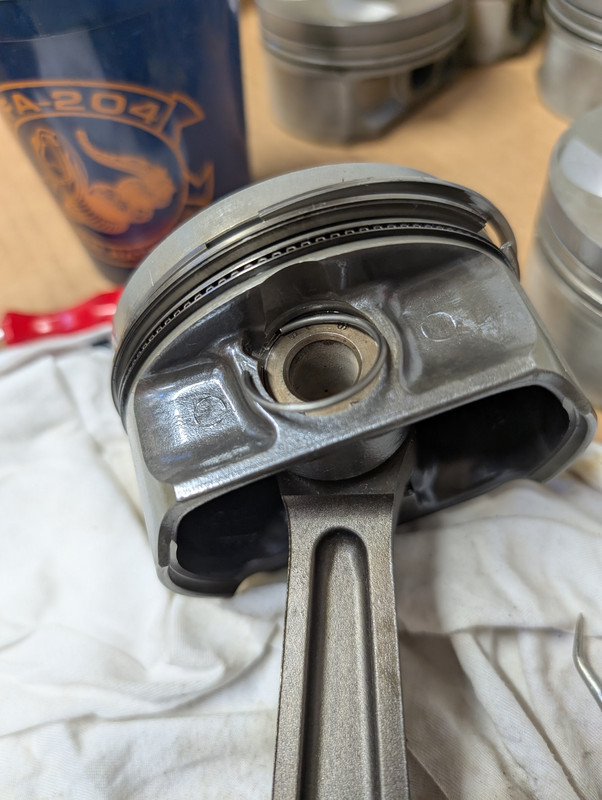 Two done, six to go. 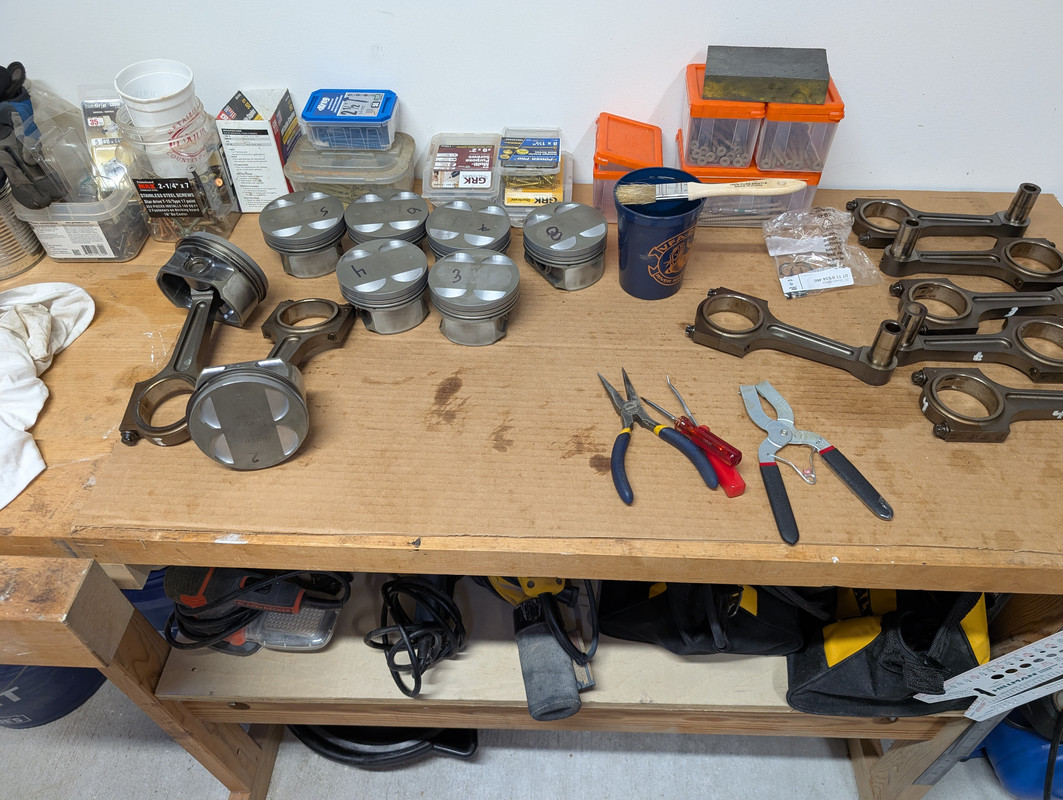 I’ll pull the rod caps off when get to stuffing them in the block but I don’t want to risk mixing them up since each cap is "snapped" off the rod after the rod is manufactured. This creates a unique mating surface which doesn't allow for swapping caps and rods. Theoretically I’m also supposed to plastiguage the new version rod bearings using the old bolts, so I didn’t want to loose them.
__________________
Current Original owner 2002 E53 X5 4.4i to 4.6i swap 2026 G80 M3 6 spd 2025 G06 X5 50e Former 1972 Audi Fox 1986 Saab 900S 1996 BMW Z3 1998 BMW E36 M3 Sedan 2004 BMW E46 M3 2006 Audi A3 Quatro 1993 Mopar 318 Jeep Grand Cherokee 2015 V6 Jeep Grand Cherokee
|
|
#4
11-11-2025, 10:50 AM
|
||||
|
||||
|
Cleaning up the block
The block is amazingly light and could weigh less than the crank.
With the pistons assembled, I cleaned the deck of the traces of head gasket where I could feel it when I dragged a fingernail over it. Interestingly bank 1-4 started out with significantly less old material around the water and oil passages than 5-8. I used 1200ish wet/dry sandpaper with wd40 to lubricate the decks. Lots of grime left on the surfaces which I'll clean off with a good spray down with cleaner. 1-4 after working it over: 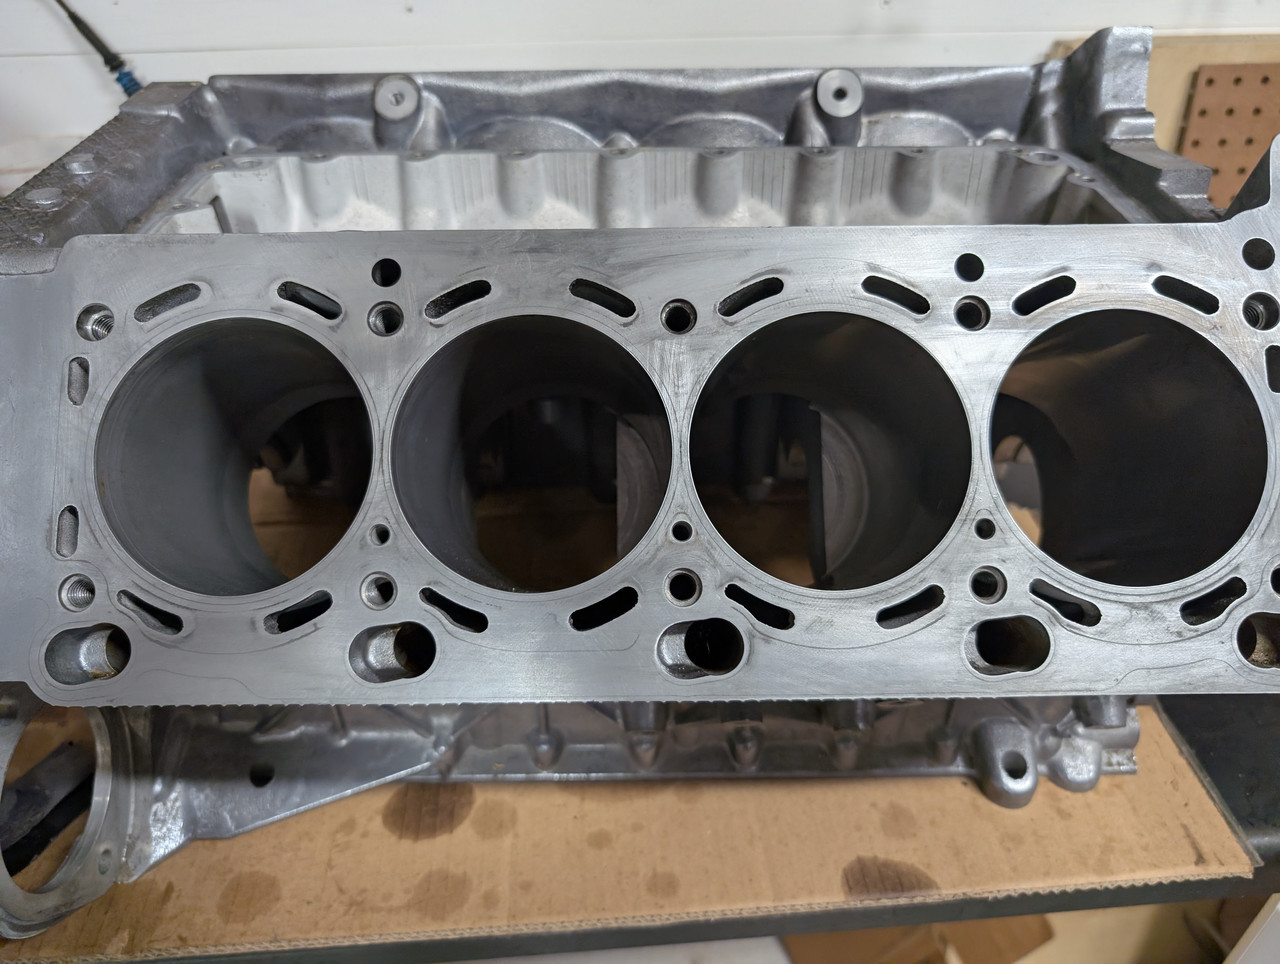 and 5-8 during the process. I ended up using some Permatex gasket cleaner on this side which helped get the last bits off. 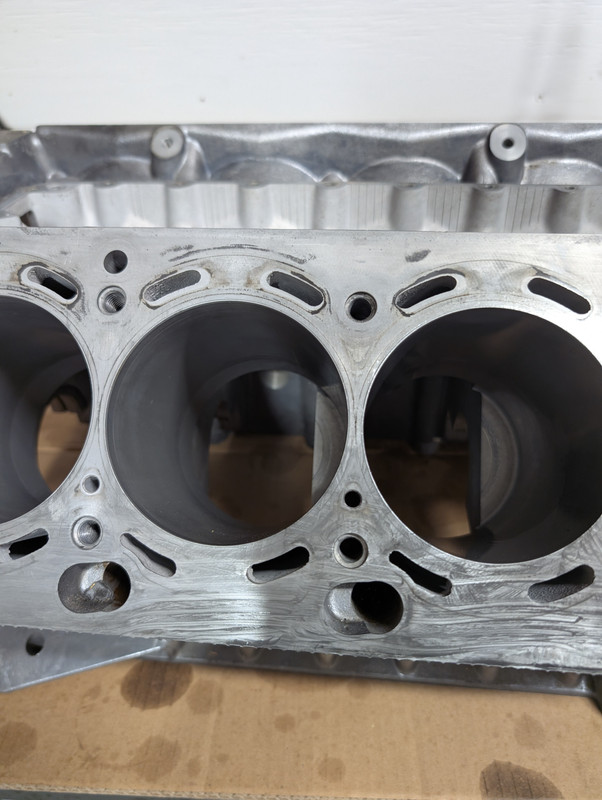 I also cleaned the mating surface for the coolant gallery cover and the rear main seal assembly on the back of the block with Permatex Gasket cleaner and a very gentle scraper to get the 20 year old paper gasket remains off. The block has several of these very small hex head plugs scattered around the bottom. I assumed they are drain plugs (in addition to the two large plugs on either side) so I pulled several that came out easily (several, like below, didn’t budge so I left them in rather than strip the hex head). My plan is to reinstall them with a little blue loctite to ensure a good seal after I do a final cleaning of the block with brake cleaner, once I size all the rings. 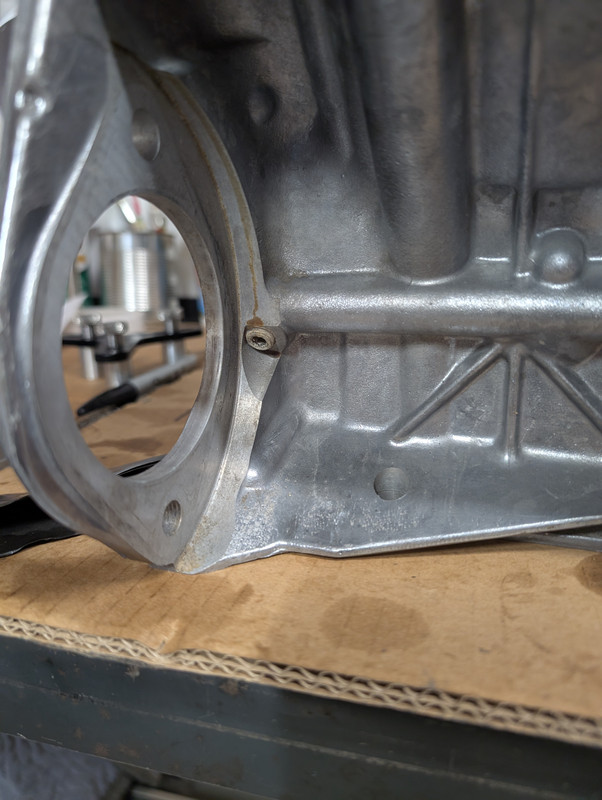 ****update*** I traced the fluid path leading to these small plugs and they are plugs in oil passages which lead to the oil squirters under the pistons. The oil flows under the valley in a tube cast into the block to the back where it hits a spring valve. I assume this keeps the oil in the head until it warms up, then the valve opens up and allows oil to flow down into the squirter circuits on each bank after which it simply falls into the pan below.
__________________
Current Original owner 2002 E53 X5 4.4i to 4.6i swap 2026 G80 M3 6 spd 2025 G06 X5 50e Former 1972 Audi Fox 1986 Saab 900S 1996 BMW Z3 1998 BMW E36 M3 Sedan 2004 BMW E46 M3 2006 Audi A3 Quatro 1993 Mopar 318 Jeep Grand Cherokee 2015 V6 Jeep Grand Cherokee
|
|
#5
11-12-2025, 07:55 PM
|
|||
|
|||
|
Nice work!
Will the 4.6 cams on the 4.4 need a tune? I didnt know these motors have cracked connecting rods. Interesting on the ring deposits, are the M62's prone to them? I was thinking of trying Valvoline Restore and Protect just because there is a lot of evidence they clean so well. No oil consumption on the 4.6 and it was spotless under the valve cover last time the gaskets was done though.
__________________
04 X5 3.0i auto 03 X5 4.6is
|
|
#6
11-13-2025, 11:59 AM
|
||||
|
||||
|
Quote:
I'd like to find a place that can run it on a test stand to break it in and make sure it doesn't come apart in some way due to shoddy workmanship. And since I'm leaning towards building my first track car around it, they could ideally develop a tune for it. I'm guessing it will make 310 to 320 HP-ish with the 4.6 cams in it, but that is just a guess. Partee Racing in Virginia specializes in the S62 and has a test stand set up for that motor, which should use the same bell housing as the M62 (I think). They do S62 tuning so I suspect the M62 wouldn't be a stretch for them. It's tough to say when and why all the carbon came from, nor how much it was affecting the compression on each cylinder, or if my M62 build up was unusual at 155k when it came out of the X5. After the heads were replaced under warranty at 20k miles,, the motor never burnt much oil at all until very late in its tenure in my E53 when I also think it began loosing compression on 4, 6 and 8. These 3 cylinders were sitting at 160ish PSI, while the other 5 were at or above 175ish. The carbon was pretty uniformly deposited across all 8 though - heavy on the tops and ring groves. The heads and valves however, looked pretty good. As far as the rods go, I think they are sintered which makes a strong rod and is good for mass production, but my machine shop said that cracking the caps off is done just to save money and mass produce them. The videos on line of rod caps being cracked off are pretty cool to watch.
__________________
Current Original owner 2002 E53 X5 4.4i to 4.6i swap 2026 G80 M3 6 spd 2025 G06 X5 50e Former 1972 Audi Fox 1986 Saab 900S 1996 BMW Z3 1998 BMW E36 M3 Sedan 2004 BMW E46 M3 2006 Audi A3 Quatro 1993 Mopar 318 Jeep Grand Cherokee 2015 V6 Jeep Grand Cherokee
|
|
#7
11-14-2025, 05:01 AM
|
|||
|
|||
|
Quote:
It would be cool to see how much the 4.4 with 4.6 cams and DME puts out. A 4.4is badge on the side wouldnt be out of place I think. Sorry to hear of the bearing parts holdup, hope they come in fast.
__________________
04 X5 3.0i auto 03 X5 4.6is
|
|
#8
11-13-2025, 12:04 PM
|
||||
|
||||
|
Bearing shell confusion
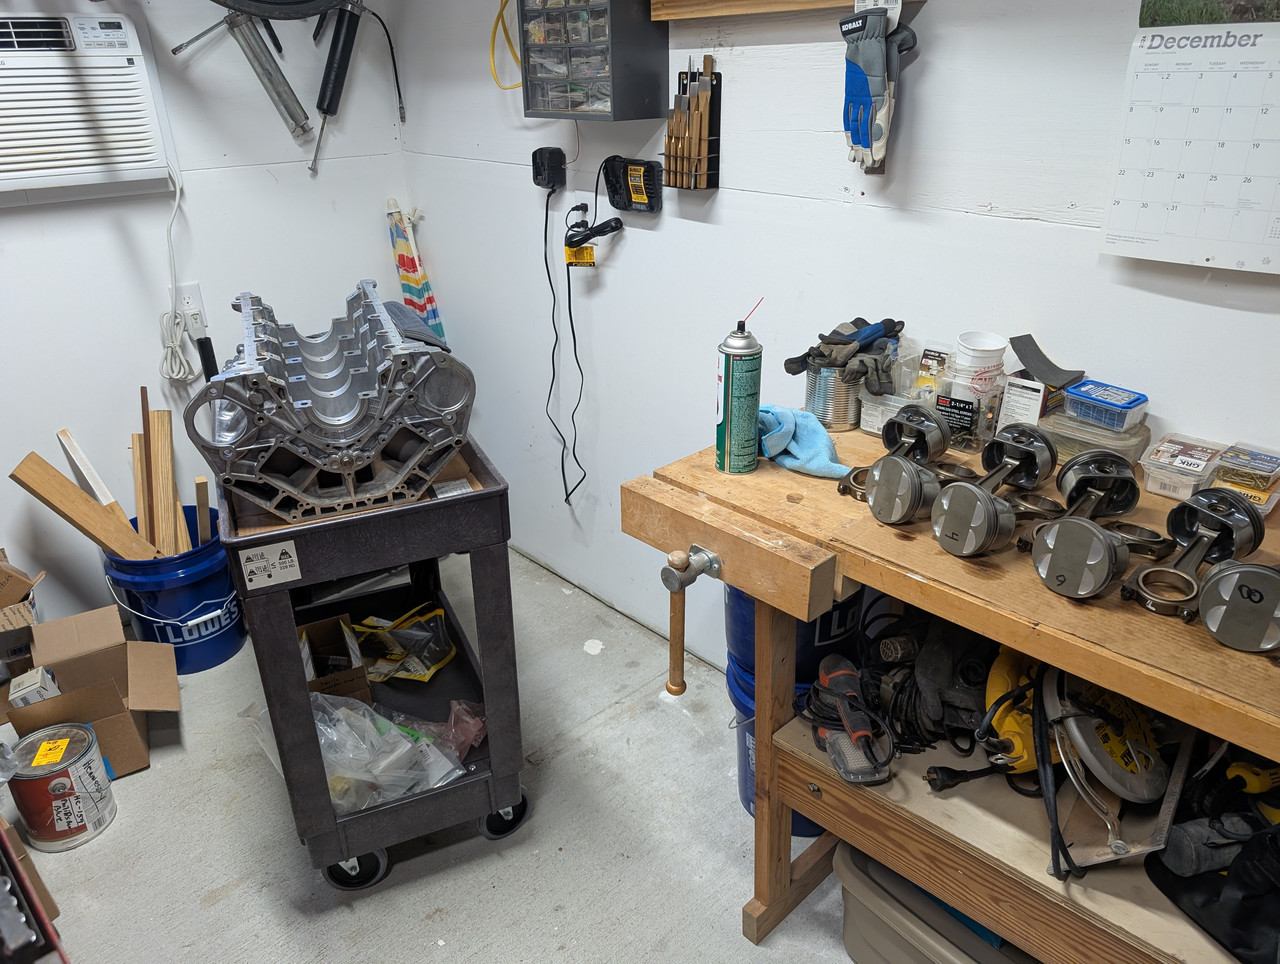
With the block ready to go, I decided to build it up in my shop, then move it over to the garage I belong to, where it will live until I find a suitable car to graft it into. My solution to a workbench that I could also roll it out amd load into to my X5 eventually is as follows…cheap but effective:
 First up is the small oil valve in the back of the block. I can’t find mention of it in TIS anywhere, so I torqued it like an oil drain plug 18 ish ftlbs. 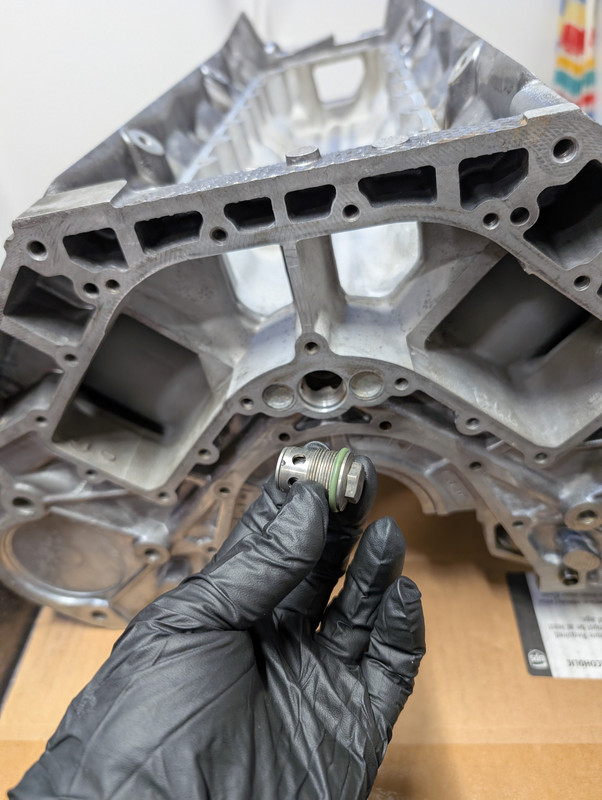 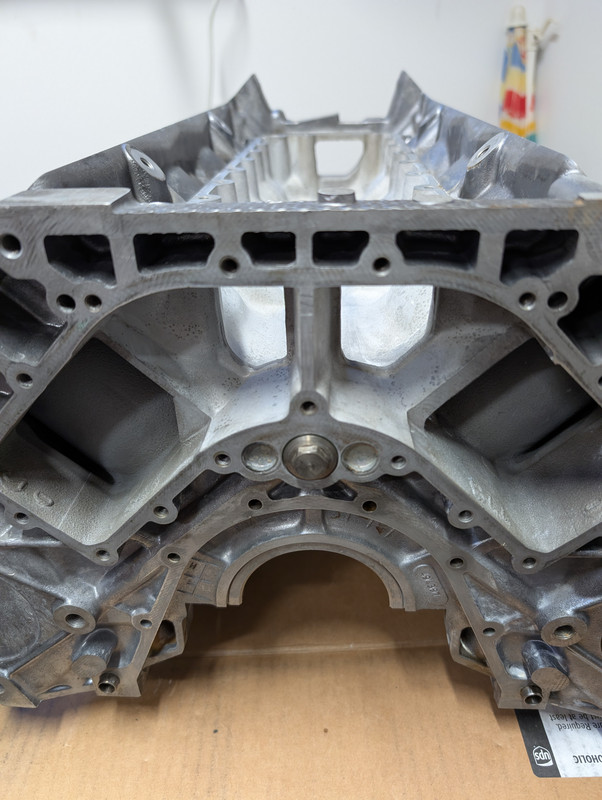 Then it’s getting down to the business of installing bearing shells and after taking a look at my collection of crank shells, I realize I have too many cap shells, and no crankcase side (grooved) shells. Clearly I screwed up the part numbers when I ordered them, but this gives me an opportunity to take stock of the crazy color coded bearing system BMW uses and what I need. That’s when the wheels fell off my bus. Up until this point I thought I had this all sorted out , thanks to some great help from forum members, but after looking at TIS, my notes and pics from disassembly, and RealOEM, and the old bearing shells that I kept, I’m quite confused. 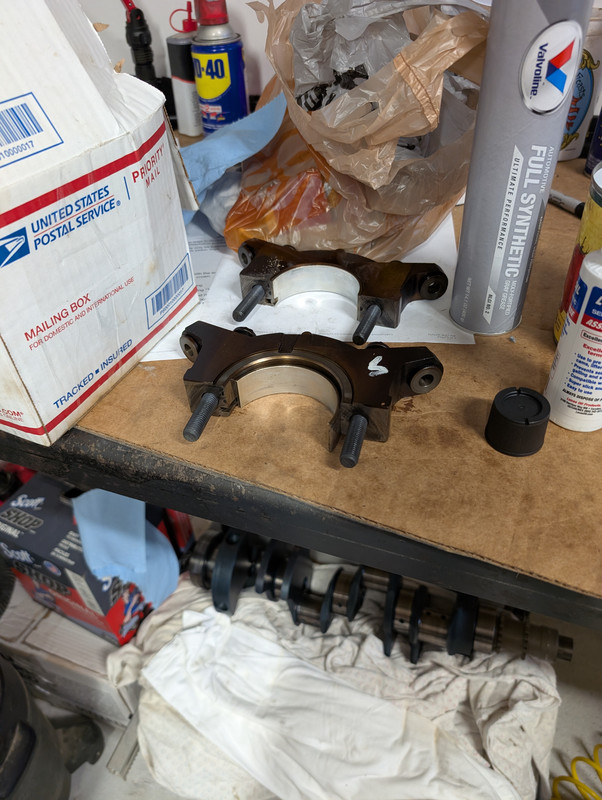 The shells come in three sizes (.25mm increments) to account for cranks that have been machined and each of those three sizes has three color options (yellow, green and white). Since I measured my crank I know it has virtually zero wear so I’ll need OE sized shells (70mm). TIS says the block gets 5 yellow shells of the appropriate size (70mm for me) so that’s easy, and the caps get shells of the appropriate size (70mm) and color. The color is denoted by a dot on the crank, next to the journal it corresponds to. In my case: journal 1 = Yellow journal 2 = green journal 3 = green journal 4 = yellow journal 5 = TBD (no legible color dot here so my plan was to use a yellow shell since I mic’d the crank and all journals were 70mm (OE) spec. I also planned to plastiguage this journal, per TIS just to be sure I shouldn’t use a different color) So I think I’ve got it suitcased and go to find in TIS and write down shell part numbers (there are 24 separate part numbers for top and bottom shells to account for sizes and colors) and decide just as a backup I’ll see if the old cap shells I left in caps have numbers on them. In fact they do, when is when I lost all SA. The number stamped in the back of the shell includes all three possible color combos… In the case above (bearing 5 cap) the number has the last three digits for yellow, green and white stamped into it. In this case “…908, 909, 910). I thought maybe there is a little tic mark next to the actual color of the shell, but I don’t see one. So obviously the size matters, but does any of this color crap matter? 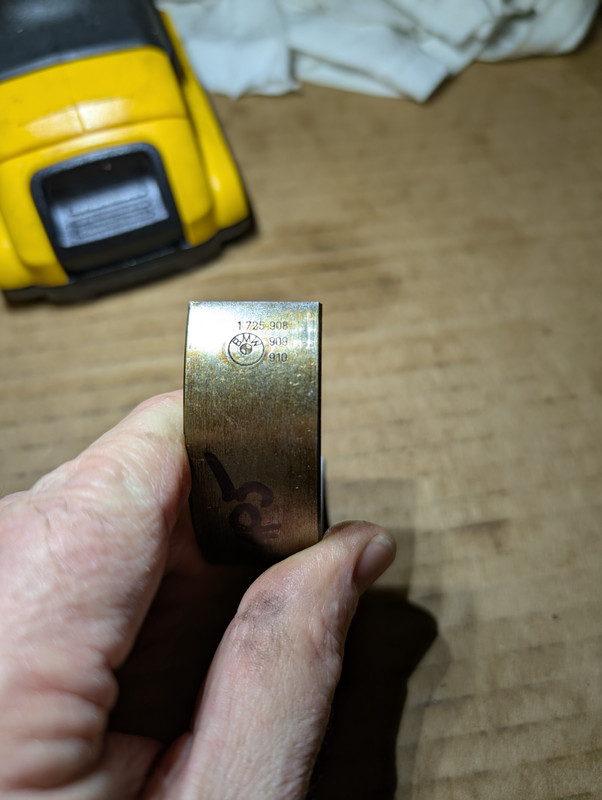 So I ordered the five yellow block side shells (the ones with the oil grooves) in the OE (70mm) size that I somehow screwed up months ago in my original order, but I expect all three color part numbers will be stamped on the back. These shouldn’t matter as much though since TIS says to use all yellow shells in the block. I guess I’ll use the cap shells I have on hand and revert back to using plastiguage to check the clearance. Happily I saved the original bolts. perhaps when the M62 first came out the colors denoted a very, very small difference in shell size to accommodate slight crank differences. However bmw found that as they transitioned to very lightweight oils for fuel economy, it simply didn’t matter any more so they did away with the color scheme in practice (but not in TIS or part numbers! ). who knows. Since I hung on to the original crank bearing bolts I may plastiguage them all, just to be sure I’m in spec. So I’m at a standstill until my 5 shells for the block side come in.
__________________
Current Original owner 2002 E53 X5 4.4i to 4.6i swap 2026 G80 M3 6 spd 2025 G06 X5 50e Former 1972 Audi Fox 1986 Saab 900S 1996 BMW Z3 1998 BMW E36 M3 Sedan 2004 BMW E46 M3 2006 Audi A3 Quatro 1993 Mopar 318 Jeep Grand Cherokee 2015 V6 Jeep Grand Cherokee
|
|
#9
12-01-2025, 03:21 PM
|
||||
|
||||
|
My bearing shells arrived before the holiday and the crank is finally in.
I followed TIS, and also watched a great N62 build video on YouTube. Slightly different motors, but an almost identical bottom end build. TIS is a godsend, but it does have some pretty big holes at some points. Given that I have the OE “colors” for each crank journal except for 5, and I had the crank mic’d by the shop that polished and cleaned it I am very sure of the shells to use for 1 through 4. I thought about plastiguaging bearing 5, per TIS, but since that journal mic’d at OE specs too, I decide the “base” yellow shell would work on that cap and if for some reason the motor spun a bearing, I will know where to look first! I also put a micrometer on the OE bearing 5 shell and a new yellow one and they read identical to my eye. 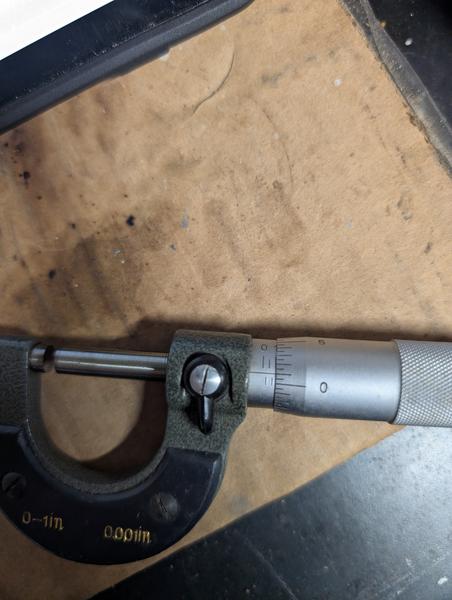 So after consulting my notes I installed the correct color shell in each cap, and a yellow one in cap 5. Recall that the block gets 5 yellow shells, per TIS. The block shells have an oil groove and the cap shells are smooth. Install is easy with the retaining groove and tab in the shells. 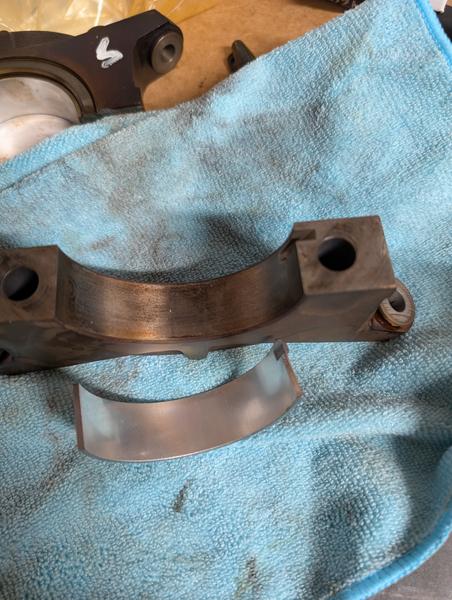 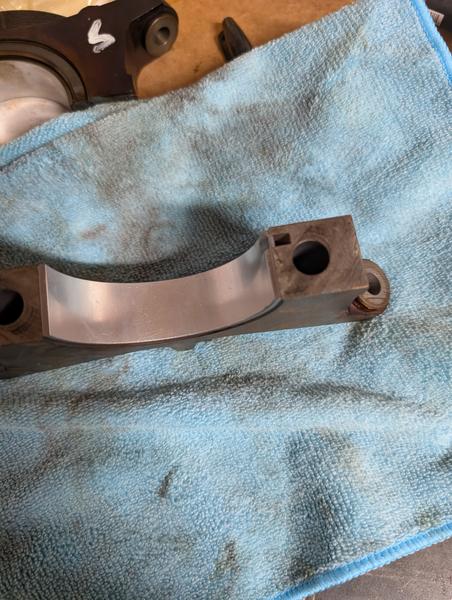 Next up, each cap was installed with a cost of assembly lube on both sides and the oil groves/notches on the same side of the motor (block and cap). I verified this alignment too with some photos I took during disassembly. The adjustable threaded spacers must be backed down to where they touch the cap, before assembly. The pic below shows its OE position in the motor at disassembly: 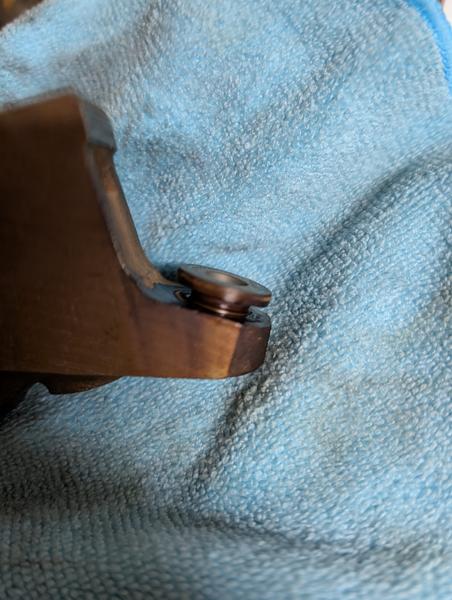 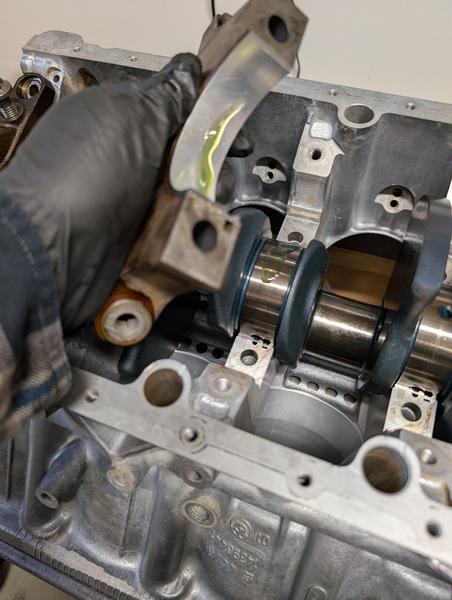 Bearing 5 has 4 thrust washers that keep the axial play within limits, two in the block and two on the cap. The block washers can get fed into the groves after the crank is in (with a bit of lube) and the cap washers are held in place by tabs that fit into groves in the caps. Critically, the washer halves have lubrication grooves in their faces that must face the crank, not the cap or block. You can make out the silver locating tabs on on ether side of the block 5 cap below: 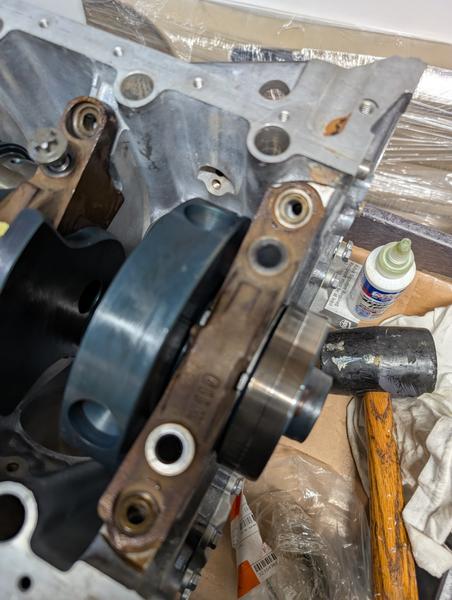 Once all the caps were in I installed new OE BMW main bearing bolts. The caps needed a bit of finagling fore and aft to get the bolts to screw in smoothly. 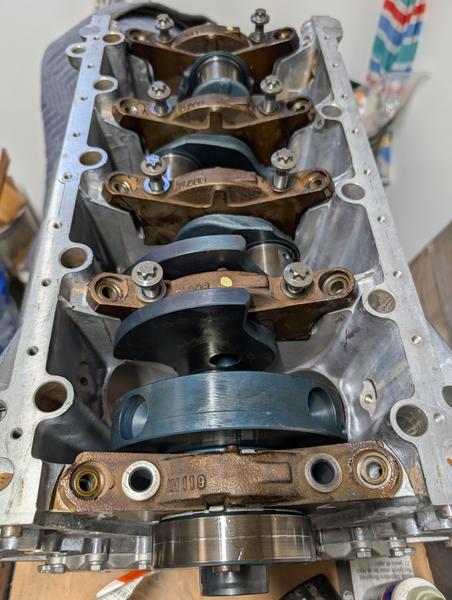 Torquing is a several step process….20 NM of joining torque on each; then back bearing 5 bolts off until loose and tap on both ends of the crank with a rubber mallet to help set the axial position and thrust washers; then re- torque 5 to 20 NM. Finally the (M11) bolts get another 100 degrees of tightening each. My guess is it ends up being a couple hundred ft/lbs: 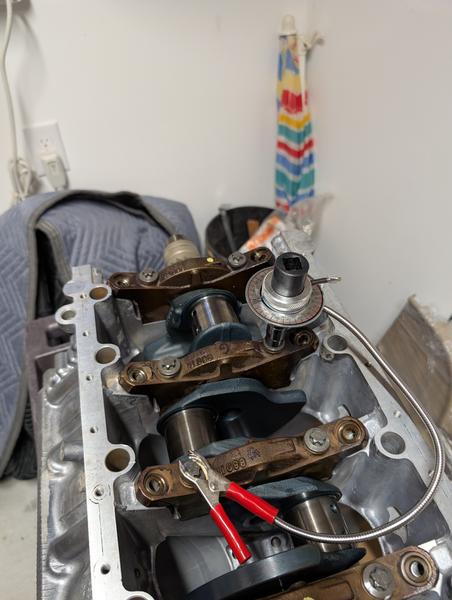 Finally the threaded sleeves in the caps get tightened against the block to 20 NM with a hex head, and finally the collar screws go in over them and are joined at 20 NM and then get another 45 degrees. 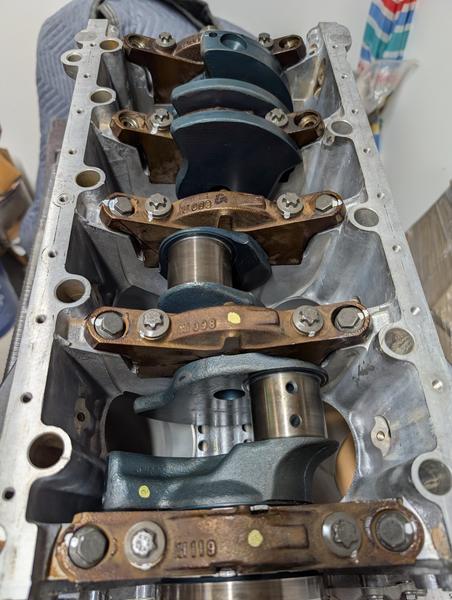 Real OEM says there are 10 of these screws, two per cap. It’s actually only 7 since caps 1 and 2 actually get 3 threaded screws with spacers and threaded studs on the end of them, between these two caps, to mount the oil pump too. Torque is the same as the screws. I still need to out these in. The crank is tight, but turns smoothly - so I’ve got that going for me at least. Next up is to install a new oil pump and temporarily put the upper oil pan cover on to protect the whole thing. Then I’ve got to buy a motor stand to make getting the pistons in easier.
__________________
Current Original owner 2002 E53 X5 4.4i to 4.6i swap 2026 G80 M3 6 spd 2025 G06 X5 50e Former 1972 Audi Fox 1986 Saab 900S 1996 BMW Z3 1998 BMW E36 M3 Sedan 2004 BMW E46 M3 2006 Audi A3 Quatro 1993 Mopar 318 Jeep Grand Cherokee 2015 V6 Jeep Grand Cherokee Last edited by Henn28; 12-01-2025 at 03:37 PM.
|
|
| Bookmarks |
| Thread Tools | |
| Display Modes | |
|
|
|
|





 Hybrid Mode


