
|
|
|
|
||||||||||
| Xoutpost server transfer and maintenance is occurring.... |
| Xoutpost is currently undergoing a planned server migration.... stay tuned for new developments.... sincerely, the management |
 |
|
|
LinkBack | Thread Tools | Display Modes |
|
#311
 01-26-2025, 11:22 AM
|
||||
|
||||
|
Quote:
I had no idea you could put those things on upside down! Did you drive it that way, or did you catch it before driving it? As far as not worrying, I’m not sure it ever stops. Even after 20k on some of these parts I rebuilt, I still hear every squeak, knock and other noise and wonder if it is the diff, xfer case, motor, etc. coming apart. It’s funny how I never thought twice about this stuff when I had/have a shop do the work.
__________________
Current Original owner 2002 E53 X5 4.4i to 4.6i swap 2026 G80 M3 6 spd 2025 G06 X5 50e Former 1972 Audi Fox 1986 Saab 900S 1996 BMW Z3 1998 BMW E36 M3 Sedan 2004 BMW E46 M3 2006 Audi A3 Quatro 1993 Mopar 318 Jeep Grand Cherokee 2015 V6 Jeep Grand Cherokee Last edited by Henn28; 01-26-2025 at 11:27 AM. 
|
| Sponsored Links | |
|
|
|
|
#312
01-26-2025, 05:47 PM
|
|||
|
|||
|
I didn't drive it, but did roll it around in the garage. It could have driven, sort of. The steering wasn't going full lock. Something was up but I wasn't sure. A few days later I eventually noticed the nick mark on the control arm where it was contacting the tie rod. The ball joint end goes downward through the knuckle, not up.
 300 miles in and I think it's okay. I put a spec twin disc on this one for some reason, not many options. It's chattering like crazy out of first still. I think I've had two smooth starts. Not sure how this is going to go. I previously had the 550 clutch which was very nice but it didn't last and wouldn't hold the e50 tune. This was supposedly the best option. I might be 0/2 with aftermarket clutches. The uuc one on e53 is nice but I cannot avoid smelling it, especially reverse. I don't think it is going to last either.
__________________
'05 E53 3.0 6mt '17 F30 340ix 6mt '96 E36 328is, in progress
|
|
#313
02-07-2025, 10:36 AM
|
||||
|
||||
|
Busy work on the E53
I decided to buy a new oil pump for the 4.4 rebuild, which arrived from Getbmwparts last week. I have a gently used E53 version of the M62 oil pump I'm happy to contribute to someone's cause, if needed. The AWD and RWD pumps are different. Also coming in was 8 sets of new M64TUB44 Mahle piston rings that I grabbed from FCP as they popped up on clearance. At this point I have everything I need on hand to rebuild the bottom end of the 4.4, except two of the 4 thrust washers needed for main bearing 5, and the bottom end of the 4.4! Its at the shop still with the crank getting cleaned up. Hopefully this or next week it will be ready. He did mic it and find one cylinder slightly beyond tolerance (oval), but I'm going to rebuild it anyway and see how it comes out. The guy said to me that he wouldn't have thought twice about the measurement or even have told me it if I hadn't given him the specs. Hopefully new rings will make a good seal.
I had some time off this week so decided to tackle a few maintenance items I'd been putting off because they involve coolant, power steering fluid, and messes generally. My X still has the OE steering pump reservoir in it and I figure the filter in the bottom of the reservoir was long gone. The pump was a "rebuild" rock auto LUK pump I decided to use during the swap because it was dirt cheap and not a terrible job if it only lasted a couple years. I've also been getting a "check coolant level" warning intermittently that seemed to indicate the sensor in the bottom of the tank was going bad. The tank is only a year or two old, but I reused the OE sensor when I did that job. Finally, my left front headlight has been fogging up after heavy rain, or a wash-job. I suspect the sealant has failed between the cover and the housing, but since I don't want to to tackle that job yet, I have a replacement rubber gasket (PN 63128386711) that popped up on clearance at FCP many months ago that I figured I'd try. All this stuff is easier to do with the left front light out of the car, so I pulled it. The new gasket popped right on and I did notice several breaks and tears in the OE one. Small, but perhaps they were letting water in. I have noticed what I think (hopefully) just dirt and grime on the inside of the lens cover, so eventually this will need to be addressed by breaking them open to clean/polish, and resealing them. 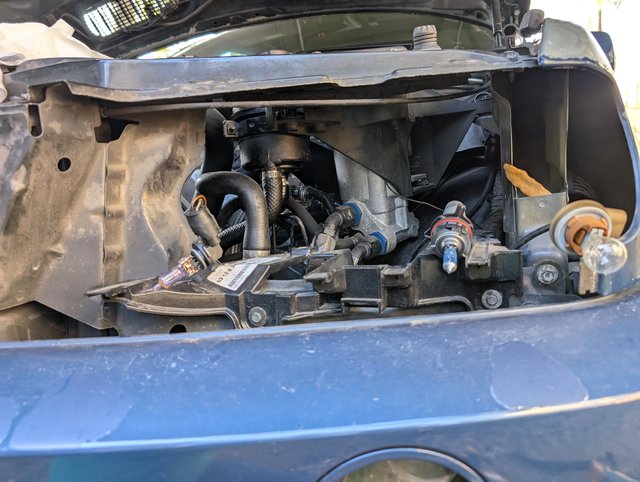 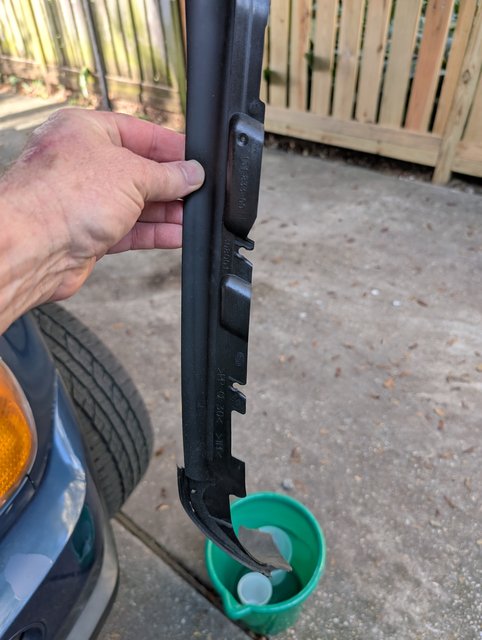 Next up, I unbolted and drained the coolant tank from the hose to the aux pump of as much coolant as I could. Of course despite thinking I had gotten every drop, there was plenty left in the tank to dribble out onto the motor when I pulled the small bleed hose to make room to access the bottom of the tank. The "new" level sensor is of a completely different design than the old one. In fact, I initially thought that some plastic bits broke off the old one and were stuck in the tank. Nope, it was a bare wire design while the new one is entirely plastic. 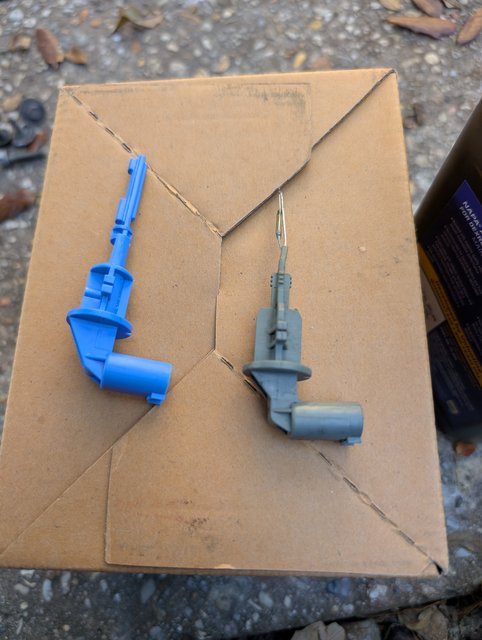 The old one pops right out and the new one fit perfectly. No gaskets or seals, because the sensor doesn't touch the coolant. Thanks to the forum for this info. 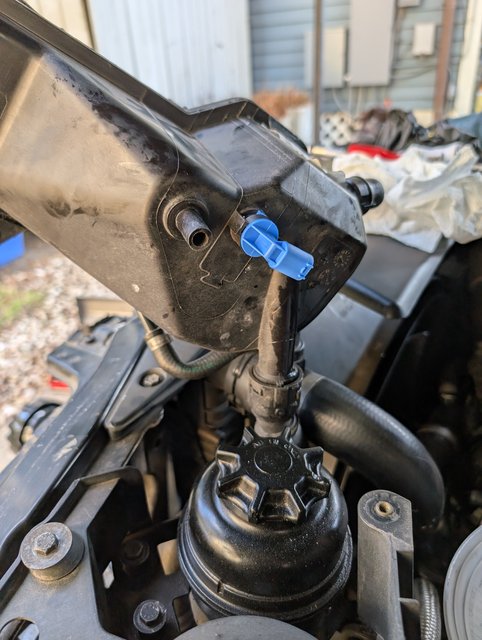 After this I moved the tank over towards the motor and out of the way so I could loosen the reservoir and pull the larger line from the bottom and drain it. That little tank holds more than it seems it should...or at least more than a small mardi gras cup! laurel and hardy mess ensued as I tried to plug the outlet with my finger, while dumping the cup into a larger cup I had on hand. The good news is that the connector for the ABS/DSC pump is directly below the reservoir, so it conveniently fills up with Dextron III. 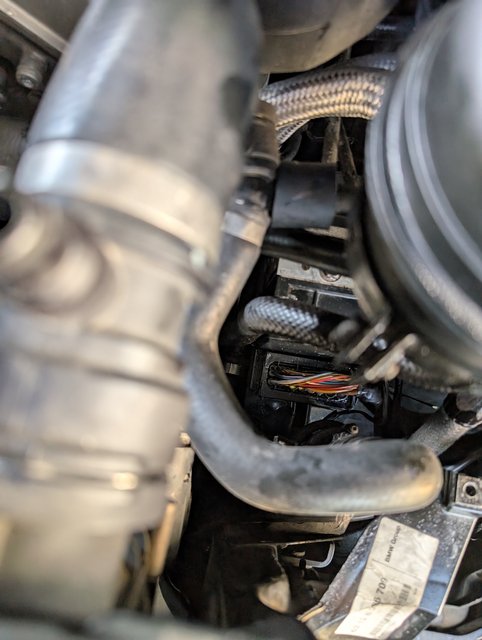 Once cleaned up with half a can of electronics cleaner and compressed air however, it was easy to pull the other line and yank the pump. The new one pops right in, and seemed to be slightly larger in diameter than the OE one, as judged by the clamp that I had to loosen fully to make enough room for the reservoir to slide down fully. Its interesting to me that the 4.6 I swapped in 3 years and roughly 20k miles ago has sprouted minor leaks from the vanos seals, one of the valve cover bolt seals, and the front diff. The diff is likely my fault as installing this while the motor was in the car was a huge pain and I suspect I nicked the seal between the oil pan and the diff. All are minor however so I've cleaned them up and placed them on an "ignore" inspection schedule. It is a bit frustrating to see that the valve cover on the left side is already showing pitting and corrosion under the paint. I was in a hurry when I swapped the motor in so I elected to not have the covers powder coated at that time. 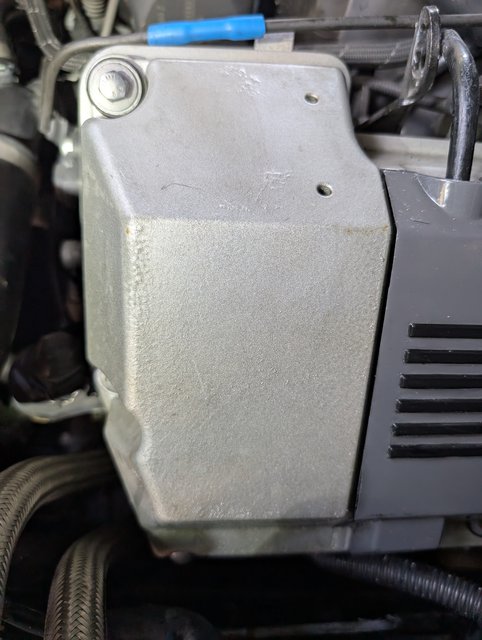 At any rate, so far so good after logging a few miles on the car after the work.
__________________
Current Original owner 2002 E53 X5 4.4i to 4.6i swap 2026 G80 M3 6 spd 2025 G06 X5 50e Former 1972 Audi Fox 1986 Saab 900S 1996 BMW Z3 1998 BMW E36 M3 Sedan 2004 BMW E46 M3 2006 Audi A3 Quatro 1993 Mopar 318 Jeep Grand Cherokee 2015 V6 Jeep Grand Cherokee Last edited by Henn28; 02-07-2025 at 10:54 AM.
|
|
#314
03-13-2025, 02:30 AM
|
||||
|
||||

__________________
Indy Shops: Berkeley: German Auto Sport Phoenix: Babbitt Motor Werks | Arizona Bimmer Motor Works Reno: Reno Rennsport Rides: 00 BMW X5 4.4 93 Nissan 300ZXTT 88 Nissan 300ZXT Shiro #853 88 Nissan 300ZXT Shiro #773 84 Nissan 300ZXT 50th AE 78 Datsun 280Z Black Pearl 15 Yamaha WR250R 06 Yamaha R1 AE Email: WE350Z at gmail
|
|
#316
03-13-2025, 11:12 AM
|
||||
|
||||
|
Its OEM, kind of getting beat up by now almost 25 years old!!
Thanks yes Im pretty happy with the wheels and tires for the price!
__________________
Indy Shops: Berkeley: German Auto Sport Phoenix: Babbitt Motor Werks | Arizona Bimmer Motor Works Reno: Reno Rennsport Rides: 00 BMW X5 4.4 93 Nissan 300ZXTT 88 Nissan 300ZXT Shiro #853 88 Nissan 300ZXT Shiro #773 84 Nissan 300ZXT 50th AE 78 Datsun 280Z Black Pearl 15 Yamaha WR250R 06 Yamaha R1 AE Email: WE350Z at gmail Last edited by we350z; 03-13-2025 at 06:38 PM.
|
|
#317
04-19-2025, 12:17 PM
|
||||
|
||||
|
Ive been chasing a slow speed front end clunk, which new OE sway bar links didn't fix so yesterday I jacked it up and checked all the torques. Everything looked good except one of the subframe bolts seems just a tiny bit loose. I dropped it several years ago to get the front diff in and maybe I didnt torque it quite enough? Well see how it drives now. Beyond this Ill just be throwing parts at it. I just put new lower control arms on it a month ago, and the uppers are 2 year old Turner mono ball pieces so I hope they arent bad. Maybe Ill try those polyurethane pieces next.
I recently put all new edge protection / weather stripping on all 4 doors, and the trunk. Id been slowly buying these pieces over the past 6 months and now that they are on the doors close much more firmly. The 23 year old original pieces were ripped and worn. I also re-tightened the upper trunk lid hinge bolts, which seems to have fixed a persistent clunk from the back of the car as it flexed at slow speeds on uneven surfaces.   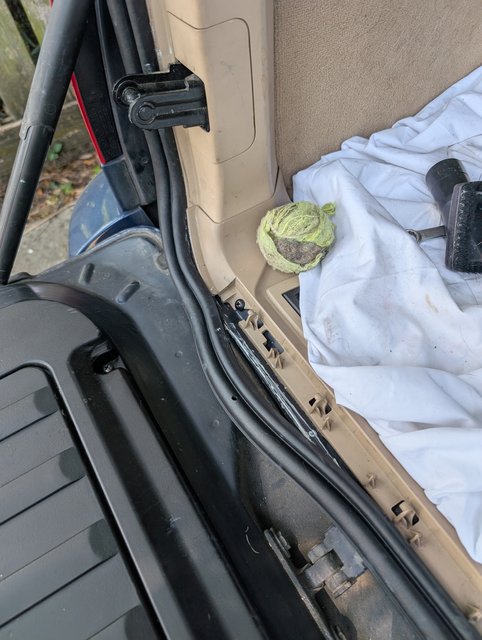 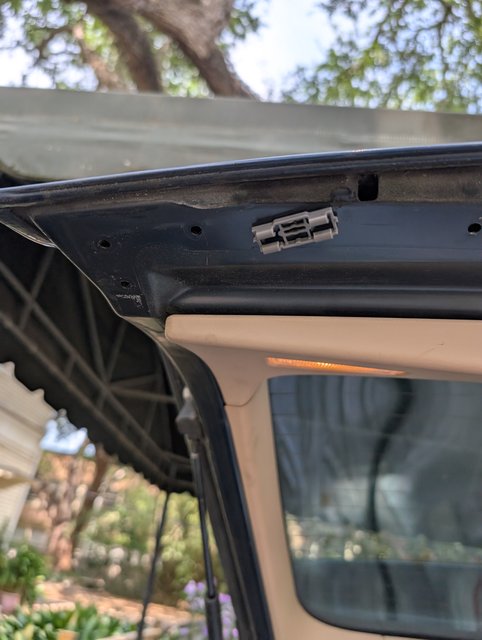 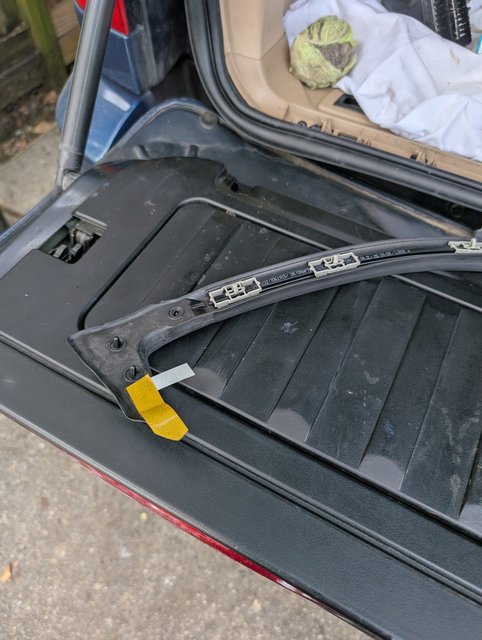 in other news, my block and crank are back and sitting on my porch, waiting to begin reassembly. The block and oil pans were just cleaned up and the crank was polished. Also, the block amd crank were were measured by the shop , to back up my micrometer measurements. Everything was within OE specs, except one of the cylinders was very slightly out of round tolerance. Im going with new rings and a rebuild anyway on it. I kept the x5 oil pan as I need to punch a hole in the 540 eBay pan at approximately the correct place for the OSV and PCV oil return to drain into. The 540/RWD OSV setup is under the timing cover, so Id like to keep ourmx5 setup, as it seems much better. There will be some challenges though modifying the hardline that runs down the back of the motor from the OSV and PCV, especially where it goes around the exhaust manifold. Its a needlessly complicated BMW design 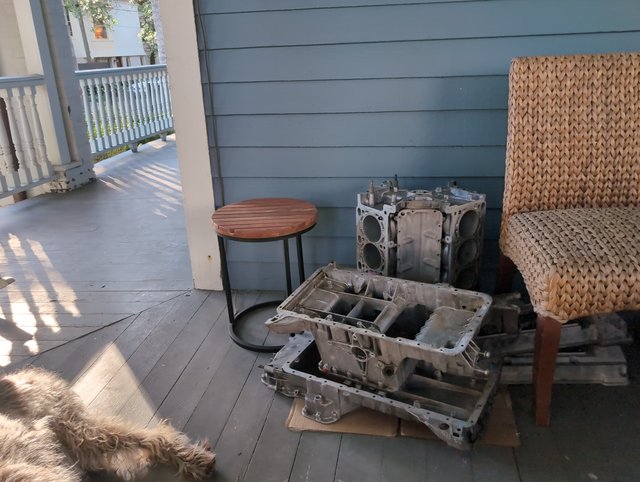 my plan now is to lap the cylinders with felt pads and the Sunnen lapping compound used on alusil blocks. AM Tuned (Audi shop) sells a kit to get this done. I figure why not, and from what I read exposing the silicon again is the best way to ensure a good break in when using new rings. Ive found some good and definitive reading on the process and plan on renting a profilometer to ensure I get the correct hone. Thats the plan anyway.
__________________
Current Original owner 2002 E53 X5 4.4i to 4.6i swap 2026 G80 M3 6 spd 2025 G06 X5 50e Former 1972 Audi Fox 1986 Saab 900S 1996 BMW Z3 1998 BMW E36 M3 Sedan 2004 BMW E46 M3 2006 Audi A3 Quatro 1993 Mopar 318 Jeep Grand Cherokee 2015 V6 Jeep Grand Cherokee Last edited by Henn28; 04-20-2025 at 09:28 AM.
|
|
#318
05-10-2025, 05:59 PM
|
||||
|
||||
|
Block lapping
Not technically x5 related, beyond the fact that the motor below started life in my 4.4, maybe useful for someone doing a rebuild someday.
I finally have my block and crank back (block cleaned and crank polished) so I can get to work on the bottom end. I don't have my pistons back yet, but I can at least get the crank in with new bearing shells. First though, I decided that since this was a project, I might as well put a lap on the cylinders to help the new rings seat. I've read everything I can find on this process, and got some good advice from Peter Partee at Partee racing. Key to the process is having a profilometer on hand to see where the cylinder wall are before lapping, and then again after lapping to make sure you get them into spec. I ended up renting a profilometer for the job because, again, its a project so why not. As it turns out nothing is an exact science, even with an instrument that measures in microns. 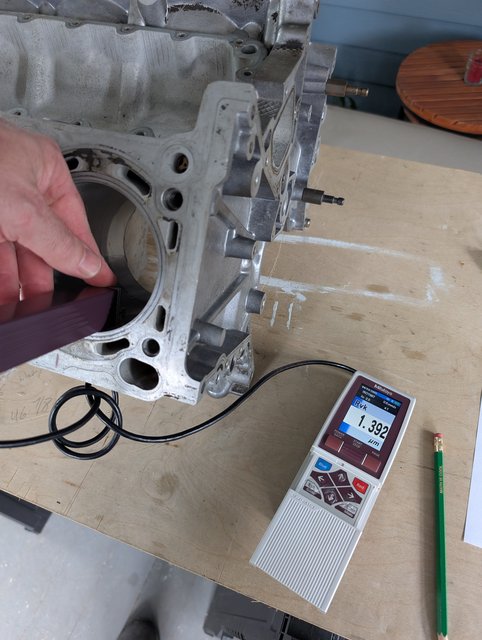 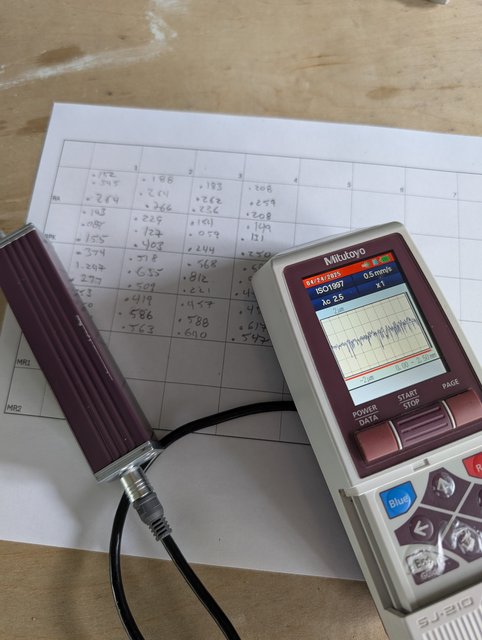 My pre-measurements generally put the cylinder walls in the .2 micron range for average height (Ra) and (mostly) in the 2 micron or below range for mean height (Rpk). There are several other measurements that I took with the profilometer, including valley depth numbers, but Rpk in particular seems to to be the most telling. Valley depth was interesting and difficult to obtain reliably because in addition to 20 years of crap in the valleys of the cylinder walls, between the silicon crystals, the lapping paste builds up in there too I think, despite vigorous cleaning with brake cleaner. I took measurements at three places on the walls, and often had to repeat the measurements several times to get numbers that made sense. Bottom line though is that all the cylinders save for a few showed wear below what my reading indicates is a minimum Rpk of 3, and a desired of .4 - .7ish. On to lapping then. The kit I bought from AM Tuned had the felt lapping tool, a tin of the lapping compound and some directions. Basically you slather it on the walls (there is just enough for 8, plus 2 re-do cylinders), put some on your felts, and lubricate the whole mess with wd-40. Then you set your watch and start honining with a drill on low RPM (600 or below). I started at 60 seconds on cylinder one and then did about 80 seconds on number 2. After measuring 2 was showing Rpk and RA numbers of .422 and .406 while number 1 was barely at .3 microns. This lead me to lap every cylinder for about 70 to 80 seconds which produced in spec Rpk and RA numbers on all but two. I used the remaining paste to redo these two cylinders, along with number 1 and got all of the cylinders up to at least .3+ and often .4 or .5ish. 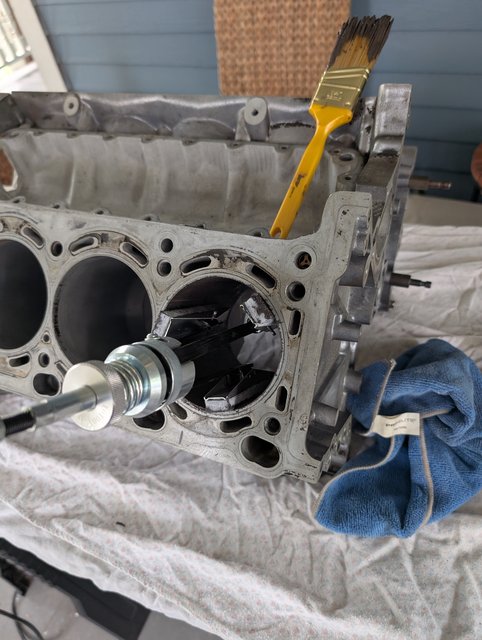 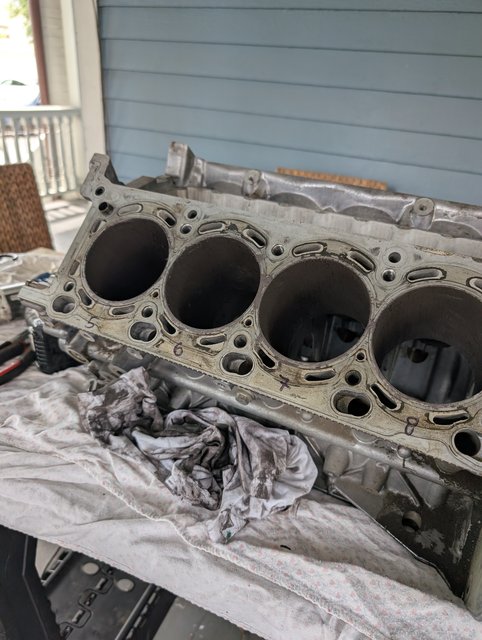 All 4 bores on one side ready for lapping in the pic above. After lapping the bores look 80% better. Some of the wear marks are still there, but there is a much more uniform gray to them, which I read is good. Bore 1 below has been lapped while bore 2 has not:  A messy job, but hopefully one which will pay off with the ring change.
__________________
Current Original owner 2002 E53 X5 4.4i to 4.6i swap 2026 G80 M3 6 spd 2025 G06 X5 50e Former 1972 Audi Fox 1986 Saab 900S 1996 BMW Z3 1998 BMW E36 M3 Sedan 2004 BMW E46 M3 2006 Audi A3 Quatro 1993 Mopar 318 Jeep Grand Cherokee 2015 V6 Jeep Grand Cherokee
|
|
#319
06-18-2025, 04:15 PM
|
||||
|
||||
|
Front end clunk saga
I figure Ill pick up the sway bar end link discussion here, since Im way past the sway bar end links while trying to fix my persistent front end clunk. Initially it developed over slow speed bumps, but then developed to include under braking from slow speeds. I also have a steering wheel shudder at about 50 to 60 mph, like from a wheel balance issue but I just had them balanced a couple weeks while getting an alignment after doing the lower control arms with OE pieces.
I was convinced that the Turner monoball thrust arm bushings were bad after 2 years, which is about what I see on OE bushings on the x5. As such, I replaced them with poly bushings from Powerflex, and updated the other thread accordingly. The clunk under braking has gone away it seems, but not the clunk over bumps at lower speeds. While I had the thrust arms off I found the right ball joint that it attaches to at the knuckle to have failed. Super loose in all axes, including up and down I think Ive finally found the culprit. Long story short tho, they arent coming out easily due to stripped hex/torx heads on the bolts, so I bought an eBay knuckle for the right side ($80 or so) and ordered a bearing kit and hub from FCP. Thr hub arrived and looked to be in good shape. After a quick clean-up, I took it to my local steering shop and they pressed the hub and bearing out in 1/100 of the time it would have taken me.   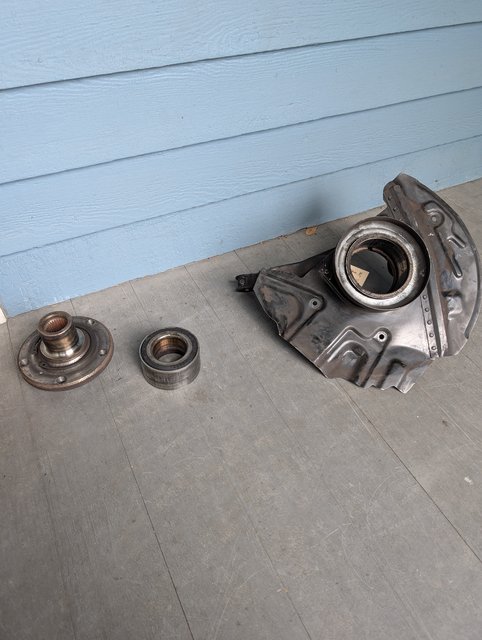 My bearing kit and Loctite 638 order arrive tomorrow, so I tapped off the dust shield and took some 1500 wet dry paper (wd40 lube) to the inner surface of the knuckle where the bearing race sits. Then I put a brush on my drill and cleaned up the bores where the control arms attach. It all cleaned up pretty nicely and is ready to go after a brake kleen wash.  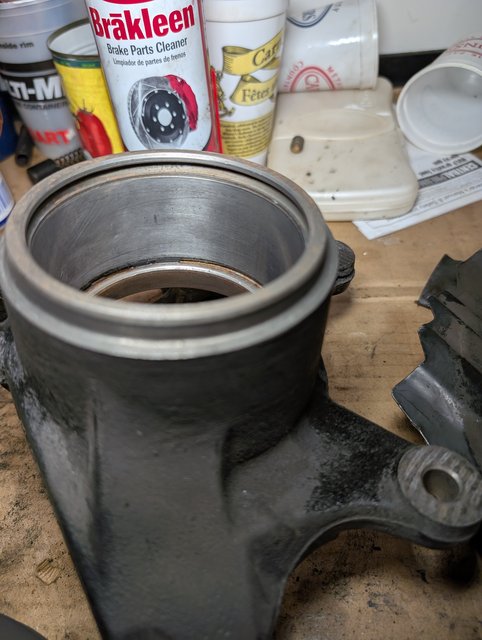 Fortunately the ball joint was held in by torx head bolts that although beaten up, came off easily with a slightly smaller socket hammered on them. The ball joint popped out way easier than I recall any other doing in the past. My lemforder kit has the crappy torx screw heads that strip so easily, so I may see about replacing them with hex bolts. Per TIS the torque on them is only 60 NM, but they have thread locker on them and obviously take a beating under the car from corrosion. 
__________________
Current Original owner 2002 E53 X5 4.4i to 4.6i swap 2026 G80 M3 6 spd 2025 G06 X5 50e Former 1972 Audi Fox 1986 Saab 900S 1996 BMW Z3 1998 BMW E36 M3 Sedan 2004 BMW E46 M3 2006 Audi A3 Quatro 1993 Mopar 318 Jeep Grand Cherokee 2015 V6 Jeep Grand Cherokee
|
|
#320
06-19-2025, 08:21 PM
|
|||
|
|||
|
I feel for your font end knock.
I cannot fix mine which is pissing me off. Nothing really left to replace with mine :-( I've done top mounts, new struts, new lower front and rear control arms, new tie rods. The only thing not replaced were the ball joints which looked in good shape with no sloppy movement (previous owner must have replaced). Let me know if you find a fix. I've had 2 independent suspension shops look now and neither can locate. My next guess would be worn LH CV joint.
|
|
| Bookmarks |
| Thread Tools | |
| Display Modes | |
|
|
|
|


 Linear Mode


